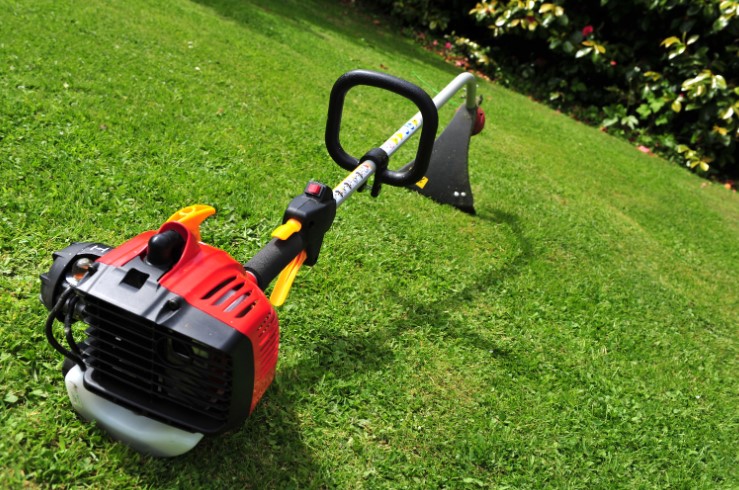
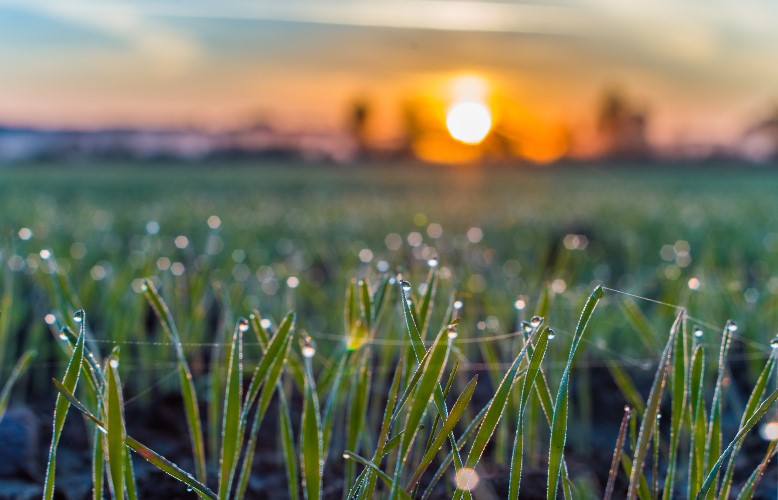
by Kanimozhi BV | Oct 15, 2024 | Garden, Exterior
Can You Cut Wet Grass With a Strimmer? Cutting wet grass is a common challenge, especially in the UK, where rain is frequent and lawns often stay damp for days. If you’ve wondered whether you can use your strimmer to tackle wet grass or how to mow damp grass safely, you’re not alone.
In this guide, I’ll explore whether it’s safe, practical, and advisable to use a strimmer in these conditions, and offer tips on how to do it effectively.
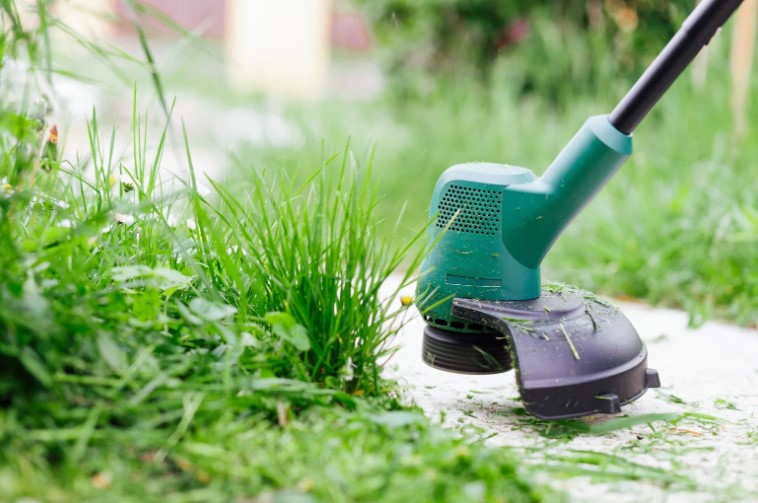
How Does a Strimmer Work on Grass?
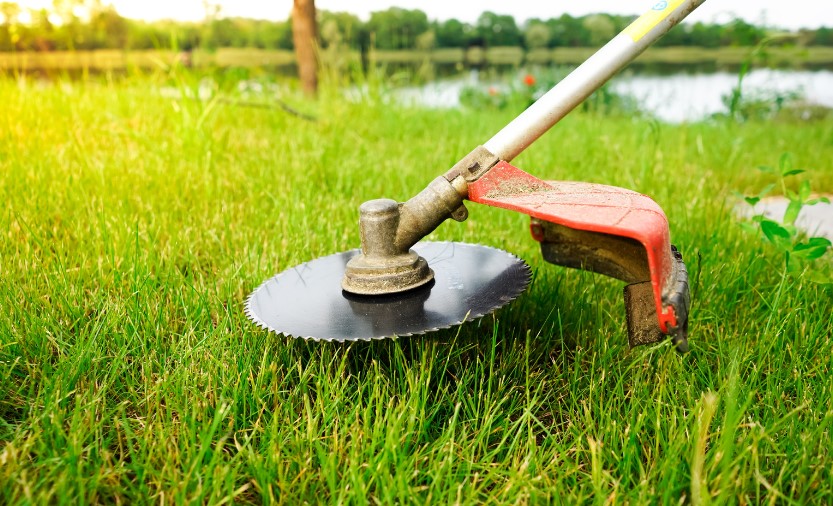
Strimmers, also known as line trimmers or grass trimmers, use a rapidly spinning nylon string or metal blade to shear through grass and weeds.
These handy tools are perfect for maintaining a well-kept lawn, especially in tight or hard-to-reach spaces. However, when it comes to wet grass, things can get tricky.
When grass is wet, it tends to clump together, making it more difficult for the strimmer to cut cleanly. Wet grass can also clog the cutting head, reducing the tool’s efficiency and causing the motor to work harder than it should.
This means that cutting wet grass can be more of a challenge compared to dry grass, especially if you don’t have the right equipment.
Is It Safe to Use a Strimmer on Wet Grass?
Safety should always be your top priority when using a strimmer, particularly in wet conditions. The risks associated with using a strimmer on wet grass vary depending on the type of strimmer you own:
- Corded electric strimmers pose the highest risk, as water can increase the likelihood of electric shock. If water seeps into the electrical components, it can cause serious malfunctions or even lead to injury.
- Cordless battery-powered strimmers are somewhat safer in wet conditions, as there’s no direct electrical connection to worry about. However, they are still susceptible to battery drain and performance issues if they become clogged with wet grass.
- Petrol-powered strimmers are generally the safest option for wet conditions because they don’t have any electrical components at risk. However, petrol strimmers are heavier, and wet ground can make handling them more challenging.
No matter which type of strimmer you use, it’s important to wear protective clothing, such as non-slip boots and gloves, and to ensure that your grip and footing are solid to prevent accidents.

Does Wet Grass Damage a Strimmer?
Yes, cutting wet grass can damage your strimmer. Here are some common issues that can arise when using a strimmer on wet grass:
- Clogging: Wet grass tends to wrap around the cutting head, causing clogs that slow down the tool and make it less effective.
- Overheating: The strimmer’s motor has to work harder to cut through thick, wet grass, which can lead to overheating and, in some cases, permanent damage to the motor.
- Water damage: For electric or battery-powered models like Flymo, water can damage the electrical components, shortening the lifespan of your strimmer.
To reduce the risk of damage, it’s essential to stop regularly and clear the cutting head of debris when working with wet grass during the clearance of overgrown garden. After use, always clean and dry your strimmer thoroughly to avoid corrosion and mechanical issues.
Are There Any Strimmer Models Better Suited for Wet Grass?
Some strimmer models are better suited for cutting wet grass than others. Here’s a breakdown of the most effective types:
- Petrol-powered strimmers: These are typically the most powerful and durable models, making them the best choice for cutting thick or wet grass. Since they don’t rely on electricity, there’s no risk of electric shock, and their engines are built to handle tougher conditions.
- Cordless battery strimmers: While not as powerful as petrol models, cordless strimmers are safer than corded ones in wet conditions. However, they do tend to run out of battery more quickly when cutting wet grass, so keep a spare battery handy if you plan to work for an extended period.
- Corded electric strimmers: These should be avoided in wet conditions due to the risk of electrical shock and damage to the internal components. If you only have a corded model, it’s best to wait until the grass is dry.
When selecting a strimmer, look for features like high motor power, durability, and water-resistant components if you frequently deal with damp lawns.
What’s the Best Way to Maintain Your Strimmer After Cutting Wet Grass?
Proper maintenance is crucial to keeping your strimmer in good working condition, especially after using it on wet grass. Here’s a simple step-by-step guide to maintaining your strimmer:
- Turn off and unplug the strimmer (if electric) or let it cool down (if petrol).
- Remove any debris: Use a cloth or small brush to clear away grass that may be wrapped around the cutting head or other components.
- Dry the strimmer: If your strimmer has been exposed to moisture, wipe it down with a dry cloth, paying special attention to the motor area and any ventilation slots.
- Inspect for damage: Check for signs of wear, such as frayed strings, dull blades, or electrical damage.
- Store the strimmer in a dry, covered space to prevent further exposure to moisture.
Regular cleaning and drying will help extend the life of your strimmer, ensuring it remains effective even after dealing with wet grass.
Practical Tips for Strimming Wet Grass Safely
If you absolutely must strim wet grass, here are some practical tips to help you get the job done safely and efficiently:
- Use a petrol or cordless strimmer: As mentioned earlier, these models are better suited for wet conditions.
- Sharpen the blades or replace the string before use to make cutting easier.
- Clear the cutting head frequently to prevent clogs.
- Strim slowly: Wet grass is heavier and more difficult to cut, having clear understanding on how to cut grass and when to cut grass are important, so moving at a slower pace will help reduce strain on your strimmer.
- Watch your footing: Wet ground can be slippery, so make sure to wear non-slip boots and work on even ground when possible.
When Should You Avoid Using a Strimmer on Wet Grass?
While it’s possible to strim wet grass, there are certain situations where it’s safer to wait for better weather:
- Heavy Rain or Thunderstorms: Using a strimmer, especially corded models, in rain increases the risk of electric shock. Even petrol strimmers can be difficult to control in these conditions, and thunderstorms add the risk of lightning.
- Waterlogged Lawns: Strimming on heavily saturated ground can damage both the lawn and strimmer. Muddy soil makes it harder to balance, increasing the risk of slips and falls, and can also uproot grass.
- Strimmer Overheating or Clogging: If the strimmer is struggling, stop to prevent motor damage. It’s better to wait for conditions to improve.
- High Slopes or Uneven Ground: Wet grass on slopes increases the chance of slipping. It’s safer to wait for dry conditions to avoid injuries.
Waiting for drier conditions helps protect both your strimmer and your safety.
How Does Cutting Wet Grass Affect the Lawn’s Health?
Cutting wet grass can negatively impact your lawn in several ways:
- Uneven Cuts and Clumping: Wet grass sticks together, leading to uneven cuts and clumping, which can block sunlight and damage underlying grass mostly when cutting grass next to a wall.
- Grass Uprooting: Wet, heavy grass is easier to uproot, leaving bare patches that weaken the lawn.
- Increased Risk of Disease: Clumped, damp grass encourages fungal diseases, such as mold, which can spread and damage the lawn.
- Soil Compaction: Walking or strimming on wet grass can cause soil compaction, preventing water, air, and nutrients from reaching the roots.
For a healthier lawn, it’s best to trim when the grass is dry.

Pros and Cons of Different Strimmer Types for Wet Grass
| Strimmer Type |
Advantages |
Disadvantages |
| Corded Electric Strimmer |
Powerful, easy to use |
Risk of electric shock, clogging issues |
| Cordless Battery Strimmer |
No electric hazard, mobile |
Battery life drains faster in wet grass |
| Petrol-Powered Strimmer |
High power, best for thick/wet grass |
Heavier, more expensive, needs maintenance |
Conclusion
So, can you cut wet grass with a strimmer? Yes, but it’s not always the best idea. The safest approach is to use a petrol-powered or cordless strimmer and to take your time, ensuring you keep the cutting head clean and your footing secure.
If conditions are too wet, it’s often better to wait for a drier day to avoid damaging both your strimmer and your lawn.
By following the practical tips outlined here and properly maintaining your strimmer and knowing the legal time to mow grass, you can safely manage your lawn even in challenging UK weather.
FAQs
1. Can I strim wet grass without damaging my lawn?
Yes, but wet grass can uproot easily and cause soil compaction. Strim slowly and avoid walking on wet areas to prevent damage.
2. How can I make my strimmer more effective on wet grass?
Sharpen the blades, raise the cutting height, and strim in small sections to avoid clogs.
3. Is it possible to prevent grass clumping when using a strimmer on wet grass?
Raise the cutting height, use sharp blades, and rake the grass before strimming to reduce clumping.

by Kanimozhi BV | Oct 14, 2024 | Garden, Exterior
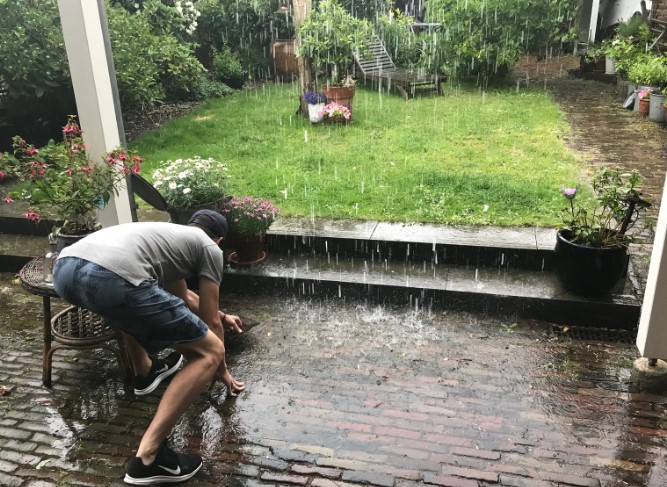
When British weather brings constant rain, it’s natural to wonder: Can you cut wet grass with a Flymo? Whether you’re using a hover or cordless model, mowing in damp conditions presents unique challenges.
Wet grass affects your Flymo’s performance, can cause clumping, and may even lead to safety risks. In this guide, I’ll cover the challenges, precautions, and best practices for mowing wet grass with a Flymo.
Why Is Cutting Wet Grass a Challenge?
Wet grass can make mowing much more difficult for any lawnmower, and Flymo mowers are no exception. Flymos are known for their hovering ability, which allows them to glide effortlessly over the lawn.
However, when grass is wet, it becomes heavier and tends to stick to the blades, which can result in clogged cutting heads and uneven mowing.
For hover models, the problem intensifies. Wet grass weighs down the grass blades, preventing them from standing upright, which compromises the hovering feature.
This can cause the mower to lose lift, making it difficult to maneuver smoothly. While cordless Flymos offer better flexibility in wet conditions, they too can struggle with the extra weight of damp grass.
Is It Safe to Cut Wet Grass with an Electric Flymo?
Cutting wet grass with an electric Flymo raises safety concerns, especially regarding electrical hazards. Moisture can easily seep into the motor or electric components, posing risks like electrical shorts or even electrocution.
Here’s how to mow wet grass safely with an electric Flymo:
- Use a Residual Current Device (RCD): This helps prevent electric shock by cutting off power if there’s a fault.
- Inspect the cables: Always check for frayed or damaged cables before mowing, as water combined with faulty wiring can lead to dangerous situations.
- Avoid standing water: If the grass is waterlogged or if puddles have formed, it’s best to wait for drier conditions.
If you’re unsure about mowing in wet conditions with an electric Flymo, it’s safer to wait until the grass is dry.
Can You Use a Flymo on Wet Grass?
What Happens If You Mow Wet Grass with a Flymo?
Mowing wet grass with a Flymo hover mower can lead to various issues. The added weight of the wet grass impacts the mower’s ability to hover properly.
Without its signature gliding effect, the mower may not move as smoothly across the lawn, leading to uneven cuts especially when cutting near a wall and making it harder to maneuver.
Additionally, wet grass tends to clump together, which can jam the blades and slow down the mower’s performance. This means you’ll likely need to stop frequently to clear out clogs, which puts added strain on the motor and can cause overheating, especially in electric Flymo models.
Cordless Flymos are more mobile but still struggle with clumping and the extra moisture.
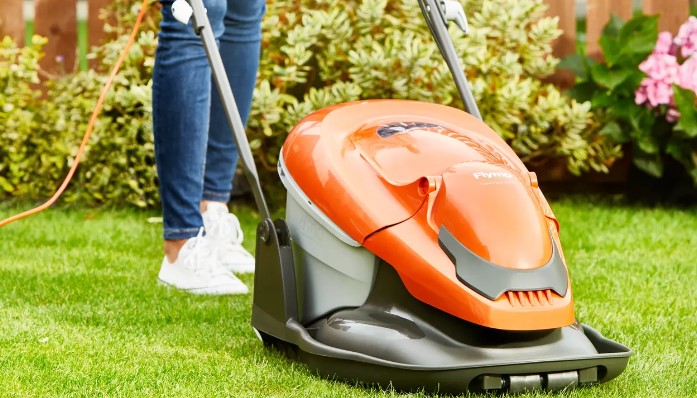
Image: Source
Are There Any Flymo Models Better Suited for Wet Grass?
Some Flymo models handle damp conditions better than others, though none are ideal for extremely wet grass. Here’s a comparison of Flymo models that are slightly better suited for use on damp grass:
| Flymo Model |
Power Source |
Wet Grass Performance |
Hover Feature |
| Flymo Turbo Lite 250 |
Electric |
Fair |
Works well |
| Flymo Easi Glide 300 |
Electric |
Good |
Excellent hover |
| Flymo Mighti-Mo 300 |
Cordless |
Good for damp grass |
No hover feature |
The Flymo Easi Glide 300 offers the best performance on damp grass, as its hover feature is more effective, but all Flymos can experience difficulties in extremely wet conditions.
Cordless models like the Flymo Mighti-Mo 300 handle wet grass better than corded models, as they avoid the risk of electric shock.
Tips for Mowing Wet Grass Safely with a Flymo
How to Prepare Your Flymo for Wet Grass Mowing?
Before you start mowing wet grass, it’s essential to prepare your Flymo to minimize potential issues. Here’s what you should do:
- Sharpen the blades: Wet grass puts more strain on the blades, so make sure they’re sharp to ensure a cleaner cut.
- Clean the mower: Remove any old grass clippings or debris from previous uses to avoid clogging, especially when dealing with damp grass.
- Check electrical components: Ensure that all electrical parts, especially on electric Flymo models, are dry and functioning properly before starting.
What Precautions Should You Take While Mowing Wet Grass?
Mowing wet grass can be dangerous, so following the right safety precautions is critical. Here’s how to stay safe:
- Move slowly: Wet grass can be slippery, making it harder to maintain control. Mow at a slow, steady pace to prevent accidents.
- Avoid puddles: Waterlogged areas can overwhelm your Flymo and increase the risk of electric shock (for electric models).
- Wear proper footwear: Non-slip shoes with good traction are a must when working on wet grass to prevent slips.
In summary:
- Inspect for safety hazards like damaged cables.
- Wear slip-resistant shoes.
- Go slow and avoid standing water or waterlogged areas.
Alternatives to Mowing Wet Grass
Should You Wait for the Grass to Dry?
In many cases, the best approach is to simply wait for the grass to dry before mowing with a Flymo.Cutting wet grass can damage your lawn by tearing or uprooting the grass, rather than giving it a clean cut.
This can weaken the root system and affect the long-term health of your lawn.Wet grass can also become flattened, causing the Flymo blades to miss patches and result in an uneven cut.
Waiting for drier weather helps avoid these issues and ensures a smoother, cleaner cut and also there are legal time to mow grass, you can use those timing to cut grass .
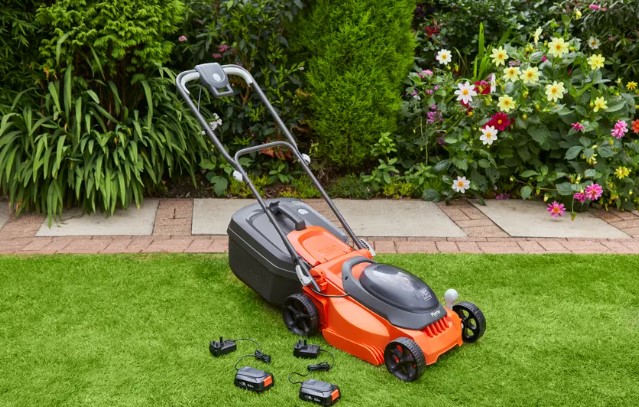
Image: Source
Can You Improve Wet Grass Cutting Results?
If waiting isn’t an option, there are a few strategies on how to cut grass, you can use to get better results when cutting wet grass with a Flymo:
- Raise the cutting height: This reduces the risk of clogging and allows the blades to handle the grass more effectively.
- Rake the grass beforehand: Lifting the grass blades with a rake removes excess moisture and helps prevent clumping.
Taking these steps will improve your Flymo’s performance when mowing damp grass.
Conclusion
So, can you cut wet grass with a Flymo? While it’s possible, it’s not ideal. Wet grass can clog the mower, reduce cutting efficiency, and, in the case of electric Flymo models, pose safety risks.
If you’re wondering, can you cut wet grass?, the answer is yes, but it’s best to wait for drier conditions to avoid these issues and ensure both your lawn and mower stay in good condition.
However, by following key precautions—like sharpening the blades, wearing appropriate footwear, and paying attention to electrical safety—you can mow damp grass safely and with better results.
In general, the best approach is to wait for a dry day to ensure both your lawn and Flymo mower stay in optimal condition. However, if you must mow in damp conditions, these tips will help you navigate the process more safely.
Frequently Asked Questions
1. Can Mowing Wet Grass Cause the Flymo to Lose Hover Function?
Yes, wet grass adds weight, which can cause the Flymo to lose its hover ability, leading to uneven cuts.
2. How Can I Prevent My Flymo from Clogging When Mowing Wet Grass?
Keep the blades sharp, raise the cutting height, and clean the mower frequently during use to prevent clogging.
3. Should I Rake Wet Grass Before Mowing with a Flymo?
Yes, raking wet grass helps lift the blades and reduce moisture, making it easier for the Flymo to cut evenly without clogging.
Image Disclaimer:
The images used in this article are for illustrative purposes only and are sourced from external websites. We do not claim ownership of these images. All image rights and credits belong to their respective owners. If you are the rightful owner of any image and would like it removed or credited differently, please contact us, and we will take immediate action
by Kanimozhi BV | Oct 12, 2024 | Exterior, Garage
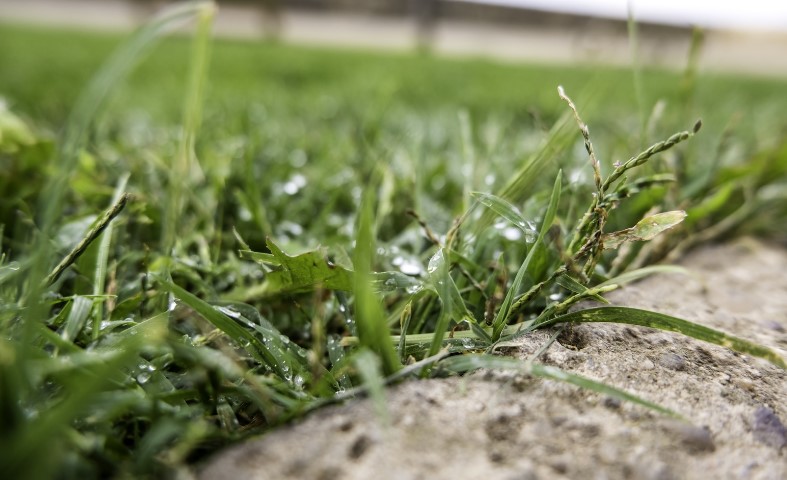
Maintaining a beautiful lawn is essential for every homeowner, but unpredictable weather can sometimes complicate things. If you’re like me, you’ve probably wondered whether it’s okay to mow the lawn when the grass is wet or damp.
Cutting wet grass can seem like a quick fix after rainfall, but is it really safe? In this guide on can you cut wet grass. let’s dive into the details of mowing wet grass, the potential risks, and how to do it safely when necessary.
Can You Cut Grass When It Is Wet?
The short answer is: yes, you can cut grass when it’s wet, but it’s not always ideal. Wet grass behaves differently from dry grass and artificial grass, and this can affect the quality of the cut, the health of your lawn, and even the safety of the person mowing.
Why does wet grass present a challenge?
- Slipping hazards: Both for you and the mower. Wet grass can be slippery, and that increases the chance of accidents, especially if you’re on a slope.
- Mower performance: Wet grass can cause your mower to clog, making the engine work harder and reducing its lifespan.
But, in some cases, cutting wet grass might be necessary. If you’re unable to wait for drier conditions, let’s look at how you can mow safely.
Can You Cut Grass in the Rain?
Mowing grass while it’s actively raining is something I avoid at all costs. Not only does it increase the chances of accidents, but it also affects the health of the lawn and equipment.
The water on the grass blades adds extra weight, making them bend, which results in an uneven cut. The soil underneath becomes muddy and slippery, which can damage the grass’ roots when the mower wheels move across it.
Key reasons to avoid cutting grass in the rain:
- Safety risks: You are at greater risk of slipping or losing control of the mower.
- Lawn damage: The lawn may suffer from ruts or compressed soil.
- Mower damage: Rain can damage the mower’s motor, especially for electric models.
It’s always better to wait until the rain has passed and assess the conditions before getting started.
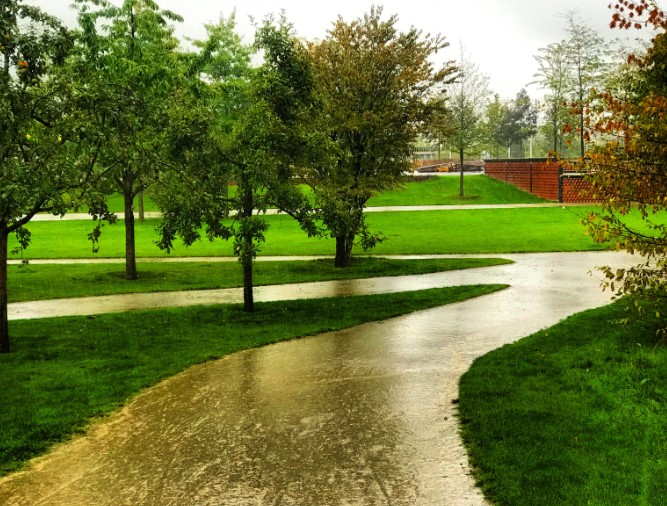
Can You Cut Grass After It Rains?
After heavy rainfall, you might be eager to get the overgrown lawn back in shape. The good news is that you can mow the grass once it’s stopped raining, but timing is key. In general, legal time to cut grass is between 8.00 am to 8.00 pm. It would help if you waited until the grass has had a chance to dry out a bit before mowing.
How long to wait depends on the weather and the type of soil in your lawn. Clay-based soil tends to hold more water, so it may take longer to dry.
Ideally, you want to wait until the grass is damp, not soaking wet, to avoid issues like tearing the grass blades or leaving behind uneven patches.
Is It Bad to Mow Wet Grass?
Is mowing wet grass really a bad idea? Yes, in most cases. While it’s not impossible, there are several downsides to cutting wet grass that can affect your lawn in the long term.
- Uneven cuts: Wet grass tends to bend rather than stand upright, so the mower doesn’t cut evenly. This can leave patches along with an unsightly finish.
- Clumping: Wet grass tends to clump together, which can clog your mower and lead to piles of grass on the lawn that can suffocate the turf below.
- Damage to grass: Wet blades of grass are more prone to tearing rather than being cleanly cut. Torn grass blades are even more susceptible to diseases.
Overall, it’s best to avoid mowing wet grass if you can, but if it’s unavoidable, take the necessary precautions.
What Are the Pros of Cutting Grass When It Is Wet?
While cutting wet grass is generally not recommended, there are some advantages in specific situations:
- Faster growth management: After rain, grass can grow rapidly, so mowing wet grass can help prevent overgrowth.
- Easier clean-up: Wet clippings are heavier and less likely to blow around, making clean-up easier.
- More effective in cold weather: In cooler months, waiting for grass to fully dry can be impractical, so mowing while slightly damp helps maintain a tidy lawn.
- Reduced Dust: When grass is dry, mowing can stir up dust and pollen, especially in dry climates. Wet grass keeps the dust down, making mowing more comfortable for people with allergies or respiratory issues.
- No Waiting for Dry Weather: In regions with frequent rain, waiting for perfectly dry conditions could lead to overgrown grass. Mowing while it’s wet allows you to stay on top of lawn maintenance without having to delay for long periods of time.
Despite these pros, the risks often outweigh the benefits, so assessing the grass and soil conditions is crucial before mowing.
What Are the Cons of Cutting Grass When It Is Wet?
The downsides of mowing wet grass usually outweigh the benefits and can cause lasting damage:
- Uneven cutting: Wet grass bends, making it hard to achieve an even cut.
- Clumping: Grass clumps together, clogging the mower and smothering the lawn.
- Increased disease risk: Wet grass is more prone to fungal infections, which spread easily in moist conditions.
- Soil compaction: Mowers can compact wet soil, hindering grass growth.
- Mower damage: Wet grass strains the mower, leading to engine issues and rust.
- Tearing instead of cutting: Wet blades are more likely to tear, which weakens the grass and can cause brown patches.
- Safety risks: Wet grass is slippery, increasing the risk of accidents, especially on slopes.
In most cases, waiting for the grass to dry is the safer and better option for your lawn’s long-term health.
How Long to Wait to Mow Grass After the Rain?
The exact waiting time before mowing after rain depends on several factors, including how heavily it rained and the drainage quality of your lawn.
According to the rule of thumb, wait until the grass is no longer sopping wet and the soil is firm underfoot. If you step on the lawn and your shoes are soaked or you leave a noticeable imprint, it’s best to hold off.
Here’s a quick guide to follow:
| Rain Type |
Ideal Waiting Time |
| Light Drizzle |
1-2 hours |
| Moderate Rain |
3-5 hours |
| Heavy Rain |
6-24 hours |
Waiting for these periods can help you avoid lawn damage and ensure a cleaner, safer cut.
Does Cutting Wet Grass Damage Your Lawn?
Yes, cutting wet grass can potentially damage your lawn, and here’s why:
Tearing Grass Blades
Wet grass blades are more likely to tear rather than be cleanly cut. This can lead to ragged edges, making the grass more susceptible to diseases like fungal infections. Torn grass also takes longer to heal, which weakens the overall health of your lawn.
Compacting the Soil
Mowing over wet soil can compact it, especially if the ground is soft from recent rain. Compacted soil reduces airflow and drainage, which can suffocate the grass roots, prevent proper nutrient absorption, and hinder growth.
Clumping of Grass
When wet grass is cut, it tends to clump together. These clumps can smother patches of grass underneath, leading to uneven growth and even dead spots if the clippings aren’t removed.
Increased Risk of Lawn Diseases
Wet conditions are ideal for fungal growth. Mowing wet grass can introduce pathogens to freshly cut blades, spreading diseases like brown patch, which can quickly damage a large area of your lawn.
While these issues can cause long-term harm to your lawn, the severity depends on how often you mow in wet conditions and how well you manage the clippings and soil compaction.
How Can You Safely Mow Wet Grass?
If you absolutely must mow wet grass, there are certain steps you can take to ensure you do it as safely and effectively as possible. The goal is to minimize damage to both your lawn and your mower, while also reducing the risk of personal injury.
1. Use a Petrol-Powered Mower
- Why it matters: Petrol-powered mowers are generally more robust than electric ones in wet conditions. If you’re using an electric mower, there’s a risk of water damage to the electrical components.
- Petrol mowers, on the other hand, are less likely to short-circuit, though care should still be taken not to allow water into the engine.
2. Keep the Blades Sharp
- Why it matters: Damp grass is more likely to tear, which can cause harm to your lawn. Sharp mower blades are essential to ensure a clean cut, even when the grass is damp.
- Dull blades will only shred the grass, leaving it vulnerable to disease also resulting the lawn to look ragged.
3. Mow Slowly and in Small Sections
- Why it matters: When mowing wet grass, it’s important to go slowly, especially cutting near a wall. Wet grass puts more strain on the mower, so rushing can cause the blades to clog or the engine to overheat.
- Additionally, cutting in small sections allows you to assess how well the mower is performing and prevents it from getting bogged down.
4. Raise the Mower Deck
- Why it matters: Setting your mower to cut the grass higher than usual can help prevent tearing and reduce the amount of clumping that occurs.
- Mowing too low in wet conditions heightens the chances of scalping the lawn and can harm the root system.
5. Use a Grass Catcher or Mulching Setting
- Why it matters: A grass catcher or mulching mower setting can help deal with clippings more effectively in wet conditions.
- Instead of leaving wet clumps on the lawn, a grass catcher will collect the clippings, making it easier to dispose of them and preventing them from rotting on the turf.
6. Monitor the Ground Conditions
- Why it matters: If the soil beneath the grass is too soft, your mower can leave ruts in the lawn, and the wheels may compact the soil. If the ground is too soft, it’s better to wait until conditions improve.
What Are the Risks Involved in Cutting Grass When It Is Damp?
Mowing damp grass presents a number of risks that go beyond just damaging the lawn. If you don’t take proper precautions, you could endanger your mower, your safety, and the overall health of your yard.
1. Increased Risk of Slip and Fall Accidents
Wet grass is slippery, and this significantly increases the risk of personal injury. When the ground is wet, it’s easy to lose traction, especially on slopes or uneven ground.
If you’re using a heavy mower, this can be particularly dangerous, as losing control of the equipment could lead to serious injury.
2. Higher Chance of Mower Malfunction
Damp grass can clog the mower’s blades and deck, causing the engine to overheat or stall. The added moisture also increases the likelihood of rusting and corrosion, especially if the mower isn’t cleaned and dried properly after use.
3. Soil Compaction
Moist soil tends to be softer and is more susceptible to becoming compacted. When the mower wheels roll over damp ground, they can compact the soil, which limits root growth and reduces air circulation in the soil.
Compacted soil is harder for grass to grow in and more susceptible to nutrient deficiencies.
4. Fungal Diseases
When grass is wet, it’s more likely to spread fungal infections. Mowing damp grass can create small cuts and wounds on the blades, which serve as entry points for diseases.
Common lawn diseases that thrive in wet conditions include brown patch, leaf spot, and rust. These can quickly spread through your lawn if the conditions are right.
5. Reduced Lawn Resilience
Damp grass is generally weaker, and mowing it in such conditions can reduce the lawn’s ability to recover from stress. Cutting wet grass can weaken the turf and make it more prone to other environmental stresses like heat, drought, or pests.
DIY Tips for Cutting Wet Grass
If you find yourself needing to mow wet grass, here are some DIY tips that can help you minimize the risks and ensure a more effective cut:
1. Use a High-Quality, Self-Propelled Mower
A self-propelled mower can help you maintain better control when the ground is slippery. It takes some of the effort off your hands, allowing you to focus on steering and safety.
Look for a mower with adjustable speed so you can slow down on slippery patches.
2. Clean Your Mower Regularly
After mowing wet grass, it’s essential to clean your mower thoroughly. Wet grass can stick to the underside of the mower deck, and if left unattended, it can lead to rust and mechanical issues.
Use a hose to wash off the grass clippings and allow the mower to dry completely before storing it.
3. Mow in Different Directions
In damp conditions, if you mow in the same direction every time, the wheels can create ruts in the lawn. By changing your mowing pattern each time, you reduce the risk of compaction and keep the grass blades from getting stuck in one direction.
4. Mow More Frequently
Wet grass grows faster, so during rainy periods, you may need to mow more often than usual. By mowing more frequently, you prevent the grass from growing too long and reduce the amount of clippings that can clog the mower.
5. Mow During Midday
If possible, mow during the warmest part of the day when the grass has had a chance to dry out a little. Midday sunlight helps dry the grass quickly, making it easier to mow even if it’s still damp.
Alternatives to Mowing Wet Grass
If mowing wet grass isn’t feasible or safe, there are a few alternatives that can help you maintain your lawn without risking damage to your mower or your grass.
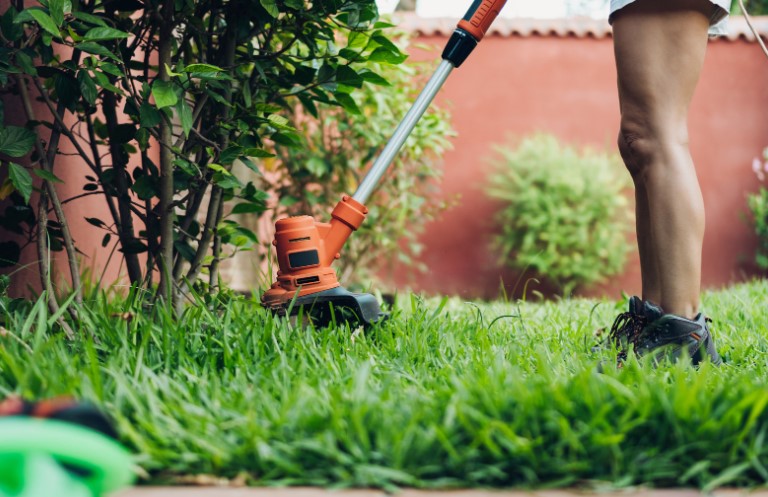
1. Use a String Trimmer
For small patches of wet grass, a string trimmer (or strimmer) can be a great alternative. A trimmer is lighter and less likely to damage wet grass, making it ideal for touch-ups around the edges of your lawn or in tight spaces.
However, it may not be suitable for large areas, as it won’t give you the even finish that a mower provides.
2. Wait for Better Conditions
Sometimes, the best option is simply to wait for drier conditions. If your lawn is only slightly overgrown, waiting an extra day or two until the grass dries won’t harm your lawn.
Skipping a mowing session won’t cause long-term damage, and it will give you better results in the long run.
3. Rake the Lawn First
If your lawn is only damp from morning dew or light rain, raking it before mowing can help lift the grass blades and reduce the moisture content.
This can make it easier for the mower to cut the grass cleanly without leaving clumps or uneven patches behind.
4. Hire a Lawn Care Professional
If you’re unsure about mowing wet grass, consider hiring a professional lawn care service. They have the experience and equipment to handle wet conditions safely and effectively, and they can help you maintain a healthy lawn without risking damage.
What Are the Different Types of Mowers Used to Cut Grass?
When it comes to mowing grass, especially in wet conditions, selecting the right mower is crucial. Different types of mowers have their own strengths and weaknesses, so it’s important to choose one that fits your lawn’s needs and your comfort level.
Here are some of the most commonly used types of mowers:
1. Flymo
A Flymo is a type of hover mower that glides on a cushion of air, making it lightweight and easy to maneuver, especially on uneven ground.
These mowers are great for small to medium lawns and work well in damp conditions, but they may struggle with long or dense grass.
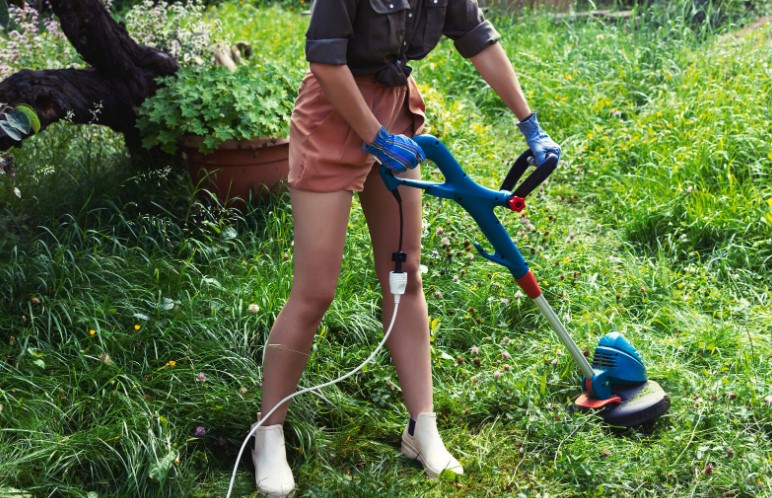
2. Strimmer (String Trimmer)
A strimmer, also known as a string trimmer, is best for cutting grass in hard-to-reach areas like edges, around trees, and along fences.
It’s ideal for small patches of wet grass, though it’s not designed for mowing large areas. It’s a good complement to a regular lawn mower.
3. Petrol Mower
Petrol mowers are powerful and can handle wet grass better than electric models. They’re great for larger lawns and tougher terrain.
However, they require more maintenance, and their noise and emissions may be a downside for some users.
4. Electric Mower
Electric mowers are quieter and more environmentally friendly than petrol mowers, but they may struggle in wet conditions due to the risk of electrical issues.
These mowers are ideal for small to medium-sized lawns and require access to an electrical outlet.
5. Cordless Mower
Cordless mowers provide the convenience of electric models without the trouble of managing cords. They run on rechargeable batteries, making them portable and easy to use.
However, their power and runtime may be limited, especially when cutting thick or wet grass.
Conclusion
In conclusion, while cutting wet grass is not always the best option, it can be done safely if necessary.
By following the precautions I’ve outlined for can you cut wet grass and understanding the potential risks to both your lawn and equipment, you can keep your yard in top shape no matter the weather.
Remember, patience and preparation are key to successful lawn care, especially when it comes to mowing damp or wet grass.

by Kanimozhi BV | Oct 9, 2024 | Wall, DIY Ideas, Interior
Removing wallpaper can be a daunting task, especially if you don’t have a wallpaper steamer on hand. While steamers are useful, they aren’t always necessary.
If you’re tackling a room makeover or for a new wallpaper for living room and need to strip the wallpaper, there are other effective methods that don’t require specialized equipment.
In this guide, I’ll walk you through how to remove wallpaper without a steamer, using simple tools that are likely already in your home.With a little patience and the right approach, you’ll have those walls ready for a fresh new look in no time.
Why Remove Wallpaper Without a Steamer?
Accessibility and Cost
One of the most common reasons to remove wallpaper without a steamer is accessibility. Steamers, while effective, aren’t always available, and renting or buying one can add unnecessary costs to your project.
Fortunately, manual wallpaper removal methods are just as effective as wallpaper measurements when done properly, allowing you to save money by using everyday tools like warm water and a scraper.
Effectiveness of Manual Methods
Though using a steamer is faster in some cases, removing wallpaper manually can still provide excellent results. Traditional techniques like soaking the wallpaper with water and using a scraper are tried-and-true methods.
With enough soaking time and care, these methods can remove even stubborn wallpaper without damaging your walls.

Before you begin, gather these essential tools to make the job easier:
- Bucket of warm water: You’ll need this to soak the wallpaper.
- Spray bottle: If you prefer, a spray bottle can be more precise for applying water.
- Scraper or putty knife: This helps you peel the wallpaper without damaging the plaster underneath.
- Sponge: For scrubbing away any leftover adhesive.
- Protective gloves: Keep your hands safe from sharp scrapers or chemicals.
If the wallpaper is particularly stubborn, these additional tools can help:
- Vinegar: Mixed with water, vinegar is a natural and effective way to loosen wallpaper glue.
- Chemical wallpaper remover: This can make tough areas easier to handle, especially if the wallpaper is thick or has been painted over multiple times.
How to Prepare the Room Before Wallpaper Removal?
Protecting the Room
Before starting the wallpaper removal, it’s important to prep your space. Wallpaper removal can be messy, so you’ll want to protect your floors and furniture:
- Cover the floors with plastic sheeting or old cloth to catch any debris and water runoff.
- Move furniture away from the walls or cover it with plastic to protect from splashes.
Prepping the Wallpaper
Before you start soaking large areas, it’s always smart to test a small section of wallpaper:
- Choose a hidden area of the wall and spray it with water. Let it soak for 10 to 15 minutes.
- Try peeling off the wallpaper. If it comes off easily, you’re ready to proceed. If not, consider adding vinegar or using a chemical wallpaper remover for tough spots.
How to Remove Wallpaper Without a Steamer? Step-by-Step Guide
Step 1: Soak the Wallpaper
To begin, you’ll need to soak the wallpaper thoroughly to loosen the adhesive that holds it in place. Here’s how:
- Fill a bucket with warm water or prepare a spray bottle for more controlled application.
- For particularly stubborn wallpaper, mix vinegar into the water at a ratio of about 1 part vinegar to 4 parts water.
- Spray or apply the water to the wallpaper using a sponge or spray bottle, making sure to cover one section of the wall at a time.
- Allow the water to soak into the wallpaper for 10 to 15 minutes. This gives it time to loosen the glue beneath the paper.
Pro tip: Don’t rush this step! If the wallpaper doesn’t come off easily, it likely needs more soaking time.
Step 2: Scrape Off the Wallpaper
Once the wallpaper is soft from the soaking, it’s time to start scraping:
- Use a scraper or putty knife and gently insert it under the edge of the wallpaper.
- Work at a shallow angle to prevent damage to the plaster beneath the wallpaper.
- Slowly peel the wallpaper back in small sections. If it tears or sticks, reapply water or vinegar to loosen it further.
For best results, work from the top of the wall down, and scrape slowly to avoid leaving gouges in the wall.
Step 3: Dealing with Stubborn Sections
Some sections of the wallpaper may be more stubborn than others, especially if there are multiple layers of paint or glue:
- Reapply water or vinegar to those areas and let it soak for another 10 minutes.
- If water and vinegar don’t work, you can use a chemical wallpaper remover.
How to Remove Wallpaper Adhesive Without a Steamer?
Once the wallpaper is off, you may notice that the wall is sticky with leftover adhesive. Here’s how to clean it off without a steamer:
Removing Leftover Glue
- Use a sponge soaked in warm, soapy water to scrub the adhesive off the wall.
- For stronger cleaning power, mix vinegar into the water. This natural solution works well to dissolve glue residue.
- Wipe down the walls thoroughly and allow them to dry before moving on to painting or adding new wallpaper.
Conclusion
Removing wallpaper without a steamer is completely achievable as wallpaper paste disposal with the right techniques. While it might take a bit more time and effort, manual methods like soaking with warm water or a vinegar solution can effectively strip away wallpaper, leaving your walls ready for their next transformation.
With a scraper in hand and patience on your side, you’ll be able to remove wallpaper successfully and prep your space for a fresh new look. Remember, taking it one section at a time is key – and soon enough, you’ll have smooth, clean walls to work with.
Table: DIY Wallpaper Removal vs. Hiring a Professional
| Aspect |
DIY Wallpaper Removal |
Hiring a Professional |
| Cost |
Low |
High |
| Time Commitment |
High |
Low |
| Effort |
Significant |
Minimal |
| Result Control |
Full control |
Relies on professional |
FAQs on Removing Wallpaper Without a Steamer
1. Can I Remove Wallpaper with Just Water?
Yes, water alone can be effective for most wallpaper types. It may take longer, but with enough soaking time, water will loosen the adhesive and allow you to peel the wallpaper off.
2. What’s the Best DIY Wallpaper Removal Solution?
A simple mix of warm water and vinegar is one of the best DIY solutions for wallpaper removal. It’s inexpensive, easy to make, and effective at breaking down glue.
3. Is It Better to Hire a Professional for Wallpaper Removal?
If you’re dealing with a large room or extremely stubborn wallpaper, hiring a professional may save you time. However, for smaller projects, removing wallpaper yourself is cost-effective and entirely doable.

by Kanimozhi BV | Oct 8, 2024 | Wall, Interior
Woodchip wallpaper, popular decades ago, is now often viewed as outdated, and its removal can be tricky due to its textured nature.
The embedded woodchips in the wallpaper make it harder for moisture to penetrate, resulting in a more challenging removal process.
If you’re ready to tackle this home improvement project, you’re in the right place. In this guide, I’ll show you how to remove woodchip wallpaper effectively, helping you prepare your walls for a fresh, modern finish.
Why Is Woodchip Wallpaper So Difficult to Remove?
Woodchip wallpaper removal can be more time-consuming compared to other types of wallpaper as well as for the wallpaper measurement. Here’s why:
- Textured surface: The woodchips embedded in the paper make it thicker and less porous.
- Multiple layers: Often, woodchip wallpaper has been painted over several times, further sealing it to the wall.
- Adhesive: Strong adhesives used in older wallpapers can harden over time, making removal harder.
Before you start, make sure you’ve gathered the right tools. The process will be smoother and less frustrating with the correct equipment.
- Wallpaper steamer: This is the most effective way to soften the wallpaper and its glue.
- Scraper or putty knife: It helps to peel the wallpaper without damaging the plaster beneath especially for the wallpaper around windows.
- Sponge and water: For soaking areas that are too delicate for the steamer.
- Protective gloves: Prevents burns from the steam and protects your hands while scraping.
- Chemical wallpaper remover: Ideal for tough spots where steam alone isn’t working.
- Sanding tool: Useful for smoothing the wall after removal.
- Filler: For patching any holes or uneven areas after the wallpaper is removed.
How to Prepare The Room for Wallpaper Removal?
Preparation is key to making the wallpaper removal process easier and less messy.
Protecting Floors and Furniture:
- Cover the floor with plastic sheeting or an old cloth to catch debris.
- Move the furniture away from the walls to give yourself room to work.
- If furniture can’t be moved, cover it with plastic or fabric to protect it from dust and water.
Testing a Small Area:
Before diving in, it’s a good idea to test a small section of the wallpaper. Here’s how:
- Choose a small, less visible spot (like behind a door).
- Soak the area with warm water or steam to see how easily the wallpaper comes off.
- If it lifts without too much effort, you’re ready to proceed. If not, you might need to use a chemical wallpaper remover.
How to Remove Woodchip Wallpaper? – Step-by-Step Guide
Removing woodchip wallpaper requires patience and the right technique. Look over the following steps for better results:
Step 1: Soften the Wallpaper
- Start by using a wallpaper steamer. Run the steamer over a small section of the wall for about 30 seconds to a minute, allowing the steam to loosen the glue.
- Also in addition to this, you can use hot water to soak the wallpaper. Fill a spray bottle with warm water, spray the surface, and wait for the moisture to penetrate the paper.
Key tip: Avoid rushing – let the steam or water fully soak in before attempting to scrape the paper.
Step 2: Scrape Off the Wallpaper
Once the wallpaper is soft, use a scraper to begin peeling it off. Here’s how to do it:
- Hold the scraper at a slight angle and gently push it under the edge of the wallpaper.
- Use slow, steady motions to avoid damaging the wall underneath.
- Start to work in small sections, beginning from the top & moving down.
Be careful: If the wallpaper doesn’t come off easily, apply more steam or use water from hot water tank before scraping further.
Step 3: Removing Stubborn Sections
Some areas of the wallpaper may be more difficult to remove. For these spots:
- Reapply steam to soften the paper further.
- If the wallpaper still won’t budge, consider using a chemical remover. Apply it to the stubborn area, following the instructions on the product, and let it sit for the recommended time.
- After the chemical has softened the glue, resume scraping.
What Should I Do After Removing the Wallpaper?
Once the wallpaper is off, there are a few more steps to ensure your walls are ready for painting or re-wallpapering.
Cleaning the Wall Surface:
- Remove adhesive residue: Use a sponge soaked in warm, soapy water to scrub away any leftover glue or wallpaper paste. Ensure the walls are clean as well as smooth.
- Check for imperfections: After cleaning, run your hand over the wall to feel for any bumps or rough patches.
Preparation for Wall Painting or New Wallpaper:
- Sanding: If the wall feels uneven, use a sanding tool to smooth out the surface.
- Fill in holes or cracks: Apply a filler to any gaps or damage that was hidden under the wallpaper.
- Prime the wall: If you plan to paint, use a primer to create a smooth, even surface. This will help the paint adhere properly and give you a professional-looking finish.

Table: DIY Wallpaper Removal vs. Hiring a Professional
| Aspect |
DIY Wallpaper Removal |
Hiring a Professional |
| Cost |
Low |
High |
| Time Commitment |
High |
Low |
| Effort |
Significant |
Minimal |
| Results Control |
Full control over the process |
Relies on the professional |
Conclusion
Removing woodchip wallpaper can feel like a daunting task, especially if you’ve never done it before. But with the right tools, some patience, and following these step-by-step instructions, you’ll be able to remove the wallpaper effectively and prep your walls for a new look.
Whether you’re planning to paint or apply new wallpaper, the satisfaction of seeing smooth, clean walls is worth the effort. Take it one section at a time, and soon enough, you’ll have a fresh canvas to work with.
FAQs on Woodchip Wallpaper Removal
1. Can I Paint Over Woodchip Wallpaper?
Yes, but it’s not recommended. The texture will still show through the paint, so for a smooth finish, it’s better to remove the wallpaper.
2. How Long Does It Take to Remove Woodchip Wallpaper?
It depends on the room size and wallpaper condition, but for an average room, expect the process to take a few hours to a day.
3. Is It Better to Hire a Professional for Wallpaper Removal?
If you have time and patience, DIY is cost-effective. Hiring a professional saves time and ensures a quicker, hassle-free process, though it’s more expensive.
