
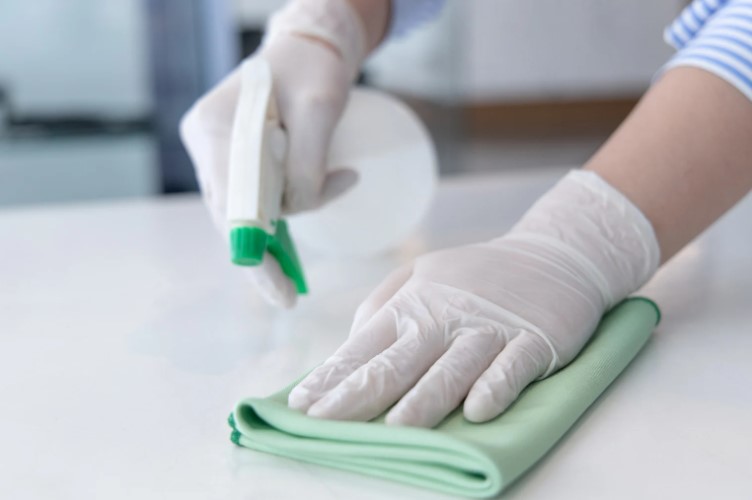
by Kanimozhi BV | Oct 4, 2024 | Carpet, DIY Ideas, Interior
Need tips on how to get dents out of carpet? Carpet dents from heavy furniture are an annoying but common problem.
When furniture rests in one place for too long, the carpet fibers get compressed, leading to noticeable indentations. But don’t worry, these dents aren’t permanent!
You can easily restore your carpet to its original state with a few simple tricks. In this guide, we’ll walk you through 5 smart DIY hacks that can remove dents from your carpet and prevent future damage.
What Causes Carpet Dents?
Carpet dents usually occur when heavy furniture, like sofas, beds, or bookshelves, sits in the same spot for an extended period.
The weight of the furniture compresses the carpet fibers, flattening them against the backing and making the indentations more noticeable. If left unaddressed, these dents can become more permanent as burns in the carpet, especially with high-pile carpets.

While regular vacuuming can help maintain your carpet’s fluffiness, it’s not enough to prevent dents entirely. The best strategy is a combination of DIY fixes and preventive measures, which we’ll cover below.
5 DIY Hacks on How To Get Dents Out Of Carpet – How To Remove?
How to Use Ice Cubes to Fix Carpet Dents?
One of the simplest and easiest methods to lift carpet dents is the ice cube method. This trick is particularly effective for small, shallow dents caused by furniture legs.
Materials Needed:
- Ice cubes
- A spoon or blunt tool
- A vacuum cleaner
Steps:
- Place several ice cubes directly on the dent. Use enough to cover the entire indentation.
- Let the ice melt completely over several hours (or overnight).
- Once the water has been absorbed, use a spoon or blunt tool to gently fluff the carpet fibers back into place.
- After the area dries, vacuum the spot to further lift the fibers, remove stagnant water smell and restore the texture.
This method works by rehydrating the carpet fibers, making them swell and return to their original shape. It’s safe for most carpets and doesn’t involve heat or chemicals, making it a go-to option for homeowners.
How Does Steam Ironing Work for Carpet Dent Removal?
For more stubborn dents, a steam iron can be the best powerful solution. This method uses heat and moisture to relax the carpet fibers, helping them spring back to life.
Materials Needed:
- A steam iron
- A damp cloth
- A vacuum cleaner
Steps:
- Dampen a clean cloth & place it right over the stubborn dent.
- Set your steam iron to a medium heat setting (no higher).
- Without letting the iron touch the carpet directly, gently press it over the damp cloth for about 10-15 seconds. The steam will enhance the carpet, loosening the fibers.
- Remove the cloth and use your fingers or a spoon to lift the carpet fibers.
- Finally, vacuum the area to complete the process and restore the texture.
Caution: Avoid direct contact between the iron & the carpet to prevent synthetic fibers from getting damaged. This method is best suited for synthetic carpets like nylon or polyester.
Can Vacuuming Help Remove Dents?
If you’re looking for a quick and simple solution, vacuuming can help remove minor dents, especially if they’ve just started forming.
Steps:
- Vacuum over the dented area using a brush attachment or standard vacuum head.
- Go over the spot multiple times, as vacuuming helps lift the carpet fibers by drawing them upward.
- For extra effect, fluff the fibers manually with your fingers after vacuuming.
This method works best on light dents that haven’t set deeply into the carpet. For older or larger dents, consider pairing this with one of the other methods mentioned here.
Does a Hairdryer Work for Small Dents?
A hairdryer can provide a quick fix for small dents by using heat to lift compressed carpet fibers.
Materials Needed:
- Hairdryer
- Spray bottle with water
- A comb or spoon
Steps:
- Lightly spray the dented area with water to dampen it.
- Set your hairdryer on a medium heat setting, holding it about 6 inches away from the carpet.
- As you apply heat, gently fluff the carpet fibers with a spoon or comb.
- Allow the area to dry fully before using the carpet again.
This method is effective for minor dents and is a low-risk option for delicate carpets.
How Can You Use a Plunger to Fix Carpet Dents?
A plunger may seem like an unusual tool, but it can help create suction to lift deep carpet dents, especially for larger or more persistent indentations.
Steps:
- Place the plunger over the dent & press down to create suction.
- Slowly pull up on the plunger to lift the carpet fibers.
- Repeat the process if needed, & fluff the fibers manually afterward.
This method works best on dense carpet fibers and is a quick option for pulling up compacted areas.
How to Prevent Carpet Dents in the Future?
Prevention is always better than cure. To avoid dealing with carpet dents in the future, try these effective strategies:
- Use Furniture Pads or Coasters: These distribute the weight more evenly, preventing pressure from building up in one spot.
- Move Your Furniture Regularly: Shifting the position of heavy furniture every few months can help prevent permanent indentations.
- Use Area Rugs or Carpet Protectors: Placing a rug or protector under heavy furniture can reduce the impact on the carpet.
- Install Furniture Gliders: These help furniture slide more easily, reducing the pressure that causes dents.
These small steps can save you from dealing with frustrating dents and help prolong the life of your carpet.
Conclusion
Removing carpet dents doesn’t have to be a daunting task. With these 5 simple DIY hacks, you can restore your carpet’s appearance and maintain its texture for years to come.
Whether you’re using the ice cube method or opting for a steam iron, these methods are practical, affordable, and effective.
By following the preventive tips on how to get dents out of carpet, you can also avoid the hassle of dealing with dents in the future. Now that you’re equipped with these solutions, say goodbye to unsightly dents and hello to a fresh-looking carpet!
FAQs:
Q1: How long does it take for ice to remove carpet dents?
It typically takes a few hours to overnight for ice to melt and fully rehydrate the carpet fibers. After the ice melts, it’s important to blot up any excess water and allow the area to dry completely.
Q2: Can you use a steam cleaner to remove dents from carpets?
Yes, a steam cleaner can be very effective for dent removal, especially for large areas. The steam helps relax the carpet fibers, allowing them to return to their natural shape.
Q3: Will carpet dents go away on their own?
Minor dents may gradually fade over time with regular vacuuming and foot traffic. However, deeper dents usually need one of the DIY methods described here to fully lift.
Q4: Can I use a clothes iron instead of a steam iron to fix carpet dents?
Yes, you can use a regular iron, but make sure to always use a damp cloth as a barrier between the iron and the carpet to prevent direct heat damage.
Q5: Are these methods safe for all carpet types?
Most methods, like the ice cube and vacuuming techniques, are safe for most carpet types. However, for delicate carpets made from natural fibers, it’s better to avoid direct heat or excessive water.
by Kanimozhi BV | Oct 3, 2024 | Carpet, Interior
Need tips on how to fix burnt carpet? Carpet burns, whether from cigarettes, irons, or other hot objects, can severely affect the appearance of your home. But with the right tools and techniques, it’s possible to repair burnt carpet without having to replace the entire thing.
In this guide, I’ll walk you through the steps on how to fix burnt carpet, from minor marks to larger, more severe damage, and help you restore your carpet’s beauty.
- Scissors or utility knife
- Sandpaper for minor burns
- Vacuum cleaner
- Carpet adhesive or superglue
- Replacement fibers (taken from hidden areas of your carpet)
- Heavy book or object for securing patches
Optional tools for larger burns:
- Carpet remnant for patching
- Carpet repair kit if you don’t have matching spare fibers
How Do You Fix Small Carpet Burns?
Step 1: Trim the Burnt Fibers
For smaller burns (like cigarette burns), carefully cut the damaged fibers using scissors.
Be sure not to remove too much, as you want to avoid creating a visible gap.
Step 2: Replace with New Fibers
Take fibers from a hidden section of the carpet. Use superglue to attach these fibers to the burnt area.
Once dry, trim them to the right length and blend them with the surrounding carpet by gently brushing.
How to Fix Larger Burns Using Patching Techniques?
Step 1: Cut Out the Burnt Area
For larger burns, like those caused by irons, use a utility knife to cut around the damaged area.
Cut a square or rectangular shape to make patching easier and avoid visible seams.
Step 2: Create and Apply the Patch
If you have a matching carpet remnant, cut it to the same size as the hole. Apply carpet adhesive to the patch and the edges of the hole.
Press the patch into place and secure it with a heavy object like a book overnight to ensure a strong bond.
Step 3: Blend the Patch
Once the patch is secure, vacuum the area in multiple directions to help blend the new piece with the surrounding carpet fibers.
What About Iron Burns on Carpet?
How to Assess the Severity of Iron Burns?
Iron burns can cause deep scorch marks or surface-level burns. For superficial burns, lighter methods like sanding or cleaning may suffice.
However, deeper burns will require patching or replacing fibers.
How to Remove Discoloration from Light Iron Burns?
For surface burns:
- Use sandpaper to lightly sand the burnt area.
- Follow with a vacuum to remove debris.
- If there is still discoloration, apply a diluted vinegar solution to lighten the area.
How to Repair Deep Iron Burns?
For deeper burns:
- Trim the burnt fibers and use carpet filler to level the area.
- Alternatively, cut out the damaged section and apply a matching patch as described above.
Should You Try DIY or Call a Professional for Carpet Burn Repair?
While minor burns can be easily handled with DIY methods, more extensive damage may require a professional. Professional carpet repair is recommended if:
- The burn covers a large area.
- You lack spare carpet remnants or matching fibers.
- You’re not confident about achieving a seamless result.
However, DIY methods can save both time and money for smaller issues, so give it a try before considering professional help.
How to Prevent Carpet Burns in the Future?
Preventing burns is always easier than repairing them. Here are some tips:
- Use heat-resistant mats under irons, curling tongs, or candles.
- Avoid smoking near carpets.
- Ensure that hot objects like straighteners are kept on protective surfaces rather than directly on the floor.
Conclusion
Fixing burnt carpet doesn’t have to be complicated. Whether it’s a small cigarette burn or a larger iron scorch mark, you can tackle most issues with a little time, patience, and the right tools.
Following this guide on how to fix burnt carpets, will help you restore your carpet and keep your home looking fresh without the need for a costly replacement.
FAQs
1. Can I repair a burnt carpet on my own?
Yes, for smaller burns, you can use simple DIY methods like trimming fibers or patching small areas with adhesive and replacement fibers.
2. What if I don’t have spare carpet for a patch?
You can take fibers from hidden areas like under furniture or use a carpet repair kit with color-matching patches and adhesive.
3. Is it possible to fix a light burn mark without cutting?
Yes, you can try sanding the area or using a diluted bleach solution to lighten the mark on light-coloured carpets.
4. Should I try DIY repair for large burns?
For larger burns, it’s best to attempt a DIY patch, but if the damage is extensive, hiring a professional is recommended for a seamless finish.
5. Can I prevent carpet burns in the future?
Use heat-resistant mats under hot objects and keep irons, candles, or curling tongs away from carpets to prevent burns.

by Kanimozhi BV | Oct 3, 2024 | Wall, Interior
Blu Tack is a convenient, reusable adhesive for sticking posters, pictures, notes or hanging paintings on your walls. However, while Blu Tack serves its purpose well, removing it can sometimes leave behind stains, marks, or sticky residue that’s tough to clean.
In this guide, I’ll walk you through the best methods on how to remove Blu Tack from walls without damaging the paint.
Why Does Blu Tack Leave Marks on Walls?
Blu Tack may seem harmless at first, but it can sometimes leave unsightly marks behind. Understanding why this happens can help you avoid further issues.
Composition of Blu Tack
Blu Tack is designed to be tacky, which means it has adhesive properties that can grip surfaces tightly.
Over time, especially if Blu Tack is left on the wall for extended periods, it can harden or bond to the paint, leaving marks when you try to remove it.
Types of Walls Most Prone to Stains
Certain wall types are more susceptible to stains from Blu Tack:
- Matte or flat finishes tend to absorb oils and adhesive residue more easily, which can leave visible marks.
- Satin or semi-gloss walls are less likely to show stains, as they have a smoother surface that is easier to clean.
- Blu Tack tends to adhere more firmly to porous walls, such as those with textured or rough finishes.
How To Remove Blu Tack From Walls Without Damaging Paint?
Here’s a step-by-step guide to safely remove Blu Tack from your walls while preserving your paint.
Step 1: Gently Peel Off the Blu Tack
Start by carefully peeling away the Blu Tack from the wall. You can:
- Use your fingers or a plastic card (like an old credit card) to gently lift the Blu Tack without scraping the wall.
- Avoid using sharp objects like knives, as these can easily damage the paint or leave scratches.
Step 2: Use Warm Soapy Water for Residue
If any sticky residue remains, try this gentle approach:
- Pour small amount of mild dish soap with warm water and mix it well.
- Dampen a soft cloth or sponge in the soapy water, and gently rub the Blu Tack residue in circular motions.
- Be patient—don’t scrub too hard, as this may strip the paint.

Step 3: Apply Vinegar or Citrus Cleaner for Stubborn Stains
For tougher stains or residue, a vinegar or citrus-based cleaner can be very effective:
- Dampen a cloth with vinegar or citrus cleaner.
- Lightly blot the affected area, letting the cleaner sit for a minute or two to dissolve the residue.
- Gently wipe the wall, being cautious not to apply too much pressure, especially on delicate paint finishes.
Step 4: Use an Eraser for Final Cleaning
A simple white eraser (the type used for pencil marks) can help with any remaining residue:
- Rub the eraser gently over the Blu Tack marks.
- Use small circular motions to lift off the last traces of adhesive.
Step 5: Dry and Inspect the Wall
Once you’ve finished cleaning the area:
- Use a dry cloth to pat the wall and remove any moisture.
- Inspect the wall for any leftover residue or stains. If any marks remain, repeat the process with a gentler hand.
Common Mistakes to Avoid When Removing Blu Tack
When removing Blu Tack, it’s easy to accidentally damage your wall if you’re not careful. Here are some mistakes to avoid:
Rubbing Too Hard
Applying too much pressure when rubbing the Blu Tack residue can lead to paint damage, especially on matte or flat finishes. Always use gentle motions and take your time.
Using Harsh Chemicals
Avoid using strong chemicals or cleaning agents like bleach, acetone, or turpentine, as they can discolor or damage the paint. Stick to vinegar, citrus-based cleaners, or mild soap.
Not Testing on a Small Area First
Before applying any cleaning solution to a large area, always test it in a small, hidden section of the wall to make sure it won’t damage the paint or surface.
What If Blu Tack Has Left a Stain?
If Blu Tack has left a noticeable stain on your wall, don’t worry.
Step 1: Use a Baking Soda Paste for Light Stains
For minor stains, a simple baking soda paste can work wonders:
- Mix baking soda with water until it has the consistency of a thick paste.
- Use a sponge or cloth and apply the paste to the stained area.
- Let it stay there for 10-15 minutes, then gently wipe it away with a damp cloth.
Step 2: Use Magic Erasers for Deep Stains
For deeper or more stubborn marks, magic erasers can help:
- Dampen the magic eraser slightly and gently rub the stained area.
- Be sure to test the eraser in a small area first, as it can be abrasive and may strip some types of paint.
Step 3: Repaint the Area for Persistent Stains
If all else fails and the stain is still visible on walls, you may need to do a quick paint touch-up:
- Match the paint color and apply a light coat over the stained area.
- Allow the paint to dry and blend it in with the surrounding wall.
Conclusion
Removing Blu Tack from walls doesn’t have to be a big task to deal. By following these simple on how to remove blu tack from walls, you can safely remove Blu Tack without damaging your paint or leaving behind sticky residue.
Remember to use gentle cleaning methods and avoid harsh chemicals, and you’ll be able to maintain the look of your walls.
Table: Quick Solutions to Remove Blu Tack From Walls
| Method |
Tools Needed |
| Peel Blu Tack off gently |
Hands or plastic card |
| Warm soapy water for residue |
Mild soap, water, cloth |
| Vinegar or citrus cleaner for stains |
White vinegar, citrus cleaner |
| Use an eraser for light residue |
White eraser |
| Baking soda paste for light stains |
Baking soda, water, sponge |
Related Article: How to Paint High Stairwell Without Ladder?
Frequently Asked Questions (FAQs)
1. Can Blu Tack ruin paint on walls?
Yes, Blu Tack can cause damage to paint, especially if left on the wall for a long time. It can leave behind sticky residue or even remove some paint when peeled off improperly.
2. Is it safe to use cleaning products like vinegar or baking soda on walls?
Yes, vinegar and baking soda are safe and effective for removing Blu Tack residue. Just make sure to test them on a small, hidden area of the wall first to avoid damage.
3. Will Blu Tack work better on certain types of walls?
Blu Tack adheres well to most wall types, but satin and semi-gloss finishes are less prone to staining than matte or textured walls, which are more likely to retain marks or residue.

by Kanimozhi BV | Oct 2, 2024 | Bathroom, DIY Ideas, Interior
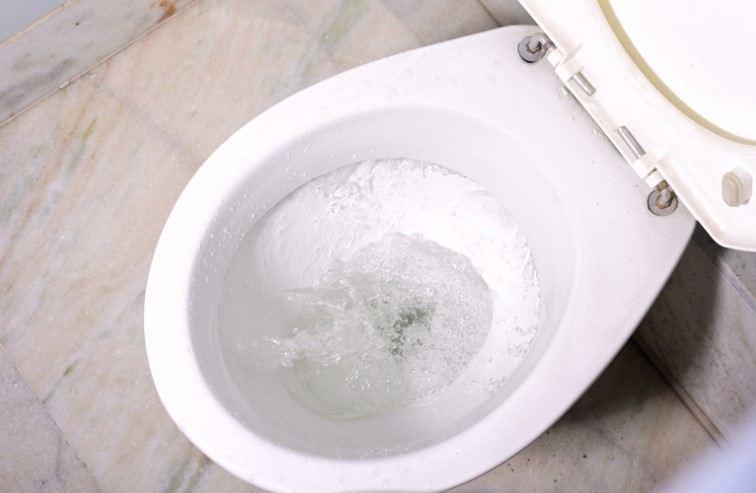
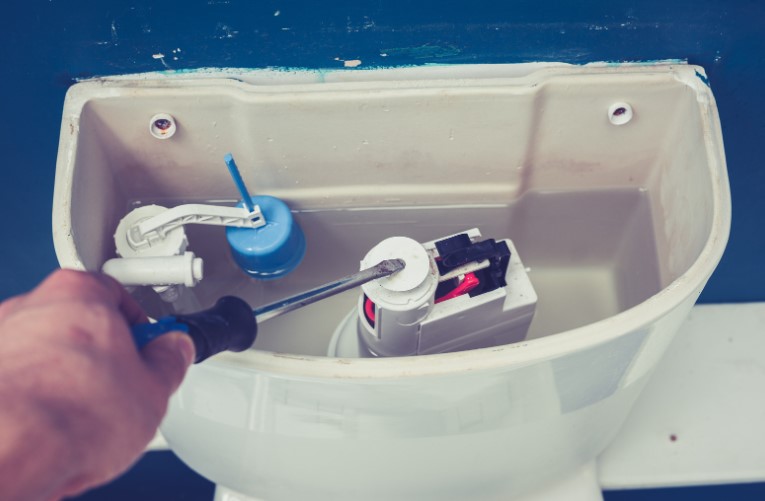
A running toilet can be frustrating and wasteful, especially if your toilet uses a button flush mechanism, common in UK households.
The constant sound of running water not only indicates an internal issue but also leads to significant water wastage, leads to brown stains in the toilet bowl and higher utility bills. Luckily, you can fix this problem yourself with a little patience and guidance.
In this guide, I’ll walk you through how to fix a running toilet with a button flush, addressing common causes and offering clear, actionable steps to resolve the issue.
A running toilet means water is flowing into the toilet bowl without stopping, even after flushing. There are several potential reasons why a button flush toilet may continuously run, and understanding the cause is key to fixing it.
- Worn Out Flush Valve Seal: The flush valve seal (or flapper) controls the release of water when you flush. Over time, it can wear out or become loose, allowing water to seep through even when the button is not pressed.
- Faulty or Misaligned Fill Valve: The fill valve controls the amount of water in the cistern. If it’s faulty or incorrectly aligned, it can cause the water to continue running into the tank and overflowing into the bowl.
- Sticking Button Mechanism: If the flush button mechanism is worn out or sticking, it may not return to its proper position, causing water to keep running.
- Malfunctioning Float Adjustment: The float determines the water level in the cistern. If it’s not adjusted correctly, the cistern might overfill, causing continuous running.
Before you can fix a running toilet, it’s important to pinpoint the exact cause. Here’s how you can diagnose the problem in your button flush toilet:
1. Checking the Flush Valve Seal
The flush valve seal is a rubber or silicone part that blocks the flow of water when the toilet isn’t flushing. Over time, it can become brittle, misaligned, or worn out, leading to a leak. To check if it’s the problem:
- Turn off the water supply.
- Remove the cistern lid and you can locate the flush valve at the bottom of the tank.
- Check for signs of wear, cracking, or any misalignment in the valve.
- If the seal looks damaged or isn’t sitting correctly, it needs to be replaced.
2. Examining the Fill Valve for Leaks
The fill valve regulates the water level inside the cistern. If the fill valve isn’t closing properly after flushing, water can continuously flow into the tank. Here’s how to check:
- Watch the water level after flushing. If it keeps rising beyond the fill line, the valve might be faulty.
- Look for water flowing through the overflow tube, which indicates the valve isn’t shutting off.
- Try adjusting the float height to see if it resolves the issue. If not, the fill valve may need to be replaced.
Sometimes, the issue lies with the flush button itself. If it’s sticking or not returning to the correct position after being pressed, the water will keep running. To diagnose:
- Press the flush button a few times to see if it feels stuck or sluggish.
- Open the cistern and manually check the linkage between the button and the flush valve.
- If the button seems stiff or the linkage isn’t working smoothly, consider cleaning or replacing the button mechanism.
4. Checking the Float Height and Position
The float has the overall responsibility for the control of the water level in the cistern. If it’s not adjusted correctly, the cistern can overfill, leading to continuous water flow. Here’s how to check:
- Have a look at the water level in the tank. If it’s higher than the overflow tube, the float needs to be adjusted.
- Lower the float slightly to reduce the water level and stop the overflow.
- Check whether this adjustment stops the running water. If not, there may be an issue with the fill valve.
5. Looking for Clogged Inlet Holes
Clogged inlet holes can cause uneven water flow and prevent the toilet from flushing properly. If water isn’t entering the bowl at the correct rate, the toilet may not complete its flush cycle, leading to continuous running. Check for mineral buildup or blockages:
- Use a small brush or wire to clean out the holes where water enters the bowl.
- Flush the toilet to see if the flow improves after cleaning.
Now that you’ve diagnosed the problem, it’s time to fix the issue. Below is a step-by-step guide to help you repair the most common causes of a running button flush toilet.
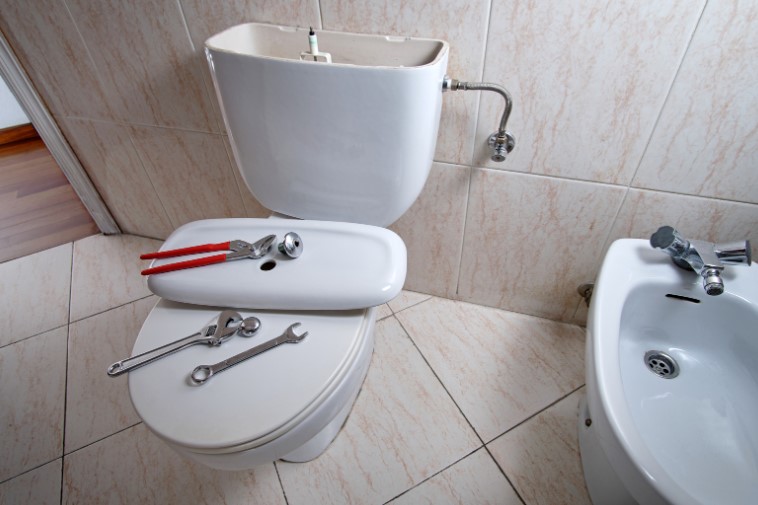
Step 1: Turn Off the Water Supply and Remove the Cistern Lid
Before beginning any repairs, it is mandatory to turn off the water supply to the toilet. Locate the shut-off valve, usually found behind or next to the toilet. Once the water is off:
- Press the flush button to drain the remaining water from the cistern.
- Remove the cistern lid carefully and set it aside. Be gentle, as the lid can be fragile.
Step 2: Inspect and Replace the Flush Valve Seal
A worn or damaged flush valve seal is often the main culprit in running toilets. To replace it:
- Locate the flush valve at the base of the cistern.
- Remove the old seal by detaching it from the valve.
- Install the new seal, ensuring it sits properly and forms a tight seal.
- Test the new seal by turning the water back on and observing if the leak has stopped.
Step 3: Make Adjustment in the Float and Fill Valve
If the water level in the cistern is too high, you’ll need to adjust the float:
- Check the float mechanism on the fill valve. Most floats can be adjusted by either turning a screw or sliding the float up or down.
- Lower the float so the cistern fills to the correct level (below the overflow tube).
- If adjusting the float doesn’t work, consider replacing the entire fill valve.
If the flush button is sticking, it might need to be cleaned or replaced:
- Disconnect the button mechanism from the flush valve.
- Clean any dirt or grime that may be causing it to stick.
- If cleaning doesn’t solve the issue, replace the button mechanism with a new one.
Step 5: Reassemble and Test the Toilet
Once all repairs are complete, reassemble the parts:
- Put the cistern lid back in its place to reassemble.
- Allow the cistern to fill by turning on the water supply.
- Test the toilet by flushing a few times to ensure the running issue has been resolved.
How Much Does Professional Repair Cost?
If you prefer to call a professional plumber instead of attempting the repair yourself, it’s helpful to understand the typical costs. In the UK, the cost of hiring a plumber to fix a running toilet can vary depending on the issue. Here’s a breakdown:
- Average cost range:
- £70 to £150, depending on the complexity of the problem.
- Lower-end costs:
- Simple adjustments like setting the float correctly.
- Replacing a flush valve seal.
- Higher-end costs:
- Replacing a fill valve or the entire button flush mechanism.
- Additional factors:
- Emergency call-outs or repairs outside of regular working hours can increase the cost.
- The price may also rise if parts need to be specially ordered or if the toilet model is difficult to access.
By knowing the potential costs, you can decide whether to attempt a DIY fix or call in a professional.
Conclusion
Fixing a running toilet with a button flush isn’t as daunting as it may seem. By diagnosing the problem—whether it’s a worn flush valve seal, faulty fill valve, or sticking button mechanism—and following this step-by-step guide, you can restore your toilet to working condition in no time.
Remember, timely repairs not only prevent water wastage but also reduce your utility bills.
| Issue |
Quick Fix |
| Worn Out Flush Valve Seal |
Replace the flush valve seal |
| Faulty Fill Valve |
Adjust or replace the fill valve |
| Sticking Button Mechanism |
Check and replace the button mechanism |
| Incorrect Float Position |
Adjust the float height |
| Clogged Inlet Holes |
Clean the inlet holes inside the cistern |
Frequently Asked Questions (FAQs)
1. How do I know if my toilet’s fill valve is faulty?
If the water in the cistern keeps rising or flows into the overflow tube, the fill valve may not be shutting off properly and needs adjusting or replacing.
If the flush button sticks, try cleaning it to remove dirt or debris. If this doesn’t work, the mechanism may need replacement.
3. Is it worth fixing a running toilet myself, or should I call a plumber?
Most running toilet issues, like replacing the flush valve seal or adjusting the float, are easy to fix on your own. But if the problem persists or feels complicated, calling a plumber can save time.

by Kanimozhi BV | Oct 2, 2024 | Washing Machine, Appliances
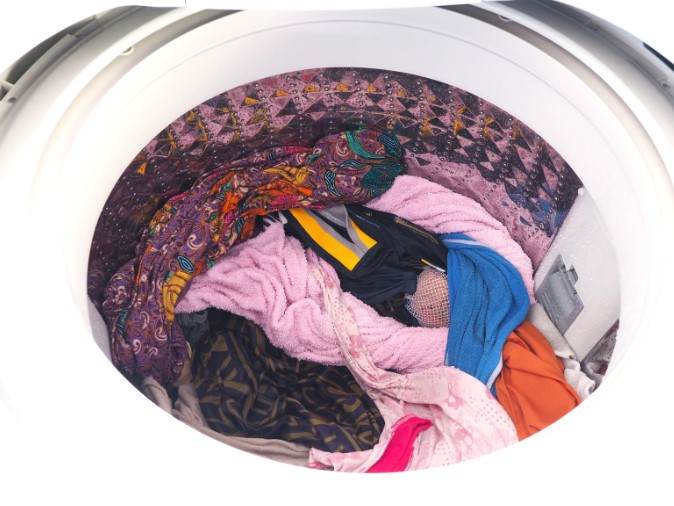
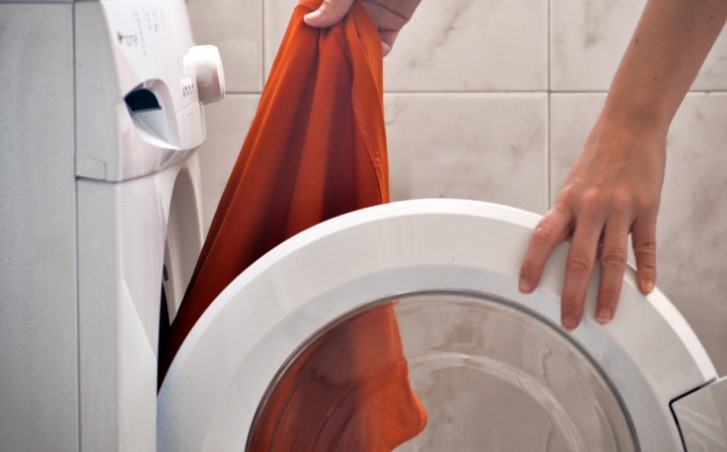
Are you looking for how to fix a washing machine that won’t spin? Washing machines are essential household appliances, and when they malfunction, it can be quite a hassle.
One of the most common problems is when your washing machine refuses to spin. This guide provides a comprehensive, step-by-step approach to repairing a washer that’s not spinning, covering everything from diagnosis to repair.
Why is My Washing Machine Not Spinning?
A washing machine that won’t spin can result from various causes, ranging from simple to complex. Understanding the potential reasons is the first step toward fixing the issue.
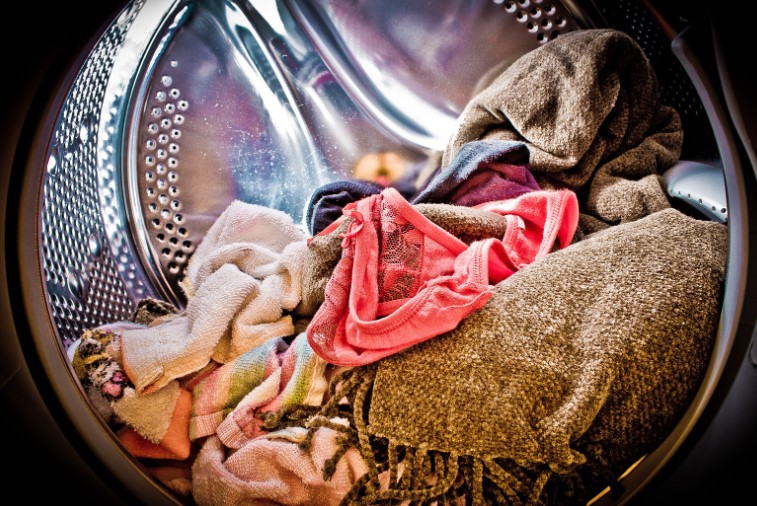
Common Causes of a Non-Spinning Washing Machine
- Unbalanced Load: If the laundry inside the drum is unbalanced, it can prevent the machine from spinning.
- Clogged Drain Pump: Blockages in the drain pump or hoses can stop the machine from spinning properly.
- Broken Belt or Motor: A broken drive belt or a faulty motor can prevent the drum from turning.
- Faulty Lid Switch or Door Lock: For safety reasons, the machine won’t spin if the door isn’t closed or if the switch is defective.
- Worn Bearings: Over time, bearings can wear down, making it difficult for the drum to spin.
How Do I Diagnose the Problem?
There are several key areas to check to determine why your washing machine isn’t spinning.
1. Checking the Load Balance
One of the simplest issues could be an unbalanced load. If your washing machine detects an uneven distribution of laundry, it might refuse to spin to avoid damage. To check:
- Open the door and try to rearrange the clothes that fix the drum.
- Ensure that the items are evenly spread across the drum.
- Close the door and switch on the machine to restart the spin cycle.
2. Inspecting the Lid Switch or Door Lock
Modern washing machines have safety features that prevent them from spinning if the door isn’t securely closed. Here’s how to check:
- Have a look for a clicking sound when you close the door. If you don’t hear it, the latch might be defective.
- Use multimeter to check the lid switch.
- If faulty, the lid switch or door lock may need replacement.
3. Examining the Drainage System
If the drain pump is clogged, water may not leave the drum, and the machine will not spin. Here’s how you can inspect it:
- Unplug the machine for safety.
- Check the drain hose for kinks or blockages.
- Inspect and clean the drain pump filter, which is usually located at the bottom front of the machine.
4. Listening for Unusual Noises
Unusual sounds can provide valuable clues. Grinding or clicking noises may indicate worn bearings or motor issues:
- Listen closely during the wash and spin cycles.
- If you hear a loud grinding, it may be time to replace the bearings.
5. Testing the Spin Cycle
If you suspect a problem with the machine’s programming, try manually testing the spin cycle:
- Fix over the machine to the spin cycle.
- Observe if the drum attempts to spin but stops after a few seconds.
- This could indicate a problem with the motor or drive belt.
6. Looking for Error Codes
Many modern washing machines will display an error code on the control panel. Check the user manual or the manufacturer’s website to interpret these codes, which can guide you toward the specific issue, such as a motor failure or lid lock malfunction.
Step-by-Step Guide on How To Fix a Washing Machine That Won’t Spin
Once you’ve found the issue, you can start the repair process. Below is a step-by-step guide to address the most common problems with non-spinning washing machines.
Step 1: Unplug the Washing Machine
Before starting any repair, safety is critical. It is important to unplug the washing machine from the power source to prevent electric shocks.
Step 2: Check for an Unbalanced Load
If the load inside the machine is unbalanced, make a redistribution of the clothes. Heavy items like towels or bedsheets should be spread out evenly. Once balanced, restart the spin cycle to see if the problem is resolved.
Step 3: Clear Out the Drain Pump
A clogged drain pump is a common issue. Here’s how to clear it:
- Open the front panel to access the drain pump.
- Place a shallow container under the pump to catch any remaining water.
- Remove the filter from the machine and clear out any debris or lint.
- Reattach the filter and run the machine.
Step 4: Inspect the Drive Belt
The drum will stop spinning due to a broken or loose drive belt:
- Discard the back panel of the washing machine.
- Check the belt for signs of wear or slackness.
- If the belt is broken or loose, replace it with a new one, ensuring it fits securely around the pulleys.
Step 5: Examine and Replace the Motor
If the motor is faulty, it needs to be replaced. Here’s a simplified guide:
- Test the motor using a multimeter for electrical faults.
- If no power is detected, remove the drum and then remove the motor from the washing machine.
- Install a new motor and reconnect the wires.
Step 6: Test the Machine After Repair
Once all repairs are completed, plug the washing machine back in and run a test spin cycle. Ensure the machine spins properly and that all issues have been resolved.
Conclusion
Fixing a washing machine that won’t spin can be as simple as redistributing the load or as complex as replacing the motor. By following this step-by-step guide, you can diagnose and repair the problem with confidence.
Regular maintenance, like cleaning the filter and avoiding overloading the machine, can prevent future issues and prolong your washing machine’s life.
Quick Fixes for Non-Spinning Washing Machines
| Issue |
Quick Fix |
| Unbalanced Load |
Rebalance the laundry |
| Clogged Drain Pump |
Clear the pump and hoses |
| Broken Belt |
Replace the belt |
| Faulty Lid Switch |
Replace the lid switch |
| Worn Bearings |
Replace the bearings |
Frequently Asked Questions (FAQs)
1. Can a Clogged Filter Stop the Machine from Spinning?
Yes, a clogged filter can obstruct water drainage, preventing the machine from spinning. Regularly clean the drain pump filter to ensure smooth operation.
2. How Can I Prevent My Washing Machine From Having Spin Issues?
- Avoid overloading the drum.
- Clean the drain pump and filter in a regular basis.
- Check for error codes and address any issues immediately.
3. Is it Worth Repairing a Washing Machine That Won’t Spin?
In many cases, especially with simple issues like a clogged pump or faulty belt, it’s worth repairing. However, for older machines or severe motor problems, replacement might be more cost-effective.
