
by Kanimozhi BV | Sep 21, 2024 | Wall, DIY Ideas, Interior
How much wallpaper do I need? is your question then here is the answer. One of the most important steps in starting a wallpapering project is determining exactly how much wallpaper you need.
Ordering too much can lead to wastage, while underestimating means halting your progress to order more.In this comprehensive guide, I’ll help you calculate the exact amount of wallpaper required for your room, ensuring you get it right the first time.
Understanding the Basics of Wallpaper Calculation
Several factors affect how much wallpaper is needed for a room. It’s important to consider these elements before you start measuring.
What Factors Affect How Much Wallpaper I Need?
The following factors play a critical role in determining how much wallpaper is necessary:
- Room Dimensions: The height and width of the walls are the primary factors in calculating the total surface area that needs to be covered.
- Doors and Windows: You’ll need to account for the area of doors, windows, or other openings when calculating the total area. Subtract their dimensions, but remember to buy a little extra wallpaper to ensure a seamless match.
- Wallpaper Pattern Repeat: If your wallpaper has a pattern, you’ll need to account for the pattern repeat, which may require additional wallpaper to ensure that the design lines up properly.
How to Measure My Room for Wallpaper?
Accurately measuring your room is essential for determining the correct amount of wallpaper.
Step-by-Step Guide on How Much Wallpaper Do I Need
Here’s how I typically measure a room to ensure I get the right amount of wallpaper:
- Tape measure
- Calculator
- Pen and paper
- Ladder (if necessary for high walls)
2. Measure the Height of Each Wall:
- Begin by measuring from floor to ceiling for each wall in the room. Write down the height of every wall.
3. Measure the Width of Each Wall:
- Measure the width of each wall. Multiply the height and width to calculate the total area (in square metres) for each wall.
- Example: A wall that is 2.5 metres high and 4 metres wide would be 2.5 x 4 = 10 square metres.
4. Repeat for All Walls:
- Continue measuring all the walls that you plan to wallpaper. Sum the total square metreage of all walls together.
5. Account for Windows, Doors, and Openings:
- Subtract the areas for windows, doors, or any other openings. Measure their height and width, multiply, and subtract from the total wall area.
- Example: If a window is 1.5 metres tall and 1 metre wide, subtract 1.5 x 1 = 1.5 square metres.
6. Double-Check Your Measurements:
- Always double-check your numbers to ensure accuracy, especially if you have a room with irregular shapes or sloped ceilings.

What About Doors, Windows, and Openings?
When wallpapering, subtracting the area of doors and windows is important to avoid buying excess wallpaper. However, there are some considerations:
- Keep Extra for Pattern Matching: Even after subtracting openings, I recommend buying some extra wallpaper to ensure you can match patterns around doors and windows.
- Measuring Openings: Measure the height and width of doors and windows accurately and subtract them from the total.
Should I Measure Around Furniture or Obstacles?
When measuring walls, I suggest ignoring built-in furniture, radiators, or alcoves that won’t be papered.
However, if you plan to move these items in the future or simply want more flexibility, measure the entire wall and adjust as needed later.
Measuring Walls with Sloped Ceilings or Irregular Shapes
Sloped ceilings or unusual room shapes can make wallpapering more complicated. In these cases:
- Measure the tallest point and widest point of the wall.
- Treat the wall as a regular rectangle for calculation purposes and cut away any excess wallpaper when you hang it.
How Many Rolls Of Wallpaper Do I Need?
Once you’ve measured the walls, the next step is calculating how many wallpaper rolls you’ll need. This can be done either manually or with a wallpaper calculator.
Using the Wallpaper Calculator
A wallpaper calculator can do the heavy lifting for you by calculating the number of rolls based on your room’s dimensions. Most UK wallpaper rolls are standard sizes, but here’s a table to break it down:
| Roll Size |
Coverage (approx) |
Typical Use |
| 10 metres x 53 cm wide |
5 square metres |
Most standard wallpaper rolls in the UK |
To manually calculate, follow these steps:
- Add Up Total Wall Area: Use your measurements to get the total wall area in square metres.
- Divide by Roll Coverage: Divide the total wall area by the coverage of a single roll (typically 5 square metres).
- Example: If your total wall area is 25 square metres, and one roll covers 5 square metres, you’ll need 25 ÷ 5 = 5 rolls.

If you’re calculating manually, use this formula:
- Total wall area (in sq.m) ÷ Roll coverage = Number of rolls needed
For example:
- Total wall area = 40 square metres
- Standard roll covers = 5 square metres
- 40 ÷ 5 = 8 rolls
Does the Type of Wallpaper Affect the Number of Rolls?
Different types of wallpaper may require more or fewer rolls based on their thickness, material, or pattern. For example:
- Textured or thick wallpapers: May offer less coverage per roll due to their weight and thickness.
- Patterned wallpaper: May require additional rolls to ensure proper alignment and matching of the design.
How to Factor in Wastage or Errors in Calculation?
It’s always better to err on the side of caution by purchasing an extra roll or two to account for:
- Wastage at the time of the cutting & installation process.
- Pattern matching, which often uses up more wallpaper than anticipated.
- Future repairs: Having leftover wallpaper allows you to make touch-ups or replacements down the road without worrying about a mismatch.
What Common Mistakes Should I Avoid When Measuring for Wallpaper?
Here are a few mistakes I often see people make when measuring for wallpaper:
- Forgetting to account for pattern repeats: If your wallpaper has a large repeat, failing to consider this can lead to misaligned patterns.
- Incorrectly subtracting door and window areas: Make sure to subtract their area accurately, but remember to order slightly more wallpaper to cover potential mistakes.
- Not buying enough extra rolls: Always get an additional roll or two, especially if you’re using patterned wallpaper. It’s better to have too much than to run out mid-project.
I recommend buying 1–2 extra rolls. Here’s why:
- Pattern matching: Especially for larger repeats, you’ll use more wallpaper than expected.
- Future repairs: If there’s damage to the wallpaper down the line, having the same batch of wallpaper stored away makes it easier to fix without colour variation.
- Margin for error: Misalignments and mistakes can happen, so it’s better to be prepared.
Make sure to have the following tools handy for accurate wallpaper measurement:
- Tape measure: For measuring wall height and width.
- Ladder: Useful for measuring higher areas, especially in rooms with tall ceilings.
- Calculator: To quickly do the essential calculations.
- Pencil and paper: For jotting down your measurements.

Pro Tips for Getting the Most Accurate Measurements
- Measure twice to ensure you don’t make errors.
- Round up measurements slightly to allow for any mistakes.
- Always measure in metres and centimetres, as most wallpaper calculators use metric units.
How to Handle Patterned or Textured Wallpaper?
If you’re using wallpaper with a large pattern repeat or texture, be prepared to order more rolls. Here’s why:
- Pattern Repeat: This refers to the distance between the start of a pattern and when it repeats. Larger repeats mean more wallpaper is needed to ensure the pattern aligns correctly across your walls.
- Textured Wallpapers: They often come in heavier materials, requiring additional rolls to cover the same area compared to standard wallpaper.
Can I Estimate Wallpaper for a Feature Wall?
If you’re wallpapering just a feature wall, the process is much simpler:
- Measure only the feature wall: Measure the height and width of the feature wall and multiply to get the area.
- Use standard roll coverage: Divide the total wall area by the coverage of a single roll to find how many rolls are needed.
- Buy extra for matching: Even for feature walls, buy a little extra, especially if you’re working with patterns.
Conclusion
Calculating how much wallpaper you need doesn’t have to be overwhelming. With accurate measurements, consideration of pattern repeats, and proper planning for extra rolls, you’ll have the right amount of wallpaper for your project.
Always buy a little more than necessary to account for potential mistakes or future touch-ups, ensuring a smooth and successful wallpapering experience.
Frequently Asked Questions About Wallpaper Calculation
1. Can I Use a Wallpaper Calculator to Help Me?
Yes, wallpaper calculators are available online, and they simplify the process. All you need to do is input the dimensions of your walls, and it will calculate the number of rolls you need based on standard wallpaper sizes.
2. What If My Walls Aren’t Straight or Even?
For uneven or crooked walls, measure the longest and tallest parts, and treat them as if they’re regular rectangles. During the wallpapering process, you can cut away excess wallpaper to fit your unique walls.
3. Should I Account for Waste When Ordering Wallpaper?
Yes, always account for about 10-15% extra to cover wastage due to cutting mistakes, misalignment, or trimming.
4. How Do I Store Leftover Wallpaper?
Store any extra wallpaper in a cool, dry area away from sunlight to avoid fading. Ensure that the rolls are kept upright and tightly sealed to prevent damage.
by Kanimozhi BV | Sep 21, 2024 | Garden, Exterior
Garden edging enhances the visual appeal and structure of an outdoor space, creating a clear boundary between lawns, flower beds, and pathways. One of the best ways to achieve a natural and durable garden border is by using wooden sleepers.
Whether using timber sleepers or railway sleepers, they offer a sturdy, rustic, and long-lasting edging solution that suits both modern and traditional gardens.
This guide provides a step-by-step process on how to lay sleepers for garden edging, covering:
- Types of sleepers and why they are suitable for edging
- How to lay railway sleepers as a border
- DIY installation vs. professional costs
- Sleeper garden edging ideas for inspiration
By the end, you’ll have all the knowledge to successfully install sleepers as garden edging that enhances your outdoor space for years to come.
What Are Sleepers and Why Use Them for Garden Edging?
Sleepers are large wooden beams traditionally used in railway construction but now popular for landscaping due to their strength, durability, and rustic charm. They create defined borders for flower beds, lawns, patios, and pathways.
Types of Sleepers for Garden Edging
| Type |
Features |
Pros |
Cons |
| Softwood Sleepers |
Pressure-treated pine or spruce |
Affordable, lightweight |
Less durable, needs maintenance |
| Hardwood Sleepers |
Oak or tropical hardwood |
Extremely durable, rot-resistant |
Expensive, heavy |
| Reclaimed Railway Sleepers |
Previously used on railways |
Aged, rustic appearance |
May contain creosote (harmful to plants) |
| Treated Timber Sleepers |
Chemically treated for longevity |
Resistant to rot and insects |
Chemical treatment may not be eco-friendly |
Why Choose Railway Sleepers for Garden Edging?
- Strong & Durable: Railway sleepers are thicker and heavier than standard timber sleepers, making them ideal for structural garden borders.
- Rustic Aesthetic: Their weathered look adds a natural, aged feel to garden landscapes.
- Eco-Friendly Option: Reusing railway sleepers is a sustainable choice when sourced responsibly.
However, if using old railway sleepers, ensure they are not treated with creosote, as it can be harmful to plants and soil.
- Spirit level
- Saw (for cutting sleepers)
- Drill and screws
- Mallet
- Shovel
- Tape measure
- Wheelbarrow
- Landscape fabric (optional)
Materials Needed:
- Timber or railway sleepers
- Metal brackets or wooden stakes
- Concrete (if extra stability is needed)
- Wood preservative (to prevent rot)
- Gravel or sand for a stable base
How to Lay Sleepers for Garden Edging? – Step-by-Step Guide
Step 1: Plan and Measure the Garden Edge
- Mark out the area where you want to install the sleepers.
- Use a string line or spray paint to create a guide.
- For curved edges, cut sleepers into smaller sections for better flexibility.
Step 2: Prepare the Ground
- Dig a shallow trench (50mm deep) to help secure the sleepers in place.
- Remove weeds and level the soil.
- Add a gravel or sand base to aid drainage and prevent rot.
Step 3: Position and Cut the Sleepers
- Lay the sleepers along the trench and check alignment.
- Cut sleepers to size using a saw, ensuring smooth edges for tight joints.
Step 4: Securing the Sleepers in Place
There are three main ways to secure sleepers as garden edging:
- Metal Brackets: Attach brackets to the sleepers and secure with screws.
- Wooden Stakes: Hammer stakes into the ground behind the sleepers.
- Concrete Base: Set sleepers in concrete for maximum durability.
For railway sleepers, due to their weight, concrete or wooden stakes provide the best stability.
Step 5: Finishing Touches
- Apply a wood preservative to protect against moisture and insects.
- Fill gaps with soil, gravel, or decorative stones for a polished look.
- Compact the surrounding soil to hold the sleepers securely.
How to Lay Railway Sleepers as a Border?
Using railway sleepers as a garden border creates a bold and sturdy boundary that lasts for years. Since railway sleepers are heavier and thicker than standard timber sleepers, the installation process requires extra stability.
Steps to Lay Railway Sleepers as a Border
- Choose the Right Sleepers: Opt for hardwood railway sleepers for better longevity. Avoid creosote-treated sleepers if using near plants.
- Dig a Trench: Create a 100mm deep trench to hold the heavy sleepers in place.
- Lay a Gravel Base: This improves drainage and prevents the wood from sitting directly on damp soil.
- Place the Sleepers: Arrange them in a straight line or curve, depending on your design.
- Fix in Place:
- Use long metal rods or wooden stakes hammered into the ground.
- If stacking sleepers, use coach screws or timberlock screws to secure them together.
- Seal and Treat: Apply a wood preservative to enhance durability.
Railway sleepers provide a thick, heavy-duty border perfect for defining pathways, flower beds, or driveways.
How Much Does It Cost to Lay Sleepers for Garden Edging?
| Expense |
Estimated Cost (UK) |
| Softwood sleepers (per sleeper) |
£15 – £30 |
| Hardwood sleepers (per sleeper) |
£30 – £60 |
| Railway sleepers (per sleeper) |
£40 – £80 |
| Fixings (brackets, screws) |
£5 – £20 |
| Concrete (if needed) |
£5 – £15 per bag |
| Professional installation |
£100 – £300 |
Using railway sleepers can be more expensive due to their weight and size, but they last decades with minimal maintenance.
Railway Sleepers Garden Edging Ideas
Railway sleepers can be used in creative ways to enhance garden design:
- Raised Planters: Stack sleepers to create deep flower beds.
- Stepped Sleepers: Perfect for tiered edging on sloped gardens.
- Pathway Borders: Use sleepers to frame gravel or stepping stone pathways.
- Lawn Edging: Create a crisp, defined border between grass and flower beds.
- Sleepers with LED Lighting: Drill lights into the sleepers for a modern garden look.
Tips for Maintaining Your Sleeper Garden Edging
- Apply a wood preservative annually to protect against rot.
- Check for movement and re-secure loose sleepers.
- Ensure proper drainage with drain covers to avoid moisture damage.
- Avoid untreated sleepers sitting directly in soil.
Conclusion
Laying timber or railway sleepers for garden edging is an effective way to define outdoor spaces while adding a natural and stylish look. Railway sleepers provide a strong, bold border, while timber sleepers offer a more versatile and budget-friendly option.
By following the step-by-step installation process on how to lay sleepers for garden edging, homeowners can create long-lasting and visually appealing garden borders. Whether using sleepers for flower beds, pathways, or raised borders, they provide both functionality and beauty to any outdoor space.
For larger installations, consider hiring a professional landscaper to ensure a polished and secure finish.
Frequently Asked Questions
1. Can you use railway sleepers for garden edging?
Yes, reclaimed railway sleepers are a popular and durable choice for garden edging, though they can be heavy and may require extra care during installation.
2. What’s the best way to cut garden sleepers?
You can use a hand saw or a power saw for cutting sleepers, depending on the thickness and type of wood. Ensure to sand the edges to avoid splinters.
3. How do you prevent sleepers from moving over time?
Ensure that the sleepers are properly secured using stakes, pins, or brackets, and backfill the trench with compacted soil or gravel to hold them in place.

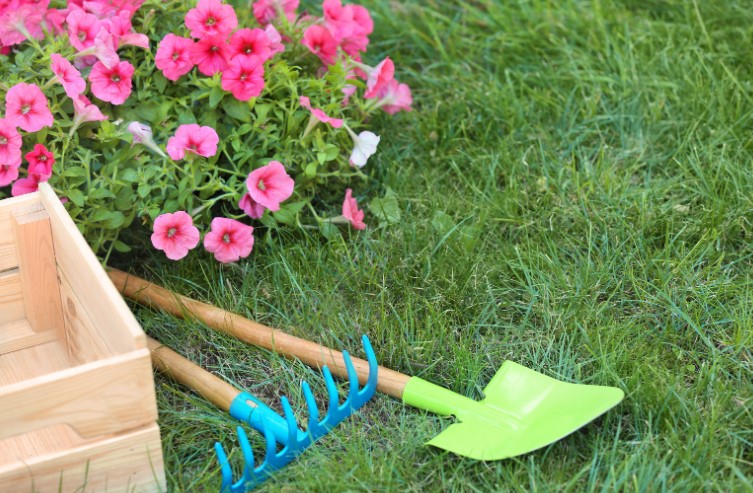
by Kanimozhi BV | Sep 20, 2024 | Garden, Exterior
The introduction should explain why cutting grass at the right time is essential for a healthy, green lawn. Readers often wonder when to cut grass, especially with the changing UK seasons, where temperature fluctuations and rain patterns can significantly impact grass growth.
I’ll explain that this guide focuses on providing a seasonal breakdown and the best lawn care practices to help them maintain their lawn’s health all year round.
This sets the tone for the rest of the guide, preparing the reader for actionable tips and useful information.
Why Is Timing Important for Lawn Mowing?
This section highlights the importance of timing when it comes to mowing. Readers will learn that mowing too early or late in the year can lead to grass damage.
For example, cutting grass when it’s too wet can cause soil compaction and root damage, while mowing during extreme heat can stress the lawn. It’s important to explain how grass growth slows down in colder months and speeds up in warmer weather.
I’ll also discuss how correct timing promotes stronger grass roots, better water retention, and reduces the risk of fungal diseases or pest infestations.
By maintaining the correct mowing schedule, the lawn can stay healthier and greener throughout the year.
What Happens if You Mow Grass Too Early or Too Late?
In this section, I’ll provide specific scenarios of what happens when you mow too early or too late. For example:
- Too Early in Spring: Mowing when temperatures are still low, or the ground is wet from frost, can tear at the grass blades and weaken the lawn, making it more susceptible to disease.
- Too Late in Summer: If the lawn is left too long, and then mowed aggressively during a hot spell, it can stress the grass. Cutting off too much at once leads to scalping, where the grass turns brown, and the lawn is left vulnerable to drought.
This section will also guide the reader on the signs to look for, such as soil conditions, grass length, and weather patterns, so they can make informed decisions about when to mow.
Seasonal Guide on When to Cut Grass in the UK
This section breaks down mowing practices by season, offering specific guidance for spring, summer, autumn, and winter. Each season brings different growth patterns, and the reader needs to adjust their mowing routine accordingly.
Spring (March – May)
Spring marks the beginning of the mowing season in the UK. After winter, grass starts growing again when the temperature consistently rises above 8°C.
The first mow should be done on a high mower setting to avoid stressing the grass, which is still recovering from its dormant state.
Key points to include:
- Start mowing once grass reaches around 7-8 cm.
- Mow once every 7 to 10 days, depending on growth speed.
- Gradually lower the mower height with each cut as spring progresses.
This section will also stress the importance of dry conditions when mowing, as cutting wet grass can cause the blades to tear and damage the lawn.
Summer (June – August)
In summer, grass tends to grow quickly, especially during early summer when temperatures are warm and there’s enough moisture in the soil.
However, during heatwaves or dry spells, the grass growth slows down. I’ll explain the need for adjusting mowing height during periods of extreme heat.
Key points to include:
- Mow once a week, but during peak growth periods, twice a week may be needed.
- Raise the mowing height during hot spells to protect the grass from drying out.
- Water the lawn early in the morning or late in the afternoon to maintain moisture, and avoid cutting during the hottest part of the day.

Autumn (September – October)
Autumn presents cooler temperatures and more frequent rainfall, which encourages strong growth before the onset of winter.
It’s an ideal time to prepare the lawn for the colder months by keeping the grass at a slightly longer height, allowing the roots to grow deeper.
Key points to include:
- Mow every 10 days as growth slows.
- Keep the mower at a medium height to protect the grass from early frost.
- Avoid cutting during wet or muddy conditions to prevent soil compaction.
Winter (November – February)
Winter mowing is less frequent, as grass growth significantly slows down. However, if the winter is mild, there may still be some growth.
The final and last cut of the year must be done just before consistent frost sets in.
Key points to include:
- Only mow if the grass is dry and temperatures are above 5-8°C.
- Adjust the mower height as high to prevent damage to dormant grass.
- Avoid mowing when the ground is found frozen or waterlogged, as this can compact the soil and damage the grass.
How Often Should You Mow Your Lawn?
This section explains the general rule of thumb: mow frequently enough that you never remove more than one-third of the grass height. Mowing too much or too little can stress the grass and hinder healthy growth.
- During rapid growth periods (spring and early summer), mow weekly or even twice a week.
- In hot, dry conditions, mow less frequently and raise the mowing height.
- During autumn, reduce the frequency but keep the grass a bit longer to prepare for winter.
This will provide the reader with a clear understanding of how their mowing frequency needs to change based on the conditions and time of year.
What is the Best Time of Day to Mow?
This section focuses on the optimal times of day for mowing grass:
- Early morning (6-8 AM): Avoid mowing, as the grass is often wet with dew, leading to uneven cuts and compacting the soil.
- Mid-morning (8-10 AM): This is the ideal time to cut your lawn, as the grass will be dry, as well as the temperatures are not too hot. The lawn has time to recover before the evening.
- Midday (12-2 PM): Mowing during this time can stress the grass, especially in hot weather.
- Late afternoon (4-6 PM): A good time to mow if the morning window is missed, but ensure the grass has time to recover before nightfall.
- Evening (after 6 PM): Avoid mowing, as the grass doesn’t have enough time to heal before the cool, damp night sets in, which can lead to disease.
In the UK, there are no strict laws regarding lawn mowing times, but it’s recommended to avoid early morning or late evening mowing to prevent disturbing neighbours.
Many councils advise legal time to mow between 8 AM and 8 PM to avoid noise complaints.

Additional Lawn Care Tips
This section provides a few extra tips to maintain a healthy lawn, such as:
- Sharpening mower blades: Dull blades in lawn mower tear at the grass instead of cutting it cleanly, which can stress the lawn and leave it vulnerable to disease.
- Mower settings: Change the mower height as per grass growth patterns.
- Watering advice: Water in the morning to prevent fungus, and avoid watering immediately after mowing.
How to Care for Your Lawn After Mowing?
This part covers essential post-mowing care tips:
- Don’t mow the grass too short, as longer blades help shade the roots and retain moisture.
- Fertilising: After mowing, especially in the spring and autumn, consider applying a slow-release fertiliser to keep the grass healthy.
- Keep an eye on pests and fungal infections after mowing, particularly if you cut grass in damp or humid conditions.
Conclusion
In the conclusion, I’ll summarise the key points on when to cut grass, reinforcing the importance of mowing at the right times throughout the year.
I’ll encourage readers to adopt a consistent lawn care schedule, which not only keeps their lawn looking neat but also promotes long-term grass health.

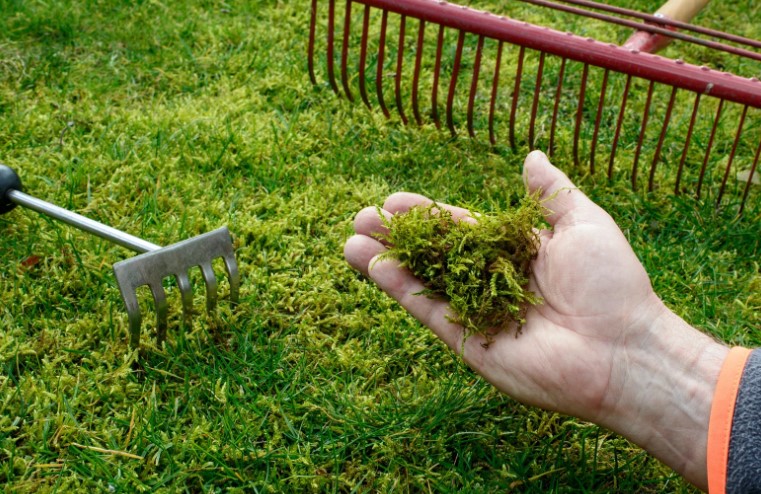
by Kanimozhi BV | Sep 19, 2024 | Garden, Exterior
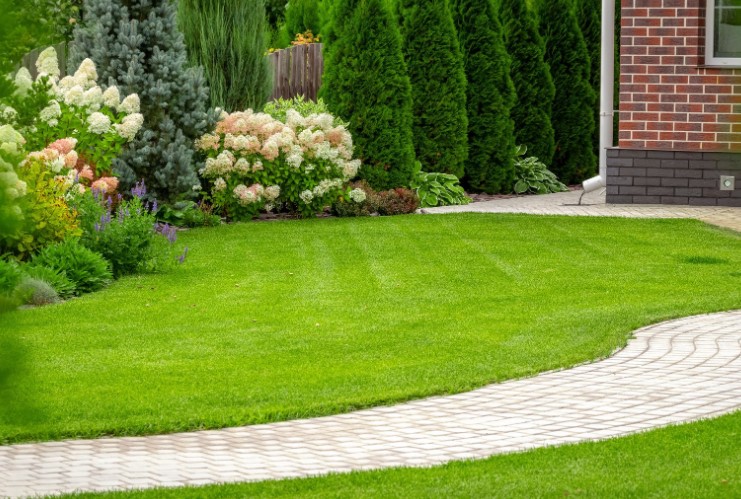
Maintaining a perfect lawn is important. A well-kept lawn boosts curb appeal, makes outdoor spaces more enjoyable, and promotes healthy grass growth.
In this guide, I’ll share expert insights into how to cut grass effectively, from choosing the right equipment to avoiding common mistakes.
Whether you’re new to lawn care or just looking to sharpen your skills, these pro tips and tricks will help you achieve a vibrant and healthy lawn.
Why Is Proper Grass Cutting Important?
Proper grass cutting is essential for the overall health of your lawn. Regular mowing helps grass grow more evenly, promoting thicker, healthier lawns that are less prone to weeds and disease.
Cutting grass at the correct height also encourages the development of deeper roots, leading to more drought-resistant lawns.
Benefits of regular mowing include:
- Encourages thicker growth and better coverage.
- Prevents weeds from spreading.
- Reduces the likelihood of pests and lawn diseases.
- Improves the overall appearance and uniformity of your lawn.
How Often Should I Cut the Grass?
“How often should I mow my lawn?” Which might be the common question all have. However, the exact answer depends on several factors, such as the grass type, the season, and local climate conditions.
Spring and Summer:
- Mow once a week during the time of growing seasons.
- Faster-growing grass may need mowing every 5-6 days.
Autumn and Winter:
- Mow every 10 to14 days as grass growth slows.
- In winter, mow only if necessary (approximately once a month).
Remember the golden rule: Never cut more than one-third of the grass blade in a single mow. Cutting more than that can stress the grass, leading to poor health.
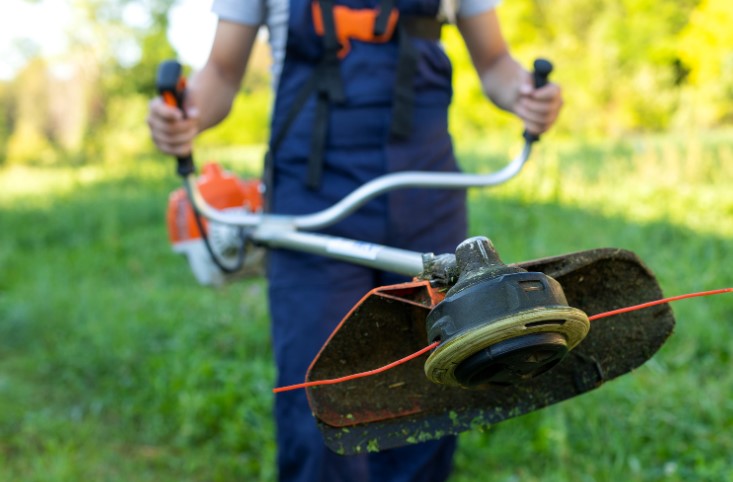
What Equipment Do I Need to Cut Grass?
The essential equipment you’ll need to cut grass:
- Lawn Mower: The type of mower to mow your lawn depends on your lawn size and grass type. Common mower types include:
- Rotary Mower: Suitable for most lawn types, including uneven terrain.
- Cylinder Mower: Best for fine, well-maintained lawns.
- Hover Mower: Ideal for small lawns and slopes.
- Grass Trimmer: For trimming areas the mower can’t reach, like around flower beds or pathways.
- Lawn Edger: To create neat, defined edges along borders.
Tool Maintenance Tips:
- Sharpen mower blades regularly for cleaner cuts.
- Ensure your tools are serviced annually for optimal performance.
| Equipment Type |
Recommended For |
Key Feature |
| Rotary Mower |
General lawn use |
Handles uneven ground well |
| Cylinder Mower |
Well-maintained fine lawns |
Provides a precise cut |
| Hover Mower |
Small/sloped lawns |
Easy to maneuver on inclines |
| Grass Trimmer |
Trimming edges and corners |
Reaches where mowers can’t |
| Lawn Edger |
Neat lawn borders |
Cleanly cuts along borders |
How Much Does It Cost to Cut 1 Acre of Grass?
Cutting a large area like an acre can be time-consuming and expensive, especially if you hire professional services. The cost to cut depends on several factors, including:
Labour Costs in the UK:
-
- Hiring a professional: £100 – £200 per session.
- Costs may vary based on complexity (e.g., sloped terrain, trees).
DIY Mowing Costs:
-
- Lawn mower: A reliable ride-on mower costs about £1,500 or more.
- Fuel: Mowing an acre consumes around 2 litres of fuel
- Time investment: Mowing an acre can take up to 2-3 hours, depending on the terrain.
For regular maintenance, investing in your own equipment is more cost-effective than hiring a service, especially during the growing season.
How Short Should I Trim the Grass?
Trimming your grass to the correct height is crucial for its health. The general rule is to keep grass between 2.5 to 4 cm for most lawns, though this can vary based on the type of grass:
- Cool-season grasses (like ryegrass or fescue): Trim to about 3-4 cm.
- Warm-season grasses (less common in the UK): These can be cut slightly shorter, around 2.5 cm.
Risks of cutting grass too short (scalping):
- Weakens the grass by exposing roots to excessive sunlight.
- Makes the lawn more vulnerable to disease, pests, and drought.
- Reduces its ability to recover from damage.
How Often Should I Mow My Lawn?
For the best results:
- During the growing season, mow at least once a week.
- In peak summer months, mowing every 5-6 days may be necessary.
- Observe the growth rate of your lawn to determine the ideal mowing frequency.
What Is the Best Time of Day to Cut Grass?
Timing is crucial when it comes to mowing. Here’s a breakdown of the best and worst times to mow your lawn:
- Best time: Late morning (8-10 AM) or early evening (4-6 PM).
- Grass is dry, and the temperature is moderate, reducing lawn stress.
- Worst time: Early morning or midday.
- Early morning dew makes grass wet, causing clumping and uneven cuts.
- Mowing during midday heat stresses the grass.
Avoid mowing wet grass to prevent clumping and damage to both your lawn and your mower.
How to Cut Grass Efficiently? – Step-by-Step Guide
How Should I Prepare My Lawn Before Mowing?
- Remove any debris: Clear sticks, rocks, and toys to avoid damaging your mower or causing uneven cuts.
- Check grass height: Ensure your lawn is ready for mowing and isn’t too short to avoid scalping.
What’s the Correct Mowing Technique?
To achieve a clean and even cut:
- Mow in straight, overlapping rows for uniformity.
- Alternate your mowing direction with each mow to prevent lawn ruts.
- For a striped effect, mow in straight lines using a rear roller mower.
How Should I Trim Lawn Edges?
To trim grass edges near a wall:
- Use a lawn edger: It’s essential for neat, defined borders.
- Trim after mowing: This gives your lawn a sharp, professional appearance.
What are the Common Grass Cutting Mistakes to Avoid?
- Cutting Grass Too Short (Scalping): This weakens the grass and leaves it vulnerable to stress and disease.
- Using Dull Mower Blades: Dull blades tear the grass, which can lead to a brown, unhealthy appearance.
- Mowing Wet Grass: Wet grass clumps, causing uneven cuts and potentially damaging the mower.
- Mowing in the Heat of the Day: Heat stresses the grass and slows recovery from mowing.
What are the Pro Tips for a Perfect Lawn Finish?
- Sharpen Blades Regularly: Dull blades tear rather than cut grass, which can damage your lawn.
- Change Mowing Patterns: Alternating your mowing direction anywhere prevents ruts and ensures a smooth, even finish.
- Use a Mulching Mower: This type of mower chops grass into small pieces, returning nutrients to the soil and improving lawn health.
- Watering After Mowing: Water the lawn in the morning after mowing to promote strong, healthy growth.
Conclusion
Cutting grass may seem straightforward, but doing it properly requires attention to detail. From choosing the right tools to understanding the best mowing frequency, there’s much to consider if you want to keep your lawn looking its best.
By following these pro tips and tricks on how to cut grass, you can ensure your lawn stays lush, healthy, and beautiful throughout the year.
FAQs About How to Cut Grass
1. Should I leave grass clippings on the lawn?
Yes, especially if using a mulching mower. Grass clippings might help to retain the moisture and which will return nutrients to the soil.
2. How do I know if I’m cutting grass too short?
If your lawn looks brown or patchy after mowing, you’re likely cutting too much at once.
3. Can I cut grass in the rain?
It’s best to avoid it. Wet grass clumps, making it harder to cut evenly and increasing the chance of mower damage.
4. What’s the best way to mow a sloped lawn?
Mow across the slope, not up and down, to prevent slipping and ensure an even cut.
by Kanimozhi BV | Sep 19, 2024 | Garden, Exterior
Grass growth is something we all monitor closely, especially as the seasons change. As someone who takes pride in a well-maintained lawn, it’s important to know when does grass stop growing so you can adjust your lawn care routine accordingly.
In the UK, grass growth is largely influenced by temperature and seasonal shifts, particularly in autumn and winter. In this guide, I’ll walk you through exactly when grass stops growing and what steps you should take to keep your lawn healthy year-round.
What Factors Affect Grass Growth?
Grass growth depends heavily on three key factors: temperature, sunlight, and moisture.
During the spring and summer, warmer temperatures, longer daylight hours, and frequent rainfall create ideal conditions for your lawn to thrive.
But as autumn sets in, these conditions begin to change.
- Temperature: The most significant factor in grass growth is temperature. When it drops below 10°C, grass growth slows down. As temperatures fall further, particularly under 5°C, growth halts completely.
- Sunlight: Shorter days mean less sunlight, which grass needs for photosynthesis. Without enough sunlight, your lawn’s growth naturally slows.
- Moisture: While rain is essential for growth, too much or too little can be problematic. Autumn tends to bring more rainfall, which is generally good for grass, but as winter approaches, frost and snow can limit moisture absorption.
By understanding how these factors influence your lawn, you can better predict when to expect changes in growth.
When Does Grass Stop Growing in the UK?
In the UK, grass typically begins to slow its growth in late autumn, around October. The further north you are, the earlier this process might start, due to cooler temperatures.
Grass stops growing entirely by the time winter arrives, usually around late November to early December.
Grass growth in the UK halts when the temperature consistently stays below 10°C. At this point, your lawn essentially goes into dormancy, conserving energy until warmer weather returns in spring.
Key Points to Remember:
- Grass starts slowing down in autumn as temperatures dip.
- Growth typically stops in winter when temperatures drop below 5-10°C.
- Northern areas of the UK may see earlier dormancy than southern regions.
How Does Seasonal Change Affect Lawn Growth?
What happens during Autumn?
As the weather cools, you’ll notice your grass growing more slowly. Autumn is a crucial time to carry out seasonal lawn care to prepare it for the coming winter months.
You’ll still need to mow during this time, but less frequently than in the summer.
- Mowing can reduce to once every 10-14 days.
- You can carry out fertilization to strengthen the grass before it goes dormant.
- It’s also a good time to aerate your lawn, allowing it to absorb water and nutrients more effectively.
What happens during Winter?
When winter hits, your grass enters dormancy. This means that even if the grass is still green, it isn’t actively growing.
During dormancy, your lawn won’t require any mowing, but you’ll need to take care of it in other ways, such as protecting it from frost and minimizing foot traffic.
- Avoid mowing as the grass won’t be growing.
- Focus on protecting the lawn from winter damage, such as snow mold or frost damage.
- Use this time to maintain your lawn tools for the upcoming spring.
What Should I Do Before Grass Stops Growing?
Before your grass completely stops growing, it’s essential to prepare it for the colder months.
The transition between autumn and winter is the ideal time for these end-of-season lawn care tasks:
- Fertilize your lawn with a winter fertilizer rich in potassium. This strengthens the roots and prepares the grass for winter dormancy.
- Aerate the soil to allow better penetration of water and nutrients. This is especially important before frost sets in.
- Remove thatch—the layer of dead grass and debris—to prevent disease during winter.
- Stop mowing when the grass growth rate is minimal, generally once temperatures dip below 10°C.
By following these steps, you can ensure that your lawn is well-prepared to endure the winter and bounce back come spring.

How to Care for Your Lawn During Winter Dormancy?
Once your grass enters dormancy, your lawn care routine will shift. Although your grass isn’t actively growing, it still needs a bit of attention to stay healthy.
- Avoid Mowing: There’s no need to mow your lawn in winter since the grass has stopped growing.
- Limit Foot Traffic: Walking on dormant grass, especially when it’s frosty, can damage the grass blades, leading to patchy growth in spring.
- Protect Against Frost: Keep an eye out for frost damage. Frost can make the grass brittle, so avoid walking on the lawn during frosty mornings.
- Clear Debris: Even though the grass isn’t growing, it’s still important to keep the lawn clear of fallen leaves and debris, which can lead to mold or pest issues.
By taking these steps, you’ll help your lawn remain healthy throughout the winter, ensuring a quicker recovery once spring arrives.
Conclusion
Knowing when grass stops growing is key to managing your lawn care routine effectively. In the UK, grass growth slows in autumn and typically stops by early winter.
By preparing your lawn with the right seasonal care, you can ensure that it stays healthy and ready to thrive again when spring arrives.
Whether it’s fertilizing in autumn or protecting the lawn during its winter dormancy, these steps will help maintain a lush, green lawn all year round.
Take advantage of the slower growing months to carry out essential lawn care tasks, and you’ll be rewarded with a healthy, vibrant lawn when the warm weather returns.
Table : Comparing Grass Growth In Different Seasons
Here’s a table comparing grass growth in different seasons to help clarify when grass slows down and stops growing in the UK:
| Season |
Temperature |
Grass Growth Rate |
Lawn Care Activities |
Mowing Frequency |
| Spring |
10°C – 18°C |
Rapid growth |
– Fertilize
– Aerate
– Weed control |
Once every 5-7 days |
| Summer |
18°C – 25°C |
Peak growth |
– Water frequently
– Mow regularly
– Apply summer fertilizer |
Once every 7 days (more in heat) |
| Autumn |
10°C – 15°C |
Slows down |
– Apply autumn fertilizer
– Aerate
– Remove thatch |
Once every 10-14 days |
| Winter |
Below 10°C |
Growth stops (Dormant) |
– Minimize foot traffic
– Clear debris
– Protect from frost |
No mowing required until spring |
Frequently Asked Questions About Grass Stop Growing
1. Does grass grow in winter in the UK?
In most parts of the UK, grass stops growing entirely during the winter months. While the grass may still look green, its growth halts due to the colder temperatures.
2. What happens if I mow my lawn in winter?
Mowing a dormant lawn can damage the grass, as the blades are less resilient and more prone to injury during this period. It’s best to avoid mowing until growth resumes in spring.
3. When should I expect my lawn to start growing again in the spring?
Grass growth typically resumes in early spring, around March or April, when temperatures begin to rise above 10°C. At this point, you can start regular mowing and other lawn care activities.
