

- Why Should I Felt My Shed Roof?
- What Tools and Materials Do I Need Before I Start?
- How I Prepared My Shed Roof for Felting?
- Step-by-Step: How To Felt A Shed Roof
- Table: Materials & Purpose Checklist
- Common Mistakes I Avoided (And You Should Too)
- My Maintenance Tips After Installation
- Conclusion: My Experience Felting a Shed Roof
- FAQs On How To Felt A Shed Roof (And the Answers I Found)
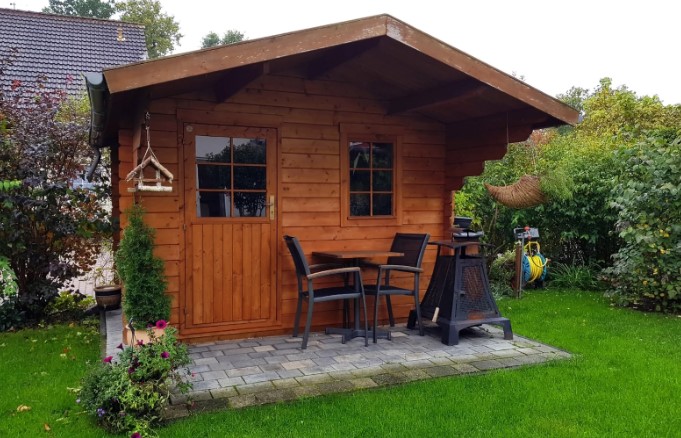
When I noticed the rainwater dripping through the roof of my garden shed, I knew it was time to take action. The old felt was torn, worn out, and letting water seep through.
That’s when I decided to learn how to felt a shed roof myself—and surprisingly, it turned out to be a rewarding and cost-effective DIY job.
In this guide, I’ll walk you through everything I did to get my shed fully weatherproof again.
Why Should I Felt My Shed Roof?
Is felt roofing waterproof and durable?
Absolutely. Shed roof felt is designed to create a waterproof barrier that protects the shed from rain, snow, and moisture buildup.
In the unpredictable UK weather, roofing felt helps to keep the structure dry and extend its lifespan.
What are the benefits of using shed roof felt in the UK climate?
From frequent rain to cold winters, the UK climate puts outdoor buildings to the test. I chose felt because it’s:
- Budget-friendly
- Easy to apply
- Great at insulating against damp
Can felt extend the life of my garden shed?
Yes, a well-installed shed roofing felt layer can add years of protection to your shed. It prevents rot, warping, and mould by sealing the roof timber against moisture penetration.
What Tools and Materials Do I Need Before I Start?
I gathered all my tools in advance so I wouldn’t have to stop halfway. Here’s a list of what I used:
Basic tools I gathered for felting:
- Hammer and galvanised roofing nails
- Heavy-duty utility knife
- Straight edge or ruler
- Tape measure
- Ladder
- Roofing adhesive or bitumen (optional but helpful)
Choosing the right type of shed roofing felt:
There are different kinds of felt available in the UK. I opted for heavy-duty bitumen felt, which is ideal for garden sheds. You can also choose:
- Mineral felt (basic protection)
- Torch-on felt (more professional, but needs a blowtorch)
- Self-adhesive felt (easier for smaller sheds)
Shed felt fixings and accessories:
- Edge trim to tidy up the roof edges
- Clout nails (galvanised for rust protection)
- Sealant or cold bitumen adhesive for overlaps
How I Prepared My Shed Roof for Felting?
Removing old felt and inspecting the timber roof
The first step was stripping off the old, damaged felt. I used a scraper and hammer to pull out the nails and peel it back.
Once removed, I checked the underlying timber boards for signs of rot or warping.
Repairing any damaged boards or battens
One edge had suffered water damage, so I replaced a couple of roof boards. Better to sort it out now than have problems later.
Cleaning and measuring for a neat installation
Before laying new felt, I brushed off any dirt and debris, then measured the roof so I could cut the felt rolls to size ahead of time.
Step-by-Step: How To Felt A Shed Roof
Here’s exactly how I installed the new felt on my shed roof:
Step 1 – Laying the first strip of felt on the lower edge
I started at the bottom edge of the roof and unrolled the first strip with a 50mm overhang. This overhang allows water to drip off instead of soaking into the wood.
Step 2 – Overlapping and layering the felt sheets
Each layer of felt should overlap the one below it by at least 75mm. This prevents water from sneaking underneath. I used my straight edge and knife to trim the sheets cleanly.
Step 3 – Securing the felt with roofing nails and adhesive
I nailed the felt every 150mm along the top edge and used roofing adhesive under the overlaps to keep the layers wind-resistant.
Step 4 – Folding and fixing the edges neatly
At the edges, I folded the felt down and secured it underneath the roofline using nails. This helps protect the sides of the roof from rain and wind.
Step 5 – Adding ridge felt or capping strip on top
Finally, I added a separate strip of felt across the roof ridge, overlapping both sides. This acts as a seal and prevents water ingress at the topmost part of the shed.
Table: Materials & Purpose Checklist
| Material/Tool | Purpose |
| Shed roof felt roll | Main waterproofing layer |
| Roofing nails | To secure felt to timber |
| Roofing adhesive | For overlap sealing and wind resistance |
| Hammer or nail gun | To drive nails quickly and securely |
| Utility knife | For cutting felt to size |
| Straight edge & tape | For accurate measurements |
Common Mistakes I Avoided (And You Should Too)
Here are a few errors I made sure to dodge:
- Not allowing enough felt overhang: This can cause water to run back into the timber.
- Nailing too close to the edge: The felt can tear over time.
- Laying felt in bad weather: Moisture gets trapped and ruins the adhesive.
- Skipping adhesive on overlaps: Especially in wind-prone areas, this is a must.
My Maintenance Tips After Installation
After felting, I make it a habit to:
- Inspect the roof every few months for lifting edges or nail damage
- Brush off moss and leaves to prevent moisture retention
- Apply sealant on weak spots after harsh weather
Conclusion: My Experience Felting a Shed Roof
Felting my shed roof wasn’t just a repair job—it was a confidence boost. It took me an afternoon, saved me money, and protected my tools and garden supplies from water damage.
Now, whenever I hear rain tapping on the roof, I feel proud knowing I installed the felt myself—and it’s holding up perfectly.
If you’re considering tackling this yourself, I say go for it. Just take your time, use the right materials, and follow these steps carefully.
You’ll not only learn how to felt a shed roof, but you’ll also gain a skill that’s practical and genuinely satisfying.
Related Article: How to Repair Roof Felt from Inside Loft?
FAQs On How To Felt A Shed Roof (And the Answers I Found)
1. How much felt do I need for my shed roof size?
Measure the length and width of each roof side. Add an extra 100–150mm for overhang and overlaps. I bought one roll for my 6x4ft shed, and it was more than enough.
2. Do I need underlay before roofing felt?
For most garden sheds, roofing underlay isn’t essential. However, some people use it for added insulation and extra waterproofing.
3. Can I felt a shed roof alone or do I need help?
I managed it solo, but if your shed is larger or if it’s windy, having an extra pair of hands helps keep the felt in place while you nail it down.
4. How long does shed roofing felt last?
Basic felt lasts about 5–8 years, while heavy-duty felt can last 10–15 years with proper maintenance.
5. What weather is best for felting a shed?
Dry, calm days are ideal. I did mine in early spring when there was no rain forecast—never install felt when it’s wet or windy.
0 Comments