

- Why Grouting Floor Tiles Properly Matters?
- When Should You Grout? - The Right Time to Start
- Tools and Materials You Need for Grouting Floor Tiles
- Step-by-Step: How I Grout Floor Tiles?
- What to Watch Out For — Common Mistakes and How to Avoid Them?
- Aftercare — How to Make Your Grout Last
- Conclusion — My Final Thoughts and Best Practice Advice
- FAQs — Common Questions I Get Asked On How to Grout Floor Tiles
Why Grouting Floor Tiles Properly Matters?
When I first started tiling, I underestimated the importance on how to grout floor tiles properly. I thought it was just about filling gaps.
But grout does far more than that — it seals the joints, keeps moisture out, prevents tile edges from chipping, and even enhances the overall appearance of the tiled surface.
If grouting is done poorly or skipped altogether, tiles can shift, cracks may appear, and moisture can seep through the subfloor. In areas like bathrooms or kitchens, this could lead to mould growth or water damage. So learning how to grout floor tiles correctly isn’t just a finishing touch — it’s essential for durability and hygiene.
When Should You Grout? – The Right Time to Start
Timing matters. I always wait until the tile adhesive has fully cured — usually 24 hours, though it depends on the brand. Grouting too soon can displace tiles or trap moisture.
Before I begin, I double-check that:
- The tiles are firmly set and clean
- All tile spacers are removed
- There’s no dust, adhesive residue, or debris in the joints
Clean joints allow the grout to bond better and make the process far smoother.
Tools and Materials You Need for Grouting Floor Tiles
I keep all my tools ready before I start grouting — it avoids interruptions mid-process. Here’s a quick checklist of what I use:
- Grout (powdered or premixed)
- Rubber grout float
- Mixing bucket & margin trowel
- Sponge and clean cloth
- Clean water
- Optional: rubber gloves, grout sealer
Choosing the Right Grout Type
Here’s a breakdown of common grout types I’ve worked with:
| Grout Type | Best For | Notes |
| Sanded Grout | Wider joints (3mm or more) | Adds strength, good for floors |
| Unsanded Grout | Narrow joints (<3mm) | Smoother texture, easy to spread |
| Epoxy Grout | High-moisture areas | Waterproof and stain-resistant, but trickier to apply |
| Premixed Grout | Small DIY jobs | Convenient but more costly |
Step-by-Step: How I Grout Floor Tiles?
Let me walk you through the exact steps I follow when grouting floor tiles — this is a tried-and-tested method that works every time.
Step 1: Mix the Grout to the Right Consistency
If I’m using powdered grout, I mix it in a clean bucket by gradually adding water. The goal is a smooth, peanut butter-like texture — not too runny, not too dry.
I let it sit for a few minutes, then remix. This helps reduce air bubbles and improves spreadability.
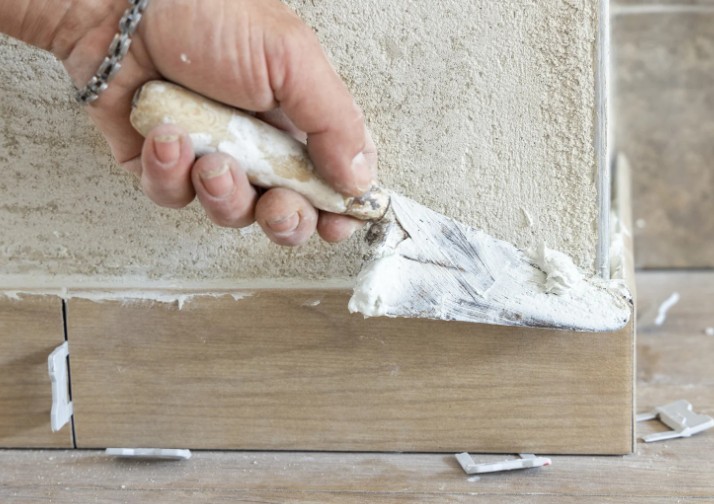
Step 2: Apply Grout Using a Float
I scoop the grout onto the tiles with a rubber grout float, holding it at a 45° angle. I press it firmly into the joints, dragging diagonally across the tiles to fully fill the gaps.
I always work in small sections (about 1m² at a time) so the grout doesn’t begin to harden before I’m ready to clean it.
Step 3: Remove Excess Grout
Using the float at a sharper angle (closer to 90°), I scrape off the excess grout from the tile surface. It’s important to leave the grout in the joints but clear the rest to avoid a thick haze.
Step 4: Clean the Tiles with a Damp Sponge
After letting the grout sit for about 10 to 15 minutes, I wipe the tiles with a damp (not wet) sponge. I rinse frequently and use smooth, diagonal strokes to avoid pulling grout out of the joints.
This step may need to be repeated as the grout continues to cure — I often do a light second wipe after another 30 minutes.
Step 5: Buff and Finish
Once the grout has fully dried (usually 24 hours), I buff the tiles with a dry cloth to remove any remaining haze. For areas like bathrooms or kitchens, I often apply a grout sealer to protect against moisture and staining.
What to Watch Out For — Common Mistakes and How to Avoid Them?
Over the years, I’ve made a few errors and learned the hard way. Here are some grouting mistakes I now avoid at all costs:
- Mixing grout with too much water: Weakens the final result.
- Working too slowly: Grout can dry before you clean it.
- Poor joint filling: Leaving voids can lead to cracking.
- Over-washing tiles: Using too much water during cleaning can pull grout out or create uneven surfaces.
- Not sealing in wet zones: Especially in bathrooms, sealing is a must.

Aftercare — How to Make Your Grout Last
Once the grout is in place, I don’t just forget about it. Proper aftercare makes a big difference.
- Avoid walking on the floor for at least 24 hours
- Seal grout lines in moisture-prone areas for extra durability
- Clean regularly using pH-neutral cleaners — harsh chemicals can erode grout over time
Conclusion — My Final Thoughts and Best Practice Advice
Grouting is more than just the last step — it’s the final seal of protection and polish for your floor tiles. When done right, it keeps moisture out, holds tiles firm, and completes the look.
Take your time to:
- Mix the grout properly
- Fill joints completely
- Clean methodically and patiently
Don’t rush. Treat grouting floor tiles as a craft, not a chore. When I grout with care, I know I’m not just finishing the job — I’m protecting it for years to come.
Related Article: How Long Does Grout Take to Dry?
FAQs — Common Questions I Get Asked On How to Grout Floor Tiles
1. How soon can I walk on newly grouted floor tiles?
I always wait at least 24 hours before walking on the floor — and if I can, I leave it for 48. This gives the grout time to cure and harden properly.
2. What type of grout should I use for floor tiles?
For floors, I usually go with sanded grout unless the joints are very narrow. It’s more durable and less likely to shrink or crack.
3. Can I use the same grout for wall and floor tiles?
Technically yes, but I prefer using stronger, sanded grout for floors and unsanded for walls, especially with delicate tiles or narrow joints.
4. What if the grout starts cracking or crumbling?
If I spot cracks, I remove the damaged grout and reapply. Usually, the issue is from poor joint filling, incorrect mixing, or subfloor movement.
0 Comments