
by Kanimozhi BV | Dec 12, 2025 | Exterior, Garden
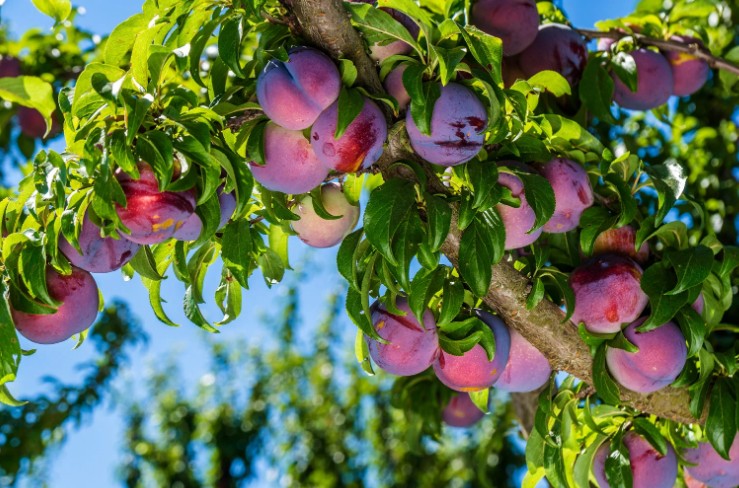
Growing your own plum tree from a simple stone might sound like a gardening myth, but it’s actually quite achievable — especially here in the UK, where cool winters provide the perfect conditions for getting started.
If you’ve ever wondered “Can you grow a plum tree from a stone?”, the answer is a resounding yes — with patience, the right method, and a little understanding of how plum seeds grow.
This guide will walk you through how to start from a plum stone, prepare it for germination, plant it, and nurture it into a fruit-bearing tree. Let’s dig in!
How to Grow a Plum Tree from a Stone in the UK?
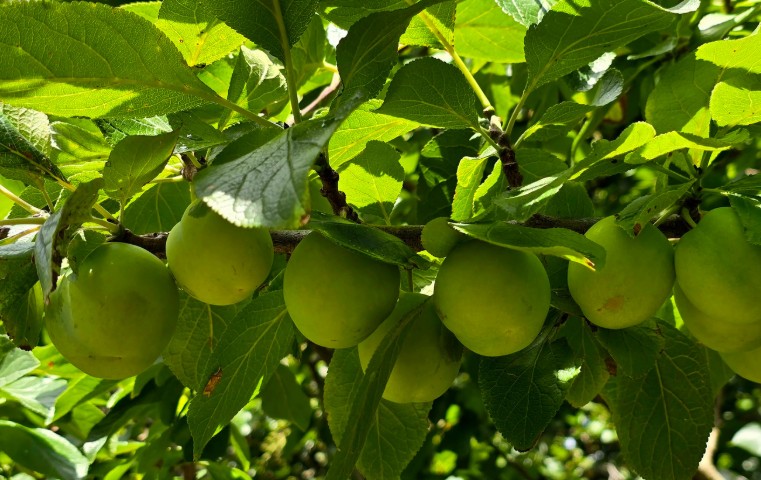
When you eat a plum and are left with the hard stone in the middle, you’re actually holding the seed of a potential tree.
However, it’s not as simple as dropping it into soil and waiting. Unlike many vegetable seeds, plum stones have a dormant period — they must be cold stratified to break dormancy and prepare them for germination.
Here in the UK, your cool climate makes this process easier, especially if you’re patient and follow the steps.
what you’ll need?
- Ripe, preferably organic plums
- A small hammer or nutcracker (optional)
- Paper towel and sealable bag
- Fridge space for stratification
- Compost and a pot for planting
How Long Does It Take to Grow a Plum Tree from a Stone?
The process of growing a plum tree from seed is a very long-term project. While it’s incredibly rewarding to see a tree grow from something as small as a seed, you’ll need to prepare for a multi-year journey before you enjoy any fruit.
Here’s a general timeline:
| Phase |
Timeframe |
Notes |
| Cold stratification |
8–12 weeks |
Chilling helps break seed dormancy |
| Germination |
2–4 weeks (post-chilling) |
After planting indoors |
| Sapling growth |
1–2 years |
Ready for outdoor planting after frost |
| Fruit-bearing maturity |
3–8 years |
Depends on care, climate, and seed genetics |
Unlike grafted nursery trees, a tree grown from a plum stone may take longer and might not produce identical fruit to the parent plum, especially if it came from a hybrid variety.
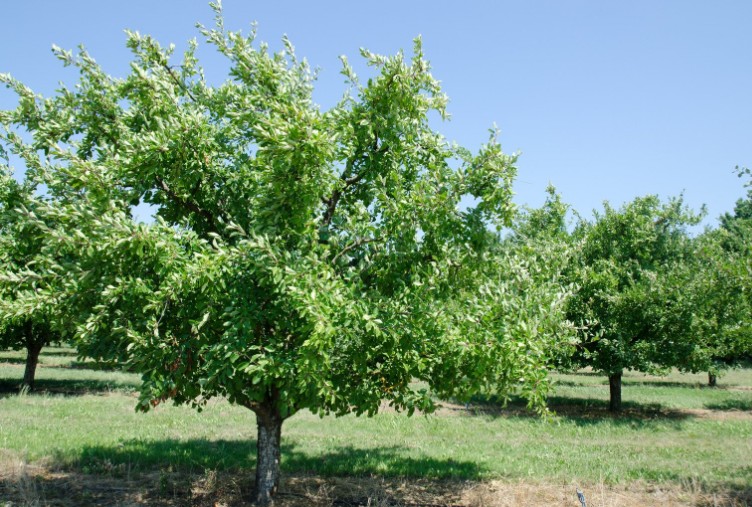
How Big Do Plum Trees Grow in the UK?
In UK gardens, plum trees can grow to varying sizes depending on the variety and whether you prune them.
| Tree Type |
Average Height |
Ideal For |
| Standard Plum Tree |
4–6 metres |
Large gardens |
| Dwarf Plum Tree |
2–3 metres |
Small gardens or containers |
To control the size of your tree:
- Choose a dwarf or semi-dwarf variety.
- Prune annually to encourage strong structure.
- Use a container to limit root growth.
UK’s moderate climate supports healthy growth, especially in full sun and well-drained soil.
Can You Grow a Plum Tree From a Stone in the UK?
Yes, and the UK climate makes this process quite favourable. Plum seeds require cold stratification, which mimics winter — and the UK’s cool, damp winters help replicate the process naturally.
However, to improve success rates, you should stratify the seed in your refrigerator. This controlled environment ensures the seed gets consistent cold exposure, improving germination chances.
What are the Key Tips to grow plum tree?
- Start the process in autumn or early winter
- Be patient — germination won’t happen instantly
- Expect variety in fruit or flowering compared to the original plum
Why Do Plum Seeds Need Cold Stratification?
Plum trees are temperate fruit trees, meaning their seeds have evolved to survive winter. If planted fresh, most plum seeds won’t germinate unless they’ve experienced a cold period — this is nature’s way of preventing premature sprouting in autumn.
Cold stratification tricks the seed into thinking it has gone through winter, so it’s safe to grow in spring.
Cold Stratification Time Table
| Stratification Method |
Duration |
Temperature |
| Fridge (moist paper towel) |
8–12 weeks |
1–4°C |
| Outdoors (in compost) |
Winter (Nov–Mar) |
Natural UK winter |
| Extended (optional) |
12–16+ weeks |
For stubborn seeds |
Always check for mould, keep conditions slightly damp (not soaked), and label your bag with a start date.
Step-by-Step: How to Plant Plum Stone Seeds in the UK?
- Pick ripe, locally grown or organic plums
- Let the stone dry for a few days
- Optionally crack the stone gently to remove the seed, being careful not to damage it

2. How to Test Seed Viability?
Drop the seed in water:
- Sinks = viable
- Floats = likely dead
3. How to Refrigerate the Seed?
- Wrap the seed in a damp paper towel
- Place in a ziplock bag
- Stock in the fridge (not freezer!) for 8–12 weeks
4. How to Check for Germination?
- After a few weeks, check if a root has emerged
- If yes, it’s time to plant
5. How to Plant the Seed?
- Use a small pot with free-draining compost
- Bury seed 1–2 inches deep
- Water lightly and place in a sunny indoor spot
6. How to Transit Outdoors?
- Wait until after the last UK frost (usually mid to late spring)
- Harden off the plant by slowly exposing it to outdoor conditions
What about the Soil, Sunlight, and Placement Tips for UK Gardens?
Plum trees thrive when given the right environment:
- Soil: Well-draining loamy or sandy soil is best
- Sun: Full sun (6–8 hours daily) is essential
- Space: Allow at least 2–3 metres between trees (or use containers)
What to Expect Year-by-Year on Plum Growth?
Year 1:
- Seed germinates, becomes a small sapling
Year 2–3:
- Grows larger, develops stronger branches and leaves
Year 4+:
- May begin to flower and eventually produce fruit (though fruit may differ in size/taste)
What are the Plum Tree Growing Tips for Beginners?
Here’s a quick checklist to help your plum-growing project succeed:
- Use organic or local plums when possible
- Always stratify the seed before planting
- Be patient — fruit can take 4–8 years
- Use containers if space is limited
- Prune annually after year 2

Conclusion
So, can you grow a plum tree from a stone in the UK? Absolutely! With a bit of preparation and a lot of patience, you can turn a supermarket plum into a living tree — right in your garden.
While it may not give fruit identical to its parent, the journey of nurturing a tree from seed is a deeply rewarding one. Give it a try, follow the steps, and before long, you’ll be watching your very own plum tree from seed reach for the sky.
What are the Frequently Asked Questions On Can You Grow a Plum Tree from a Stone?
1. Will the tree produce the same fruit as the original plum?
No. Seed-grown trees often don’t produce fruit identical to the parent — especially if the plum was a commercial hybrid.
2. Can I plant the stone directly in soil outside?
You can, but results are unpredictable. Outdoor stratification is slower and exposes the seed to pests or rot. Fridge stratification is more controlled.
3. Do I need to prune the young tree?
Yes. Light pruning during the dormant season helps shape the tree and promotes strong growth.
by Kanimozhi BV | Dec 11, 2025 | Exterior, Garden
Are you wondering about asparagus plantation and looking for tips on how to grow asparagus in the UK?
Why Grow Asparagus in the UK?
What Makes Asparagus a Stylish and Smart Garden Choice?
If you’re dreaming of a garden crop that offers long-term rewards with minimal maintenance, look no further than asparagus.
As a perennial vegetable, it comes back every year — often producing delicious spears for up to 20 years once fully established.
Asparagus is also a perfect fit for the UK gardening calendar. It’s a springtime delicacy, typically harvested from late April to mid-June, and is considered a gourmet vegetable packed with vitamins A, C, E, and K, as well as folate and fibre.
Here’s why you’ll love it:
-
Low maintenance after the first few years
-
Long lifespan (up to two decades)
-
Beautiful, ferny foliage adds elegance to your garden beds
-
Exceptionally flavourful when homegrown
Whether you’re new to gardening or looking to upgrade your veg patch, learning how to grow asparagus is both rewarding and delicious.
When and Where to Plant Asparagus in the UK?
What’s the Best Time of Year to Plant Asparagus?
In the UK, the ideal time to plant asparagus crowns is in early spring, from late March to April, once the threat of frost has passed.
If you’re starting from seed, you can sow them indoors as early as February, or outdoors from April once the soil has warmed.
This timing allows young plants to establish strong roots before summer arrives, setting them up for long-term success.
What Kind of Soil and Location Does Asparagus Need?
Asparagus prefers a sunny, sheltered spot with excellent drainage. It’s important to avoid areas that get waterlogged during winter.
Here’s what to look for:
-
Soil type: Sandy or loamy soil is best
-
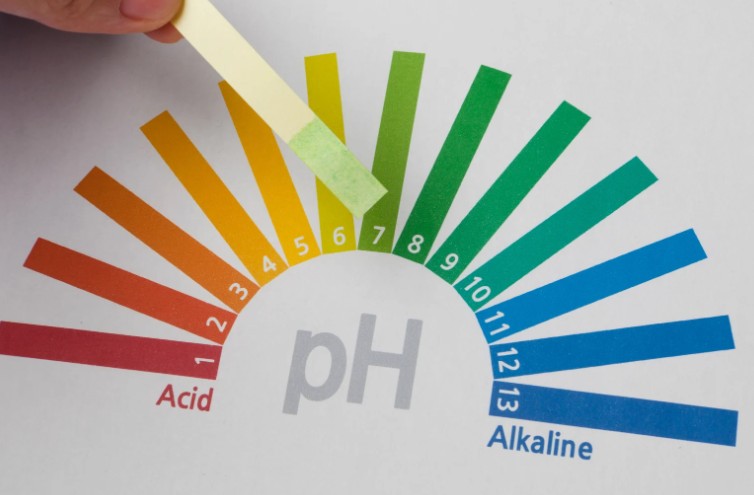
pH level: Slightly alkaline (6.5–7.5 is ideal)
-
Drainage: Raised beds or ridges help prevent root rot
If your soil is heavy clay, consider adding grit or compost or creating a raised bed for optimal conditions.
Should You Grow Asparagus from Crowns or Seeds?
Which Is Better for UK Gardeners: Crowns or Seeds?
While both options can be successful, most UK gardeners choose crowns (1-year-old asparagus roots) for a faster and easier harvest.
However, growing from seed is cheaper and allows you to nurture stronger, disease-resistant plants.
Here’s a comparison:
| Method |
Time to Harvest |
Ease |
Notes |
| Crowns |
2–3 years |
Easy |
Quicker harvest, common in UK gardening |
| Seeds |
3–4+ years |
Harder |
Cheaper, more control over plant quality |
If you’re new to asparagus, start with crowns — they’re widely available at garden centres in spring and offer quicker gratification.
How to Grow Asparagus Step-by-Step?
How Do You Prepare the Bed for Asparagus?
A bit of prep goes a long way when planting asparagus. Here’s how to create the ideal asparagus bed:
- Choose a sunny location with good drainage
- Clear all perennial weeds before planting
- Dig a trench 20–30 cm (8–12 inches) deep and 30 cm wide
- Mix in plenty of well-rotted compost or manure at the bottom
Let the soil settle before planting your crowns or seedlings.
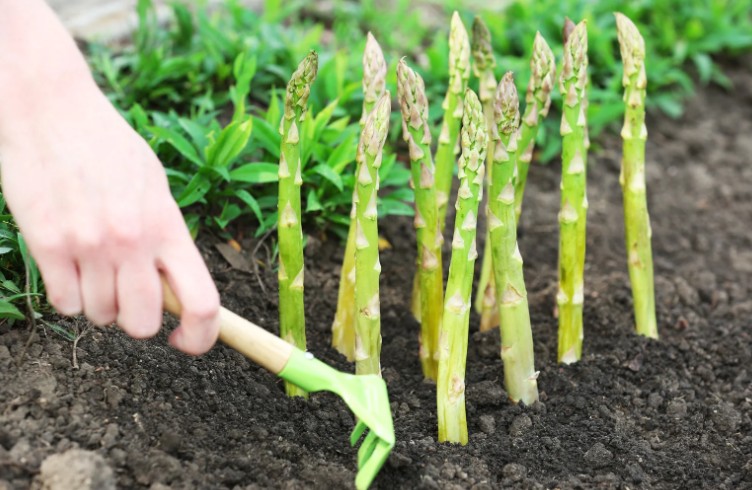
How to Plant Asparagus Crowns?
- Create a small mound of soil along the bottom of your trench.
- Place each crown on top of a mound, spreading the roots evenly.
- Space them 30–45 cm (12–18 inches) apart.
- Cover with 5–8 cm (2–3 inches) of soil.
- As the shoots grow, gradually fill in the trench.
This method protects tender roots while encouraging strong spear growth.
How to Start Asparagus from Seed?
If you’re feeling patient and adventurous, follow these steps:
- Sow seeds indoors in February or March
- Transplant seedlings outdoors once they reach 15 cm tall and the weather warms up (usually late April or May)
- Thin out weaker plants and space strong seedlings about 40 cm apart
- Keep soil moist during early growth
Growing from seed can produce healthier long-term plants, but it requires an extra year or two before harvesting.
How to Care for Asparagus Plants Throughout the Year?

How Often Should You Water and Feed Asparagus?
Asparagus plants like moist but not soggy soil. During dry periods (especially in summer), water deeply once a week.
Feed in spring and mid-summer with:
Avoid overfeeding with nitrogen-rich fertilisers, as this promotes foliage over spears.
How Do You Manage Weeds and Mulching?
Weeds can seriously compete with young asparagus plants. Keep your beds tidy by:
- Applying a thick layer of organic mulch (like straw or leaf mould)
- Hand-pulling weeds (avoid digging, which can damage roots)
- Using weed-suppressing fabric in the early years
What Are the Seasonal Care Tasks for Asparagus?
Spring: Mulch and feed.
Summer: Harvest and water as needed.
Autumn: Cut back dead ferny foliage after yellowing.
Winter: Keep the bed clean and protected from frost.
As the plants mature, maintenance becomes easier each year.
How and When to Harvest Asparagus in the UK?
When Can You Start Harvesting Asparagus?
Patience is key. For the first 2 years, allow the plant to establish without harvesting (yes, really!). Start light harvesting in year 3, and full harvesting by year 4.
- Year 1: No harvest
- Year 2: Optional, 1–2 spears per plant
- Year 3+: Harvest for 6–8 weeks
What’s the Right Way to Harvest the Spears?
When spears are 15–20 cm tall and tips are tightly closed, it’s time to harvest.
- Use a sharp knife or asparagus cutter
- Cut spears just below soil level
- Don’t wait too long — older spears become woody
Pro Tip: Stop harvesting in late June, so the plant can recover and prepare for the next season.
What are the Common Problems When Growing Asparagus And How to Fix Them?
Why Isn’t My Asparagus Growing?
- Crowns planted too deep
- Soil is too heavy or poorly drained
- Not enough sun
Check these early, and you’ll avoid poor yields later.
How to Deal with Weeds, Pests, or Poor Drainage?
- Raised beds are great for soggy areas
- Use mulch to control weeds naturally
- Keep an eye out for slugs and asparagus beetles
Companion planting with tomatoes or parsley may help reduce pests naturally.
What are the Stylish Garden-to-Table Ideas for Fresh Asparagus?
How Should You Store and Prepare Your Harvest?
Freshly picked asparagus is best used immediately, but you can store it for 2–3 days in the fridge:
- Wrap in damp paper towel
- Place in a container or upright in a glass with water
Before cooking, snap the woody ends and rinse thoroughly.
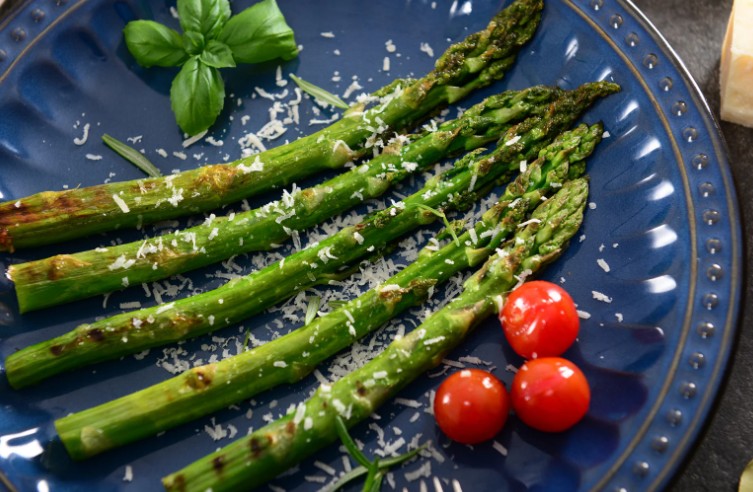
What Are Some Easy Ways to Cook Asparagus?
Asparagus is a versatile vegetable. Try it:
- Grilled with olive oil and sea salt
- Blanched and added to salads
- Roasted with lemon and garlic
- Stir-fried with spring vegetables
You can even pair it with soft-boiled eggs or drizzle it with hollandaise sauce for a posh brunch vibe.
Conclusion
Learning how to grow asparagus in the UK is a rewarding process that requires patience, preparation, and a bit of planning. But once established, these hardy perennials offer delicious, homegrown spears year after year.
Whether you’re dreaming of a stylish kitchen garden or simply want to enjoy spring’s finest crop, asparagus is a beautiful investment in your gardening journey.
What are the FAQs On How to Grow Asparagus in the UK?
1. Can you grow asparagus in pots or containers in the UK?
Yes — choose a large, deep pot (at least 40 cm), and ensure proper drainage. Compact varieties do better in containers.
2. How long does it take for asparagus to fully mature?
Typically 2–3 years from crowns, and 3–4+ years from seed.
3. Does asparagus need full sun?
Yes — at least 6–8 hours of sunlight daily ensures healthy spear growth.
4. Can I harvest asparagus in the first year?
No. Let the plant establish fully. Start with light harvesting in year 3.
5. When is asparagus season in the UK?
Late April to mid-June — a short but glorious harvest window!
by Kanimozhi BV | Dec 9, 2025 | Exterior, Garden
When I first started gardening in the UK, one of the things I often wondered was: is clay soil acid or alkaline? It’s a question that many gardeners ask — and the answer isn’t as straightforward as I initially thought.
Understanding the pH level of clay soil is crucial for healthy plant growth and long-term garden success.
So in this guide, I’ll share everything I’ve learned about clay soil pH, how to test it, and what you can do to make your garden thrive.
Is Clay Soil Acid or Alkaline? – Does Its Texture Define Its pH?
What Exactly Is Clay Soil?
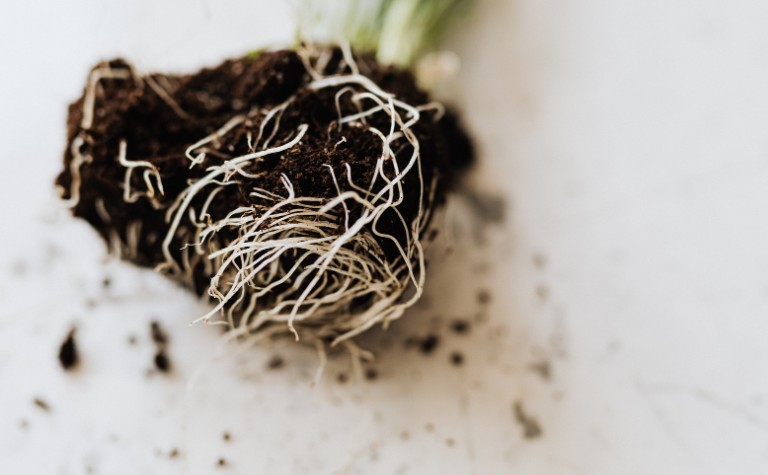
Clay soil is what many of us call “heavy” soil. It’s made up of very fine particles that stick together, creating a dense and compact texture. This type of soil tends to:
But here’s something I learned early on: the term “clay soil” refers to its texture, not its acidity or alkalinity. That means just because the soil is clay-based doesn’t tell you much about its pH.
Why Clay Soil Has a Strong Buffering Capacity?
One interesting thing about clay soil is its buffering capacity. In simple terms, this means it doesn’t change its pH easily.
Clay particles — along with organic matter — can hold onto nutrients and resist sudden shifts in pH. So whether your clay soil is acidic, neutral, or alkaline, it will likely stay that way unless something significant changes.
Can Clay Soil Be Acidic or Alkaline?
The Truth: Clay Soil Can Be All Three
The big surprise for me was this: Clay soil can be acidic, neutral, or alkaline. It all depends on several factors such as:
-
Local geology (what kind of rock lies beneath the soil)
-
Rainfall levels
-
Drainage and leaching
-
Previous soil amendments (like lime or compost)
-
Fertiliser use over the years
So, if you’re wondering “is clay soil acid or alkaline?”, the honest answer is: it varies!
When Clay Soil Tends to Be Alkaline?
In many parts of the UK, especially areas with chalky or limestone bedrock, clay soil often leans toward being neutral to alkaline. I’ve tested soils that sit on chalky subsoil and found pH readings around 7.5 to 8.0.
Other signs that your clay soil might be alkaline include:
-
Presence of chalky white fragments in the soil
-
Past use of lime or cement debris in the garden
-
Reduced growth of acid-loving plants like rhododendrons or blueberries
When Clay Soil Might Be Acidic
On the flip side, if your area gets a lot of rainfall, especially in woodland or peaty regions, clay soil can be acidic. You might have acidic clay soil if:
-
The pH test shows below 6.0
-
Your plants suffer from nutrient deficiencies (like iron chlorosis)
-
You use a lot of acid-forming fertilisers
What Is the Ideal Soil pH — and How Do Clay Soils Measure Up?
What pH Is Best for Most Plants?
Most plants in UK gardens thrive in soils with a pH between 6.0 and 7.0. This slightly acidic to neutral range allows for optimal nutrient uptake.
Here’s a quick reference table:
| pH Range |
Soil Type |
Plant Suitability |
| 4.0 – 5.5 |
Strongly acidic |
Only acid-loving plants thrive |
| 5.5 – 6.5 |
Moderately acidic |
Ideal for many vegetables and fruits |
| 6.5 – 7.5 |
Neutral |
Most garden plants grow well |
| 7.5 – 8.5 |
Alkaline |
Suitable for some shrubs and perennials |
From my experience, clay soils often fall between 6.5 and 7.8, especially in the Midlands and South of England. But again, testing is key.
How Can I Find Out If My Clay Soil Is Acidic or Alkaline?
Soil pH Testing: The Only Way to Know for Sure
I always recommend doing a soil pH test before planting anything. You can:
When I tested different spots in my garden, I found minor variations — which helped me plan where to plant certain crops.
What are Other Clues from Your Garden?
There are some visual and historical clues you can look for:
-
Plants struggling without explanation could signal pH imbalance
-
Moss and fungi growth may indicate acidic conditions
-
If you’ve used lime regularly, your soil may be more alkaline
What Can I Do About My Soil’s pH?
If Your Clay Soil Is Too Acidic?
Here’s how I raised the pH in one of my acidic garden beds:
-
I added ground limestone (garden lime) in the autumn
-
Mixed it thoroughly into the topsoil
-
Re-tested after 3 months to track changes
Clay soils respond slowly, so I had to be patient. Here’s a quick look at what works:
What are the Ways to Raise pH? – Reduce Acidity
If Your Clay Soil Is Too Alkaline?
Trying to make alkaline soil acidic is harder — especially with clay. But here’s what helped in my raised beds:
-
Added ericaceous compost to the planting area
-
Mixed in sulphur-based amendments
-
Used containers with tailored soil for acid-loving plants
Tip: Instead of changing the pH too much, consider growing plants that prefer alkaline soil, like lavender, lilac, or clematis.
How Can I Improve Clay Soil in General?
Regardless of pH, clay soil often benefits from better structure. Over the years, I’ve followed this routine:
Here’s a quick bulleted list of tips:
-
Add organic mulch annually
-
Use green manure crops in winter
-
Aerate compacted areas with a garden fork
Improving structure helps roots grow deeper and reduces waterlogging — making clay soil more plant-friendly no matter its pH.
Conclusion
So, is clay soil acid or alkaline? The answer isn’t simple — it depends. Clay soil can be acidic, neutral, or alkaline, depending on where you live, your garden’s history, and how the soil has been treated.
From my own experience, the only way to know for sure is to test the pH. Once you have that information, you can choose to:
-
Adjust the pH using lime or sulphur-based amendments
-
Improve the structure with compost and aeration
-
Or simply select plants that thrive in your existing soil
By understanding your clay soil and working with it — rather than against it — you can build a productive and beautiful garden that truly flourishes.
Frequently Asked Questions (FAQ) On Is Clay Soil Acidic or Alkaline
1. Is clay soil naturally acidic or alkaline?
Clay soil is not naturally one or the other — it can be acidic, neutral, or alkaline, depending on local geology, rainfall, and past land use. You can’t tell just by the texture; a soil pH test is the only way to know for sure.
2. How do I test the pH of my clay soil?
You can use a DIY pH test kit, a digital soil meter, or send a soil sample to a lab. For best results, test several areas of your garden and average the readings.
3. What pH is best for most garden plants?
Most plants prefer a slightly acidic to neutral soil, ideally between pH 6.0 and 7.0. Some, like rhododendrons and blueberries, prefer more acidic conditions, while others thrive in slightly alkaline soil.
4. Can I make my clay soil more acidic?
Yes, but it can be challenging due to clay’s buffering capacity. You can lower pH by adding elemental sulphur, acidifying fertilisers, or using ericaceous compost in beds or containers.
5. Can I use lime on clay soil?
Absolutely. If your soil is too acidic, applying garden lime can raise the pH. Just be sure to apply it in the right season (usually autumn or early spring) and mix it into the soil well.
6. What plants grow well in alkaline clay soil?
If you discover your clay soil is alkaline, consider growing:
-
Lavender
-
Clematis
-
Lilac
-
Geranium (Cranesbill)
-
Choisya
These plants tolerate — and sometimes prefer — alkaline conditions.
by Kanimozhi BV | Dec 8, 2025 | Garden, Exterior
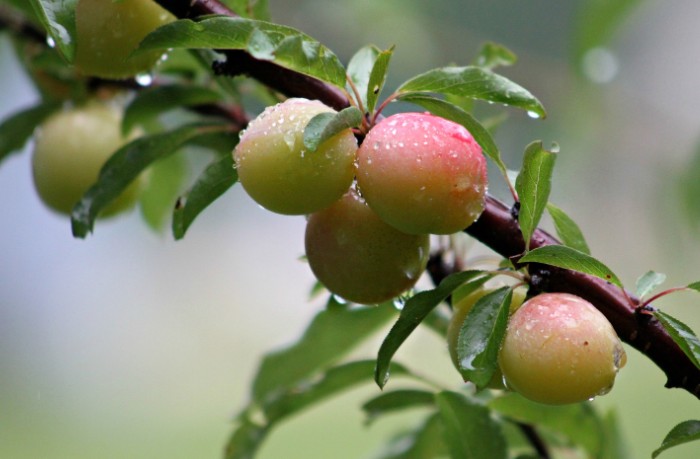
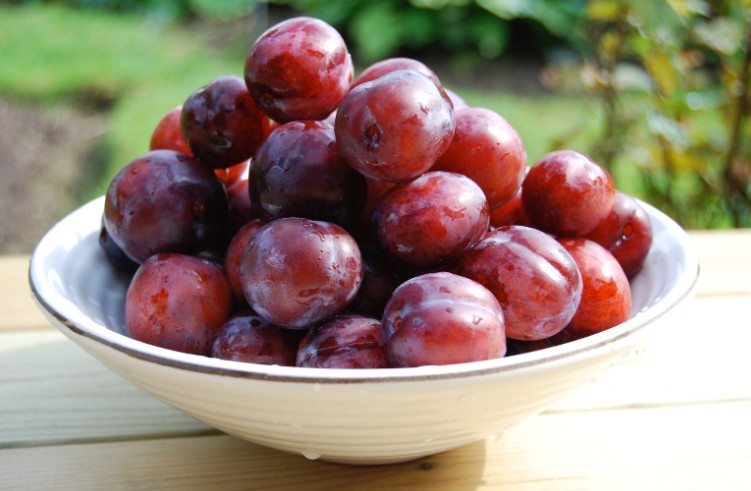
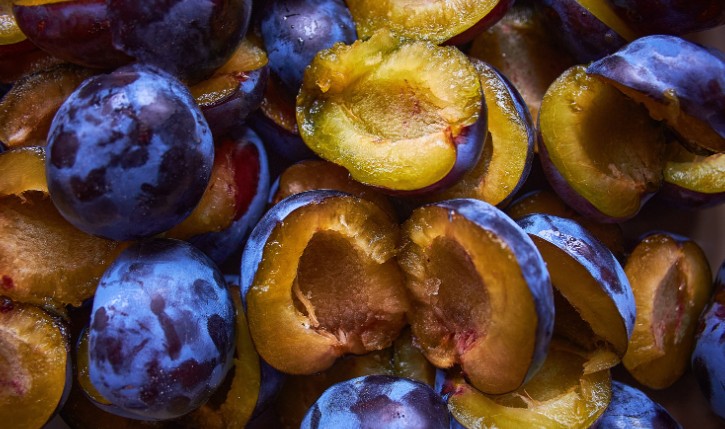
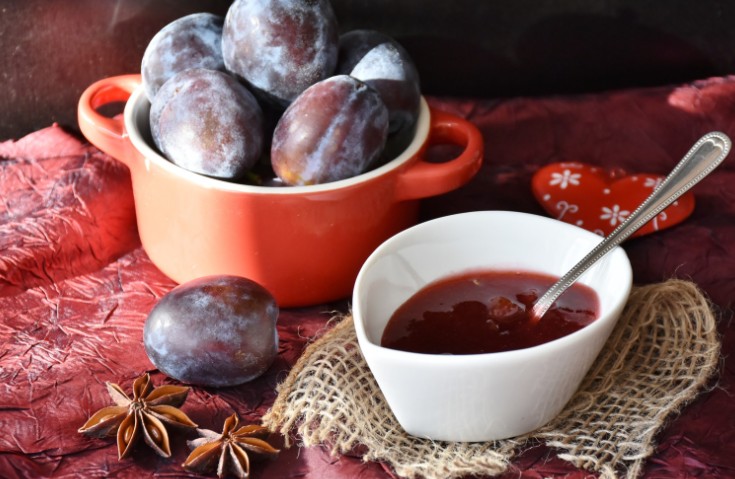
When the UK summer rolls in, I often find myself with an overflowing basket of plums — too many to eat before they spoil.
Instead of letting them go to waste, I’ve learned to freeze plums the right way, so I can enjoy their juicy flavour all year round.
In this guide on how to freeze plums, I’ll show you the top 4 methods I’ve used to successfully freeze plums, depending on how I plan to use them later.
What to Know Before Freezing Plums?
How To Choose the Right Plums?
If you’re planning to freeze plums, choosing the right ones is essential. I always go for plums that are:
Overripe plums may seem tempting, but they tend to become mushy once thawed, so I set those aside for stewing instead.
Wash and Prepare Properly
I make sure to wash the plums thoroughly in cold water and pat them dry with a clean towel. It’s also important to remove any stems. Clean fruit freezes better and retains its quality for longer.
Whole vs. Halved or Sliced Plums
Both whole and sliced plums can be frozen, but each has its pros and cons. I freeze whole plums when I’m short on time or planning to stew them later.
But if I know I’ll want to bake with them or make smoothies, halving or slicing them before freezing saves time later.
Top 4 Ways to Freeze Plums (Suitable for UK Kitchens)
1. Whole Fruit Freezing (Simplest Method)
This method is perfect for when I just want to get it done quickly:
-
Wash and dry the plums.
-
Leave them whole or remove the stems.
-
Place them in freezer-safe bags or containers.
-
Seal, label with the date, and freeze.
While this is the easiest approach, the plums can be tricky to pit once frozen. Still, it’s a good option if I plan to stew or blend them later.
2. Flash-Freezing Halved or Sliced Plums
If I want to use plums gradually — say, for baking or in smoothies — this method works brilliantly. It prevents them from sticking together.
Here’s what I do:
-
Slice the plums in halves or quarters and the detach the stones from it.
-
Spread them out on a baking tray in a single layer, making sure the pieces don’t touch.
-
Freeze for 2–4 hours until firm.
-
Transfer into freezer bags or containers, seal, and store.
This approach makes it easy to grab only what I need later, without having to defrost a big lump of frozen fruit.
3. Freezing Plums in Syrup or Sugar Pack
When I want to retain the best flavour and texture for desserts, I go for the syrup pack method. It takes a bit more effort, but the results are worth it.
Steps I follow:
-
Pit and slice the plums.
-
Prepare a light sugar syrup by dissolving 1 part sugar in 4 parts warm water, then cool it down.
-
Add plum slices to containers and pour the syrup over them.
-
Leave some headspace (about 1cm) to allow for expansion.
-
Seal tightly, label, and freeze.
This is my go-to when I’m freezing plums for crumbles or cobblers in winter.
4. Stewed or Cooked Plums for Freezer Storage
If my plums are too ripe or starting to soften, I stew them first. This also makes things really convenient when I want to throw together a quick dessert later.
Here’s how I do it:
-
Cut and pit the plums.
-
Gently stew with a splash of water and optional sugar until soft.
-
Let them cool completely.
-
Store in freezer-safe tubs or resealable bags.
I usually freeze this as a fruit compote or base for crumble fillings. It’s such a time-saver when I want to whip something up quickly.
How Long Can You Freeze Plums?
Here’s a comparison of how long each method keeps well in the freezer:
| Freezing Method |
Ideal Storage Duration |
Notes |
| Whole fruit |
6–8 months |
Slight texture loss after thawing |
| Flash-frozen slices |
8–10 months |
Keeps shape and easy to portion |
| Syrup-packed |
Up to 12 months |
Best for flavour and texture |
| Stewed/cooked |
6–9 months |
Ready to use, great for desserts |
To maintain quality, I keep my freezer at -18°C and label everything with dates.
How Should You Use Frozen Plums?
When I take frozen plums out of the freezer, how I use them depends on how I froze them:
-
For smoothies: Use slices straight from frozen.
-
For baking: Halved or syrup-packed plums go perfectly in pies and cakes.
-
For sauces and jams: Cook them directly from frozen — no need to thaw.
-
For snacking: Flash-frozen plum slices are lovely and refreshing, especially in summer.
I avoid using defrosted plums raw — the texture just isn’t the same as fresh.
Which Freezing Method is Best for You?
Here’s how I choose the method, depending on what I need:
-
If I want speed and simplicity, I go with whole plums.
-
When I need to portion out plums easily, flash-freezing slices is ideal.
-
For rich flavour and smoother texture, I opt for syrup-packed plums.
-
And when I have very ripe fruit, I stew it before freezing.
What are the Benefits of Freezing Plums at Home?
I’ve found that freezing plums isn’t just convenient — it’s also incredibly rewarding. Here’s why I make it part of my seasonal routine:
-
Reduces food waste
-
Saves money by preserving seasonal UK fruit
-
Allows me to enjoy plums throughout the year
-
Makes baking and dessert prep much easier
Conclusion
Freezing plums at home is simple, satisfying, and seriously useful. Whether I’m freezing them whole or preparing a sweet syrup pack, I always find a method that suits my needs.
If you’re new with how to freeze plums, I suggest experimenting with a couple of methods to see what works best for your kitchen. With the right approach, you’ll never have to say goodbye to the taste of summer again.
Related Article: When Are Plums Ready to Pick in the UK? A Seasonal Guide from My Orchard
FAQs on How To Freeze Plums in the UK
1. Can you freeze plums with the stone in?
Yes, you can freeze plums with the stones in. I’ve done it when I’m in a rush. Just be aware that the stone becomes harder to remove once frozen, so it’s more convenient to pit them first.
2. Do I need to blanch plums before freezing?
No, blanching isn’t needed. Plums freeze well raw. Just wash, prep, and freeze using your chosen method.
3. What’s the best way to thaw frozen plums?
I usually thaw them overnight in the fridge or use them directly from frozen in cooking or baking. Avoid defrosting on the counter for too long.
4. Can I freeze Victoria plums or damsons using these methods?
Absolutely. These methods work just as well with Victoria plums, damsons, greengages, and other UK varieties.
5. How can I prevent freezer burn on my frozen plums?
I always use airtight containers or resealable freezer bags and try to remove as much air as possible. Labelling with a date also helps me use them in time.
by Kanimozhi BV | Dec 5, 2025 | Garden, Exterior
If you’ve ever had too many ripe plums and wondered what to do with them before they spoil, you’ve likely asked yourself: can you freeze plums?
Whether they’re from your garden, a farmers’ market, or the local supermarket, freezing plums is a brilliant way to extend their shelf life and reduce food waste.
In this guide, you’ll learn how to freeze plums properly, what methods work best, how long they last, and what to do with them after freezing.
You’ll also get answers to common questions like can you freeze plums whole? and can you freeze plums with the stones in?
Can You Freeze Plums at All? – Is It Safe and Practical?
Yes — you can freeze plums, and they freeze very well. Freezing is one of the easiest and most effective ways to preserve plums long term.
Once frozen, they can last for up to six months in a typical UK freezer without losing their flavour.
Freezing works for all types of plums, including:
- Victoria plums
- Damson plums
- Greengages
- Black and red plums
Just keep in mind that the texture will soften after thawing, so frozen plums are best used for cooking, baking, blending, or making jam.
Can You Freeze Plums Whole?
Yes, you can freeze plums whole — and it’s probably the simplest method if you’re short on time.
What are the Benefits of freezing whole plums?
- No prep needed — just wash and freeze
- Retain more moisture and flavour
- Great for smoothies or sauces
However, whole plums take longer to defrost, and they’re harder to pit after thawing. If you’re planning to use them for cooking or baking, it’s often better to slice and pit them first for convenience.
Can You Freeze Plums with the Stones In?
Yes — you can freeze plums with the stones in, but it’s not usually recommended unless you plan to eat them straight from the freezer or use them for blending.
Why You Can Freeze Plums with the Stones In?
- Stones can cause the plums to split or crack as they freeze
- Harder to use in recipes once thawed
- May affect flavour slightly during long storage
If you’re freezing plums for pies, tarts, chutneys, or compotes, it’s best to remove the stones first.

Whole vs Sliced: What’s the Best Way to Freeze Plums?
It depends on how you’ll use them later. Here’s a quick comparison to help you decide:
| Freezing Method |
Best Use Cases |
Pros |
Cons |
| Whole plums |
Smoothies, snacking |
Quick and easy prep, retain more juice |
Harder to pit later, slower thawing |
| Sliced or halved |
Baking, jam, compotes |
Fast to defrost, easier to cook with |
Requires upfront preparation |
What Can You Do with Frozen Plums?
Frozen plums are incredibly versatile and can be used in both sweet and savoury recipes. Whether you thaw them fully or use them from frozen, here are some great ways to put them to use:
- Make plum crumbles or pies
- Add to smoothies or shakes
- Simmer into a compote or sauce
- Use in jam or chutney
- Add to yogurt or porridge
- Roast with pork or duck for a tangy glaze
What are the Tips for Freezing Plums in UK Households?
If you’re freezing plums often, especially from your own garden, a little planning goes a long way. Here are some helpful tips:
- Freeze them in summer, when UK plums are at their peak
- Always label containers with the freezing date and plum variety
- Store in the coldest part of your freezer to maintain quality
- Use within 6 months for the best taste and texture
- Avoid refreezing once thawed — use straight away in a recipe
Conclusion
So, can you freeze plums? Absolutely — and it’s one of the smartest ways to make the most of the plum season in the UK.
Whether you’re dealing with homegrown Victoria plums or store-bought Damsons, freezing helps you cut down on waste and enjoy rich plum flavours all year long.
Whether you choose to freeze them whole or sliced, with or without the stones, you’ve got options. Just follow the easy steps outlined above, and your freezer can become a year-round plum pantry.
Related Article: When Are Plums Ready to Pick in the UK? A Seasonal Guide from My Orchard
FAQs About Can You Freeze Plums
1. Can you freeze plums without removing the stone?
Yes, but it’s better to remove the stones before freezing if you’re planning to cook or bake with them later.
2. Do you need to peel plums before freezing?
No, plum skin freezes well and softens during cooking. You can leave it on.
3. How long do frozen plums last?
They last up to 6 months in the freezer without losing flavour. They’re still safe after that but may lose texture.
4. Can you use frozen plums in jam?
Yes, frozen plums are perfect for jam-making. You can use them straight from the freezer — no need to thaw first.
5. Do plums need blanching before freezing?
Not at all. Plums freeze well raw — just wash, cut, and freeze.
