I have spent years inspecting London flats and suburban family homes, and I’ve seen first-hand how bed bugs use our favourite outfits as a “Trojan Horse” to enter our bedrooms—here is exactly how to stop them without ruining your wardrobe.
The Short Answer: Can Bed Bugs Live In Clothes?
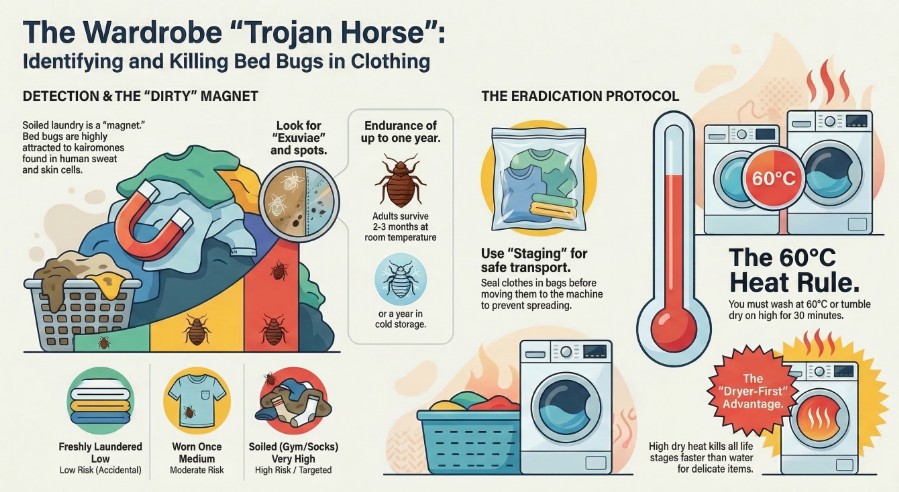
Yes, bed bugs can live in clothes, primarily by hiding in seams, pockets, and folds to “hitchhike” between locations. To kill bed bugs and their eggs effectively, you must wash infested clothing at 60°C (140°F) or tumble dry on high heat for at least 30 minutes.
How To Tell If Bedbugs Are In Your Clothes?
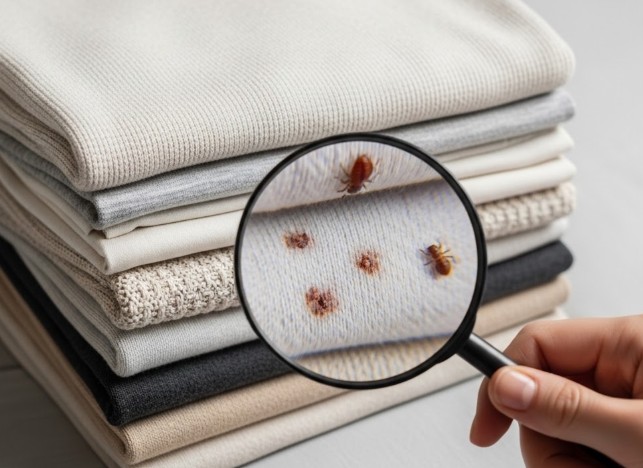
Identifying bed bugs in fabric is often more difficult than spotting them on a mattress because of the many deep hiding spots clothes provide. In my professional experience, you aren’t usually looking for a crawling insect, but rather the evidence they leave behind.
Dark Spotting: Look for tiny black or reddish-brown dots (faecal spotting) on labels, inside pockets, or along the internal seams of trousers and shirts.
Exuviae (Skins): As bed bugs grow, they shed their pale, translucent exoskeletons. You’ll often find these “hollow bugs” tucked into the cuffs of shirts or the hems of jeans.
The Sweet Scent: If you have a significant number of bugs in a wardrobe, you may notice a sickly-sweet, musty odour, often compared to coriander or rotting raspberries.
Blood Smears: Small, unexplained red smears on light-coloured fabrics are a classic sign that a bug was crushed while you were moving or sitting.
How Long Do Bed Bugs Live On Clothes?
This is the most common question I get from worried homeowners. The answer depends entirely on the environment. Bed bugs are biologically designed for endurance.
At Room Temperature: In a typical UK home (around 20°C), an adult bed bug can survive on a piece of clothing for 2 to 3 months without a blood meal.
In “Diapause” (Cooler Conditions): If clothes are stored in a cold garage or attic, their metabolism slows down. In some cases, they can survive for up to a year without feeding.
In Sealed Bags: Simply bagging up your clothes and leaving them in the spare room for a week will not work. Unless the bag is kept in extreme heat or sub-zero temperatures (below -18°C) for several days, the bugs will simply wait for you to open it again.
Why Is Your Soiled Laundry A “Magnet” For Bed Bugs?
A groundbreaking study by the University of Sheffield confirmed what we pest experts have long suspected: bed bugs are significantly more attracted to “dirty” laundry than clean laundry. They are guided by kairomones—the chemical signals left behind by human sweat and skin cells.
Condition Of Clothing
Attraction Level
Risk Of “Hitchhiking”
Freshly Laundered
Low
Low (Usually Accidental)
Worn Once (Work Shirt)
Medium
Moderate
Soiled (Gym Kit/Socks)
Very High
High / Targeted
Pro-Tip 1: The “Dryer-First” Method If you have delicate items that might shrink at 60°C, put them in the tumble dryer on high heat while they are completely dry for 30 minutes. Dry heat penetrates fabric much faster than water, killing all life stages (including eggs) without the agitation of a full wash cycle.
Can Bed Bugs Actually Live In The Clothes You Are Wearing?
It is a common myth that bed bugs live on people like lice do. They do not like heat radiating directly from your skin for long periods. Instead, they prefer to stay in the “outer” layers.
If you are sitting on a train or in a hotel lobby, they will crawl into the seams of your coat, the folds of your scarf, or the cuffs of your trousers. They are “hitchhikers,” not residents.
Can Bed Bugs Survive A Standard 40-Degree Wash?
In short: No. While a 40°C wash might drown some adults, it is rarely hot enough to kill the eggs, which are incredibly resilient.
To be safe, you must hit the 60°C mark. If your fabric cannot handle that temperature, the tumble dryer is your best friend. Even a 10-minute blast on the highest setting is more effective than a long, lukewarm wash.
How To Safely Decontaminate Your Wardrobe Without Spreading The Infestation?
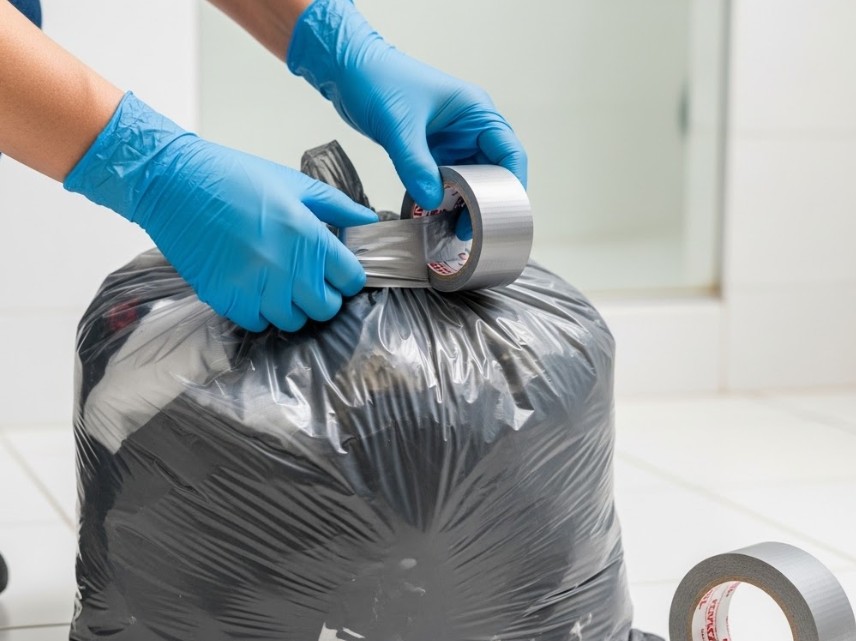
The biggest mistake I see people make is carrying infested clothes through the house to the washing machine, dropping eggs along the carpeted hallway as they go.
Pro-Tip 2: Use Soluble Laundry Bags Professional pest controllers use “dissolvable” laundry bags. You place the clothes in the bag inside the affected room, seal it, and toss the whole thing into the machine. The bag dissolves in the wash, ensuring no bugs escape during transit.
The “Staging Area” Technique:
Clear a space in your bathroom (hard floors make bugs easier to spot).
Strip the wardrobe and place items directly into heavy-duty bin bags.
Seal the bags with tape before leaving the room.
Only open the bags when they are right in front of the washing machine door.
Conclusion & Final Expert Summary
Dealing with bed bugs in your clothes is stressful, but it isn’t a “death sentence” for your wardrobe. You do not need to throw away your favourite outfits. By using targeted heat (60°C) and being mindful of how you transport “dirty” laundry, you can completely clear your clothes of these pests.
When to call the pros: If you have treated your clothes but continue to find new “Rule of Three” bites (three bites in a row) on your skin, the infestation is likely rooted in your bed frame or skirting boards, requiring professional heat treatment. Before booking, you may want to research how much it costs to get rid of bed bugs to help budget for a full home clearance.
What are the FAQ About Can Bed Bugs Live In Clothes?
1. Can they live in synthetic fabrics like polyester?
Yes. While they find it slightly harder to climb very smooth surfaces, they can easily hide in the seams and waistbands of gym leggings, polyester blouses, and nylon jackets.
2. Do bed bugs jump from person to person on the Tube?
Bed bugs cannot jump or fly. They can only crawl. An infestation on public transport usually happens when a bag is placed next to an infested one, or someone sits in a seat where a bug has recently dropped off.
3. Can I use a steamer instead of a washing machine?
A high-pressure garment steamer is excellent for clothes that can’t be washed. However, you must move slowly (about 2.5cm per second) to ensure the steam reaches the core of the fabric to kill the eggs.
4. What should I do with “Dry Clean Only” silk or wool?
Inform your dry cleaner that the items may have been exposed to bed bugs. The standard dry cleaning process (using perchloroethylene) typically kills bed bugs, but the cleaner needs to handle the items with care to avoid infesting their shop.
Home Diagnostics and Technical Standards Specialist at Hello Mag. She provides high-level Expertise in appliance mechanics and scientific pest management, ensuring every guide follows strict safety protocols and manufacturer standards. As a leading Authority on technical home specs, Kanimozhi audits complex data to provide homeowners with the most accurate, verified, and reliable diagnostic solutions available.
I’ve spent years renovating Victorian terraces in London and Bristol, and if there is one thing I’ve learned the hard way, it’s that a single “scritch-scratch” in the skirting board at 2 AM is never just one mouse.
I once spent three weeks thinking a single snap trap behind the fridge would do the trick, only to realize I was dealing with a multi-generational family that had claimed my wall voids as their own. Getting rid of mice isn’t just about a trap; it’s about outsmarting a biological clock.
⚡The Short Answer: How Long Does It Take To Get Rid Of Mice?
For a minor infestation, it typically takes 1 to 3 weeks to achieve total eradication using a combination of professional-grade traps and entry-point sealing. However, if the nesting site is established within wall cavities, the process can take up to 5 or 6 weeks to ensure the entire breeding cycle is broken.
Mouse Removal Timelines: DIY vs. Professional Intervention
When you’re dealing with a UK home—especially older builds with suspended timber floors—the method you choose dictates your “freedom date.”
Method
Time to First Catch
Time to Total Eradication
Success Rate
Basic DIY (Snap Traps)
24–48 Hours
4–6 Weeks
Moderate
Professional Pest Control
12–24 Hours
2–3 Weeks
High
Humane/Live Catch
1–3 Days
6+ Weeks (Relocation is key)
Low
Poison/Rodenticide
3–7 Days
3–4 Weeks
High (But risky for pets)
Why Does It Take So Long To Clear A Mouse Infestation?
The biggest mistake I see homeowners make is assuming that catching one mouse means the job is done. To understand the timeline, you have to understand the “21-Day Rule.”
A female house mouse can produce a new litter every 21 days. If you kill the adults but miss the entry points or the nest, you are simply waiting for the next “crop” to mature.
Furthermore, the “5mm Rule” is the bane of UK property managers. If you can poke a standard Bic pen into a gap under a door or around a radiator pipe, a mouse can get through it.
Until every one of those gaps is plugged with wire wool or specialist sealant—a key step in our complete guide on how to get rid of mice in the house or you have utilised natural deterrents like those found in our list of what smells do mice hate— your “removal” timeline is actually an “infinite loop” of new mice arriving from the street or neighboring gardens.
What Is The Realistic Day-By-Day Recovery Timeline?
If you start a concerted effort today, here is what your next month will likely look like:
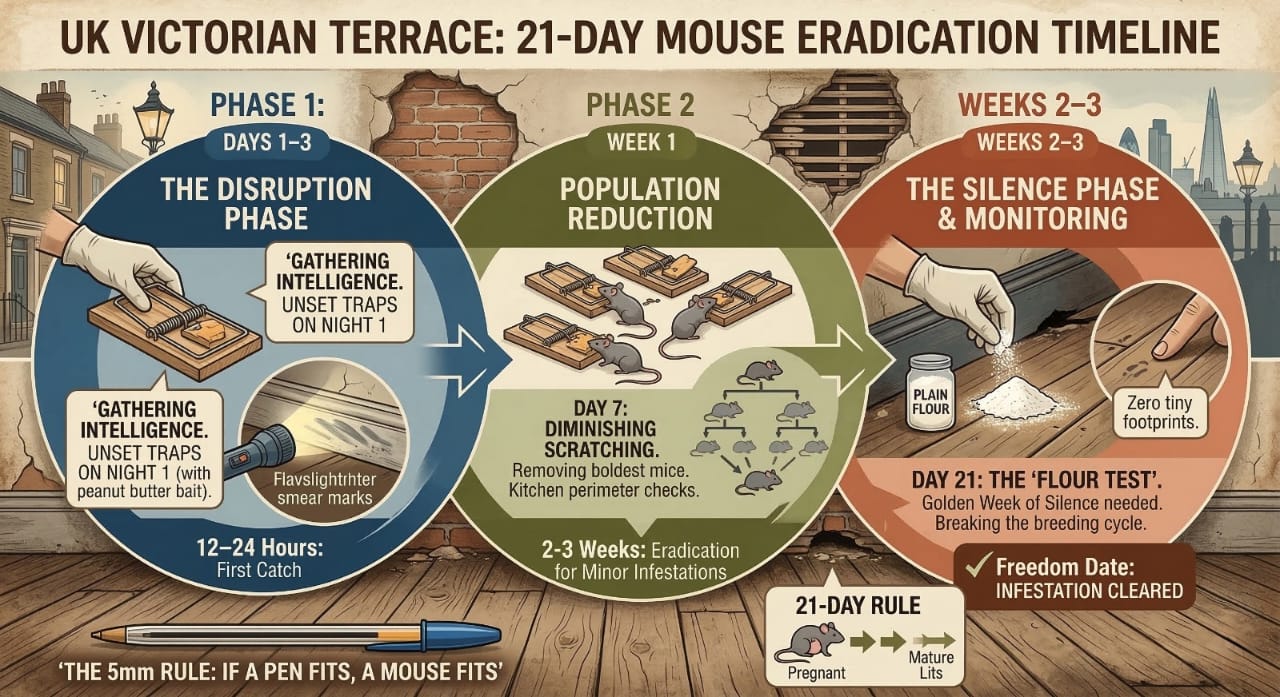
Days 1–3: The Disruption Phase
During the first 72 hours, you are gathering intelligence. You’ll place traps along the “smear marks” (the greasy trails mice leave along walls). You might actually see more activity initially because you’ve disrupted their safe routes.
Pro-Tip: Don’t set the traps on Night 1. Place them “unset” with bait (peanut butter is better than cheese) for 24 hours. Mice are “neophobic”—they fear new things. Let them eat for free once; they’ll be overconfident on Night 2 when you actually set the trigger.
Week 1: Population Reduction
This is when you’ll see the most “catches.” You are removing the boldest members of the colony. By day 7, the nighttime scratching should diminish significantly. This is also the time to do a “perimeter sweep” of your kitchen cabinets.
Weeks 2–3: The Silence Phase and Monitoring
This is the “danger zone” where most people stop. It’s been quiet for four days, so you pack away the traps. Don’t. This is usually when the juveniles or the “shy” mice begin to emerge.
You must keep the traps active through this entire period to ensure no survivors are left to restart the breeding cycle.
How Do You Know When The Mice Are Truly Gone?
The absence of noise isn’t proof; silence is just a sign they are being cautious.
The Flour Test (Pro-Tip): This is my go-to “Information Gain” trick that professionals use but rarely mention. Lightly dust a small amount of plain flour on the floor near your kickboards or under the sink at night. If there are no tiny footprints in the morning for three consecutive nights, you are likely in the clear.
Additionally, look for the “Golden Week of Silence.” If you have had zero new droppings, zero footprints in the flour, and zero noises for seven full days, you have successfully broken the infestation.
What Factors Slow Down The Removal Process?
The Pet Food Trap: If you leave a bowl of kibble out for your cat or dog overnight, you are providing a 5-star buffet. Mice will ignore your traps because they have a safer, easier food source.
Cluttered Lofts: In the UK, we love storing Christmas decorations in cardboard boxes. These are essentially “mouse hotels.” Until you switch to plastic “Really Useful” boxes, you are providing nesting material that shields them from your treatments.
Adjoined Properties: If you live in a semi-detached or terraced house and your neighbor has an infestation they aren’t treating, your timeline will be much longer. Mice move through the joist gaps between houses with ease.
Who Is Responsible For Mice In A UK Rental Property?
If you are a renter, the timeline for removal often depends on how fast your landlord acts. Under the Homes (Fitness for Human Habitation) Act 2018, landlords are generally responsible for dealing with infestations unless they can prove the tenant’s lifestyle (e.g., extreme clutter or poor food hygiene) caused the problem.
If the mice are entering through structural defects—like a hole in the external brickwork or a faulty drain—it is 100% the landlord’s legal obligation to fix it. If they refuse to act, contact your local council’s Environmental Health department.
They can issue an improvement notice which usually speeds up the “professional intervention” timeline significantly.
Conclusion: Reclaiming Your Home
Getting rid of mice isn’t a weekend DIY project; it’s a three-week siege. By respecting the 21-day breeding cycle and using the “Flour Test” to verify your progress, you can ensure that once the scratching stops, it stays stopped. Seal the gaps, clear the crumbs, and stay vigilant. Your home belongs to you—not the rodents.
What are the FAQ About How Long Does It Take To Get Rid Of Mice?
1. Does one mouse mean an infestation?
Almost always, yes. Mice are social creatures. If you see one during the day, it usually means the nest is overcrowded and the “low-ranking” mice are being forced to forage while the others sleep.
2. Do ultrasonic repellers speed things up?
In my experience: No. While they might cause temporary annoyance, mice quickly habituate to the sound. I’ve seen mice nesting directly underneath an active ultrasonic plug-in. Spend that money on better traps and steel wool instead.
3. Can I sleep in a room with a mouse?
It is safe in the sense that they won’t attack you, but mice are incontinent—they urinate as they walk to mark trails. This can spread salmonella and hantavirus. If you have mice in the bedroom, it’s time to escalate to professional BPCA-accredited help immediately.
Kani
Lead Technical Researcher
Kanimozhi BV
Kanimozhi is a home improvement and diagnostics specialist at Hello Magazine UK. With a background in technical research, she bridges the gap between professional trade standards and practical DIY solutions. From troubleshooting complex appliance error codes to ecological pest control and modern interior design, Kanimozhi provides evidence-based guides to help UK homeowners maintain safe, efficient, and beautiful living spaces.
Home Diagnostics and Technical Standards Specialist at Hello Mag. She provides high-level Expertise in appliance mechanics and scientific pest management, ensuring every guide follows strict safety protocols and manufacturer standards. As a leading Authority on technical home specs, Kanimozhi audits complex data to provide homeowners with the most accurate, verified, and reliable diagnostic solutions available.
Technical Review by BPCA Certified Pest Professional Last Updated: March 2, 2026
⚠️ MANDATORY SAFETY ALERT: Many essential oils (Peppermint, Eucalyptus, Tea Tree) are toxic to cats and dogs. Always place deterrents in non-accessible areas like lofts, behind heavy appliances, or inside wall voids.
The Quick Answer: What Smells Do Mice Hate?
If you need an immediate barrier, mice have a biological aversion to these scents because they overwhelm their advanced olfactory receptors or mimic natural predators:
Citrus (Lemon/Orange) (Limonene is a natural acidic deterrent)
Tea Tree Oil (Strong medicinal scent disrupts scent mapping)
Lavender (Linalool acts as a mild, floral deterrent)
Citronella (Strong lemony scent masks food odors)
The Science: Why Mice See With Their Noses?
Mice possess a sensory system far superior to humans. While we have roughly 6 million olfactory receptors, a mouse has closer to 1,000 different types of functional odorant receptors.
They navigate via “scent maps,” leaving tiny droplets of urine (pheromone trails) to mark safe routes to food. By introducing the smells they hate, you aren’t just creating a “bad odor”—you are effectively blinding their internal GPS.
What Smells Do Mice Hate? – The 11 Best Natural Repellents
1. Peppermint Oil (The Gold Standard)
Pure peppermint oil contains high levels of menthol, which triggers the TRPM8 receptors (cold-sensing receptors) in a mouse’s nose. This creates an intense “burning cold” sensation that forces them to retreat.
How to use: Soak cotton balls in 100% pure oil and place near entry points.
UK Maintenance: Refresh every 48–72 hours as central heating causes rapid evaporation.
2. White Vinegar (The Pheromone Eraser)
Mice rely on “urine pillars” to guide the colony. The acetic acid in white vinegar chemically neutralizes these markers.
The Strategy: Use a 50/50 water-vinegar mix to wipe down baseboards and pantry shelves.
3. Ammonia (Predator Mimicry)
Ammonia smells remarkably similar to the concentrated urea found in the urine of cats, foxes, and owls. A mouse smelling ammonia perceives the area as a marked hunting ground.
Safety Warning: Use only in lofts or garages. Never mix with bleach.
4. Cayenne Pepper & Chilli Flakes
The capsaicin in chillies causes a physical burn on a mouse’s paws. Since mice are constant groomers, they will lick their paws and experience a painful burning sensation on their tongue, teaching them to avoid the area.
5. Clove & Cinnamon (The Festive Deterrents)
Cloves contain eugenol, and cinnamon contains cinnamaldehyde. Both are sharp irritants. These are excellent for protecting wardrobes or drawers where you want a pleasant scent for humans but a hostile one for rodents.
6. Eucalyptus & Tea Tree
These medicinal oils are highly pungent. Eucalyptus, in particular, contains cineole, which has been shown in studies to reduce rodent activity in enclosed spaces like air vents or lofts.
7. Lemon & Citronella
Acidic citrus scents and citronella mask the “scent of indoors” (food and warmth) that attracts mice from the outside.
Why Scent-Only Methods Often Fail?
As an expert in British pest patterns, I must provide a reality check: scents are deterrents, not exterminators.
Habituation: A starving mouse will eventually tolerate a bad smell to reach a food source.
Maternal Instinct: A mother mouse will rarely abandon her nest just because it smells like peppermint.
Structural Gaps: If you don’t block the holes, new mice will simply keep trying different routes.
What Is The Scent + Shield 3-Step Strategy?
To truly protect your UK home, you must combine olfactory deterrents with physical barriers.
Step 1: Identify Hotspots
Look for grease marks along skirting boards. If you can fit a ballpoint pen into a gap, a mouse can fit through it.
Step 2: The Steel Wool Plug
Fill every identified hole with Grade 0000 Steel Wool. Mice cannot chew through these fibers as they cause immediate cuts to their mouths.
Step 3: Chemical Sealing
Seal the wool in place with silicone caulk. This holds the barrier and prevents food odors from wafting outside.
What is the DIY Mouse Repellent Spray Recipe?
Keep this mixed in a spray bottle for weekly maintenance.
1 Cup Water
1 Cup White Vinegar
20 Drops Peppermint Essential Oil
1 tsp Liquid Dish Soap (to emulsify the oil and water)
Instructions: Shake well and spray entry points and behind appliances every 3 days.
Final Verdict: Prevention is Better Than Cure
Understanding what smells do mice hate is your first layer of defense. By using peppermint oil and vinegar, you make your home uninviting to scouts. However, the real victory comes from structural proofing and impeccable hygiene.
FAQ: What Smells Do Mice Hate?
1. Does coffee keep mice away?
No. This is a common myth. Mice have been known to scavenge through compost piles containing coffee grounds; it does not reliably repel them.
2. Are ultrasonic repellers better than scents?
Evidence is mixed. Most mice habituate to ultrasonic sounds within weeks. A “Scent + Shield” approach is significantly more reliable for long-term protection.
3. How do I clean mouse droppings safely?
Always wear a mask. Spray droppings with a disinfectant or bleach solution first to prevent airborne pathogens (like Hantavirus) before wiping them up with a paper towel. For a full breakdown on health risks, read our guide on the chances of getting sick from mouse droppings in the UK
Kani BV
Lead Technical Researcher
Kanimozhi BV
Kanimozhi is a home improvement and diagnostics specialist at Hello Magazine UK. With a background in technical research, she bridges the gap between professional trade standards and practical DIY solutions. From troubleshooting appliance error codes to ecological pest control, Kanimozhi provides evidence-based guides for safe and efficient UK households.
Home Diagnostics and Technical Standards Specialist at Hello Mag. She provides high-level Expertise in appliance mechanics and scientific pest management, ensuring every guide follows strict safety protocols and manufacturer standards. As a leading Authority on technical home specs, Kanimozhi audits complex data to provide homeowners with the most accurate, verified, and reliable diagnostic solutions available.
Discovering bed bugs in your home can be a distressing experience. Beyond the physical discomfort, the immediate concern for most UK homeowners is the financial impact. Because these pests are notoriously resilient, quick fixes often lead to mounting costs over time.
In this guide on how much does it cost to get rid of bed bugs, we break down the current UK market rates for professional removal, identify the environmental triggers in your home that might be driving the bed bug treatment cost up, and show you how to prepare your property to ensure you only have to pay for treatment once.
Note: While we provide expert home environment and maintenance advice, we are not medical professionals. If you have health concerns regarding bites or reactions, please consult a healthcare professional or contact NHS 111.
How Much Does It Cost To Get Rid Of Bed Bugs?
Estimated Bed Bug Treatment Cost In The UK
The price of professional pest control in the UK varies significantly based on your location (London and the South East often command a 15-20% premium) and the size of your property.
Property Size
Chemical Spray (2nd Visit Incl.)
Heat Treatment (One-Off)
Professional Inspection Only
Studio / 1-Bed Flat
£250 – £450
£500 – £850
£50 – £100
3-Bedroom House
£450 – £750
£850 – £1,600
£80 – £120
4+ Bedroom House
£700 – £1,100
£1,400 – £2,500+
£100 – £150
Prices are estimates based on 2024/2025 UK market averages. Total bed bug treatment cost may increase if the infestation has spread to multiple rooms or communal areas.
Why Is The Cost So Variable For UK Homes?
When you call an exterminator, they don’t just look at the bugs; they look at your home’s environment. Several “problem-based” factors can influence your final quote:
Infestation Severity: If you catch the problem early (localised to one mattress), costs are kept low. If the infestation is “well-established,” bed bugs will have migrated into skirting boards, behind wallpaper, and into electrical sockets, requiring more labour-intensive work.
Building Age and Structure: Older UK properties, particularly Victorian or Edwardian terraces, often have more “voids”—cracks in plaster, gaps in floorboards, and loose skirting. These provide perfect hiding spots that require more time and chemicals (or higher heat) to penetrate.
Clutter Levels: Bed bugs thrive in “clutter-rich” environments. If a technician has to spend hours moving boxes, clothes, and furniture to reach treatment zones, you will likely face a surcharge for labour.
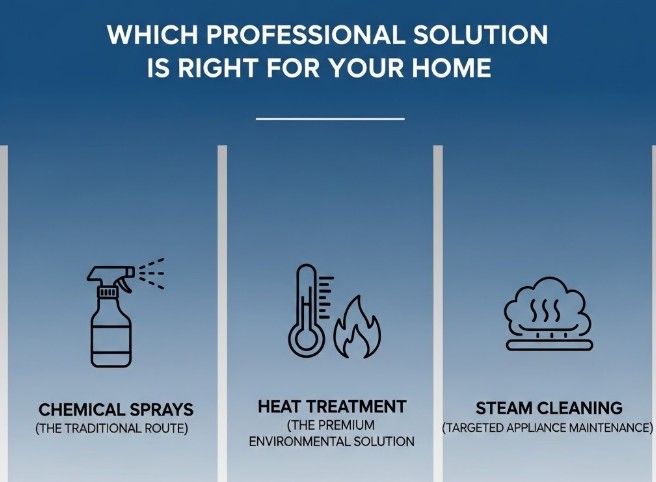
Which Professional Solution Is Right For Your Home?
Choosing the right method is about balancing your immediate budget with the long-term goal of total eradication. The specific bed bug treatment cost you pay often depends on the technology used.
Chemical Sprays (The Traditional Route)
This is the most common and affordable option. However, most professional-grade insecticides in the UK do not kill bed bug eggs.
Pros: Lower upfront cost.
Cons: Requires at least two visits (spaced 2 weeks apart) to kill newly hatched nymphs. You must be prepared for a “waiting game” while the chemicals work.
Heat Treatment (The Premium Environmental Solution)
Heat treatment involves raising the temperature of the infested rooms to approximately 55–60°C using specialised industrial heaters.
Pros: This is a “one-and-done” solution. It kills all life stages, including eggs, in a single day. It is chemical-free, making it ideal for homes with sensitive residents or pets.
Cons: Higher initial bed bug treatment cost. You must also remove heat-sensitive items (plastics, electronics, candles) from the home.
Steam Cleaning (Targeted Appliance Maintenance)
Some UK pros use “Dry Steam” (reaching over 100°C). This is often used as a supplementary tool to treat expensive upholstered furniture or mattresses that you don’t want to dispose of.
How Can You Minimise Costs Through Home Preparation?
You can significantly reduce the “labour” portion of your pest control bill by taking ownership of the home environment before the professionals arrive. A well-prepared home ensures the treatment is 100% effective, preventing the need for a costly “Re-treatment” visit.
The Homeowner’s Pre-Treatment Checklist:
High-Heat Laundering: Wash all bedding, curtains, and clothing at 60°C. The heat from the water (and a subsequent 30-minute high-heat tumble dry) is a highly effective, zero-cost way to kill bed bugs in fabrics.
Sealing the Environment: Use a high-quality sealant to fill gaps in skirting boards and around door frames. This removes the “harbourage points” bed bugs use to escape chemicals or heat.
Appliance Maintenance: Empty your vacuum cleaner immediately after use into an outdoor bin. Bed bugs can survive inside vacuum bags and crawl back out into your cupboards.
Mattress Encasements: Rather than throwing away an expensive mattress (which can cost £500+ to replace), buy a certified bed-bug-proof encasement (approx. £30–£60). This traps any remaining bugs inside, where they eventually die, and prevents new ones from entering.
Is A DIY Home Solution Effective Or A False Economy?
It is tempting to spend £20 on a “bug bomb” from a local hardware store. However, for UK homeowners, this is often a false economy.
Most shop-bought sprays act as repellents rather than killers. Instead of eradicating the colony, they often cause the bed bugs to scatter deeper into the walls or into neighbouring rooms. This turns a “one-room problem” into a “whole-house problem,” effectively doubling or tripling your eventual professional bed bug treatment cost.
If you want to take a DIY approach, focus on environmental changes (steaming, vacuuming, and sealing) rather than unverified chemical sprays.
What Are The Long-Term Maintenance Costs To Stay Bed-Bug Free?
Once your home is clear, “defensive maintenance” is your best way to protect your investment.
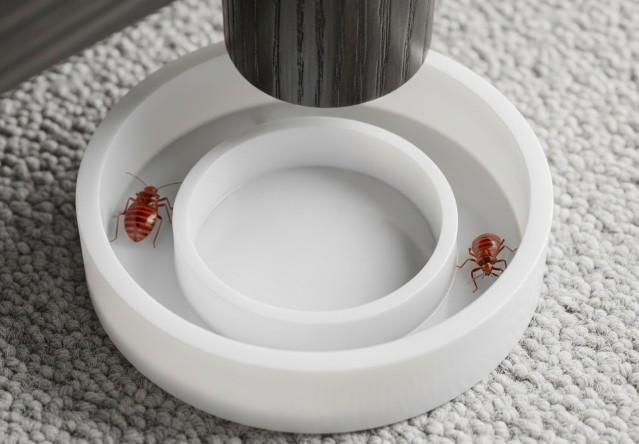
Monitoring Traps (£10 – £20): Place “interceptor” traps under the legs of your bed. These are low-cost visual monitors that will alert you to a single bug before it becomes a full infestation.
Travel Protocols: When returning from holiday, keep your suitcase in the garage or a bathtub until the clothes are laundered at 60°C.
Conclusion
Getting rid of bed bugs in a UK home is an investment in your peace of mind and the sanctity of your environment. While the initial bed bug treatment cost of £300 to £1,500 might seem high, the cost of “doing it twice” or replacing all your bedroom furniture is far higher.
By focusing on home solutions—clearing clutter, sealing cracks, and following strict laundering protocols—you can ensure that your professional treatment provides a permanent solution rather than a temporary fix. Focus on the environment, and the bugs will have nowhere left to hide.
What are the FAQ about how much does it cost to get rid of bed bugs?
1. Does home insurance cover bed bug removal in the UK?
Standard UK home insurance policies rarely cover “vermin or pests,” which includes bed bugs. However, some “Home Emergency Cover” add-ons may provide a small contribution toward the call-out. Always check your policy wording.
2. Does the council pay for bed bug removal?
Generally, no. While some councils offer discounted pest control services to residents on certain benefits (Universal Credit, etc.), most will charge a fee ranging from £140 to £300. In many boroughs, the council no longer provides this service at all.
3. How do I know if the treatment worked?
You should see a significant reduction in bites immediately. However, with chemical treatments, you may still see a few bugs for up to 10 days as eggs hatch. If you see live bugs 21 days after the final treatment, a re-visit is usually required.
4. What is the cheapest way to kill bed bugs in the UK?
The cheapest “home solution” is a combination of heat and suction: laundering all fabrics at 60°C and using a high-powered vacuum and steam cleaner on all furniture. However, this is rarely 100% effective on its own for a full infestation, and delaying professional help often increases the final bed bug treatment cost.
Home Diagnostics and Technical Standards Specialist at Hello Mag. She provides high-level Expertise in appliance mechanics and scientific pest management, ensuring every guide follows strict safety protocols and manufacturer standards. As a leading Authority on technical home specs, Kanimozhi audits complex data to provide homeowners with the most accurate, verified, and reliable diagnostic solutions available.
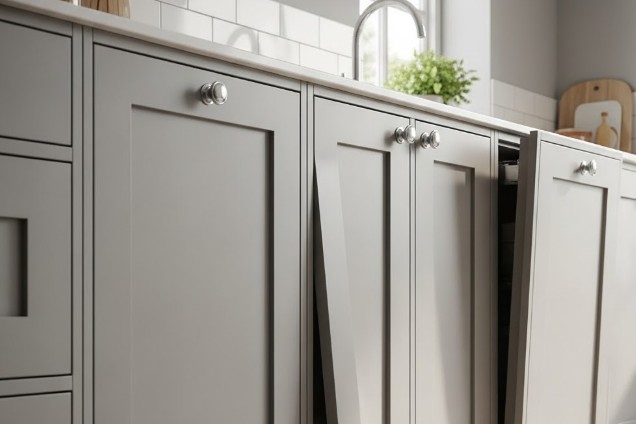
Is your kitchen looking a little “tired” or unaligned? Often, it isn’t the cabinets themselves that are the problem, but the alignment of the doors. Wonky doors, unsightly gaps, and sagging hinges can make even the most expensive kitchen look poorly installed.
The good news is that you don’t need a professional carpenter to fix this. Most modern UK kitchens use “Euro-style” concealed hinges, which are designed with built-in adjustment mechanisms.
In this guide, we will walk you through exactly how to adjust kitchen cabinet doors and cupboard hinges to achieve a flawless, showroom finish.
Essential Tools: What Do You Need for the Job?
Before you start turning screws, you need to ensure you have the correct tools. Using the wrong screwdriver is the number one cause of stripped screw heads in UK kitchens, which are often made of soft chipboard or MDF.
Tool
Purpose
Why it’s Essential
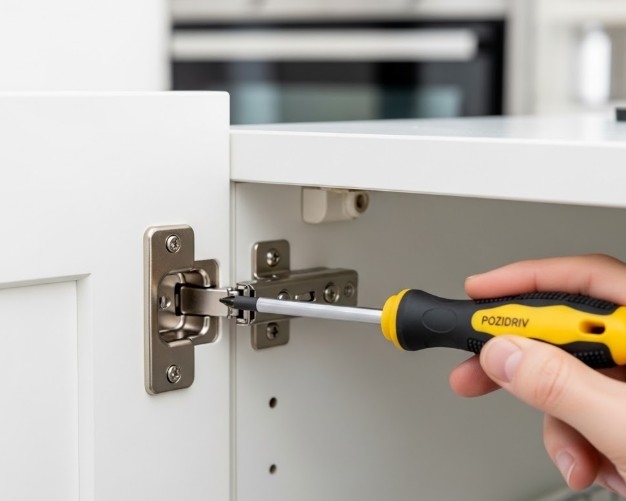
#2 Pozidriv Screwdriver
Primary Adjustment
Most UK hinges (Blum, Hafele) use Pozidriv, not Phillips. A Phillips head will slip and ruin the screw.
Spirit Level
Checking Alignment
Ensures the cabinet carcass itself is level before you blame the door.
Masking Tape
Marking
Helps you mark the original position if you are doing a major overhaul.
Wood Glue & Matches
Repairing
For fixing those pesky “spinning” screws that won’t tighten in the chipboard.
Why manual tools beat power tools for hinges?
While it might be tempting to grab your cordless drill, we strongly recommend using a manual screwdriver. Kitchen cabinets are typically constructed from melamine-faced chipboard (MFC). High-torque power drills can easily strip the threads in the wood, turning a 5-minute adjustment into a permanent repair job.
Quick Diagnosis: What Is Wrong With Your Cupboard Door?
Before you start adjusting, you need to identify the specific problem. Take a step back and look at your kitchen as a whole.
Is the door sagging? If the top corner is lower than it should be, or the door is rubbing on the unit below, you have a Vertical issue.
Is there a massive gap between two doors? If the doors don’t meet in the middle or are overlapping, you have a Horizontal (Side-to-Side) issue.
Is the door sticking out? If the door doesn’t sit flush against the cabinet frame, you have a Depth issue.
How To Adjust Kitchen Cupboard Hinges? – The Three-Way Method
Modern concealed hinges (often called “cup hinges”) allow for adjustment in three dimensions. Each hinge typically has three main screws.
1. How Do You Adjust Height (Up and Down)?
If your door is sitting too low or hitting the drawer above it, you need to adjust the vertical height. This is actually done via the mounting plate—the part of the hinge that is screwed into the cabinet side-wall.
Locate the screws: Look for the two vertical screws on the mounting plate (above and below the hinge arm).
The Process: Loosen both screws slightly on both the top and bottom hinges. Slide the door up or down to the desired height.
Pro Tip: Have someone hold the door at the correct height while you tighten the screws back up to ensure it stays level.
2. How Do You Adjust Side-To-Side (Left and Right)?
This is the most common adjustment. It moves the door towards or away from the side of the cabinet.
Locate the screw: This is the screw closest to the door itself on the hinge arm.
The Process: * Turning it clockwise moves the door closer to the cabinet edge (increasing the gap in the middle).
Turning it anticlockwise moves the door away from the edge (closing the gap in the middle).
The Balance: If the top of the door is leaning left, adjust the top hinge clockwise and the bottom hinge anticlockwise.
3. How Do You Adjust Depth (In and Out)?
Does your door have a gap between it and the cabinet when closed? Or is it so tight it’s “binding” and popping back open? This requires a depth adjustment.
Locate the screw: This is the rear-most screw on the hinge arm (furthest from the door).
The Process: Loosen this screw. You can now slide the door closer to or further away from the cabinet carcass. Once in position, tighten the screw firmly.
The Ideal Gap: You should aim for a 1mm to 2mm gap between the door and the carcass to allow for a soft-close buffer.
Advanced Fixes: What If The Screws Won’t Tighten?
A common “content gap” in most DIY guides is what to do when the cabinet material fails. In the UK, most kitchens are made of chipboard. Over time, the constant weight of the door can cause the screw holes to “blow out” or strip.
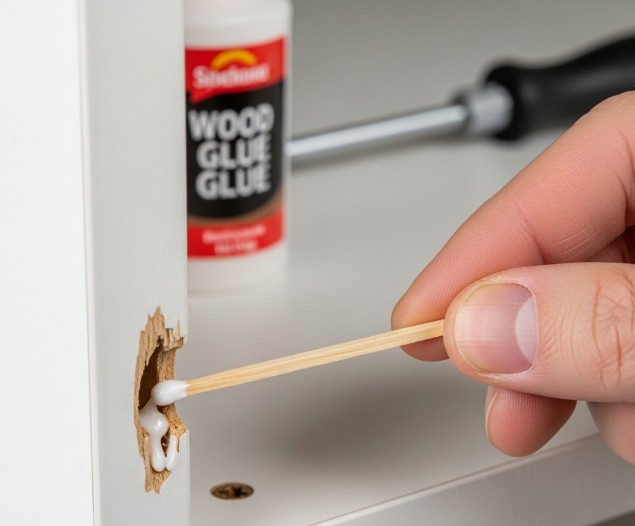
How Do You Fix Stripped Screw Holes In Chipboard?
If you turn a screw and it just spins, the wood inside is gone. Here is the expert “Matchstick Fix”:
Remove the hinge and the screw.
Dip two or three wooden matchsticks (or a wall plug) into wood glue.
Tap them into the hole until tight.
Cut off the excess wood so it’s flush with the cabinet.
Wait 30 minutes, then re-screw the hinge. The screws will now have fresh wood to “bite” into.
How Do You Adjust Soft-Close Tension?
If your doors are slamming or closing too slowly, check the hinge cup. High-end brands like Blum or Hettich often have a small switch or slider on the hinge. Flipping this switch changes the resistance of the hydraulic damper, allowing you to fine-tune the “thud.”
What are Expert Tips For A Perfect Finish?
Work Top-Down: Always start with the top cabinet hinges. Gravity works against you, so getting the top aligned first makes the bottom easier to manage.
Small Increments: Never turn a screw more than a half-turn at a time. Close the door, check the alignment, and adjust again.
The “Reveal” Rule: In the UK, the standard “reveal” (the gap between doors) is usually 2mm. Use a 2-pound coin as a makeshift spacer to ensure all your gaps are identical across the whole kitchen.
Check the Carcass: If you’ve spent an hour adjusting and the door is still wonky, use your spirit level. If the actual cabinet box isn’t level, no amount of hinge turning will fix the visual line. You may need to adjust the plastic legs at the bottom of the unit.
Conclusion
Learning how to adjust kitchen cabinet doors and cupboard hinges is one of the most cost-effective ways to refresh your home. By spending an afternoon with a #2 Pozidriv screwdriver, you can transform a messy, misaligned kitchen into a sleek, professional-looking space.
Remember: be patient, make small adjustments, and always check the “reveal” gaps between your doors for that perfect finish. If you find your hinges are physically damaged or the metal is fatigued, it may be time to replace the hinges entirely, but for 90% of homeowners, a simple turn of a screw is all it takes!
What are the FAQs About How To Adjust Kitchen Cabinet Doors?
1. Why does my cupboard door spring back open after I adjust it?
This is known as “binding.” It usually happens because the door is adjusted too close to the cabinet side (Depth adjustment). When the door closes, the edge of the door hits the carcass and acts as a lever, popping the door back open. Move the depth adjustment out by 1mm.
2. Can I use a power drill for hinge adjustments?
We strongly advise against it. The precision required is measured in millimetres. A power drill is too fast and can easily strip the Pozidriv heads or the chipboard holes.
3. My doors are still wonky—is the carcass out of level?
It’s possible. Kitchens can settle over time. Check the top of the cabinet with a spirit level. If it’s sloping, you might need to adjust the cabinet’s hanging brackets (for wall units) or the adjustable feet (for base units).
4. What is the difference between Phillips and Pozidriv?
Phillips screws have a simple cross. Pozidriv screws (common in UK kitchens) have a cross with four additional small tick marks. Using a Phillips screwdriver on a Pozidriv screw will cause it to “cam out” and ruin the screw.
Home Diagnostics and Technical Standards Specialist at Hello Mag. She provides high-level Expertise in appliance mechanics and scientific pest management, ensuring every guide follows strict safety protocols and manufacturer standards. As a leading Authority on technical home specs, Kanimozhi audits complex data to provide homeowners with the most accurate, verified, and reliable diagnostic solutions available.