
by Kanimozhi BV | Jul 14, 2025 | Bathroom, Interior
Why Should I Care About the Cost of a Bath?
With rising utility bills and growing concerns over environmental sustainability, I’ve recently found myself asking: How much does it cost to run a bath?
As someone living in the UK, where gas and electricity prices have seen notable fluctuations, understanding how my daily routines affect my finances and carbon footprint has become more important than ever.
A bath isn’t just about relaxation anymore — it’s about budgeting, energy efficiency, and conscious living. So, I decided to break it all down and get clear answers.
How Much Water Does the Average Bath Use in the UK?
The average bath water usage in the UK is around 80 to 100 litres per bath. Of course, this depends on the size and depth of your bathtub.
I checked mine — a standard UK tub — and found that it comfortably holds about 90 litres when filled to a normal level.
Here’s a helpful breakdown:
| Type of Bath |
Water Usage (Litres) |
| Small bath |
70–80 L |
| Standard UK bath |
80–100 L |
| Deep soaking tub |
100–130 L |
| Freestanding bath |
120–150 L |
So if you’re like me and love a deep soak, you might be using more than 120 litres every time you run a bath!
What’s the Cost of Heating Water for a Bath?
Water alone doesn’t cost much — but heating it does. The cost of heating water in the UK varies depending on whether you use gas or electricity.
Gas is usually cheaper, but electric boilers or immersion heaters are common in many homes, especially flats.
Here’s an overview:
| Heating Type |
Energy Rate (2025) |
Cost per 100 Litres Heated |
| Gas Boiler |
6.9p per kWh |
~30–40p |
| Electric Boiler |
24.5p per kWh |
~90p–£1.20 |
I use a gas combi boiler, and it costs me about 35p to heat enough water for a bath. If you’re using an electric immersion heater, the cost can be almost triple.
How Do Gas and Electric Costs Compare in 2025?
Thanks to updated OFGEM data, the average energy prices in 2025 are:
- Gas: ~6.9p per kWh
- Electricity: ~24.5p per kWh
This means electric heating is over three times more expensive than gas. Here’s how that translates into bath costs:
| Scenario |
Estimated Cost per Bath |
| Gas-heated bath (100L) |
30–45p |
| Electric-heated bath (100L) |
90p–£1.20 |
If you’re unsure what system you have, it’s worth checking — especially if you’re trying to cut down your utility bills.

How Much Does It Cost to Run a Bath? – Can I Calculate the Exact Cost?
Yes — and I did. Here’s a simple formula you can use:
Bath Cost (£) = (Litres × Temp Rise × 4.18) ÷ 3600000 × kWh rate
To simplify:
- For gas: £0.0035 per litre
- For electricity: £0.011–0.012 per litre
So, if I run a 90L bath with gas heating:
90 × £0.0035 = £0.31
And with electric heating:
90 × £0.012 = £1.08
Tip: Check your water temperature settings — many people heat water to 60°C but only need 40°C for a comfortable bath.
Is Taking a Bath More Expensive Than a Shower?
In short — yes, usually. Let’s compare:
| Type |
Water Usage |
Heating Cost (Gas) |
Heating Cost (Electric) |
| Bath |
80–120 L |
~30–45p |
~90p–£1.20 |
| 5-min Shower |
35–45 L |
~10–15p |
~35–50p |
| 10-min Shower |
70–90 L |
~20–30p |
~70–95p |
If you love long showers (like me on winter mornings), your cost can be similar to a bath. But for short, efficient showers, you’ll save both water and money.
How Do Water Meter Charges Affect the Cost?
Water itself isn’t free — unless you live in a home without a meter. I’m on a water meter, so every litre counts.
Key points to consider:
- Metered homes: You’re charged per cubic metre (1,000 litres)
- Unmetered homes: Fixed annual rate based on property size and value
- Average water rate (2025): £2.14 per m³
So, a 90-litre bath = 0.09 m³
0.09 × £2.14 = ~19p per bath (just for water)

Are There Ways to Reduce the Cost of Taking a Bath?
Absolutely. Over the past year, I’ve tried a few tricks and saved a decent chunk on my bills. Here are some easy wins:
Water & Energy-Saving Tips:
- Use less water: Don’t overfill the bath
- Lower your boiler temperature
- Take baths during off-peak hours if on a time-of-use tariff
- Share bath water with kids (gross but effective!)
- Install an eco bath plug or water flow restrictor
These can reduce both the cost of heating water and the total litres used.
What Other Factors Impact Bathing Costs?
I’ve found that small details can make a big difference:
- Boiler efficiency: An A-rated boiler can save ~10–15% annually
- Insulation: A well-insulated home keeps hot water hotter, longer
- Bath material: Cast iron baths retain heat better but cost more to fill
- Family usage: More baths = more bills, especially in winter
Final Thoughts: Is Running a Bath Worth the Cost?
After doing the math and testing a few approaches, I’ve found that a standard bath in the UK costs between £0.50 and £1.40, depending on how you heat your water and whether your home is on a water meter.
While showers are generally cheaper, I still believe that an occasional bath is worth it — for relaxation, muscle recovery, or just unwinding after a tough day.
Still, I’m mindful now. I monitor my energy use, and when I take a bath, I try to make it count. Everything happens only by knowing on how much does it cost to run a bath.
A warm soak doesn’t have to burn a hole in your budget — just your stress.
Related Article: How Much Do B&Q Charge to Fit a Bathroom?
Frequently Asked Questions on How Much Does It Cost to Run a Bath
1. How much does a 10-minute bath cost?
Typically £0.30–£1.20 depending on heating method and water meter charges.
2. Are bubble baths more expensive?
Not significantly — but using very hot water to counter the cooling effect of bubbles can raise heating costs.
3. Does using hot water from the immersion tank cost more?
Yes — electric immersion heaters are less efficient and more costly than gas boilers.
by Kanimozhi BV | Jul 11, 2025 | Garden, Exterior
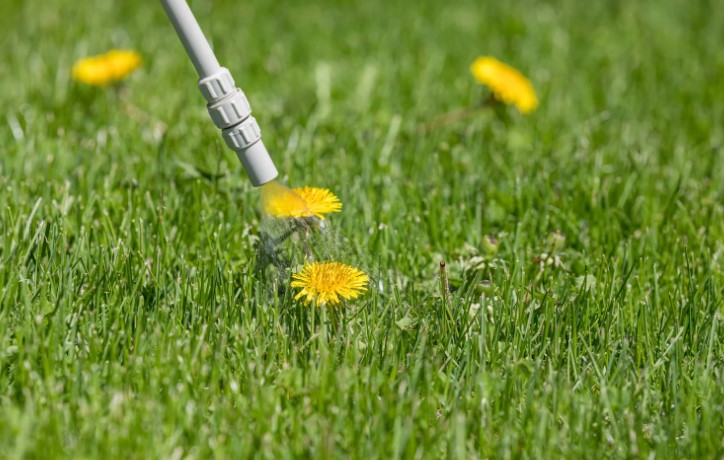
I’ve always loved a lush, green lawn — but like many UK homeowners, I’ve battled with one stubborn invader: the dandelion.
No matter how often I mowed or weeded by hand, they kept popping back up. I knew I needed a best dandelion killer that won’t kill grass, and after testing multiple options, I’ve finally found what works.
In this guide, I’ll walk you through what I’ve learned about dandelion control, which products I recommend, and how to keep your lawn healthy without damaging it in the process.
Why Do Dandelions Keep Coming Back in My Lawn?
What Makes Dandelions So Persistent?
Dandelions are tough. Their long taproots can reach over 15cm deep, which means even if I remove the top, the plant can regrow. And because they reproduce by both seed and root, it doesn’t take long before one becomes many.
They thrive in bare or thin patches of lawn — and before I knew it, they were everywhere.
Is It Bad to Have Dandelions in My Garden?
Some gardeners say dandelions are harmless or even good for pollinators. While I appreciate their place in the ecosystem, they can quickly dominate a lawn and compete with grass for nutrients. For me, maintaining a tidy garden means keeping them under control — but doing so without harming my lawn.
How Can I Kill Dandelions Without Damaging My Grass?
What Is a Selective Weed Killer?
A selective weed killer targets broadleaf weeds like dandelions while leaving grass unharmed. This is different from non-selective herbicides like glyphosate, which kill everything they touch.
When I first made the mistake of using a general weed killer, I was left with brown patches. Lesson learned — only use selective products on lawns.
When’s the Best Time to Apply Dandelion Killer?
Based on what’s worked for me, the best times are spring (April–May) and early autumn (September) when dandelions are actively growing but before they go to seed.
Here’s a quick reference:
| Region |
Best Time to Apply |
Why It Works |
| Southern UK |
March–May, Sept |
Warmer temps, early growth |
| Midlands |
April–May, Sept |
Active growth season |
| Northern UK |
May–June, Sept |
Later spring warmth |
Best Dandelion Killer That Won’t Kill Grass (UK Options)
What Are the Top Chemical Options I’ve Tried?
Here are the best selective weed killers I’ve used that really work — and don’t harm the lawn.
Weedol Lawn Weedkiller
Great for large lawns. Starts working within days.
✅ Easy to apply using a watering can
❌ Not pet-safe until dry
Resolva Lawn Weedkiller
Fast results, ideal for spot treatments.
✅ Targets dandelions and clover
❌ Slightly more expensive
Classic option with reliable results.
✅ Kills 4 types of weeds
❌ Needs precise mixing
These products are all post-emergent and broadleaf weed control formulas, meaning they go after visible weeds like dandelions without touching the grass.
Are There Any Natural or Pet-Safe Options?
I’ve experimented with glyphosate-free dandelion killers, but natural solutions are tricky on lawns. For example:
- Vinegar and boiling water: Effective but kills grass too
- GreenForce Lawn Weedkiller: Organic, selective formula
- Pet-friendly weed sprays: Safe after drying, but slower acting
If you’ve got children or pets, I recommend applying in the evening, keeping them off the lawn until it’s completely dry.

How Do I Apply Dandelion Killer Effectively?
Should I Use a Spray, Granule, or Gel?
Here’s what I’ve used in different situations:
| Product Type |
Best For |
My Experience |
| Liquid Spray |
Large lawn areas |
Fast & even coverage |
| Spot Gel |
Isolated weeds |
Very precise, no damage |
| Granules |
Weed & feed treatments |
Slower, good for maintenance |
How Do I Avoid Over-spraying and Damaging My Lawn?
Precision matters. I follow these steps:
- Use a targeted sprayer or gel applicator
- Avoid windy days to prevent drift
- Apply in dry weather but not during heatwaves
- Stick to label instructions — always
Maintaining a Dandelion-Free Lawn: What Works for Me
Can I Prevent Dandelions from Coming Back?
Yes — once I got rid of the dandelions, I started a proper lawn care in spring and autumn routine. That means:
- Regular mowing (but not too short)
- Feeding with nitrogen-rich lawn food
- Overseeding bare patches
Is a Weed and Feed Product Worth It?
Absolutely. I started using them once or twice a year, and they’ve made a big difference.
Here are my go-to combos:
- The EverGreen Complete 4-in-1 – Feeds, kills weeds & strengthens grass
- Miracle-Gro EverGreen Premium Plus – Great for patch repair + weed control

Conclusion: What Worked Best in My Garden
After trying a mix of chemical, natural, and manual methods, I found the best approach is a combination:
- A selective weed killer in spring
- Spot treatment throughout summer
- Weed and feed in autumn
- A bit of patience and consistency
According to me, Weedol Lawn Weedkiller gave the best balance of power, price & grass safety. With regular care and spot spraying, I’ve finally got the lawn I want — dandelion-free and lush.
Related Article: 5 Star Rated Strongest Weed Killer That Kills Everything
FAQs on Best Dandelion Killer That Won’t Kill Grass
1. Do I Need to Pull Dandelions Out by Hand?
It helps — especially if I catch them early. But the root often breaks, so I combine pulling with a spot treatment.
2. Can I Kill Dandelions Without Chemicals?
Only if I don’t mind risking the grass. On hard surfaces, yes. On lawns, it’s safer to use selective weed killers.
3. How Long Does It Take for Dandelion Killer to Work?
Some products show results in 3–7 days, but full die-off can take 2–3 weeks.
4. Is It Safe for Pets and Children After Application?
Yes — once the product has dried. I used to keep pets away from the lawn for 24 hours to be safe.

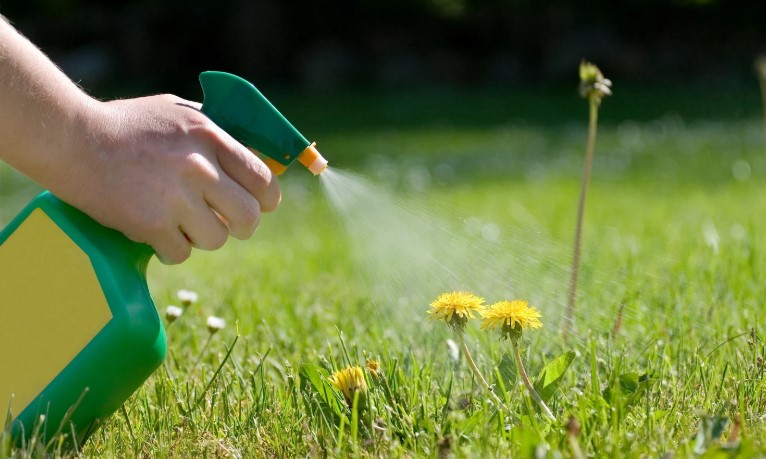
by Kanimozhi BV | Jul 9, 2025 | Garden, Exterior
Dandelions may look innocent with their cheerful yellow flowers, but once they invade your lawn, they quickly turn from pretty to pesky.
I know this firsthand—no matter how often I pulled them up, they kept coming back stronger.
That’s when I realised I needed a step-by-step plan to not just remove them but to keep them from returning for good.
In this guide on how to get rid of dandelions, I’ll walk you through how I successfully dealt with dandelions, using both natural and chemical methods, and how I keep my lawn healthy and weed-free throughout the year.
Why Are Dandelions So Hard to Get Rid Of?
When I first started my garden maintenance journey, I underestimated dandelions. They seemed like simple lawn weeds that could be pulled out with ease.
I was wrong. What makes dandelions particularly stubborn is their biology—specifically, their taproot.
What makes dandelions a tough weed?
Dandelions are perennial weeds, which means they can live for several years. Once established, they spread by both seed and root.
The yellow flower turns into a puffball of seeds, easily carried by the wind. These seeds can sprout wherever they land, especially in weakened or bare patches of grass.
What is a dandelion taproot and why does it matter?
The taproot of a dandelion is a long, thick root that extends deep into the soil—sometimes as far as 10 inches.
If even a small piece of this root is left behind, the plant can regenerate. This is why cutting off the leaves or surface growth is ineffective—the root remains and regrows quickly.

When Is the Best Time to Remove Dandelions in the UK?
Timing your weed control can make all the difference. Over the years, I’ve learned that targeting dandelions at the right time in their life cycle dramatically improves results.
Seasonal timing for best results
The most effective periods for removal are early spring and autumn. In early spring, dandelions are just emerging and haven’t yet produced seeds.
In autumn, the plant is drawing nutrients back into the taproot to prepare for winter, making this a great time to apply treatments that kill the root.
Spring vs summer vs autumn weed control
| Season |
Effectiveness |
Reason |
| Spring |
High |
Young plants are easier to remove and haven’t seeded |
| Summer |
Moderate |
Plants may already have seeded and be harder to kill |
| Autumn |
High |
Ideal for systemic treatments that reach the root |
How To Get Rid of Dandelions Without Chemicals?
If you’re like me and prefer a safer, eco-friendly approach—especially around children and pets—there are several non-chemical methods that work well with consistent effort.
Digging them out: Step-by-step guide
Manual removal is one of the most effective methods if done properly. Here’s the process I follow:
- Water the area thoroughly. This softens the soil and makes the root easier to remove.
- Use a dandelion weeder, garden knife, or hand trowel to dig down beside the root.
- Loosen the soil and gently pull up the plant, trying to remove the entire taproot.
- If any root breaks off, repeat the process in a few days.
- Fill the hole with soil and overseed with grass to prevent future growth.
- Long-handled dandelion weeder
- Hori Hori garden knife
- Steel hand trowel
- Gardening gloves
- Watering can or hose
Homemade dandelion killers
I’ve tested several natural remedies over the years, and some can be surprisingly effective:
- White vinegar: Sprayed directly on the leaves during a sunny day. The acetic acid draws moisture from the plant and dries it out.
- Boiling water: Pour it slowly at the base of the plant. This method kills the surface leaves and can damage the root, though repeat treatments may be necessary.
- Salt: Use cautiously. Salt dehydrates the plant but can also ruin soil quality, so I only use it between paving stones or cracks, not on the lawn.
Mulching and soil health
Once I remove dandelions, I cover the soil with mulch or compost. This blocks sunlight and prevents any remaining seeds from sprouting.
I also make a habit of enriching the soil to support thick grass growth, which naturally crowds out weeds.

What Are the Best Chemical Options for Killing Dandelions?
Sometimes, especially when dealing with larger infestations, natural methods just aren’t enough. That’s when I turn to chemical solutions—but carefully and selectively.
Selective herbicides vs non-selective options
- Selective herbicides target only broadleaf weeds like dandelions and don’t harm grass. These are perfect for treating lawns.
- Non-selective herbicides kill all vegetation, so I use them only on patios, driveways, or areas with no desired plants.
Best dandelion killer products in the UK
After trying many brands over the years, these are the ones I trust most:
| Product Name |
Herbicide Type |
Pet-Friendly After Drying? |
Application Notes |
| Resolva Lawn Weedkiller |
Selective Spray |
No |
Easy to use, ideal for patch treatments |
| Weedol Lawn Weedkiller |
Concentrated Mix |
No |
Powerful formula, requires dilution |
| Neudorff WeedFree Plus |
Natural Option |
Yes |
Organic, based on natural acids |
Before applying any herbicide, I always read the label carefully and choose a dry, windless day to avoid harming nearby plants.

Can I Stop Dandelions from Coming Back?
Eliminating the current batch is only half the job. I’ve learned that consistent lawn care is the only way to prevent them from returning.
Long-term lawn care strategies
- Mow high: I keep my grass around 4 cm tall. Taller grass shades the soil, making it harder for dandelion seeds to germinate.
- Feed your lawn: A balanced lawn feed strengthens the grass and reduces bare spots. I feed mine in early spring and again in late summer.
- Water deeply, not frequently: This encourages deep grass roots, making the lawn more resilient.Aerate annually: Aerating the soil helps reduce compaction and improves water and nutrient absorption.
My dandelion prevention routine:
- Inspect lawn weekly for new weeds
- Remove new growth immediately
- Overseed thin or patchy areas in spring
- Apply autumn lawn feed and moss killer
- Avoid cutting the lawn too short
Is It Safe to Remove Dandelions Around Pets and Children?
One of the reasons I started using natural methods was the concern for my family’s safety. Whether it’s children playing barefoot on the grass or pets sniffing around, safety is crucial.
Comparing natural and chemical methods
While most natural remedies are safe once dry (like vinegar and boiling water), chemical herbicides can be harmful if ingested or touched while still wet.
Always wait the recommended time before allowing pets or kids back onto the treated area.
Pet-safe alternatives
For peace of mind, I prefer Neudorff WeedFree Plus, an organic product that is safe once dry and doesn’t leave behind harmful residues.
If I use any chemical weed killer, I keep pets and children away for at least 24–48 hours and rinse the area afterward.

Conclusion: Stay Consistent and Keep Your Lawn Dandelion-Free
Getting rid of dandelions takes patience, the right tools, and a bit of elbow grease.
Whether I’m using a manual weeder on a dewy morning or applying a targeted herbicide to a stubborn patch, I’ve learned that consistency is key.
The real secret? Don’t wait until your lawn is overrun. Tackle the problem early in the season, follow up regularly, and focus on growing a strong, healthy lawn that naturally fights off weeds.
With the right approach, you can take control of your lawn and enjoy a dandelion-free garden all year long.
Related Article: How to Get Rid of Mushrooms in Lawn?

by Kanimozhi BV | Jul 8, 2025 | Water Heater, Appliances
When I first switched to an electric boiler, one of my biggest questions was: how much is electric boiler cost per month? I wanted the warmth and efficiency without dreading the energy bill.
So I tracked my usage, dug into the data, and compared my findings with real-world figures across the UK.
If you’re thinking of making the same move or simply curious about electric boiler monthly costs, this guide is for you.
What Is an Electric Boiler and How Does It Work?
An electric boiler heats water using electricity instead of gas.
It can supply hot water for both radiators and taps in the same way a traditional gas boiler does — just without the emissions.
Types of Electric Boilers
- Combi Electric Boiler: Heats water on demand — great for small homes.
- System Boiler: Uses a hot water cylinder for storing heated water.
- Storage Electric Boiler: Heats water during off-peak hours (e.g. Economy 7) and stores it for later use.
Electric boilers are popular in flats, small homes, or areas without access to a gas supply. They’re also seen as a greener alternative, especially when powered by renewable electricity.

What Factors Affect the Monthly Cost of an Electric Boiler in the UK?
Several elements influence how much you’ll pay to run your electric boiler.
1. Property Size and Radiator Count
A one-bedroom flat needs far less energy than a four-bedroom detached home. More radiators mean more hot water — which means higher usage.
2. Insulation and Energy Efficiency
If your home is poorly insulated, your boiler has to work harder to maintain warmth. That’s money slipping through the cracks — literally.
3. Your Electricity Tariff
This is a big one. The average UK electricity price (as of 2025) is around 28p per kWh, but that varies. With an Economy 7 tariff, you might pay less overnight — around 12p per kWh during off-peak hours.
What Is Economy 7 and Is It Worth It?
If you use your heating mostly at night or can schedule it cleverly, Economy 7 can save you hundreds per year. My system runs mostly between 11pm and 7am, and the savings are real.
4. Boiler Size (kW Rating) and Usage Habits
Boilers typically range from 6kW to 15kW. The higher the rating, the more power it consumes. If you like your home toasty warm and your showers long, your bills will reflect that.
How Much Does an Electric Boiler Cost Per Month in 2025?
Monthly Running Cost Estimates (UK Average Electricity Rates)
| Home Size |
Boiler Size (kW) |
Estimated Monthly Cost |
| 1-bed flat |
6–9 kW |
£70–£95 |
| 2-bed terraced house |
9–12 kW |
£95–£135 |
| 3-bed semi-detached |
12–15 kW |
£130–£180 |
| 4-bed detached |
15 kW+ |
£170–£250 |
How Much Electricity Does an Electric Boiler Use Per Month?
On average, a UK household using electric heating may consume 300–600 kWh/month in winter.
For example, a 9kW boiler running 4 hours per day:
- 9 kW × 4 hrs/day × 30 days = 1,080 kWh/month
- At 28p per kWh → £302.40/month
If you’re on Economy 7 and time usage well, this could drop to around £160/month.

How Much Does It Cost to Run a Boiler Per Day?
Daily costs depend on your setup, but here’s a rough idea:
| Boiler Size |
Daily Usage (4 hrs) |
Daily Cost (Standard Rate – 28p/kWh) |
| 6 kW |
24 kWh/day |
£6.72/day |
| 9 kW |
36 kWh/day |
£10.08/day |
| 12 kW |
48 kWh/day |
£13.44/day |
You can slash this if you’re on an off-peak tariff or heat less frequently.
My Own Electric Boiler Bill: A Real Example
I live in a 2-bed home with a 9kW electric combi boiler. I’m on an Economy 7 tariff and use a programmable thermostat.
My average winter bill comes in at around £120/month, with summer usage dropping to just £40–£50/month when the heating’s off.
Do Boilers Use a Lot of Electricity?
Electricity Consumption by Boiler Size
| Boiler Size |
Power Draw (kWh/hr) |
Monthly Cost Estimate (4 hrs/day) |
| 6 kW |
6 |
£120–£140 |
| 9 kW |
9 |
£160–£200 |
| 12 kW |
12 |
£200–£260 |
| 15 kW |
15 |
£250+ |
Yes — electric boilers can use a lot of electricity, especially during colder months.
But their efficiency (often near 100%) means no energy is wasted through flues or combustion like in gas systems.

How Does Electric Boiler Running Cost Compare to Gas?
| Fuel Type |
Unit Price (2025) |
Efficiency |
Monthly Cost (Average 2-bed Home) |
| Gas |
~8p per kWh |
85–90% |
£70–£100 |
| Electricity |
~28p per kWh |
100% |
£95–£135 |
Gas is still cheaper to run on a monthly basis. But if you don’t have a gas connection — or want to cut emissions — electric is the next best thing.
Discover more on how long does it take to fit a new boiler
How Can I Lower My Electric Boiler Heating Costs?
Here’s what I personally do to keep costs manageable:
- Use a smart thermostat to control when the boiler switches on/off
- Schedule heating during off-peak hours (if on Economy 7)
- Insulate your home – roof, walls, floors, and windows
- Keep radiators clear to allow efficient heat circulation
- Lower thermostat by 1°C – saves around 10% on bills
Conclusion: Is an Electric Boiler Worth the Monthly Cost?
From my experience, an electric boiler can be affordable if you manage your usage smartly and take advantage of off-peak rates.
While it’s not the cheapest option on the market, it’s low-maintenance, highly efficient, and environmentally friendlier than gas.
For smaller, well-insulated homes — especially without a gas connection — I believe it’s a solid investment.
Just be mindful of your tariff, insulation, and heating habits, and you’ll keep monthly costs under control.
Related Article: Why Does My Boiler Keep Losing Pressure?
FAQs – Answering Common Questions About Electric Boiler Cost Per Month
1. Is an electric boiler cheaper than gas monthly?
No — gas is still cheaper per kWh, so gas boilers usually win on monthly cost. But electric boilers are cleaner and easier to maintain.
2. How much electricity does an electric boiler use per hour?
- A 9kW boiler uses 9 kWh per hour
- Cost per hour: £2.52 at 28p/kWh
3. Do electric boilers work well with Economy 7?
Yes — especially storage or system boilers that can heat water during cheap overnight hours.
4.Are electric boilers suitable for large homes?
They can be — but you’ll need a higher kW unit (15kW or more), which increases both installation and running costs.

by Kanimozhi BV | Jul 8, 2025 | Driveway, Exterior
Upgrading your driveway can completely transform the look of your home, but it’s one of those projects where costs can vary massively.
When I began researching how much does a new driveway cost in the UK, I quickly realised that the price tag depends on a whole mix of factors — from the type of surface you choose to the size of the space, and even where you live.
In this guide, I’ll break everything down, share real numbers, and even include my own experience to help you make a more informed decision.
What Factors Influence the Cost of a New Driveway in the UK?
Before you even pick a material or call a contractor, it’s important to understand what drives the cost. Here’s what I discovered:
Size and Shape of the Driveway
The important factor is the size of the driveway. A simple rectangular shape is usually cheaper than something curved or awkwardly shaped.
The bigger the area, the more materials and labour required.
What Type of Material Used?
There are plenty of options out there, and each comes with a different price point and maintenance level.
Tarmac vs. Block Paving vs. Resin vs. Gravel
| Material |
Average Cost per m² (UK) |
Lifespan |
Maintenance Level |
| Gravel |
£30 – £60 |
10–15 years |
Low |
| Tarmac |
£45 – £70 |
15–20 years |
Medium |
| Block Paving |
£60 – £120 |
20+ years |
High |
| Resin Bound |
£70 – £130 |
15–20 years |
Low–Medium |
| Concrete |
£65 – £110 |
25+ years |
Low |
You can read more about the resin option in our in-depth blog on resin-bound driveway costs.
Labour and Installation Costs
Labour charges vary by region. For example, London-based installations are often 15–25% more expensive than the North or Midlands.
Location and Accessibility
If your home is hard to access or needs significant preparation, expect the cost to rise.
Additional Features (Edging, Drainage, Kerbs)
Extras like drainage channels, edging stones, and decorative kerbs can add anywhere from £200 to £1,000+.

How Much Does A New Driveway Cost? – Each Type (2025 UK Pricing Guide)
Tarmac Driveway Cost per m²
Expect to pay between £45 and £70 per m². It’s fast to lay, durable, making it a cost-effective choice for big areas.
Resin Bound Driveway Price Range
One of the more stylish choices, resin bound driveways typically range from £70 to £130 per m². They’re permeable, low-maintenance, and great for kerb appeal.
Dive deeper in our dedicated blog: How much does a resin bound driveway cost?
Block Paving Driveway Cost
Block paving sits between £60 and £120 per m², depending on the stone type and pattern complexity. It’s beautiful, but it does need regular weeding and upkeep.
Concrete and Gravel Driveway Prices
- Concrete: £65 to £110 per m², very long-lasting but cracks can be an issue.
- Gravel: The cheapest option at £30 to £60 per m², but it can scatter and requires occasional top-ups.
How Much Does It Cost to Pour a 20×20 Driveway?
For a 20×20 ft (approximately 37 m²) concrete driveway:
| Item |
Approximate Cost |
| Concrete Material |
£2,200 – £2,700 |
| Labour |
£800 – £1,200 |
| Total |
£3,000 – £3,900 |
If you’re going for gravel, this same area could cost as little as £1,200.

What Are the Pros and Cons of Each Driveway Type?
Here’s a quick breakdown:
- Gravel: Pros – Cheapest, quick install. Cons – Can scatter, not suitable for sloped drives.
- Tarmac: Pros – Durable, cost-effective. Cons – Not as visually attractive.
- Block Paving: Pros – Stylish, wide range of design. Cons – Weeds, higher maintenance.
- Resin: Pros – Modern look, low maintenance. Cons – Expensive.
- Concrete: Pros – Long-lasting, low upkeep. Cons – Can crack over time.
What is the Cheapest Option for a Driveway in the UK?
Gravel takes the crown here, hands down. At £30–£60 per m², it’s the most budget-friendly choice.
But remember:
- Cheaper materials may need more frequent maintenance.
- Resin and tarmac, while more expensive up front, often have lower lifetime costs.
Do I Need Planning Permission for a New Driveway in the UK?
You usually don’t need planning permission if:
- The surface is permeable (like gravel or resin).
- It doesn’t drain onto the street.
However, if you’re covering more than 5m² with a non-permeable material, or you’re in a conservation area, you might need permission. Anytime it is worth checking with your local council.
Can I Save Money by Installing a Driveway Myself?
I seriously considered the DIY route before going professional. Here’s what I learned:
DIY vs Professional Driveway Installation
| Method |
Pros |
Cons |
| DIY |
Saves labour cost, satisfaction |
Time-consuming, risk of errors |
| Professional |
Quick, high quality finish |
More expensive upfront |
Unless you’re highly experienced or it’s a simple gravel drive, I’d recommend leaving it to the pros.

Hidden Costs and Long-term Expenses
Here’s what can creep up on you later:
- Resurfacing: £300 – £1,000 depending on surface
- Cleaning & sealing: Every 1–2 years, costing £100–£300
- Repairs: Cracks, potholes, and block shifting
Budget at least £100–£200 per year for ongoing maintenance.
Real Cost Examples: What Did I Pay for My Driveway?
When I redid my driveway last year (block paving), the final cost was just over £6,500 for a two-car space.
Here’s the breakdown:
- Site prep & excavation: £1,200
- Materials: £3,500
- Labour: £1,800
If you’re interested in exact figures for a two-car setup, check out our full article on how much a 2-car driveway costs.
Conclusion: Is a New Driveway Worth the Cost in 2025?
After going through the numbers, materials, and maintenance, I can confidently say that a new driveway is worth it — not just for the aesthetics but for the added property value and practicality.
Whether you go budget-friendly with gravel or invest in a sleek resin finish, make sure the driveway suits your needs, budget, and lifestyle.
And don’t forget — the long-term benefits often outweigh the upfront cost.
FAQs – Your Driveway Cost Questions Answered
1. How long does a new driveway take to install?
Anywhere from 2 to 10 days, depending on materials and weather.
2. What’s the cheapest option for a driveway in the UK?
Gravel – both for materials and installation.
3. How much does it cost to pour a 20×20 driveway?
For a concrete one: £3,000 – £3,900, including labour.
4. Does a new driveway add value to property?
Absolutely. A well-installed driveway can boost your home’s value by 5% to 10% and makes a great first impression for buyers.
