
by Kanimozhi BV | Jun 25, 2025 | Washing Machine, Appliances
Using soda crystals in your laundry routine can raise a valid concern: can soda crystals damage washing machine components? No, soda crystals do not damage your washing machine when used correctly.
They are a traditional, safe, and effective cleaning agent—especially for tackling limescale, soap scum, and odours.
However, improper use or excessive quantities may lead to build-up or residue in the system, especially in colder wash cycles or if not fully dissolved.
What are soda crystals in washing machine?
Soda crystals, also known as washing soda, are alkaline compounds (sodium carbonate) commonly used to soften water, dissolve grease, and deep clean appliances.
In the UK, they’re a staple in traditional cleaning routines and widely used as part of washing machine maintenance with soda crystals.
These crystals are an effective natural washing machine cleaner, helping homeowners avoid harsh chemical alternatives.
They’re not only budget-friendly but also eco-conscious, making them ideal for those wanting to maintain their appliances while reducing their environmental footprint.
How do soda crystals work inside your washing machine?
When dissolved in water, soda crystals react with minerals to soften hard water, which enhances detergent efficiency.
They also break down fatty residues and eliminate odours caused by soap scum and bacteria.
This action descales the washing machine, flushes out detergent build-up, and clears any blockages in the system.
Difference from baking soda:
- Soda crystals (washing soda): High pH (~11), powerful degreaser
- Baking soda: Mild pH (~8.5), deodorizer with gentle cleaning ability
Because of their potency, soda crystals should be used in moderation and with hot water to ensure full dissolution.

Can soda crystals damage washing machine components?
Generally, no. Soda crystals are safe for your machine’s drum, pipes, and seals. They’re non-corrosive and don’t erode materials when used properly.
But using too much too often or not running a hot enough cycle can leave undissolved particles, which may clog the system or affect efficiency.
Modern high-efficiency (HE) machines in the UK often have specific guidelines.
It’s best to consult your user manual or manufacturer’s recommendations before adding anything beyond detergent.
Where to put soda crystals in washing machine?
There are two main spots:
- Drum: Best for deep cleaning—add directly into an empty drum.
- Detergent drawer: Ideal for regular laundry—add a small scoop to boost detergent action and soften water.
For those dealing with a particularly bad build-up or odour, start with a full 500g in the drum followed by a hot wash.
This removes internal residue efficiently and refreshes your machine.

How much soda crystals should you use?
| Purpose |
Amount |
Placement |
| Monthly deep clean |
500g |
Directly in drum |
| Softening laundry |
25g per load |
Detergent drawer |
| Odour removal |
200g |
Drum + hot cycle |
These are approximate values. Always adjust based on your water hardness and washing machine capacity.
When and how often should you use soda crystals?
Depending on your needs, use soda crystals as follows:
- Once a month: Run an empty hot wash (60–90°C) with 500g soda crystals to maintain cleanliness
- Weekly (optional): Add 25g to detergent drawer to soften water and enhance detergent
- Occasionally: Use 200g in the drum when tackling strong odours or noticeable residue
Using soda crystals routinely can prevent build-up and reduce the need for professional cleaning or repairs.
What steps should I follow to clean my washing machine with soda crystals?
Here’s a quick step-by-step guide:
- Add ½ kilograms of soda crystals to the empty drum
- Make sure the machine is set to the hottest cycle (preferably 90°C)
- Run the wash without any laundry
- After the cycle, wipe the rubber door seal and inside the door
- Remain the door open to let it air dry & prevent mould
This process helps remove odours like rotten egg from the washing machine, eliminates grime, and keeps your appliance fresh.
Can using soda crystals improve laundry results and save money?
Yes! Here’s how:
- Softened water: Less detergent needed for effective cleaning
- Odour control: Keeps machine fresh, improving smell of laundry
- Improved efficiency: Takes of soap scum & limescale, enhancing spin performance
In the long term, you’ll use less detergent and experience fewer machine issues—translating to lower maintenance costs and better laundry outcomes.

What if it still smells or shows gunk after using soda crystals?
If odours or residues persist:
- Repeat the cleaning process
- Add 1 cup of white vinegar or citric acid during a second hot wash
- Clean the filter and door seals manually
- Check for hidden buildup behind the detergent drawer
These extra steps can resolve lingering issues, particularly in older machines or those that have never been deep-cleaned.
Are there risks of residue or rough clothes?
Yes, but only with incorrect use. Common mistakes include:
- Overusing soda crystals without sufficient water
- Running cold washes, which may not dissolve crystals fully
- Using in every wash, which can stiffen towels or leave residue on dark clothing
To avoid these problems, always follow dosage guidelines and dissolve crystals properly by running hot cycles.
In cases of extremely hard water, consider pairing soda crystals with a limescale remover or switching to STPP (sodium tripolyphosphate) occasionally.
Conclusion – Should I keep using soda crystals?
Yes—soda crystals are a safe, economical, and eco-friendly way to clean and maintain your washing machine, as long as they’re used properly.
With the right amount and frequency, they can prolong your machine’s life, reduce detergent usage, and improve your laundry results.
Just remember:
- Use hot water for deep cleans
- Follow the dosage for each use
- Clean seals and drawers occasionally by hand
By doing so, you’ll keep your machine in great condition and avoid the worry of whether can soda crystals damage washing machine parts.

by Kanimozhi BV | Jun 24, 2025 | Bathroom, Interior
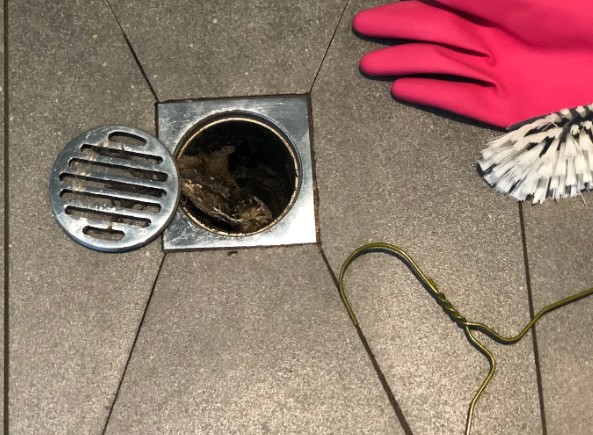
If you’re wondering how to clean a shower drain that can’t be removed, trust me—you’re not alone. I’ve faced this situation myself, and the thought of dealing with a clogged drain without taking it apart can feel overwhelming.
But the good news is, there are practical and effective ways to clean it without dismantling a thing. Here’s exactly what I do.
Why Cleaning a Fixed Shower Drain Is Tricky But Necessary?
What causes a shower drain to clog in the first place?
Over time, hair, soap scum, skin cells, and shampoo residue all build up inside the pipe. This sticky mess clings to the sides and causes slow drainage or complete blockage.
Why can’t I just remove the drain cover?
In many modern UK bathrooms, drain covers are either sealed with silicone or fitted with no easy way to remove them.
Trying to force them off might cause damage to your plumbing or tiles.
What Are The hidden dangers of ignoring a slow drain?
Left untreated, a blocked shower drain can cause:
- Mould and mildew buildup from standing water
- Unpleasant odours
- Water damage from overflow
How Do I Know My Shower Drain Needs Cleaning?
What are the Common signs of a clogged shower drain?
You probably need to clean your drain if:
- Water pools around your feet while showering
- You hear gurgling noises
- There’s a lingering damp, musty smell
Is standing water always a bad sign?
Yes, standing water usually means your drain is partially or completely clogged. It’s one of the most obvious signals that you should act quickly.
What Can I Use to Clean My Shower Drain Without Removing It?
Can natural ingredients like baking soda and vinegar really work?
Absolutely! My best ever method is the combo of baking soda & vinegar. It’s effective for breaking down soap scum and minor hair clogs, and it’s eco-friendly too.
When should I use a chemical drain cleaner?
Chemical cleaners like Mr Muscle or HG Drain Unblocker work for more stubborn clogs.
I use them only as a last choice since they can be harsh on pipes and they might also be harmful to the environment.
Is it safe to use a plunger on a shower drain?
Yes, but only a small cup plunger works well. I create a tight seal over the drain and give a few firm plunges to dislodge the blockage.
Step-by-Step: How to Clean a Shower Drain That Can’t Be Removed?
Here’s my simple, proven method:
Step 1: Remove visible debris and hair
I wear rubber gloves and pull out anything I can see. Sometimes, I will use an old or broken toothbrush or a wire coat hanger bent into a hook ro remove visible debris.

Step 2: Flush the drain with boiling water
A full kettle of hot water poured slowly into the drain, which helps to soften any greasy buildup usualy in kitchen cabinets.
Step 3: Use the baking soda & vinegar method
- Pour ½ cup amount of baking soda into the drain
- Follow with 1 cup of white vinegar
- Let it fizz for 10-15 minutes
- Rinse with more boiling water
These tools are lifesavers for catching deep hair clogs that aren’t visible at the surface.
Step 5: Rinse and monitor the flow
After cleaning, I run the shower to ensure that water flows smoothly.
Table: DIY Shower Drain Cleaning Methods I’ve Used
| Method |
Pros |
Cons |
| Baking Soda + Vinegar |
Safe, eco-friendly, affordable |
Not ideal for tough clogs |
| Boiling Water |
Quick, easy |
May not clear thick hair |
| Drain Cleaner (UK) |
Powerful and fast |
Harsh chemicals, not reusable |
| Drain Stick Tool |
Grabs clogs directly |
Might not reach deeper blockages |
What If My Shower Still Drains Slowly After Cleaning?
Should I call a plumber?
If the water still isn’t draining properly after trying all methods, it might be time to get a professional in.
Some blockages are further down the line than I can reach on my own.
What are some signs of a deeper plumbing issue?
- Gurgling from other drains in the house
- Slow drainage in multiple places
- Water backing up
How do I prevent future blockages? – My Quick Tips to Keep Your Shower Drain Clean
This brings me to some handy tips I now follow religiously.
Use a hair catcher or drain screen
It’s the easiest and most effective way to prevent hair clogs. I clean mine weekly.
Flush with hot water weekly
A weekly rinse with hot water helps prevent grease and soap scum buildup.
Avoid letting soap scum build up
I use a mild bathroom cleaner and scrub the tiles and base weekly.
- Rubber gloves
- Old toothbrush
- Flexible zip-it tool
- Baking soda and vinegar
- Kettle (for boiling water)
- Drain cover screen
What NOT to Do When Cleaning a Shower Drain?
- Don’t pour multiple drain cleaners down at once
- Never prefer using wire or any sharp objects that can scratch your plumbing
- Avoid leaving long hair lying around the drain
Final Thoughts: Keeping My Drain Clear Without Lifting a Thing
Learning how to clean a shower drain that can’t be removed has made my bathroom maintenance much easier. Now that I’ve got a simple routine, I avoid emergencies, unpleasant odours, and costly plumber visits.
With the right tools and eco-friendly methods, I’ve managed to keep everything flowing smoothly—without ever removing the drain cover.
FAQ on How to Clean a Shower Drain That Can’t Be Removed?
1. Can I use a wet/dry vacuum to unclog a shower drain if the cover can’t be removed?
Yes, if sealed properly, a wet/dry vacuum can help pull out minor clogs.
2. Is it okay to use drain cleaning enzymes instead of chemicals or baking soda?
Yes, enzyme cleaners are safe, eco-friendly, and effective for routine use.
3. Will high-pressure water jetting damage a fixed shower drain or tiles?
It can if not done carefully—best to leave it to a professional plumber.
by Kanimozhi BV | Jun 20, 2025 | Bathroom, Interior
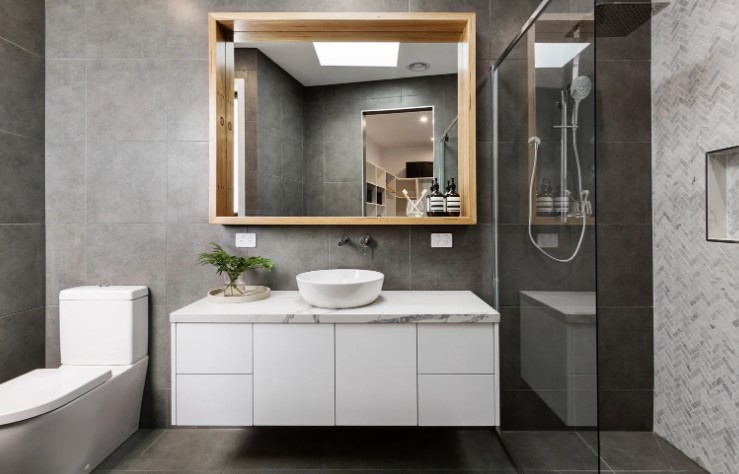
When I began planning my bathroom renovation, the first question that came to mind was: how much do B&Q charge to fit a bathroom? Like many UK homeowners, I wanted a balance between cost, convenience, and quality.
After going through the process with B&Q and researching thoroughly, I’ve put together this practical guide based on my experience and insights from others across the UK.
Understanding B&Q’s Bathroom Fitting Services
What Services Are Included in B&Q Bathroom Installation?
B&Q provides an end-to-end fitting service. This includes removal of the old suite, installation of new fixtures, cost for plumbing and electrics, and even tiling and decorating.
It’s designed for people who want a hands-off experience without hiring multiple tradespeople.
Is B&Q’s Fitting Service Full or Partial?
You have a choice to choose between a full-service package or even a fit-only option. The full package covers design, supply, and installation.
The fit-only service is for customers who already have bathroom products and simply need them installed like laying linoleum flooring. I personally chose the full-service option, as it streamlined the entire process for me.
How Does the Installation Process Work?
It all begins with a free design consultation either online or in-store. Once you’ve selected your bathroom suite and layout, B&Q schedules a home survey.
A tailored quote follows shortly after. If you’re happy with the price, you’ll book an installation date and the work begins.
My entire process, from design to final fitting, took just under four weeks.
So, How Much Do B&Q Charge to Fit a Bathroom?
What’s the Average Cost in the UK?
Bathroom installation prices in the UK typically range from £4,000 to £7,000, depending on size, style, and complexity.
B&Q’s pricing falls within this bracket but can go slightly higher depending on the level of finish.
How Does B&Q Calculate the Cost?
The quote is based on a few major factors: the size of your bathroom, how many fixtures need installing, whether any plumbing or electrical rewiring is required, and your choice of tiles or finishes.
The higher complexity in the project, the higher the cost.
Customer Pricing Examples and Real Quotes
When I researched online forums and spoke with others who used B&Q, the price range varied.
A simple install with minimal tiling cost around £4,500, while more premium makeovers, like walk-in showers or freestanding tubs, pushed the total to £7,500 or more.
Typical B&Q Bathroom Fitting Cost Breakdown
| Component |
Estimated Cost |
| Bathroom suite |
£1,500 – £2,500 |
| Labour & installation |
£2,000 – £3,500 |
| Tiling and flooring |
£600 – £1,000 |
| Plumbing & electrical work |
£800 – £1,200 |
| Removal & disposal |
£200 – £300 |
| Total |
£5,100 – £8,500 |
What Affects the Cost of a B&Q Bathroom Installation?
Does Bathroom Size Really Matter?
Absolutely. A small en-suite will cost less than a huge family bathroom. Fewer fixtures, less tiling, and simpler layouts lead to more affordable quotes.
How Much Do Materials and Fixtures Influence the Cost?
Your choice of fixtures can significantly affect the final price. For example, a basic toilet might cost £100, while a designer unit could be £500+. Similarly, ceramic tiles are cheaper than natural stone.
I opted for mid-range fittings, which kept my costs manageable without compromising on style.
Are There Hidden or Additional Charges?
One thing to watch out for is the cost of extra services. If your plumbing is outdated or you need electrical work like lighting or underfloor heating, these may be billed separately.
My quote included electrical work, but if I’d needed rewiring, that would have added about £500 more.
Is B&Q’s Bathroom Fitting Service Worth the Price?
What Did I Like About B&Q?
The process was smooth and professional. The design service helped me visualise my new bathroom before anything was installed.
And I didn’t have to coordinate with multiple tradespeople — one installer handled everything, and B&Q supported it with a two-year fitting guarantee.
What Are Some Common Drawbacks?
While my experience was mostly positive, I did come across others online who had mixed reviews.
Some mentioned delays in installation, or miscommunications between the design and fitting teams.
It’s something to be aware of and keep in mind during your own renovation.
How Does It Compare to Independent Bathroom Fitters?
In general, B&Q may cost more than hiring local trades directly. Independent installers often quote lower prices, but you’ll need to manage the project yourself.
With B&Q, you’re paying a premium for convenience, accountability, and aftercare.
Can You Save Money with DIY or Partial Installation?
What Can Be Done Yourself?
If you’re confident, there are parts of the project you might take on, like removing the old suite or doing some of the decorating.
I briefly considered this, but I didn’t have the time or tools. I left everything to the professionals, and it saved me the headache.
DIY vs Professional Costs – What’s the Difference?
Choosing to handle parts of the renovation yourself could save around £1,000–£2,000. However, if mistakes happen, you might spend more fixing them.
In my view, unless you’re skilled in plumbing or tiling, it’s better to let experts handle the core installation.
Quick Comparison:
- DIY or partial install: Lower upfront cost, higher risk
- Full professional install: Higher cost, peace of mind

Final Thoughts – Is B&Q Right for Your Bathroom Renovation?
What I Learned from My Experience
Working with B&Q made the entire bathroom upgrade feel more manageable.
The cost was on the higher side, but I knew what I was getting: a professionally installed, guaranteed bathroom from a trusted UK retailer.
Would I Recommend B&Q?
If you value convenience and are okay with spending a little extra for a smoother experience, then yes — B&Q is a solid choice.
But if budget is your priority and you’re comfortable managing a project yourself, it’s worth comparing quotes from local bathroom fitters as well.
In Summary
- B&Q charges anywhere between £5,000 and £8,500 for a full bathroom installation
- Prices depend on bathroom size, fixtures, and labour complexity
- Their full-service model offers convenience, but at a premium
- DIY or independent fitters may be cheaper, but come with more responsibilities
If you’re about to start your own renovation, I hope this guide on how much do b&q charge to fit a bathroom, has helped you get a clear idea of what to expect. Feel free to share your experience or ask me questions — I’d be glad to help!
Related Article: How Much Does Kitchen Fitting Cost?

by Kanimozhi BV | Jun 10, 2025 | Water Heater, Appliances
If you’re anything like me, waking up to a freezing house and a boiler pressure gauge sitting in the red zone is never a good sign.
I’ve had my fair share of boiler issues over the years, and one of the most frustrating problems is when the boiler keeps losing pressure.
Whether it’s a combi boiler or a regular system, pressure loss can point to something small—or something more serious.
Let me walk you through the top reasons I discovered and the fixes that worked for me, along with when it’s time to call in the professionals.
Why Does My Boiler Keep Losing Pressure?
This question had me scratching my head more than once. The pressure in my boiler would stay steady one day, then drop unexpectedly the next.
After trial and error, I found that the causes usually came down to leaks, component failure, or user error.
Understanding Boiler Pressure: Why It Matters?
What is normal boiler pressure?
When the heating is off, the normal boiler pressure should stay between 1.0 & 1.5 bar. When the heating is on, it may increase to 2.0–2.5 bar, which is generally safe.
If the pressure drops below 1.0 bar, that’s a sign the boiler is under-pressurised and may not work properly.

Why does boiler pressure drop over time?
Here are some reasons this can happen:
- Small leaks in the system
- Air released during radiator bleeding
- Worn-out components like the expansion vessel or pressure relief valve
Can a Boiler Lose Pressure Without a Leak?
Yes, it can. I used to assume a leak was the only explanation, but that’s not always true.
Air loss during radiator bleeding, a failing expansion vessel, or an open filling loop can all cause pressure loss without a visible leak.
Common Signs Your Boiler Is Losing Pressure
Do you notice cold radiators or no hot water?
The first clue I had was poor heating performance. Some radiators were completely cold, and there were mornings when the hot water just wouldn’t come through.
Is the boiler pressure gauge frequently in the red zone?
If your gauge keeps dipping into the red, that’s a clear warning. I made a habit of checking it daily during the winter, especially if I noticed any heating inconsistencies.
Top Reasons My Boiler Keeps Losing Pressure
Is there a leak in the system? (Boiler Leak Detection)
Small leaks in the system can go unnoticed for a while. I eventually found a slow drip from a radiator valve under my stairs. Common areas to check:
- Radiators and valves
- Boiler casing
- Visible pipework
Could it be a faulty pressure relief valve?
The pressure relief valve (PRV) is the one that is designed to protect the boiler by releasing excess pressure. But when faulty, it can release water constantly.
I checked the discharge pipe and noticed it was dripping even when the boiler was off.
Is the expansion vessel malfunctioning?
This component helps manage pressure as the water in the system heats and expands.
If it’s faulty, you might notice pressure rises when the system is on and drops sharply when it’s off.
Have I recently bled the radiators?
I bled my radiators one autumn and forgot to check the boiler gauge afterward. The system lost pressure because releasing air also releases a bit of water.
Is the filling loop left open accidentally?
Once, I didn’t close the filling loop properly after topping up. That led to overpressure and the PRV kicking in to release water, causing a cycle of pressure loss.

How I Diagnosed My Boiler’s Pressure Problem?
Checking for visible leaks and damp patches
I started by inspecting all radiators and joints with a torch. If spotting any marks of water or even rust generally pointed to a problem.
Monitoring the boiler pressure gauge
I wrote down pressure readings every morning. If it dropped overnight without use, I knew something was wrong.
Listening for strange boiler noises
Unusual gurgling or banging often meant air in the system or water flow issues, both linked to pressure problems.
How Do I Fix My Boiler That Keeps Losing Pressure?
This is how I managed it safely:
Repressurising my boiler using the filling loop
- Switch off the boiler & let it cool
- Located the filling loop
- Slowly opened the valves until the gauge hit 1.5 bar
- Closed both valves tightly
- Switch the boiler back on and reset it if needed
Steps to check the filling loop

Why Do I Keep Needing to Repressurise My Boiler?
If you’re constantly topping up the pressure, like I was, it usually means:
- There’s a leak somewhere
- A part like the expansion vessel or PRV is failing
- You may have left the filling loop open
In my case, it was a hidden leak under the floorboards combined with a weak PRV.
When to Call a Gas Safe Engineer?
How do I know it’s beyond a DIY fix?
If you find any of these signs, then it is time to call a professional:
- Pressure drops within hours after topping up
- Visible leaks from the boiler itself
- Recurring fault codes or system lockouts
Why regular boiler maintenance matters?
I started getting my boiler serviced annually. It’s cost-effective in the long run and can spot issues before they turn into expensive repairs.
How Often Should the Pressure Drop on a Boiler?
In a well-functioning system, boiler pressure should remain stable for weeks or even months.
Minor fluctuations are normal, but if you’re repressurising every few days or weekly, that signals a deeper problem.

Preventing Future Boiler Pressure Loss
My checklist for keeping boiler pressure stable
- Check the pressure gauge weekly
- Bleed radiators only when necessary
- Shut the filling loop completely after use
- Look out for any signs of leaks
- Book an annual boiler service
Boiler Pressure Issues: Common Fixes at a Glance
| Problem |
Visible Sign |
Can I Fix It? |
Call a Professional? |
| Leak in system |
Water under radiators or pipe joints |
Sometimes |
If leak source is hidden |
| Faulty PRV |
Water from external pipe |
No |
Yes |
| Radiators bled recently |
Air noise & lower pressure |
Yes |
No |
| Faulty expansion vessel |
Pressure rises & drops dramatically |
No |
Yes |
| Filling loop left open |
Pressure constantly fluctuates |
Yes |
Only if unsure |
Conclusion: What I Learned About Boiler Pressure Problems
When my boiler kept losing pressure, I realised it wasn’t something to ignore.
From repressurising the system to identifying hidden leaks, the process taught me a lot. Some problems were easy to fix myself, others needed professional support.
If you’re dealing with low pressure, stay calm, check the basics, and don’t be afraid to get help. A warm, reliable home is worth it.
Related Article: How Long Does It Take to Fit a New Boiler?
FAQs: What I Wanted to Know When My Boiler Lost Pressure
1. Is low boiler pressure dangerous?
It’s not immediately dangerous, but it can prevent your boiler from working and cause strain on the system if left unfixed.
2. Can I use my boiler if the pressure is too low?
Most modern boilers automatically turn off when pressure is too low. I couldn’t even restart mine until I topped it up.
3. How do I stop my combi boiler from losing pressure?
Routine checks and sealing leaks worked for me. Also, avoid frequent use of the filling loop unless necessary.

by Kanimozhi BV | May 14, 2025 | Home & Living
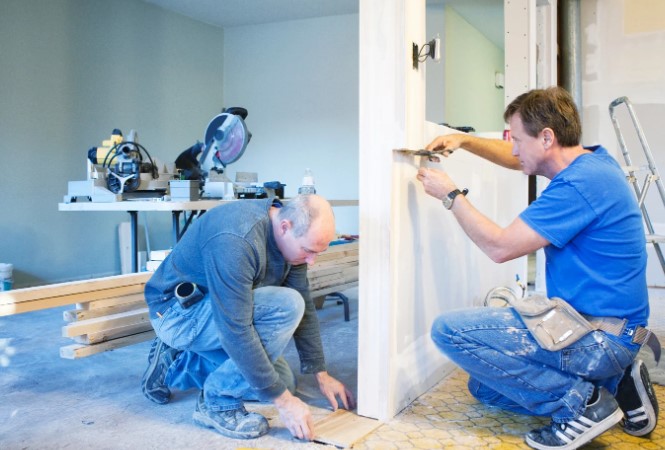
Renovating your home can be thrilling, but it’s often a challenging process with tough decisions and unexpected surprises. Every homeowner knows the anxiety that comes with wondering whether the vision in their mind matches what they’ll see once renovations are complete. This is precisely why 3D architectural visualization and 3D rendering services have become game-changers in home renovation.
With these digital tools, homeowners can visualize their dream spaces long before construction begins, relieving them of anxiety and costly mistakes. If you’ve ever struggled to explain your ideas clearly to a contractor or worried about expensive last-minute changes, these services are here to make your life easier.
The Importance of Accurate Planning in Home Renovations

Let’s face it—excellent renovations don’t happen by accident. They require meticulous planning, clear communication, and precise execution. Skipping proper planning might save time initially, but it always costs more.
This is where accurate visual planning becomes essential. Using professional 3D architectural rendering services, homeowners can see exactly how their spaces will look post-renovation, gaining a sense of control over the process. By previewing realistic representations, it’s possible to pinpoint issues before construction begins, preventing costly adjustments down the road. It’s not just about avoiding mistakes; accurate planning ensures you get the home you envisioned.
Understanding 3D Rendering Services
What exactly do we mean by 3D rendering services? These are detailed digital representations of your home or a specific space created using specialized software. Talented artists at a 3D rendering firm or a dedicated 3D visualization studio combine exact measurements with textures, lighting, and realistic materials to create lifelike visualizations.
You can virtually walk through your future living room, kitchen, or bathroom and experience the completed design before a single hammer hits a nail. It’s like getting a glimpse into the future of your home, eliminating guesswork and uncertainty.
How 3D Rendering Works
Creating a realistic 3D render involves several detailed steps. Initially, the team from your chosen 3D architectural visualization company will collect precise dimensions and images of your existing home. Designers then use specialized software like 3ds Max, SketchUp, or Blender to build an accurate digital model. Next, they apply textures, colors, furniture, and lighting effects to mimic reality closely.
The final step involves sophisticated rendering algorithms to produce stunning images or animations, providing a photo-realistic preview of your upgraded home. It’s a fascinating blend of technology, creativity, and meticulous detail.
Benefits of 3D Rendering in Home Renovations
The benefits of using 3D render services are immediate and impactful. You can experiment with various designs, materials, and color schemes without any physical changes, saving time and money.

This approach gives homeowners confidence, as they clearly understand the outcome, drastically reducing anxiety and uncertainty. Moreover, these visualizations significantly enhance the accuracy of estimates provided by contractors, helping you manage your budget effectively.
Enhancing Communication with Contractors
Have you ever felt frustrated explaining your renovation ideas to a contractor? Miscommunication can lead to delays, unexpected costs, and disappointing results. Thankfully, 3D rendering services create a clear visual language that both homeowners and contractors can understand easily.
Instead of vague descriptions, you can provide a precise visual reference. This visual clarity bridges communication gaps ensure everyone is aligned, and greatly enhances collaboration between you and your renovation team.
Streamlining the Decision-Making Process
Decision fatigue during renovations is real. With endless choices—tiles, flooring, colors, lighting—homeowners often become overwhelmed. Thankfully, 3D visualizations simplify this process, providing relief from decision fatigue.
Presenting various options clearly and visually, these renderings help you see the effects of different decisions instantly. This clarity speeds up decision-making, removes doubts, and allows you to confidently finalize choices without second-guessing yourself later.
Cost-Effectiveness of 3D Rendering Services
While hiring a professional 3D rendering agency costs money, it’s an investment rather than an expense. By pinpointing potential issues beforehand, homeowners avoid costly last-minute alterations. Clear visualizations help prevent material wastage, reduce labor costs, and eliminate expensive mid-project changes. Thus, using 3D visualization services translates into significant long-term savings, making it an economically wise choice.
Case Study: A Successful Renovation Using 3D Rendering
Take, for example, a family planning a significant kitchen renovation. Initially uncertain about layout choices, materials, and overall aesthetics, they hired a reputable 3D rendering company. The digital renderings allowed them to experiment with several layouts, cabinetry designs, and lighting plans.
After reviewing these realistic visualizations, the family confidently selected an open layout, modern cabinets, and specific fixtures, knowing exactly how their new kitchen would look. The renovation proceeded smoothly, finished on time, within budget, and precisely matched the visualized designs. This scenario perfectly highlights how effective 3D rendering can ensure successful home upgrades.
Choosing the Right 3D Rendering Service
When selecting your 3D rendering partner, consider experience, reputation, and clarity in communication. Review their portfolio carefully to ensure their style matches your vision. Also, discuss their software expertise, turnaround times, and pricing transparency. The right partner will actively collaborate with you, bringing your ideas to life with precision and enthusiasm, ensuring your renovation is a complete success.
Tips for Maximizing the Value of 3D Rendering
- Communicate Clearly: Share detailed ideas, inspirations, and concerns openly.
- Set a Realistic Budget: Clearly outline budget constraints from the start.
- Review Iteratively: Provide feedback regularly to fine-tune visualizations.
- Consider Future Needs: Plan for long-term practicality alongside immediate needs.
- Validate with Professionals: Ensure contractors review renderings for feasibility.
Conclusion
Using 3D rendering services in home renovation projects transforms uncertainty into clarity. Whether working with a dedicated 3D visualization studio or opting for specialized 3D architectural rendering services, these tools provide confidence, streamline processes, and save money.
From enhanced communication to better budgeting, incorporating these visualizations makes home renovations brighter, smoother, and more successful. If you’re considering upgrading your home, it’s time to experience firsthand the transformative impact of professional 3D rendering services.
