
by Kanimozhi BV | Jul 26, 2024 | Kitchen, DIY Ideas, Interior
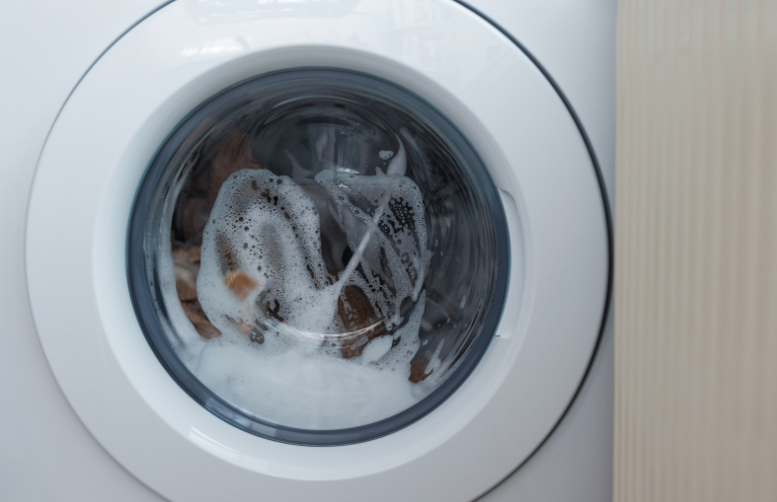
A burned smell floating around in a house is rather unpleasant and often hard to get rid of. Whether from a cooking mishap, a forgotten candle, or even an electrical malfunction, this smell seems to get everywhere in your home. This blog post aims to give practical DIY ways of removing foul odors and returning freshness back into your space.
What Might Cause Burnt Smells in the House?
Burnt odors can originate from anything, be it cooking mishaps, electrical issues, cigarette smoke, or even forgotten candles and fireplace residues. Knowing where the smell is coming from is a very important step in effectively eliminating the smell.

How to Get Rid of Burnt Smell in House? – DIY Ideas
1. Air Out the Space
The easiest and most instant way to start getting rid of a smell of burning is by airing out the space. Open all windows and doors to air your home good. If possible, create a cross-breeze by opening windows on opposite sides of a room. This helps to move the air more, therefore pushing some of that stale, burnt air back outside faster. Ceiling fans, box fans, and even just the fan setting on your HVAC system all help move the air around more.
2. Vinegar
Vinegar is a great, natural deodorizer. For this method:
- Place bowls of vinegar around the house. The vinegar absorbs the smell of burning over time.
- Make a mixture of water and vinegar boil on the stove for about 15 minutes. The steam produced helps in neutralizing odors in the kitchen and areas surrounding it.
3. Baking Soda to the Rescue
Baking soda is known to be a good absorber of smells, which can be utilized in several ways:
- Sprinkle on carpets, upholstery, and any other surface the smell rests on. Leave it on throughout the night so that it could absorb all the smells, then vacuum very well the following day.
- Place open boxes in varied rooms, much the same as you do in your refrigerator to keep the pungent smells at bay.
4. Activated Charcoal
Due to the porous nature of the activated charcoal, it becomes an excellent absorber of odors. Here is how you can use it:
- Put some activated charcoal in any storage units or just in bags and place it around the areas with the smell of burning. Let it be there for some days so that it gets time to actually absorb the smell of burning.
- You can also make use of charcoal air purifying bags, which are at your service in handy forms and are reusable.
5. Coffee Grounds
The coffee grounds not only absorb other odors but also leave a fresh, pleasant smell inside the rooms. Here is how to use them:
- Place dry coffee grounds in shallow bowls and place them in the house.
- Make small sachets of coffee grounds and hang them in different places for the absorption of odors continuously.

6. Essential Oils
Essential oils can do a good job of covering the odor and fragrance in a house. Here are some ways you can use them:
- Mix them with water in a spray bottle, and voila—you have your very own homemade air freshener. Spray it liberally all over the house where you have a pungent odor.
- Use an essential oil diffuser, which releases the fragrance into the room. Common scents include lavender, eucalyptus, and lemon.
7. Lemon and Salt Scrub
This is a nice scrub capable of cleaning and deodorizing many surfaces. Mix lemon juice with salt to form a paste. Scrub surfaces like countertops and sinks with the paste, and the abrasive nature of salt, mixed with the fresh scent of lemon, will help to dispel odors.
8. Professional Cleaning Products
Sometimes, these DIY methods are not enough, and it becomes necessary to use professional products:
- Select commercial odor removers specifically for smoke and burned odors. These are easily found in grocery stores or home improvement stores.
- Follow the instructions of the manufacturer to achieve the best possible outcome and safety measures.
9. Houseplants for Natural Air Purification
Houseplants do not simply make your house look beautiful; they also contribute much to air quality by absorbing odors and various toxins from the atmosphere. Such plants include:
- Spider plant (Chlorophytum comosum)
- Peace lily (Spathiphyllum)
- Aloe vera
Place these plants in your home to act as natural air purifiers.
10. Homemade Potpourri
Potpourri provides an ongoing fragrance in your home and can also cover up malodorous smells:
- Combine dried flowers, herbs, and spices to make the potpourri. Ingredients that you can use include rose petals, lavender, cinnamon sticks, and cloves.
- Place the potpourri in small decorative bowls around your home. Place it in areas of your home that are the smelliest.
Conclusion
Keep away these odors of burning to maintain a welcoming feel at home. In this article, we bring to you some homemade remedies to remove the stench and keep your house smelling fresher and cleaner. Ensure that you often invite some fresh air into your abode and use natural deodorizers to avoid unwanted smells. Only a minimum amount of work with the right strategies can help, and your home can always be fragrant.
Related Article: How to remove burnt smell from microwave oven?

Frequently Asked Questions
How much time does it take for the smell to go away from the burning?
The time may vary. Immediate ones like ventilation and vinegar exhibit results within a few hours. The absorption ones like baking soda and activated charcoal will take a day or two.
Are these safe with pets and children?
Most of these methods are safe, but always keep the essential oils well away from pets as they may be hypersensitive. Apart from that, ensure that activated charcoal and coffee grounds remain out of reach for children and pets.
What if the smell of burning persists?
If, with the help of the above-mentioned DIY methods, the smell is still not completely sucked out of the house, then it might be time to get professional cleaning help for deep-cleaning solutions and more potent odor-removal techniques.
by Kanimozhi BV | Jul 25, 2024 | Washing Machine, Appliances
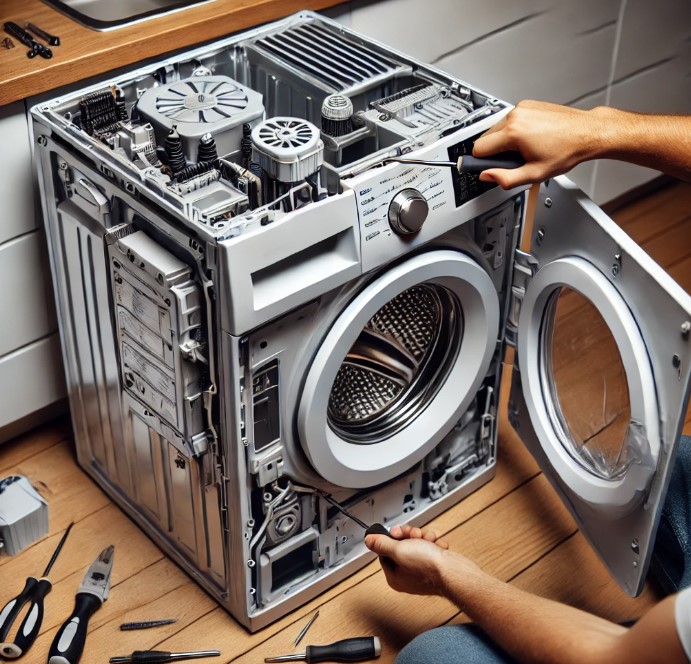
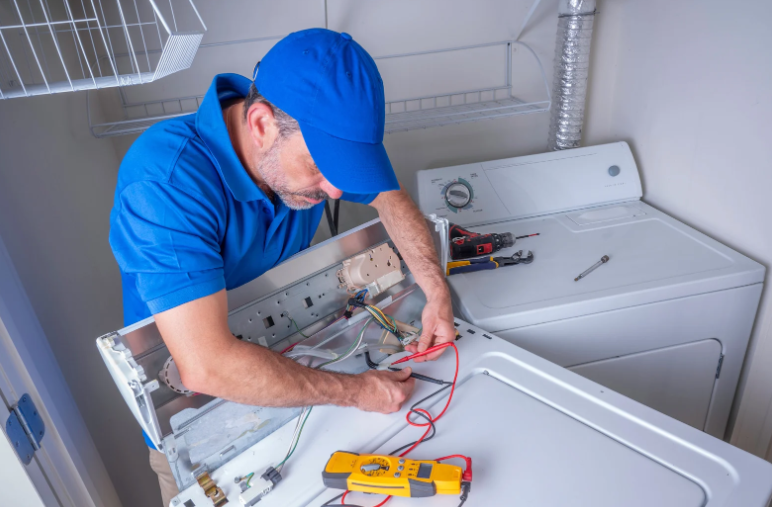
Are you searching for how to remove the drum from a washing machine? Removing the drum from a washing machine is a task that might seem daunting, but with the right guidance, it can be accomplished effectively and safely. Whether you need to replace worn-out bearings, remove foreign objects, or simply conduct maintenance, understanding the proper steps is crucial. This guide will walk you through the entire process, ensuring you can tackle this repair confidently.
Why Might You Need to Remove the Drum?
What are the Common Reasons for Drum Removal?
There are several scenarios where removing the washing machine drum becomes necessary:
- Replacing Worn-Out Bearings: Over time, the bearings that allow the drum to spin smoothly can wear out, causing noise and inefficiency. Replacing these bearings often requires drum removal.
- Removing Foreign Objects: Items such as coins, buttons, or small garments can sometimes get trapped between the drum and the tub. Removing the drum helps retrieve these objects.
- Fixing a Damaged Drum: Physical damage to the drum, like dents or cracks, can affect the machine’s performance and may need replacement or repair.
- Regular Maintenance and Cleaning: Periodically removing the drum allows for thorough cleaning, which can prevent mold and buildup from affecting your laundry.

Before starting the drum removal process, gather the following tools and materials:
- Screwdrivers (Phillips and flathead): For removing various screws.
- Wrenches: To loosen and tighten bolts.
- Pliers: Useful for gripping and pulling.
- Socket Set: For bolts that require a socket wrench.
- Rubber Mallet: To gently tap and dislodge parts without causing damage.
- Towels or Rags: To clean up any water or debris.
- Safety Gloves: To protect your hands during the complete process.
- User Manual: Specific to your washing machine model for reference.
How to Prepare Your Washing Machine?
What are the Safety Precautions?
- Unplug the Machine: Disconnect the washing machine from the electrical outlet to avoid any risk of electric shock.
- Turn Off the Water Supply: Shut off the water valves to prevent any water from flowing into the machine.
- Drain Any Remaining Water: Open the drain pump filter and let any remaining water drain out completely.
How to Position the Machine?
- Move the Machine: Shift the washing machine to an open workspace where you have ample room to maneuver and place the removed parts.
- Secure the Machine: Ensure the washing machine is stable and will not tip over during the disassembly process.
What are the Step-by-Step Process to Remove the Drum?
Step 1: Remove the Top and Back Panels
- Locate Screws: Using a screwdriver, locate and remove the screws holding the top panel in place.
- Detach the Top Panel: Lift the top panel off carefully and set it aside.
- Remove Back Panel Screws: Similarly, unscrew the back panel and remove it to access the internal components.
Step 2: Disconnect the Electrical Components

- Identify Connections: Carefully identify and label all electrical connections to ensure correct reassembly.
- Disconnect Wires: Gently unplug the wires and harnesses connected to the control panel and other components.
Step 3: Detach the Detergent Dispenser & the Control Panel
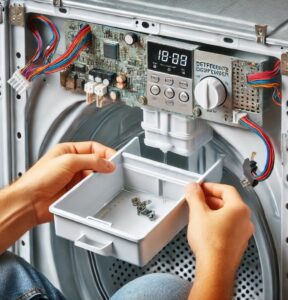
- Take Out the Detergent Tray: Slide out the detergent dispenser tray and remove any screws or clips holding it in place.
- Detach Control Panel: Unscrew and unclip the control panel, carefully setting it aside without damaging the wires.
Step 4: Detach the Door Seal and Front Panel
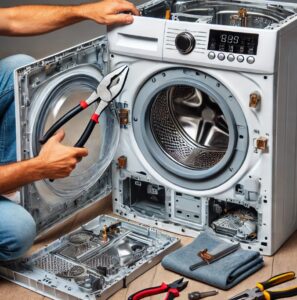
- Remove Door Seal Clamp: Using pliers, remove the clamp holding the door seal to the front panel.
- Take Off Front Panel: Unscrew and detach the front panel, lifting it away to expose the drum.
Step 5: Disconnect the Drum from the Housing

- Remove Drum Support Brackets: Locate and unscrew the brackets supporting the drum.
- Unhook Suspension Springs: Carefully unhook the suspension springs that hold the drum in place.
- Detach Shock Absorbers: Unscrew the shock absorbers connected to the drum.

- Lift the Drum: Carefully lift and maneuver the drum out of the washing machine housing. This may require some wiggling to free it completely.
- Handle with Care: Ensure you handle the drum gently to avoid any damage during removal.
How to Inspect and Maintain the Drum?
Inspecting for Damage
- Check for Cracks or Wear: Examine the drum for any signs of physical damage or wear.
- Assess Bearings: Spin the drum by hand to check the bearings. Any grinding or resistance indicates they need replacement.

Cleaning and Maintenance Tips
- Remove Lint and Debris: Use a brush or vacuum to remove any lint or debris from the drum.
- Use Cleaning Agents: Clean the drum thoroughly with a mild detergent or a mixture of vinegar and water to remove any mold or buildup.
How to Reassemble Your Washing Machine?
What are the Reassembly Steps After Removing the Drum?
- Reconnect Electrical Components: Carefully reconnect all wires and harnesses, referring to the labels made during disassembly.
- Reattach Front and Top Panels: Secure the front and top panels back in place with screws.
- Secure the Drum: Reconnect the drum’s suspension springs, shock absorbers, and support brackets.
How to Test the Machine After Reassemble?
- Run a Test Cycle: Plug in the washing machine and turn on the water supply. Run a short test cycle to ensure everything is functioning correctly.
- Check for Leaks and Noises: Observe the machine during the test cycle to check for any unusual noises or leaks.
Conclusion
Removing and maintaining the drum in your washing machine is essential for its longevity and performance. By following this step-by-step guide, you can confidently tackle the task, ensuring your machine continues to operate efficiently. Regular maintenance not only extends the life of your washing machine but also ensures your laundry is consistently clean and fresh.
What are the Drum Removal and Maintenance Checklist?
| Task |
Frequency |
Tools Needed |
| Safety Preparation |
Before starting |
Gloves, towels, rags |
| Removing Top and Back Panels |
Once, during repair |
Screwdrivers |
| Disconnecting Electrical Components |
Once, during repair |
Pliers, wrenches |
| Drum Extraction |
Once, during repair |
Rubber mallet, socket set |
| Drum Inspection |
Annually |
Visual inspection, hand spinning |
| Cleaning Drum |
Annually |
Vinegar, detergent |
| Reassembling Machine |
Once, during repair |
Screwdrivers, socket set |
| Test Cycle |
After reassembly |
Water supply, power connection |
By adhering to these guidelines on how to remove the drum from a washing machine, you can maintain your washing machine in top condition, ensuring it serves you well for years to come.
Related Article: How to Remove Agitator From Washing Machine?
Frequently Asked Questions
1. Can I Remove the Drum Myself, or Should I Hire a Professional?
Removing the drum yourself is feasible if you are comfortable with basic tools and have a good understanding of the steps involved. However, if you feel uncertain, it’s always best to consult a professional.
2. How Often Should I Check the Drum for Maintenance?
Regular checks every few months can help you catch any issues early. Thorough cleaning and inspection should be done at least once a year.
3. What Are the Signs That My Washing Machine Drum Needs Attention?
Common signs include unusual noises during operation, visible damage or wear on the drum, and clothes not coming out as clean as they should be.
by Kanimozhi BV | Jul 25, 2024 | Washing Machine, Appliances
Keeping your washing machine fresh and efficient means paying attention to one often-overlooked part — the rubber seal.
In this guide, I’ll show you how to clean washing machine seal and tackle that nasty mold buildup that can make your laundry smell musty.
Let’s dive into the exact steps I take to keep my washer clean, hygienic, and in top condition.
Why Does Mold Develop on Washing Machine Seals?
If you’ve noticed black spots or unpleasant smells around the door of your washing machine, the rubber seal is probably harbouring mould.
Front-loading machines are especially prone to this problem. The seal traps moisture, detergent residue, and even fabric softener — the perfect breeding ground for mildew and mould.
What Are the Signs of Mold in Your Washing Machine?
Wondering whether your washing machine seal needs attention? Here are the red flags I usually spot:
- A musty or damp smell inside the drum
- Visible black or grey mould spots on the rubber gasket
- Clothes smelling funky after a wash
- Slimy or sticky texture when touching the seal
If any of these sound familiar, it’s time to give that seal a thorough clean.
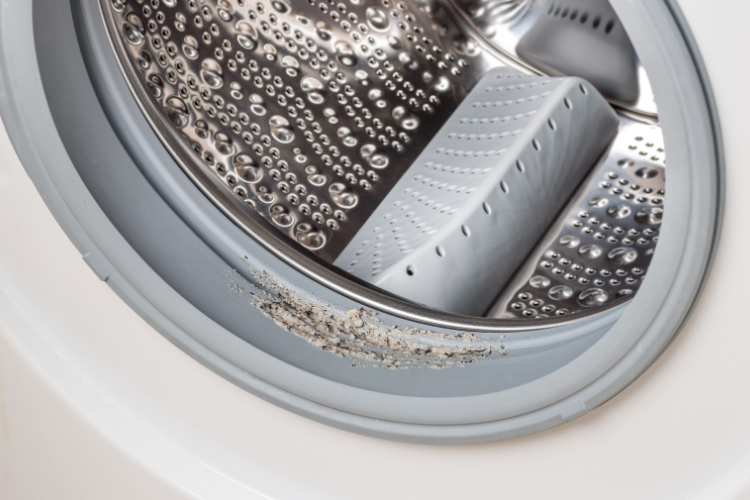
What Causes a Washing Machine Door Seal to Go Black?
Black discolouration is often caused by:
- Mould and mildew growth
- Soap scum and detergent residue
- Hard water mineral deposits
- Lack of air circulation
Over time, these things turn your door seal black and slimy. Regular cleaning prevents this.
How to Prepare for Cleaning the Washing Machine Seal?
Before I start, I always gather the right tools and ingredients. Here’s my go-to list:
- White vinegar or a commercial mildew remover
- Baking soda
- Microfibre cloths
- Soft-bristled brush (an old toothbrush works too)
- Rubber gloves
- Warm water
I also make sure the washing machine is empty and unplugged for safety.
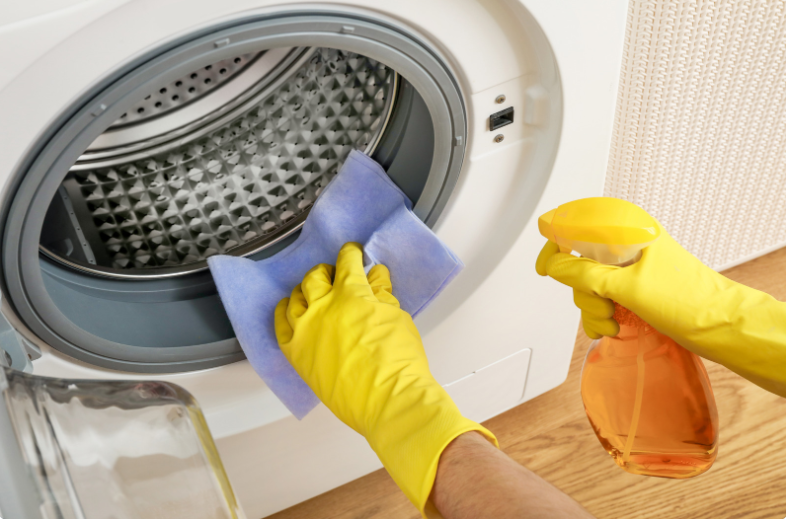
How to Clean Washing Machine Seal?
Step 1: Wipe Away Loose Dirt
I begin by pulling back the rubber seal gently and wiping away any lint, hair, or trapped detergent using a damp cloth.
Step 2: Apply a Cleaning Solution
Next, I mix equal parts white vinegar and warm water. This natural solution works wonders for breaking down grime and killing mould spores. I soak a cloth in the mix and press it against mouldy areas.
Alternatively, for tougher mould, I use a washing machine-safe mildew remover spray.
Step 3: Scrub the Seal
With an old toothbrush or a soft brush, I scrub all the folds and crevices of the seal. It’s where most of the mould hides, so I take my time to get into every corner.
Step 4: Rinse and Dry
After scrubbing, I use a clean cloth to rinse the area with fresh water, then wipe everything dry. This is crucial — moisture is what started the problem in the first place.
How to Perform a Maintenance Wash?
Once I’ve cleaned the seal, I like to give the whole machine a deep refresh.
| Step |
What I Use |
Purpose |
| Add to Drum of the Machine |
2 tablespoons baking soda |
Neutralises smells |
| Add to Drawer of the Machine |
2 cups white vinegar |
Breaks down residue |
| Set Cycle |
Hottest & longest cycle |
Cleans the internal system |
Running this cycle clears out any lingering mould, detergent build-up, or odours.
What Are Alternative Methods for Removing Stubborn Mold?
Sometimes, regular cleaning isn’t enough. Here are a few other things I’ve tried:
How To Use Bleach To Clean Washing Machine Seal?
If natural cleaners don’t cut it, I mix one part bleach with four parts water, apply it carefully with a cloth, and rinse thoroughly.
It’s effective, but I avoid using bleach too often as it can degrade the rubber.
How To Use Baking Soda Paste To Clean Washing Machine Seal?
I make a thick paste of baking soda and water, apply it directly to mouldy areas, leave it for 10–15 minutes, then scrub and rinse.
It’s great for spot treatment.

How to Prevent Mold Growth on Washing Machine Seals?
Prevention is much easier than constant cleaning. Here’s what I do after every wash:
- Wipe the seal dry after each cycle
- Leave the door ajar to let the drum air out
- Use the right amount of detergent — too much creates excess suds and residue
- Clean the seal monthly as part of my appliance care routine
What Is the Grey Sludge in My Washing Machine Seal?
That grey sludge is usually a combination of:
- Detergent build-up
- Fabric softener residue
- Skin oils and dirt from clothes
- Mould and bacteria
It collects in the folds of the seal. I clean it out monthly to avoid bad smells and keep the machine hygienic.
Conclusion
Now that you know how to clean washing machine seal, you can say goodbye to mouldy smells and hello to fresh laundry.
A little effort goes a long way. Regular maintenance keeps your washer running smoothly and your clothes smelling clean.
So, next time you notice that rubber seal looking a bit grimy, follow this guide — your washing machine (and wardrobe) will thank you!
FAQs on How to Clean Washing Machine Seal
1. How often should I clean my washing machine seal?
I clean mine once a month. If you wash heavily soiled clothes or notice smells, you might want to do it more often.
2. Can I use bleach to clean the rubber seal?
Yes, but sparingly. Always dilute it and rinse thoroughly to protect the rubber.
3. What causes black mould on the seal?
Moisture, leftover detergent, and lack of ventilation cause black mould to form inside the seal folds.
4. Is vinegar safe for cleaning washing machine seals?
Absolutely. I use it all the time — it’s a natural mould killer and deodoriser.
5. Why does my machine still smell after cleaning the seal?
The issue may be deeper in the drum or drain. Try a maintenance wash and clean the detergent drawer too.

by Kanimozhi BV | Jul 25, 2024 | Fencing, Exterior
Are you looking for a cheap way to extend fence height? In creating a private and secure outdoor space, fence height plays a vital role. Whether you want to keep prying eyes away, add an extra layer of security, or simply improve the aesthetics of your garden, extending the height of your fence can be a great solution. In this guide, I’ll share several budget-friendly methods to extend your fence height effectively.
Why Extend Your Fence Height?
Privacy Concerns
Keeping Prying Eyes Away: One of the primary reasons for extending fence height is to enhance privacy. A taller fence creates a barrier that helps keep nosy neighbors and passersby from peeking into your garden.
Creating a Private Outdoor Space: Extending your fence height can help create a secluded sanctuary in your garden where you can relax without feeling exposed.
Security Reasons
Deter Potential Intruders: A higher fence is a deterrent to potential intruders. It makes your property less accessible and more challenging to climb over.
Keeping Pets and Children Safe: If you have pets or small children, a taller fence can prevent them from wandering off or encountering dangers outside your property.
Aesthetic Improvement
Enhancing the Look of Your Garden: Extending your fence can also be an aesthetic choice. It allows you to add decorative elements and greenery, enhancing the overall look of your garden.
Adding Value to Your Property: A well-maintained and attractive fence can add value to your home, making it more appealing to potential buyers.
To extend your fence height, you’ll need some essential tools:
- Measuring Tape: For accurate measurements.
- Saw: To cut wood or other materials.
- Hammer and Nails: Basic tools for attaching new sections.
- Drill: For creating holes and driving screws.
- Screws: For secure attachments.
Common Materials
Depending on the method you choose, you’ll need various materials:
- Wooden Planks: Durable and versatile for height extension.
- Lattice Panels: Decorative and functional for adding height.
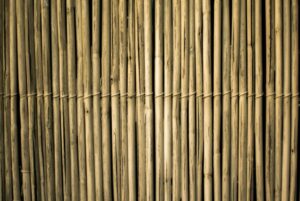
- Bamboo or Reed Rolls: Natural and affordable options.
- Fence Post Extensions: To add height to existing posts.
- Cable Ties: For securing materials in place.
Simple and Cheap Ways to Extend Fence Height
Using Wooden Planks
Step-by-Step Guide to Attaching Additional Planks:
- Measure and Cut: Measure the height you want to add and cut the wooden planks accordingly.
- Attach to Existing Fence: Use screws to attach the planks to the existing fence posts.
- Secure the Top: Ensure the top of the extension is level and secure.
Benefits of Using Wood: Wood is durable, easy to work with, and can be painted or stained to match your existing fence.

Installing Lattice Panels
How to Securely Fix Lattice Panels on Existing Fences:
- Measure and Cut: Measure the width and height needed and cut the lattice panels to size.
- Attach with Screws: Secure the panels to the top of your existing fence using screws.
- Reinforce with Posts: If necessary, add additional posts for extra support.
Decorative and Functional Advantages: Lattice panels are attractive and allow light and air to pass through while providing extra height.
Adding Bamboo or Reed Rolls
Instructions for Attaching Bamboo Rolls:
- Unroll and Measure: Unroll the bamboo or reed roll and measure the required length.
- Attach with Cable Ties: Use cable ties or garden wire to attach the roll to your existing fence.
- Secure the Bottom and Top: Ensure the roll is secured tightly at both the bottom and top.
Natural Look and Privacy Enhancement: Bamboo and reed rolls provide a natural, rustic look and are excellent for adding privacy.
Fence Post Extensions
Easy Installation of Post Extensions:
- Select Extensions: Choose extensions that match your existing fence posts.
- Attach with Screws or Bolts: Secure the extensions to the top of your existing posts using screws or bolts.
- Add New Panels: Attach additional fence panels or materials to the extended posts.
Strength and Stability Considerations: Post extensions provide a sturdy foundation for adding height, ensuring the fence remains stable.
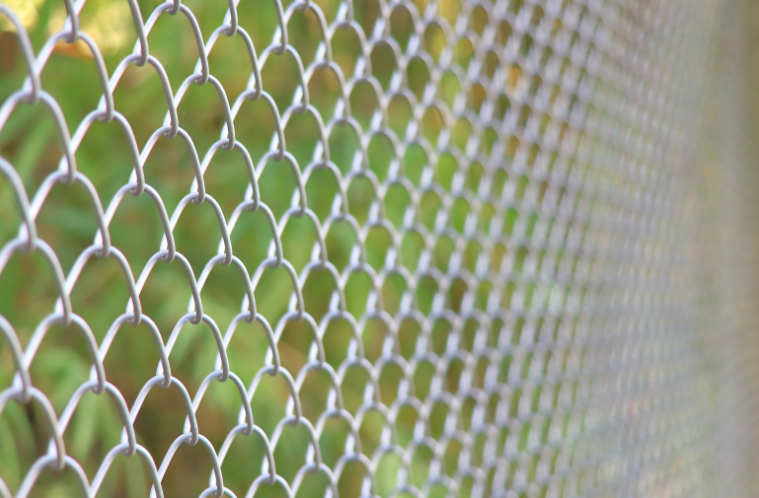
Using Mesh or Wire Fencing
Attaching Mesh or Wire for a Cost-Effective Solution:
- Measure and Cut: Cut the mesh or wire fencing to the desired height.
- Secure to Fence: Attach the mesh or wire to the existing fence using cable ties or staples.
- Ensure Durability: Make sure the mesh is tightly secured to withstand weather and wind.
Tips for Ensuring Durability: Choose galvanized or coated wire to prevent rust and prolong the life of your fence extension.
Creative Ideas for Fence Extension
Vertical Garden Fence
Integrating Plants into Your Fence Extension:
- Attach Planters: Secure planters or pots to the fence extension.
- Choose Suitable Plants: Select climbing plants or trailing vines that will grow upwards.
- Regular Maintenance: Water and prune the plants regularly to keep them healthy.
Benefits for Privacy and Aesthetics: A vertical garden adds greenery and privacy, creating a beautiful, living fence.
Hanging Planters
How to Use Hanging Planters to Increase Fence Height:
- Install Hooks: Attach hooks or brackets to the top of your fence.
- Hang Planters: Hang the planters from the hooks, varying the heights for a layered look.
- Select Plants: Use a mix of flowering and foliage plants for visual interest.
Creating a Green and Lively Fence: Hanging planters add color and life to your fence, enhancing your garden’s appeal.
Decorative Screens
Using Decorative Screens for Added Height:
- Choose Screens: Select decorative screens made of materials like metal, wood, or PVC.
- Attach to Fence: Secure the screens to your existing fence using screws or brackets.
- Ensure Stability: Reinforce with additional posts if necessary.
Combining Functionality with Beauty: Decorative screens not only add height but also enhance the aesthetic appeal of your fence.
Maintenance and Care for Extended Fences
Regular Inspection
Checking for Stability and Wear:
- Inspect Regularly: Check the fence extension for any signs of wear, damage, or instability.
- Tighten Loose Screws: Ensure all screws and attachments are secure.
Addressing Issues Promptly: Fix any problems immediately to prevent further damage and maintain the fence’s integrity.
Weatherproofing Tips
Using Sealants and Paints to Protect Materials:
- Apply Sealant: Use a weatherproof sealant on wooden extensions to protect against moisture.
- Paint or Stain: Apply a coat of paint or stain to wooden materials to prevent rot and enhance appearance.
Ensuring Longevity of the Fence Extension: Regular weatherproofing helps extend the life of your fence extension.

Cleaning and Upkeep
Keeping the Fence Clean and Free of Debris:
- Regular Cleaning: Clean the fence periodically to remove dirt and debris.
- Remove Plant Growth: Trim any overgrown plants or vines that could damage the fence.
Seasonal Maintenance Tips: Perform thorough inspections and maintenance at the change of each season to keep your fence in top condition.
Conclusion
Extending the height of your fence can enhance your privacy, security, and the overall look of your garden without breaking the bank. With a variety of budget-friendly options available, you can easily find a method that suits your needs and style. Remember to regularly maintain and inspect your extended fence to ensure it remains in good condition. Happy fencing!
Fence Extension Methods and Costs
| Method |
Materials Needed |
Estimated Cost |
Difficulty Level |
| Wooden Planks |
Wooden planks, screws, saw |
Moderate (£20-£50) |
Moderate |
| Lattice Panels |
Lattice panels, screws, drill |
Moderate (£30-£70) |
Easy |
| Bamboo or Reed Rolls |
Bamboo rolls, cable ties |
Low (£10-£30) |
Easy |
| Fence Post Extensions |
Post extensions, screws, drill |
Moderate (£20-£60) |
Moderate |
| Mesh or Wire Fencing |
Mesh fencing, cable ties |
Low (£10-£40) |
Easy |
| Vertical Garden Fence |
Planters, hooks, climbing plants |
Variable (£20-£100+) |
Moderate |
| Hanging Planters |
Planters, hooks, various plants |
Low to Moderate (£15-£50) |
Easy |
| Decorative Screens |
Screens, screws, brackets |
Variable (£30-£100+) |
Moderate |
By following these guidelines, you can effectively extend your fence height in a cost-effective manner, enhancing both the privacy and aesthetic appeal of your garden.
Frequently Asked Questions
1. Is It Legal to Extend My Fence Height?
Understanding Local Regulations: Before extending your fence, check local regulations and homeowners’ association rules to ensure you comply with height restrictions and other requirements.
2. How Much Does It Cost to Extend a Fence?
Budget Considerations and Cost Breakdown: The cost depends on the materials and methods used. Simple extensions like bamboo rolls or mesh fencing are usually cheaper, while more elaborate solutions like wooden planks or decorative screens may cost more.
3. Can I Extend a Fence on My Own?
DIY Feasibility and When to Hire a Professional: Many fence extensions can be done as DIY projects with basic tools. However, if the job seems too complex or if you’re unsure, hiring a professional may be the best option.

by Kanimozhi BV | Jul 25, 2024 | Fencing, DIY Ideas, Exterior
As a dog owner and garden enthusiast, I know firsthand how challenging it can be to keep our furry friends out of the garden. Dogs love to dig, chew, and explore, which can wreak havoc on your carefully planted flowers and vegetables. Thankfully, there are several cost-effective fencing solutions that can help keep dogs out of your garden without breaking the bank. In this guide, I’ll share ten DIY ideas that are both budget-friendly and easy to implement.
Why Do You Need to Keep Dogs Out of the Garden?

Protecting Plants and Flowers
Preventing Digging and Trampling: Dogs have a natural instinct to dig and explore. This can lead to uprooted plants, disturbed soil, and a generally messy garden. By installing a fence, you can protect your plants from being dug up or trampled.
Keeping Plants Safe from Being Chewed On: Many dogs like to chew on plants, which can damage or even kill them. Certain plants can also be toxic to dogs, making it crucial to keep them separate.
Maintaining Garden Aesthetics
Avoiding Damage to Garden Layout: A well-maintained garden takes a lot of effort, and it’s disheartening to see all that hard work go to waste because of a playful dog. Fencing helps preserve the structure and beauty of your garden.
Preserving the Beauty of the Garden: Consistent digging and running can damage the visual appeal of your garden. A fence ensures that your flowers, shrubs, and vegetable beds remain intact and beautiful.
Ensuring Dog Safety
Preventing Dogs from Ingesting Harmful Plants: Some garden plants can be toxic to dogs if ingested. A fence keeps your pets away from these hazards.
Keeping Dogs Away from Garden Tools and Chemicals: Gardening tools and chemicals can pose significant risks to dogs. By fencing off your garden, you can prevent accidental injuries and poisoning.

Before starting any fencing project, gather the following tools:
- Measuring Tape: For accurate measurements to ensure a well-fitted fence.
- Hammer and Nails: Basic tools for assembling wooden fences.
- Screwdriver: Essential for attaching screws and securing panels.
- Wire Cutters: Necessary for cutting chicken wire or mesh fencing.
- Shovel: For digging holes to place stakes or posts.
Common Materials
Depending on the fencing method you choose, you will need:
- Wooden Stakes: Provide support for various types of fencing.
- Chicken Wire: A versatile and affordable option for dog-proof fencing.
- Plastic Mesh: Durable and weather-resistant, suitable for a temporary solution.
- Picket Fence Panels: For a more decorative and permanent solution.
- Bamboo or Reed Fencing: Natural and eco-friendly, blending well with garden aesthetics.
- Garden Netting: Ideal for creating barriers without obstructing the view.
- Zip Ties: Useful for securing materials together quickly and easily.
Best 10 DIY Ideas for Cheap Fencing To Keep Dogs Out
1. Using Chicken Wire

Step-by-Step Guide on Installing Chicken Wire:
- Measure and Cut: Measure the area you want to fence off and cut the chicken wire to the appropriate length.
- Place Stakes: Drive wooden stakes into the ground at regular intervals around the garden.
- Attach Chicken Wire: Use zip ties or staples to attach the chicken wire to the stakes.
- Secure the Bottom: Make sure the bottom of the wire is firmly anchored to the ground to prevent dogs from digging underneath.
Benefits of Using Chicken Wire: Chicken wire is inexpensive, easy to work with, and effective at keeping dogs out of the garden.
2. Plastic Mesh Fencing

How to Set Up Plastic Mesh Fencing:
- Measure and Cut: Determine the amount of plastic mesh you need and cut it to size.
- Install Stakes or Posts: Drive stakes or posts into the ground to support the mesh.
- Attach the Mesh: Secure the mesh to the stakes using zip ties or garden wire.
Durability and Affordability: Plastic mesh is weather-resistant, making it a durable and cost-effective option for garden fencing.
3. Wooden Picket Fence
Building a Basic Picket Fence:
- Measure and Plan: Measure the perimeter of your garden and plan the layout of the fence.
- Cut and Sand the Wood: Cut wooden planks to the desired length and sand any rough edges.
- Install Posts: Dig holes for the fence posts and set them in place with concrete.
- Attach Pickets: Nail or screw the pickets to the posts, leaving small gaps between them for airflow.
Enhancing Garden Aesthetics: A wooden picket fence adds a charming, classic look to your garden while keeping dogs out.
4. Bamboo or Reed Fencing
Attaching Bamboo or Reed Fencing:
- Measure and Cut: Measure the required length of bamboo or reed fencing.
- Install Support Stakes: Drive stakes into the ground to support the fencing.
- Attach the Fencing: Secure the bamboo or reed panels to the stakes using zip ties or wire.
Natural and Eco-Friendly Options: Bamboo and reed fencing blends well with garden surroundings and is environmentally friendly.
5. Garden Netting

Installing Garden Netting for Protection:
- Measure and Cut: Cut the garden netting to the appropriate size.
- Place Support Stakes: Install stakes at intervals around your garden.
- Attach Netting: Use zip ties or garden clips to secure the netting to the stakes.
Versatility and Ease of Installation: Garden netting is lightweight, easy to install, and can be adjusted as needed.
6. Pallet Fencing

Repurposing Wooden Pallets as a Fence:
- Source Pallets: Obtain wooden pallets from local suppliers or businesses.
- Prepare the Pallets: Clean and sand the pallets to remove any rough spots.
- Install Pallets: Stand the pallets upright and secure them together using nails or screws.
Cost-Effectiveness and Availability: Wooden pallets are often free or very cheap and can be easily repurposed into a sturdy fence.
7. Hedge Barriers
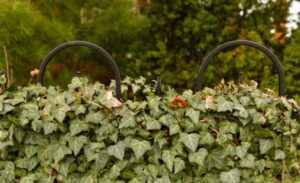
Planting and Maintaining Hedge Barriers:
- Choose Hedge Plants: Select fast-growing hedge plants suitable for your climate.
- Plant the Hedges: Space the plants evenly around the garden perimeter.
- Maintain the Hedge: Regularly water, prune, and fertilize the hedge to ensure it grows thick and tall.
Natural Look and Long-Term Solution: Hedge barriers create a living fence that adds natural beauty and provides long-term protection.
8. Wire Fencing with Wooden Stakes
Combining Wire Fencing with Wooden Stakes:
- Measure and Cut Wire: Cut the wire fencing to the desired length.
- Install Wooden Stakes: Drive stakes into the ground at regular intervals.
- Attach Wire to Stakes: Secure the wire fencing to the stakes using staples or zip ties.
Steps for Secure Installation: Ensure the wire is taut and securely fastened to prevent dogs from pushing through or digging under.
9. Portable Dog Playpen Fencing

Setting Up a Portable Dog Playpen:
- Purchase a Playpen: Choose a portable dog playpen that suits your needs.
- Assemble the Playpen: Follow the manufacturer’s instructions to assemble the playpen.
- Place in Garden: Position the playpen around the area you want to protect.
Flexibility and Convenience: Portable playpens can be easily moved and adjusted, providing a flexible fencing solution.
10. DIY Wattle Fence

Crafting a Traditional Wattle Fence:
- Gather Materials: Collect thin branches or saplings for weaving.
- Install Upright Stakes: Drive sturdy stakes into the ground at intervals.
- Weave Branches: Weave the branches in and out of the stakes to form a fence.
Rustic Charm and Functionality: A wattle fence adds a rustic touch to your garden while effectively keeping dogs out.
How to Choose the Right Fencing for Your Garden?
Considering Your Garden Layout
Assessing the Garden Space and Layout: Measure your garden and consider its shape and size when choosing a fencing solution. Ensure the fence fits well with the existing layout.
Choosing a Fence That Complements Your Garden: Select a fence that enhances the aesthetic appeal of your garden. Consider the materials and design that best suit your garden’s style.
Evaluating Dog Behaviour
Understanding Your Dog’s Habits and Behaviour: Observe your dog’s behaviour to determine the best type of fence. Some dogs are jumpers, while others are diggers. Choose a fence that addresses these tendencies.
Selecting a Fence Based on Your Dog’s Tendencies: If your dog likes to dig, opt for a fence that extends below ground. For jumpers, choose a taller fence to prevent them from leaping over.
Balancing Budget and Durability
Finding a Balance Between Cost and Durability: While it’s important to stay within budget, consider investing in durable materials that will last longer and provide better protection.
Investing in Materials That Last: Look for materials that are weather-resistant and require minimal maintenance, ensuring your fence remains effective for years to come.
Maintenance and Care for Your Garden Fence
Regular Inspection
Checking for Damage or Wear: Regularly inspect your fence for any signs of damage or wear. Look for loose posts, broken wires, or gaps that need repair.
Making Necessary Repairs Promptly: Address any issues immediately to prevent further damage and maintain the effectiveness of your fence.
Cleaning and Upkeep
Keeping the Fence Clean and Free of Debris: Clean your fence periodically to remove dirt, leaves, and other debris that can accumulate.
Seasonal Maintenance Tips: Perform seasonal maintenance, such as applying weatherproofing treatments to wooden fences and checking for damage after storms.
Cheap Fence Options and Costs To Keep Dogs Out Of Garden
| Method |
Materials Needed |
Estimated Cost |
Difficulty Level |
| Chicken Wire |
Chicken wire, stakes, zip ties |
Low (£10-£30) |
Easy |
| Plastic Mesh Fencing |
Plastic mesh, stakes, zip ties |
Low (£15-£40) |
Easy |
| Wooden Picket Fence |
Wood planks, nails, posts |
Moderate (£30-£70) |
Moderate |
| Bamboo or Reed Fencing |
Bamboo/reed panels, zip ties |
Low to Moderate (£20-£50) |
Easy |
| Garden Netting |
Garden netting, stakes, zip ties |
Low (£10-£30) |
Easy |
| Pallet Fencing |
Wooden pallets, nails, screws |
Very Low (Free-£20) |
Moderate |
| Hedge Barriers |
Hedge plants, soil, water |
Variable (£20-£100+) |
Moderate |
| Wire Fencing with Stakes |
Wire fencing, wooden stakes, staples |
Low (£15-£40) |
Easy |
| Portable Dog Playpen Fencing |
Playpen panels, connectors |
Moderate (£30-£80) |
Easy |
| DIY Wattle Fence |
Branches, stakes |
Low (£10-£30) |
Moderate |
By following these guidelines and choosing the right fencing solution, you can enjoy a beautiful, dog-proof garden that keeps both your plants and pets safe.
Conclusion
Creating a dog-proof garden doesn’t have to be expensive. With these ten DIY fencing ideas, you can keep your furry friends out of your garden while enhancing the beauty and functionality of your outdoor space. Whether you choose chicken wire, bamboo fencing, or a wooden picket fence, there’s a solution to fit every budget and garden style. Regular maintenance and thoughtful planning will ensure your fence remains effective for years to come. Happy gardening!
Frequently Asked Questions
Can I Install a Garden Fence by Myself?
Yes, many garden fences can be installed as DIY projects with basic tools and materials. Follow the step-by-step guides provided for each fencing method.
How Much Does It Cost to Build a Cheap Garden Fence?
The cost depends on the materials and size of your garden. Simple solutions like chicken wire or garden netting are usually more affordable, while wooden picket fences or bamboo fencing may cost more.
What Is the Best Type of Fence to Keep Dogs Out?
The best type of fence depends on your specific needs and your dog’s behaviour. For diggers, a fence that extends below ground is ideal. For jumpers, choose a taller fence. Options like chicken wire, plastic mesh, and wooden picket fences are effective and budget-friendly.
