by Kanimozhi BV | Apr 29, 2025 | Washing Machine, Appliances, DIY Ideas
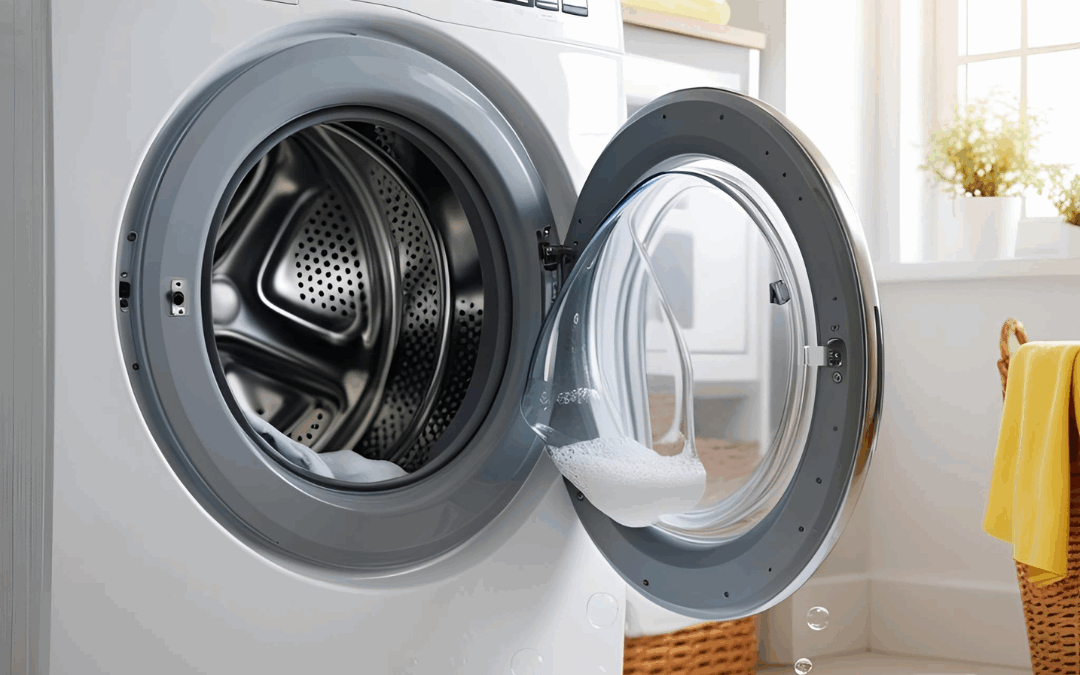
Opening a Bosch washing machine door sounds simple — until the door jams, the machine won’t unlock after a wash, or worse, an error message appears.
I’ve learned that knowing exactly how to open Bosch washing machine door can save time, prevent damage, and avoid a hefty repair bill. Let me guide you through it step-by-step.
Why Knowing How to Open Bosch Washing Machine Door Matters?
When my Bosch washing machine door refused to open after a cycle, I realised it wasn’t just a minor inconvenience.
A stuck door can mean trapped laundry, possible water damage, or even a faulty lock mechanism.
That’s why understanding the right way to open a Bosch washer door is so important — it keeps my machine and clothes safe.
Understanding the Basics of Bosch Washing Machine Doors
How Does the Locking Mechanism Work?
Most Bosch washing machines use an electronic door lock that stays locked while the machine is operating and during the spin cycle. The door usually remains locked for 2–5 minutes after the cycle ends to ensure all motion inside the washer drum has stopped safely.

When Does the Door Normally Unlock?
Typically, the door unlocks:
- Automatically a few minutes after the cycle completes
- Once the drum has stopped spinning
- After the internal temperature has cooled
If none of these happen, that’s when I know there’s an issue.
How to Open Bosch Washing Machine Door?
When faced with a jammed door, here’s exactly what I do.
Step-by-Step Guide to Opening the Door Safely
- Step 1: Turn off the washing machine and then unplug it.
- Step 2: Wait a few minutes for the internal lock to release naturally.
- Step 3: Gently try pulling the door open.
- Step 4: If it’s still stuck, check for an emergency manual release.
How to Manually Unlock a Bosch Washing Machine Door?
Most Bosch models have an emergency door release hidden behind the lower front panel:
- Remove the lower panel carefully.
- Find the small manual door release cord (usually orange or red).
- Pull the cord gently — this should unlock the door immediately.
If my machine doesn’t have a cord, I usually contact Bosch support before trying anything more forceful.

Common Reasons Why a Bosch Washing Machine Door Won’t Open
When asking myself why won’t my Bosch washer door open, here’s what I found:
Power Failure Issues
If the power is cut off during a cycle, the lock might stay engaged. Restarting the cycle or restoring power often solves it.
Water Still Inside the Drum
If there’s water remaining, the door lock will stay engaged to prevent flooding. In this case:
Door Lock Mechanism Fault
Sometimes the lock itself is broken. In that case, I need professional help to replace the door lock assembly.
What to Do If the Bosch Washing Machine Door Is Stuck?
Emergency Door Release Steps
If the normal methods don’t work, here’s my go-to process:
- Disconnect the machine from the mains.
- Wait at least 5 minutes.
- Use the emergency release cord if available.
- Drain the water manually if the drum is full.
When to Call a Professional
If the door remains stuck after manual attempts, I immediately call an authorised Bosch repair engineer. Forcing the door can break the handle or warp the door frame, making the repair even more expensive.

Troubleshooting Table: Quick Solutions for Different Problems
| Problem |
Possible Cause |
Quick Fix |
| Door won’t unlock after wash |
Normal delay |
Wait 2–5 minutes |
| Door jammed due to power cut |
Electrical failure |
Restart machine / manual unlock |
| Water still in drum |
Drainage issue |
Run drain cycle / manual drain |
| Door lock broken |
Faulty mechanism |
Call a Bosch engineer |
| Door handle broken |
Physical damage |
Professional repair required |
Tips to Prevent Bosch Washing Machine Door Issues in the Future
Regular Maintenance Practices
To keep my Bosch washing machine running smoothly:
Avoid Overloading the Machine
Overloading stresses the lock and can warp the door alignment. I always follow the recommended load size to prevent pressure build-up.
Conclusion – Opening Your Bosch Washing Machine Door with Confidence
Learning how to open Bosch washing machine door has saved me a lot of stress (and wet laundry disasters!). Whether it’s waiting for the lock to release, using the emergency door release, or knowing when to call an expert, I feel confident handling it now.
If you ever find yourself stuck, just remember:
- Stay calm and unplug the machine.
- Use the manual release if needed.
- Seek professional help if things get tricky.
Taking a little time now can save you big problems later!
FAQ On How to Open Bosch Washing Machine Door
1. How do I open a Bosch washing machine door mid-cycle?
You usually can’t open it mid-cycle for safety reasons. Some models allow it briefly after pressing pause, if water levels are low.
2. How to open a Bosch washing machine door without power?
Unplug the machine, open the lower front panel, and pull the emergency release cord to manually unlock the door.
3. How long does a Bosch washing machine door stay locked after a cycle?
The door typically stays locked for 2 to 5 minutes after the cycle ends to allow the drum to stop and water to drain.

by Kanimozhi BV | Apr 28, 2025 | Refrigerator, Appliances
Keeping my fridge at the right temperature isn’t just about keeping food cold — it’s essential for food safety, energy efficiency, and saving money.
But when faced with a dial ranging from 1 to 7, it can be confusing to know what number should my fridge be on. Let’s break it down properly.
Understanding Fridge Temperature Settings – What Number Should My Fridge be on?
Why Does the Fridge Temperature Matter?
The fridge temperature affects how long my food stays fresh and safe to eat.
If the fridge is too warm, bacteria can grow quickly, leading to food poisoning. If it’s too cold, some foods like lettuce and cucumbers might freeze in fridge and spoil.
The Food Standards Agency in the UK recommends keeping the fridge at 5°C or lower. Sticking to the right settings helps me ensure everything stays at a safe, optimal temperature.
What Temperature Should a Fridge Be in the UK?
In the UK, the ideal fridge temperature should be between 0°C and 5°C.
Anything above 5°C can put food at risk. I usually use a simple fridge thermometer to double-check the internal temperature if I’m unsure.
What Number Should a Fridge Be On? – Decoding the Dial from 1 to 7
When I first bought my fridge, I kept wondering what number should a fridge be on.
Many fridges in the UK use a dial numbered 1-7, where the higher the number, the colder the fridge.
It’s important to understand:
- 1 is the warmest setting.
- 7 is the coldest setting.
This simple logic helps me decide how to adjust my fridge depending on the season or how full it is.
Is 1 or 7 Colder on a Fridge?
On nearly every fridge, 7 is colder. Some newer models might show actual temperature readings, but if it’s a dial, higher usually means colder.
Which Number Is the Coldest on a 1-7 Fridge Dial?
Simply put:
7 = Maximum Coldness
1 = Least Cold
Whenever I need the fridge to be extra cold, like in summer or if I have a lot of meat stored, I turn it closer to 6 or 7.

What Is the Best Number to Set Your Fridge On?
What about Recommended Fridge Settings for Different Seasons?
Adjusting the fridge setting based on the season has helped me avoid food spoilage:
- Summer: I go for settings around 5 or 6.
- Winter: I usually set it to 3 or 4.
What are the Factors That May Affect Your Fridge Setting?
Other things that influence the fridge dial include:
- How packed the fridge is: A full fridge needs a stronger (colder) setting.
- Kitchen temperature: Hot kitchens mean I set the dial higher.
- Fridge model and age: Older fridges may not cool as efficiently.
How to Properly Adjust Your Fridge Setting?
What are the Step-by-Step Guide to Setting Your Fridge Temperature?
Here’s my simple method:
- Start with setting the dial at 4.
- Place a fridge thermometer on the middle shelf.
- Check after 24 hours — aim for 0°C to 5°C.
- Adjust the dial one notch higher or lower if necessary.
How to Check If Your Fridge Temperature Is Correct?
The easiest way is using a thermometer. I avoid checking near the door, as it’s warmer there. Consistent readings between 0°C and 5°C mean I’m good to go!

Common Mistakes People Make with Fridge Settings
Setting the Dial Too High or Too Low
I once thought setting it halfway would work year-round. In reality, I learned to tweak it based on the season and load.
Ignoring External Temperatures
A sunny, warm kitchen can warm up the fridge’s exterior. That’s why I adjust the setting in summer without fail.
Quick Comparison Table: Fridge Settings and Temperature Outcomes
| Dial Setting |
Expected Temperature |
Usage Advice |
| 1 |
7°C – 8°C |
Too warm for safe food storage |
| 2 |
6°C – 7°C |
Risk of bacteria growth |
| 3 |
5°C – 6°C |
Acceptable for short periods |
| 4 |
4°C – 5°C |
Ideal setting for daily use |
| 5 |
3°C – 4°C |
Good for warmer days |
| 6 |
2°C – 3°C |
Recommended during summer heat |
| 7 |
1°C – 2°C |
Extremely cold — risk of freezing items |

Conclusion: Setting Your Fridge Right for Food Safety and Freshness
In the end, figuring out what number should my fridge be on isn’t hard once I know the basic rules.
I always aim for a fridge temperature between 0°C and 5°C and adjust according to the seasons and fridge load.
Remember:
Higher number = colder fridge
Lower number = warmer fridge
By setting my fridge correctly, I keep my food fresher, longer, and safer.
Related Article: How to Defrost Fridge Freezer Without Turning it Off?
by Kanimozhi BV | Apr 25, 2025 | Bathroom, Interior
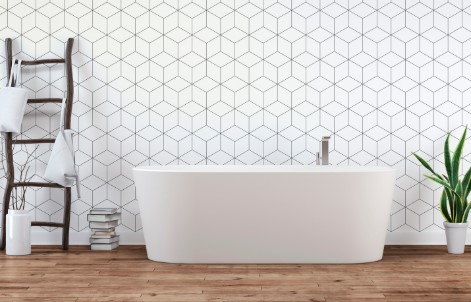
When I first asked myself, can you wallpaper a bathroom, I was met with raised eyebrows and plenty of cautionary tales.
In the UK, where the weather is damp more often than not, wallpapering a bathroom might sound like a bold move.
But let me tell you — with the right materials and approach, it’s entirely possible. Here’s my personal guide based on experience, a lot of research, and a few wallpaper rolls later!
Can You Wallpaper a Bathroom in the UK?
Yes, you absolutely can — but it’s not as straightforward as wallpapering your living area or bedroom.
Bathrooms come with unique challenges like moisture, steam, and fluctuating temperatures.
Choosing the right humidity resistant wallpaper and ensuring proper application is the key to making it work beautifully.
What Types of Wallpaper Is Best for a Bathroom?
Is Vinyl Wallpaper the Best Choice?
Definitely! Vinyl wallpaper is my top pick. It’s waterproof, durable, and easy to clean — perfect for steamy bathrooms.
These wallpapers come with a protective coating that shields the design from moisture damage.
Can Traditional Wallpaper Work in a Bathroom?
Technically, yes — but you’ll need to take extra precautions. If you’re set on a non-vinyl style, I suggest applying a clear matt varnish over the surface to seal it against moisture.
Even then, keep it away from high-moisture zones.
How Do You Prepare Bathroom Walls for Wallpapering?
Why Is Wall Preparation Crucial?
Bathroom walls need to be pristine. That means no grease, soap scum, or flaky paint. I always:
- Clean thoroughly with sugar soap.
- Sand down any bumps.
- Use a mold-resistant primer.
What Adhesives Should You Use?
Standard wallpaper paste won’t cut it. Look for wallpaper adhesives for bathrooms — specifically those with mould-inhibiting properties.
I used a strong vinyl paste that stood up brilliantly to steam.
Where Should You Avoid Applying Wallpaper in a Bathroom?
Are There High-Risk Areas?
Yes! Avoid placing wallpaper:
- Inside the shower enclosure
- Behind water taps or directly above sinks
- In areas with frequent water splashes
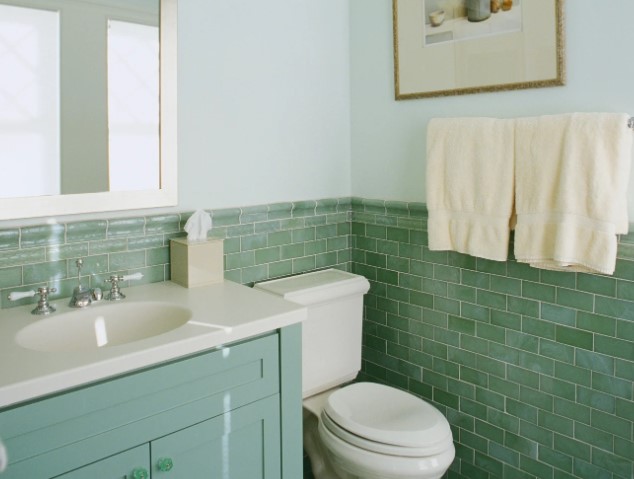
Can You Combine Tiles and Wallpaper?
Absolutely — and it’s a trendy choice.
I used tiles around the bath and sink, and bathroom wallpaper ideas for the upper walls. It gave me the best of both worlds: protection and style.
How Can You Protect Bathroom Wallpaper from Moisture?
Is Varnishing an Effective Solution?
Yes, and it’s a game-changer.
A clear, water-based varnish adds an invisible layer of protection, sealing the wallpaper from steam and splashes without altering the design.
Why Is Ventilation Important?
Good airflow is essential. I always keep a window slightly ajar and ensure my extractor fan is working properly.
It dramatically reduces moisture build-up and prolongs life of a wallpaper around windows.
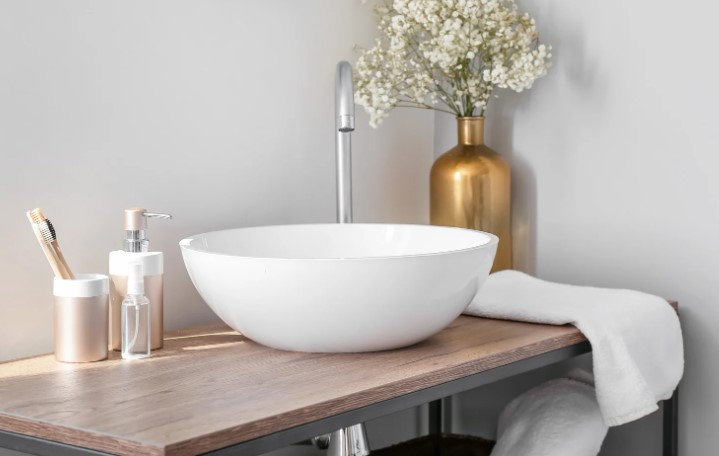
Can You Put Wallpaper in a Bathroom? – Some Design Tips
Should You Create a Feature Wall?
Yes, especially in small bathrooms. A feature wall can add depth and style without overwhelming the space.
I chose a bold floral print for the back wall, and it’s the star of the room.
How Do Patterns Affect Small Bathrooms?
Large prints can actually make a room feel more spacious. Just balance them with neutral tiles or fittings.
If you’re unsure, try peel and stick bathroom wallpaper first — it’s removable and easy to experiment with.
What Are the Pros and Cons of Wallpapering a Bathroom?
Here’s what I found from my own experience:
How Long Does Bathroom Wallpaper Last?
With proper care and the right materials, my wallpaper has lasted over 3 years and still looks fresh.
Quality moisture-proof decor and regular ventilation go a long way in increasing its lifespan.
What Are Some Alternatives to Wallpaper in Bathrooms?
If wallpapering isn’t for you, try:
- PVC wall panels
- Moisture-resistant paint
- Ceramic or porcelain tiles
These are all practical options, but I personally love the warmth and character wallpaper adds.
Conclusion: Is Wallpapering Your Bathroom Worth It?
In my experience, yes! As long as you’re strategic with placement, materials, and ventilation, wallpapering a bathroom in the UK is absolutely doable.
It brought personality to a space that’s often overlooked, and with the right care, it’s stood the test of time.
So if you’re still wondering can you wallpaper a bathroom, I say — go for it. Just do it wisely.
FAQ – Can you Wallpaper a Bathroom
1. Can wallpaper last in a bathroom?
Yes, wallpaper can last in a bathroom if it’s the right type, such as vinyl or moisture-resistant styles. Proper installation and good ventilation are key to ensuring durability over time.
2. Is bathroom wallpaper different?
Yes, bathroom wallpaper is specially designed to resist humidity and moisture. These types often feature vinyl coatings or are made from non-woven materials to prevent peeling and mold growth.
3. Does wallpaper mold in bathrooms?
It can, especially in poorly ventilated bathrooms or when using the wrong wallpaper type. To avoid mould, use mould-resistant adhesive, keep the space well-ventilated, and choose wallpapers designed for wet environments.

by Kanimozhi BV | Apr 23, 2025 | Window, Interior
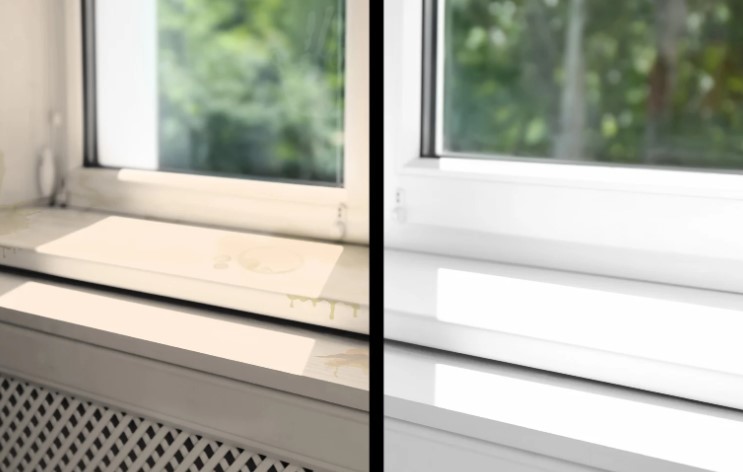
uPVC window frames are known for being low-maintenance and long-lasting, but that doesn’t mean they stay spotless forever.
Over time, I’ve noticed stains, yellowing, and grime creeping onto my own window frames, and it made me realise just how much they can dull the overall appearance of a home.
The good news? With the right approach, you can easily bring them back to looking nearly new.
Let me walk you through how to remove stains from uPVC window frames—step by step.
Why Do uPVC Window Frames Stain in the First Place?
What causes yellowing and marks on uPVC?
uPVC is durable, but it’s not immune to discolouration. In my experience, the main culprits are:
- Airborne pollutants
- Traffic fumes (especially if you live near a main road)
- Bird droppings and tree sap
- General dirt and dust that’s allowed to build up
Is it just dirt, or something more stubborn?
At first, I thought it was just surface dirt, but after trying a quick wipe-down, I realised the stains were embedded into the material. That’s when I knew I needed a more thorough window frame cleaning strategy.
How environmental factors affect the frame colour?
UK weather doesn’t help much either—rain, moss, mould, and high humidity can all contribute to the yellowing of uPVC frames, especially the white ones.
Before diving in, I like to make sure I’ve got everything I need. Whether I’m doing a light clean or tackling heavy stains, these are my go-to items.
Safe household items I always start with
- Warm water
- Washing-up liquid
- White vinegar
- Baking soda
- Soft cloths or sponges
Professional-grade products I keep for tough stains
Sometimes household items just don’t cut it. In that case, I use:
- uPVC cleaner (available at most DIY stores)
- Non-abrasive cream cleaners
- Mould and mildew sprays (for bathroom and window use)
- Microfibre cloths
- Soft-bristled brush
- Old toothbrush (great for corners and hinges)
Essential Supplies Checklist
- Bucket of warm soapy water
- White vinegar
- Baking soda
- uPVC cleaner
- Soft cloths or sponge
- Toothbrush or soft brush
- Gloves (optional but handy)
How to Remove Stains from uPVC Window Frames? – General Dirt and Surface Grime Removal
Step-by-step cleaning method using mild soap and water
Here’s what I do for a regular clean:
- Fill a bucket with warm water & add 4 to 5 drops of washing-up liquid.
- Use a soft cloth to gently wipe the frame, starting from the top down.
- Rinse with clean water & dry with a microfiber cloth.
Why I avoid harsh abrasives and wire brushes?
In the past, I made the mistake of scrubbing too hard with the wrong tools—and ended up scratching the surface. Always use non-abrasive materials to preserve the uPVC finish.
How Can I Remove Tough Stains and Yellowing?
Using baking soda and vinegar mix
When I spot yellow stains, I make a simple paste:
- Mix baking soda with a splash of white vinegar to form a thick paste.
- Apply it directly to the stain and let it sit for 10 minutes.
- Gently scrub with a cloth or soft brush and rinse thoroughly.
When I switch to a uPVC-specific cleaner?
If the vinegar paste doesn’t do the trick, I turn to a uPVC cleaner. I apply it using a cloth, rub gently in circular motions, and then wipe away with a damp cloth.
A trick I learned to restore whiteness naturally
Here’s a little hack I picked up: after cleaning, wipe the frames with a vinegar-dampened cloth and let them air dry. It gives a natural boost to the white uPVC discolouration.
What About Mould or Mildew on the Frames?
My personal method using diluted bleach
Mould tends to build up in the corners or on older frames. I use a 1:10 solution of bleach and water, carefully dabbing the affected areas, letting it sit for five minutes, then rinsing thoroughly.
Ventilation and prevention tips I always follow
To keep mould from coming back, I always:
- Keep windows slightly open when possible to reduce moisture.
- Wipe down condensation in the mornings.
- Clean frames monthly, especially in winter.
Natural vs Chemical Options Comparison
- Natural (Vinegar, Bicarb): Eco-friendly, safe, mild but slower
- Chemical (Bleach, uPVC Cleaner): Fast-acting, stronger, but harsher
Do DIY Methods Really Work Compared to Store-Bought Products?
What worked best for me?
Personally, I’ve found that DIY methods work great for regular upkeep. But for deep-set stains, especially on older uPVC, a store-bought uPVC cleaner often gets better results.
When I think it’s worth investing in commercial cleaners?
If your windows haven’t been cleaned in a long time, or the staining is years old, I definitely recommend investing in a specialised cleaner. It saves you time and elbow grease.

How Do I Prevent Stains from Coming Back?
My regular cleaning routine
Every 4–6 weeks, I:
- Wipe down the frames with warm soapy water
- Use a vinegar rinse every other clean
- Dry thoroughly to avoid watermarks
Protective treatments that actually help
Some uPVC cleaners leave behind a protective film—I’ve found this helps repel dirt and reduce discolouration.
Table: uPVC Frame Cleaning Options – Pros and Cons
| Method |
Best For |
Cost |
Effort Level |
Long-Term Results |
| Soapy Water |
Light dirt |
Low |
Easy |
Temporary |
| Vinegar Mix |
Organic stains |
Very Low |
Medium |
Good |
| uPVC Cleaner |
Tough stains |
Medium |
Medium |
Excellent |
| Bleach Solution |
Mould/mildew |
Low |
High |
Long-lasting |
Common Mistakes I’ve Made (So You Don’t Have To!)
- Scrubbing too hard and scratching the frame
- Using coloured cloths that leave dye behind
- Forgetting to test cleaning products on a small patch first
Final Thoughts – Bringing Back the Sparkle
Cleaning uPVC frames might not be glamorous, but it’s incredibly satisfying to see them go from dull and stained to bright and fresh again.
Whether you’re using household ingredients or a professional uPVC cleaner, the key is being gentle but consistent.
Now that you know my go-to methods on how to remove stains from upvc window frames, give them a try and bring back that sparkle!

by Kanimozhi BV | Apr 22, 2025 | Window, Interior
Are you looking for how to replace upvc window handle?
Why Would I Need to Replace a uPVC Window Handle?
Over time, even the most reliable uPVC window handles wear out. From everyday use to changing weather conditions, components like the spindle or locking mechanism can degrade, making operation difficult or unsafe.
You might need to replace a handle if:
- It no longer locks or unlocks
- It feels loose or wobbly
- It’s stuck in a locked position
- The key won’t turn or is missing
For me, these issues usually boil down to one of two things: security concerns or a handle that’s simply past its prime.
Are uPVC Window Handles Easy to Replace?
In most cases, yes. Replacing a uPVC window handle is a simple job that I can usually manage in 15 to 30 minutes. As long as the handle isn’t stuck or locked shut, and I have the right replacement, it’s a straightforward DIY task.

Here’s what I normally use:
- Flathead or Phillips screwdriver (depending on the screws)
- Measuring tape or ruler (for spindle size)
- New replacement handle (matched to your window type)
Optional but helpful:
- Penetrating oil (for jammed or rusted parts)
- A torch for better visibility in tight spots
DIY vs Professional Comparison
| Task |
DIY Replacement |
Professional Service |
| Cost |
£5 – £15 |
£45 – £90 |
| Time |
15–30 minutes |
30–60 minutes |
| Skill Level |
Beginner-friendly |
N/A |
How Do I Identify the Type of My uPVC Window Handle?
Before fitting a new handle, I always identify the current one. The most common types include:
- Espag Handles: Common on casement windows, with a square spindle that operates a multipoint lock.
- Cockspur Handles: Found on older uPVC windows, they hook over a wedge on the frame.
- Tilt and Turn Handles: Used on inward-opening European-style windows.
Spindle length is a key detail to measure. Standard sizes are often 40mm or 50mm, but always measure to be sure.
How to Replace a uPVC Window Handle That Won’t Open?
When a handle won’t open, it can be as if the window is fully stuck. I usually start by identifying whether the handle or the locking mechanism is causing the problem.
Here’s what I do:
- Try gently turning the key while pressing or lifting the handle.
- If it doesn’t move and stay all the way, then I apply a bit of penetrating oil and give it a few minutes.
- With gentle pressure, I try to rock the handle back and forth — forcing it can snap the spindle or damage the frame.
If that fails, it may be the internal gearbox that’s jammed. In that case, I skip further attempts and start preparing to remove the handle entirely.

How to Remove a Window Handle When Locked?
Removing a handle that’s locked shut requires care.
- I use a small flathead screwdriver to pry off the screw covers.
- Then I locate and loosen any accessible screws — sometimes only one screw is holding it in place.
- If the screws are stuck, I apply some oil and let it settle before trying again.
- In rare cases, I’ve had to carefully cut around the handle or drill out the screw, especially if it’s seized or rusted.
How To Change uPVC Window Handle That is Broken?
Once the handle is free, here’s how I go about replacing it:
- Measure the spindle length.
- Check the screw spacing to make sure your new handle fits.
- Insert the new handle’s spindle into the lock hole.
- Line up the screw holes and tighten them securely.
- Test the handle before reattaching any covers.
How Do I Choose the Right Replacement Handle?
Choosing the wrong handle is an easy mistake — I’ve made it myself early on. Here’s how I avoid that:
- Measure spindle length accurately
- Check if the handle is inline or offset
- Match screw hole spacing to the old handle
- Determine if it’s left- or right-handed
Common Handle Types
| Type |
Use Case |
Notes |
| Espag |
Modern casement windows |
Most common type |
| Cockspur |
Older uPVC frames |
No spindle; hooks onto a wedge |
| Tilt and Turn |
European-style windows |
Turns and tilts inward |
| Inline |
Spindle centred |
Often considered “universal” |
Are uPVC Window Handles Universal?
Not always. Some are labeled universal, but I always double-check:
- Spindle size
- Screw hole spacing
- Orientation (left or right handed)
Just because it fits the window doesn’t mean it will operate the mechanism correctly. Precision here saves time and frustration.
How Do I Fit a New uPVC Window Handle?
Fitting the handle is the easy part:
- Insert the spindle into the window mechanism.
- Align the handle with the screw holes.
- Insert and tighten screws evenly.
- Snap on the screw covers.
- Test open, close, and lock functions to confirm it works properly.

How to Fix a Loose uPVC Handle?
If your window handle isn’t broken but feels loose, try this:
- Remove the screw covers.
- Tighten the screws with the appropriate screwdriver.
- Check if the spindle is worn – if so, it may need replacing.
- Lubricate moving parts to prevent stiffness.
A wobbly handle that won’t tighten properly is often a sign of internal wear.
What If the Window Handle Still Doesn’t Work After Replacement?
If you’ve replaced the handle and it’s still not working, don’t panic — I’ve run into this too.
I usually check:
- Is the spindle engaging correctly with the locking gearbox?
- Are the screws tightened evenly?
- Is the handle type compatible?
Sometimes the real issue lies inside the window frame — in the locking strip or gearbox. In that case, it’s often best to speak to a window repair specialist.
Tips for Maintaining Your uPVC Window Handles
To extend the life of your window handles:
- Lubricate the spindle and moving parts every six months
- Tighten screws at the first sign of wobbling
- Don’t force handles if they feel stiff
- Wipe around handles regularly to prevent grime buildup
Conclusion
Replacing a uPVC window handle might seem intimidating at first, but with the right information and tools, it’s a job I’ve found simple and rewarding in this guide on how to replace upvc window handle. Whether your handle is broken, stuck, or just outdated, this guide should give you everything you need to do the job yourself.
By taking the time to fix it now, you’ll improve your home’s security, functionality, and overall comfort — and gain the satisfaction of a DIY win.
Related Article: How to Clean uPVC Window Frames?
FAQs on Replacing uPVC Window Handles
1. Can I replace a window handle myself?
Yes, as long as you have the right tools and handle.
No — just standard screwdrivers and a tape measure.
3. How do I know if I need a left or right handle?
Stand inside and face the window. If the handle opens to the left, it’s left-handed — and vice versa.
4. What does espag mean?
Short for espagnolette, it’s a locking system used in modern uPVC windows.

