
by Kanimozhi BV | Sep 19, 2025 | Garden, Exterior
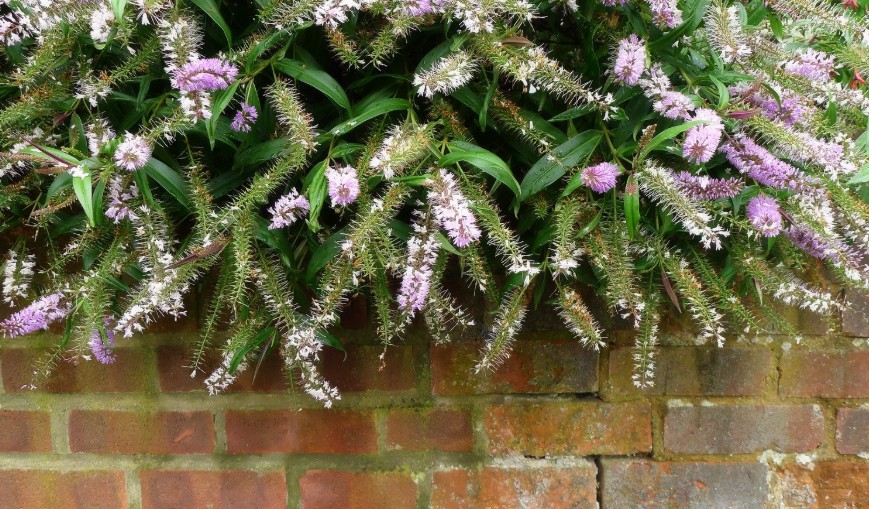
I’ve always had a soft spot for hebes — they’re the kind of shrub that asks for very little but gives back so much.
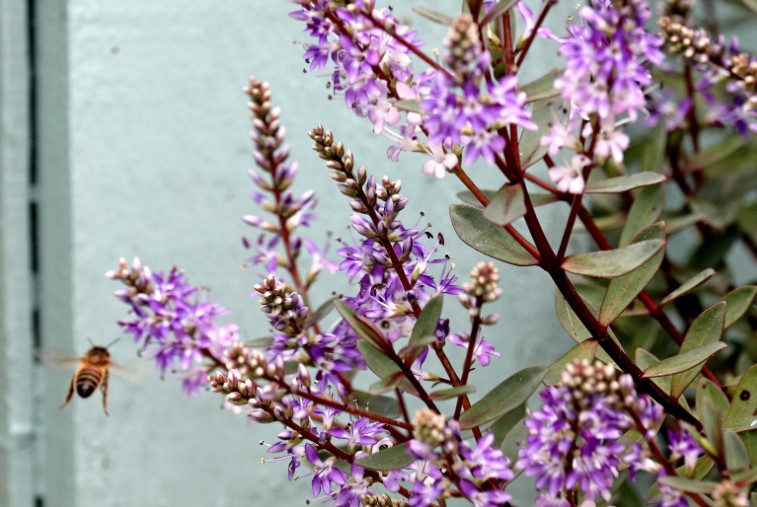
From their tidy evergreen structure to their bursts of flowers that draw in bees and butterflies, hebes have earned their spot in nearly every garden I’ve designed.
One of the most common questions I get from fellow UK gardeners is: when do hebes flower?
The answer varies a little depending on the variety and location, but I’ll break down everything I’ve learned from growing these dependable beauties in British soil.
What Are Hebes and Why I Love Them in My UK Garden?
Hebes are evergreen shrubs, mostly native to New Zealand, but they’ve adapted beautifully to UK gardens.
You’ll find them in a range of sizes — from small mounding varieties perfect for pots, to larger, more sprawling types ideal for mixed borders.

Here’s why hebes have a permanent place in my garden:
- They flower through the warmer months, adding colour when other shrubs are green-only
- Their foliage stays lush all year round
- They’re low-maintenance, ideal for beginner gardeners or busy ones like me
- Many varieties attract pollinators, making them great for wildlife-friendly gardens
When Do Hebes Flower in the UK?
This is the big question, and the answer is: most hebes flower from late spring through to autumn, depending on the variety and weather conditions.
What Are Typical Flowering Season by Variety?
In my experience, here’s a rough guide to when different types of hebes bloom in the UK:
- Late spring to early summer: Varieties like Hebe ‘Paula’ and ‘Red Edge’
- Mid to late summer: The more popular garden hybrids like Hebe ‘Great Orme’
- Late summer to early autumn: Extended flowering from varieties like ‘Autumn Glory’
These timeframes can shift slightly depending on your local climate — my hebes in sheltered, sunny spots often flower earlier and for longer.
How UK Weather Affects Blooming?
Living in the UK means our weather is never predictable. In cooler, northern regions, flowering may start later. A wet spring can sometimes delay blooms, while a dry, sunny spell can trigger an early show.
That said, hebes are incredibly adaptable. I’ve seen them push out flowers even after a poor spring, especially if they’ve been pruned and fed properly the year before.
Can Hebes Flower More Than Once a Year?
Yes, they can! Especially the long-flowering hybrids. While they don’t tend to have multiple flushes like roses, I’ve had some hebes throw out a second wave of blooms in late summer if I deadhead them after the first show.
How Long Do Hebes Flower For?
Most of the hebes in my garden flower for around 6 to 8 weeks, though some hold their blooms longer if the weather is right.
What Are The Factors That Affect Flowering Duration?
- Sun exposure – Full sun encourages longer flowering
- Feeding – Overfeeding with nitrogen can reduce blooms
- Deadheading – Encourages fresh flower spikes
- Pruning – Light pruning of hebes in late autumn keeps the plant vigorous
When conditions are ideal, I’ve seen summer-flowering hebes continue into September.
How I Encourage My Hebes to Flower More?
If you want a spectacular hebe display, there are a few things I’ve learned over the years that make all the difference.
How Soil, Sunlight & Feeding Helps Hebes?
- Soil in lawn: I always make sure the soil is free-draining. Hebes hate wet feet, and poor drainage can lead to root rot.
- Sunlight: At least 6 hours of sun a day helps develop strong flower buds.
- Feeding: I feed mine with a balanced fertiliser in spring (not too high in nitrogen), followed by a mulch of compost or well-rotted manure.
What is Pruning Hebes After Flowering?
This is essential. I lightly trim the tips of flowering stems once they fade. It keeps the plant bushy and encourages fresh shoots that will carry next year’s flowers.
Don’t prune too hard — they don’t regenerate well from old wood.
What Are the Quick Tips to Maximise Hebe Flowering?
Here are the main things I do every year to get the most out of my hebes:
- Plant in a sunny, sheltered spot
- Ensure well-draining soil
- Feed with a low-nitrogen fertiliser in early spring
- Deadhead faded blooms to extend the display
- Prune lightly after flowering ends
- Add a mulch layer in spring to improve moisture retention
These small habits go a long way toward getting a longer and more vibrant bloom.
How Is The Hebe Flowering Referenced?
Here’s a table I put together based on what I grow in my own garden:
| Hebe Variety |
Flowering Season |
Flower Colour |
Notes |
| Hebe ‘Paula’ |
Late Spring |
Purple |
Compact, hardy, low-growing |
| Hebe ‘Great Orme’ |
Summer |
Lilac |
Long-lasting bloom, ideal for borders |
| Hebe ‘Autumn Glory’ |
Late Summer–Autumn |
Violet |
Extends colour into autumn |
| Hebe ‘Red Edge’ |
Early Summer |
White |
Stunning winter foliage colour |
Learn about the frost damage recovery of hebes with my experiential guide.
Final Thoughts: Why Hebes Are My Go-To Shrub for Flower Colour
If you’re looking for a plant that brings reliable colour, low effort, and year-round interest, then hebes are well worth considering.
Over the years, they’ve become my go-to shrub for filling gaps, softening edges, and keeping the garden buzzing with life.
Whether you’re a beginner or an experienced gardener, knowing when do hebes flower — and how to keep them blooming — makes all the difference.
With just a little care, you’ll be rewarded with months of soft, beautiful colour that returns year after year.
What Are the FAQs On When Do Hebes Flower?
1. Do hebes flower in their first year?
Yes — if planted in spring or early summer, most hebes will establish quickly and produce flowers within their first year. Just make sure they’re in a sunny, well-drained spot.
2. Are hebes evergreen all year round?
Absolutely. One of the things I love most about hebes is that they retain their foliage year-round, making them useful even outside of flowering season.
3. Should I prune hebes before or after flowering?
After flowering is best. Pruning beforehand can remove the buds. I prune lightly in late summer or early autumn, shaping the plant and encouraging next year’s growth.
4. Can hebes grow in pots and still flower?
Yes, I grow several varieties in terracotta and ceramic pots. Just make sure the pot has good drainage, use a loam-based compost, and keep the pot in a sunny spot.
Home Diagnostics and Technical Standards Specialist at Hello Mag. She provides high-level Expertise in appliance mechanics and scientific pest management, ensuring every guide follows strict safety protocols and manufacturer standards. As a leading Authority on technical home specs, Kanimozhi audits complex data to provide homeowners with the most accurate, verified, and reliable diagnostic solutions available.
by Kanimozhi BV | Sep 18, 2025 | DIY Ideas
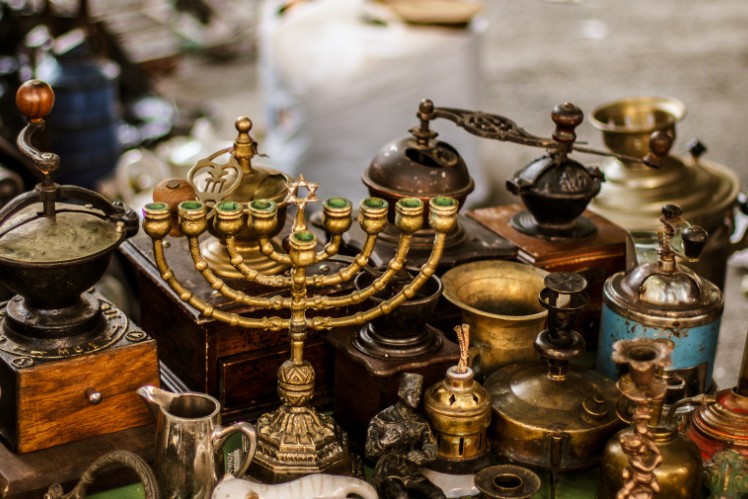
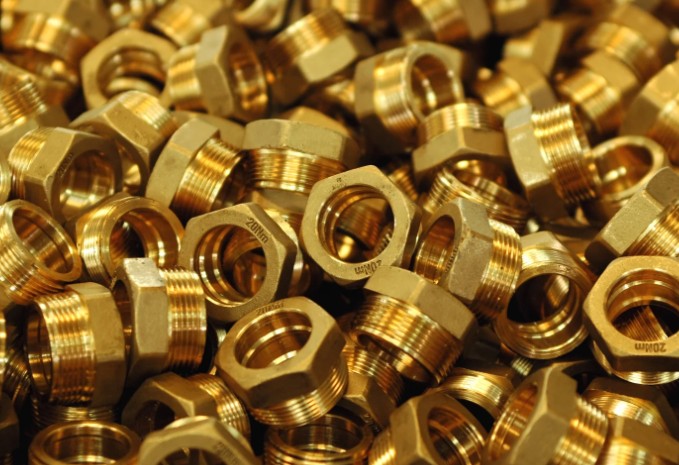
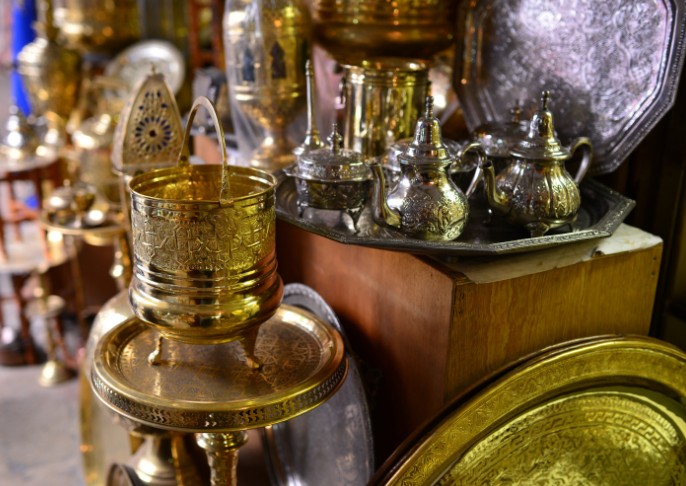
Brass has always been one of my favourite metals — its warm, golden glow adds charm to everything from vintage doorknobs to antique trays.
But nothing ruins its beauty faster than that dreaded black tarnish. I used to think once brass turned black, it was beyond saving. Thankfully, I was wrong.
In this guide, I’ll show you how to clean brass that has turned black, based on my own trial and error with everything from lemon juice to commercial polishes.
Whether you prefer natural remedies or store-bought solutions, I’ve included tips that actually work — and advice on how to keep your brass shining for years to come.
How to Clean Brass That Has Turned Black? – A Complete DIY Guide
Cleaning brass that’s turned black doesn’t have to be complicated or expensive. Over the years, I’ve found simple ways to bring even the dullest pieces back to life.
What Causes Brass to Tarnish and Turn Black?
Brass tarnishes due to oxidation. When exposed to air, moisture, or pollutants, the copper in the brass reacts and forms a dark layer on the surface.
Other common reasons for blackening include:
- Humid environments
- Frequent handling with bare hands
- Lack of cleaning or maintenance
- Exposure to harsh chemicals

Is It Safe to Clean Blackened Brass at Home?
Yes — but you need to be cautious. Using the wrong method, especially on brass-plated items, can cause permanent damage. I always test a small spot first and check if the piece is solid or plated brass before cleaning.
How Can I Tell If My Brass is Solid or Plated?
Before diving into any cleaning process, this is the first thing I check.
How To Do The Magnet Test?
Here’s how I do it:
- I grab a small magnet and hold it against the brass.
- If the magnet doesn’t stick, it’s solid brass.
- If the magnet sticks, it’s brass-plated (usually over steel or iron).
Why Knowing This Matters?
Brass-plated items have a thin brass coating that can be worn away easily. That’s why I avoid harsh scrubbing or strong acids when cleaning them.
What Are the Best Methods to Clean Brass That Has Turned Black?
Depending on how badly tarnished the brass is, I choose between natural methods or commercial products.
What are Natural Cleaning Methods? – DIY Brass Cleaning
I always start with homemade options. They’re cheap, eco-friendly, and surprisingly effective for light to moderate tarnish.
How To Use Lemon and Baking Soda Paste?
- Mix equal parts lemon juice and baking soda into a paste.
- Apply to the brass and let it sit for 5–10 minutes.
- Scrub gently with a soft cloth or toothbrush.
- Rinse thoroughly and dry.
How To Use Vinegar Soak Method?
This works well for small items.
- Fill a bowl with white vinegar.
- Submerge the brass for 30–60 minutes.
- Scrub gently with an old toothbrush.
- Rinse and dry with a microfibre cloth.
What is Salt, Flour & Vinegar Polish?
For medium blackening:
- Mix 1 tbsp flour, 1 tbsp salt, and 1 tbsp vinegar into a thick paste.
- Rub it onto the brass and let it sit for 15–20 minutes.
- Rinse, dry, and buff to shine.
What are the Chemical Cleaners? – Safe Brass Cleaning Methods
When natural methods aren’t enough — especially for heavily blackened brass — I turn to commercial options.
When Should I Use a Commercial Cleaner?
I usually reach for one if:
- Natural methods didn’t remove the tarnish
- The brass has deep grooves or engravings
- I’m in a hurry and need fast results
What are the Recommended UK Brass Cleaners?
- Brasso Metal Polish – Quick and reliable
- HG Copper Shine Cream – Gentle yet effective
- Autosol Metal Polish – Great for tough tarnish
Can I Restore Shine to Extremely Tarnished Brass?
Yes, even severely tarnished brass can sparkle again with a little patience.
What Are My Go-To Polishing Tips?
After cleaning, I always:
- Buff the brass with a dry microfibre cloth
- Apply a touch of olive oil or beeswax to seal the surface
- Use circular motions for an even finish
What If the Tarnish Won’t Come Off?
Sometimes, brass items have a protective lacquer that traps the tarnish underneath. In that case:
- I use acetone (nail polish remover) to remove the lacquer (only after testing a small spot)
- Then, I proceed with the usual cleaning
Step-by-Step Guide: How I Clean My Blackened Brass at Home?
This is the method I use most often for solid brass items with visible black tarnish.
- Lemon juice
- Baking soda
- Bowl
- Old toothbrush
- Soft cloth
- Warm water
- Microfibre towel
- Gloves (optional)
What are the Cleaning Steps?
- Mix 1 tbsp lemon juice with 1 tbsp baking soda to make a paste.
- Apply the paste all over the brass.
- Let it sit for 10 minutes.
- Scrub gently with a toothbrush.
- Rinse thoroughly with warm water.
- Dry immediately with a soft towel.
- Buff with a microfibre cloth for added shine.
How Do I Prevent Brass From Turning Black Again?
Once I clean and polish my brass, I always follow up with preventative care to keep it from darkening again.

What Is My Top Maintenance Tips?
- Dust regularly with a dry cloth
- Avoid touching with bare hands (wear gloves if needed)
- Keep it dry and away from humid areas
- Apply a protective coating (like beeswax or clear lacquer)
Should I Lacquer or Wax My Brass?
Personally, I prefer beeswax for decorative pieces — it adds a layer of protection without the mess. For items that are handled often, I sometimes use a clear lacquer spray for longer-lasting shine.
What Are The Common Mistakes to Avoid When Cleaning Brass?
I’ve made a few of these in the past, so here’s what not to do:
What Should Be Avoided?
- Using steel wool or wire brushes – they scratch the surface
- Soaking brass-plated items for too long
- Applying harsh acids without testing first
- Cleaning in poor lighting — you might miss a bad reaction!
Comparison Table: Natural vs. Chemical Brass Cleaners
Here’s a simple comparison I use when choosing how to clean a piece:
| Cleaning Method |
Pros |
Cons |
Best Use Case |
| Lemon & Baking Soda |
Eco-friendly, inexpensive |
Requires more effort |
Light to medium tarnish |
| Vinegar Soak |
Simple and hands-off |
Strong smell, slow process |
Small or detailed items |
| Commercial Cleaner |
Fast and powerful |
Contains chemicals |
Heavy/long-term tarnish |
Conclusion: Bring Your Brass Back to Life with Smart DIY Ideas
If your brass has turned black, don’t assume it’s beyond repair. With the right method — whether it’s a natural lemon paste or a reliable metal polish — you can bring back its beautiful golden glow.
Personally, I love using DIY brass cleaning methods because they’re simple, affordable, and surprisingly effective. Just remember:
- Always test your item first
- Choose the right method for your brass type
- Polish and protect after cleaning
Cleaning brass doesn’t have to be a chore — in fact, it can be incredibly satisfying to watch something dull and blackened turn bright and golden again. So go ahead, dig out those old brass treasures and give them a fresh start!
Related Article: How to Clean Silver Chain at Home?
Home Diagnostics and Technical Standards Specialist at Hello Mag. She provides high-level Expertise in appliance mechanics and scientific pest management, ensuring every guide follows strict safety protocols and manufacturer standards. As a leading Authority on technical home specs, Kanimozhi audits complex data to provide homeowners with the most accurate, verified, and reliable diagnostic solutions available.
by Kanimozhi BV | Sep 16, 2025 | Bathroom, DIY Ideas, Interior
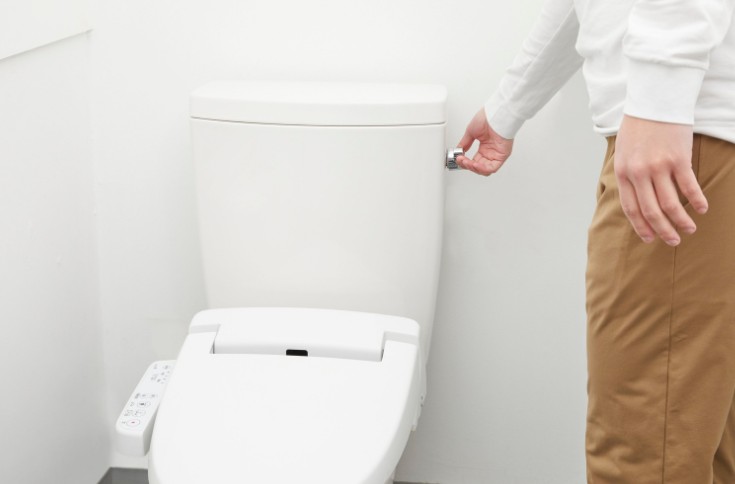
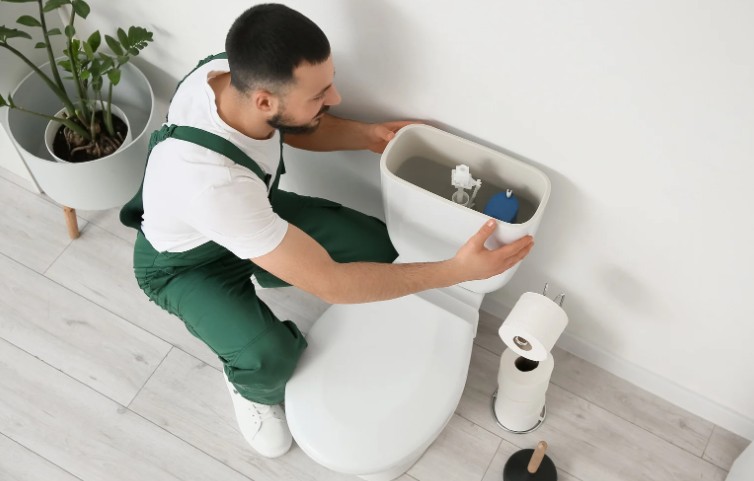
A few months ago, I noticed my toilet seat was wobbling every time I sat down. At first, I thought it just needed a quick twist with a screwdriver.
But when I looked closer, I realised it had concealed fixings — no visible screws or bolts. That’s when the frustration started and how to tighten a toilet seat with concealed fixings? Most tutorials I found were vague or didn’t apply to UK-style toilet fittings.
After some research (and a bit of crawling around the base of the toilet), I finally fixed it — and learned a lot along the way.
If you’re struggling with a loose toilet seat with hidden fixings, I’ll walk you through exactly how I tightened mine — step-by-step, using basic tools — and how you can do it too.
To fix your toilet seat properly, you don’t need a fancy toolkit — but having the right items makes the job quicker and less frustrating. Here’s what I used:
- Flat-head and Phillips screwdrivers – Some seats need a Phillips (crosshead) screwdriver, while others use a flat head. It depends on the screw type under the caps.
- Rubber gloves – Not essential, but useful for hygiene and better grip if you’re working around the base.
- Adjustable wrench – For some concealed systems, the nut underneath might spin. I used a small spanner to hold the anchor while tightening from the top.
- Torch or phone flashlight – It gets dark under the toilet rim, especially when you’re trying to see if the anchor is seated properly.
- Replacement washers or fixings – If parts are broken or worn (mine were), having a few replacements on hand is helpful. I got mine from a local DIY shop.
Having these ready saved me time and let me finish the job in under half an hour.
How Do I Know If My Toilet Seat Has Concealed Fixings?
Before you attempt anything, it’s important to understand what kind of fixing system your toilet seat uses.
In my case, here’s how I figured out I had concealed fixings:
- No visible bolts underneath the toilet pan — When I looked under the toilet, I didn’t see the usual wing nuts or screws.
- Caps at the hinges — The seat had shiny chrome covers where it attached to the toilet. These were hiding the actual screws underneath.
- Quick-release buttons — I noticed a small button on each hinge. Pressing them released the seat from the base, giving access to the fixings.
- Modern, soft-close design — Concealed fixings are usually found on newer, soft-close toilet seats that are designed to look sleek.
If you see any of these signs, you’re likely dealing with concealed fixings — and you’ll need to remove the seat to access the screws.
Step-by-step Guide On How To tightened a toilet seat with concealed fixings
This is the exact process I followed. It’s based on trial, error, and finally success.
Step 1: Remove the toilet seat
I started by pressing the quick-release buttons located at the base of the seat hinges. These allowed me to lift the seat straight off, exposing the metal caps underneath.
Not all models have buttons — some require a firm pull or twist. If yours doesn’t come off easily, don’t force it. Check for a small clip or latch instead.

Step 2: Expose the concealed fixings
Under the seat hinges, I found chrome caps hiding the screws. I used a flat-head screwdriver to gently pop them open. Be careful here — I scratched mine slightly before realising I needed to lever from the side, not the top.
Once the caps were open, the screw heads were clearly visible, set into plastic or metal anchor housings.
Step 3: Tighten the screws
This is where things got a bit tricky.
Using a Phillips screwdriver, I turned the screws clockwise. However, I noticed one of them just spun without getting tighter. That meant the plastic anchor inside the toilet pan was turning too.
To fix that, I held the plastic anchor steady underneath the toilet with a small spanner, then tightened the top screw again. This time it worked — the screw locked in place and pulled the anchor tight against the ceramic.
Be gentle: I tightened until the hinge stopped moving, then gave it a quarter turn more. Any tighter, and I risked cracking the toilet pan or damaging the anchor.
Step 4: Realign the hinges
Before putting the seat back, I checked the hinge alignment. If one is slightly off-centre, the seat will twist or shift over time. I adjusted both hinges to sit evenly spaced from the toilet rim and pointed straight forward.
Step 5: Clip the seat back on
Finally, I clicked the seat back onto the hinges until I heard a firm click on both sides. I gave the seat a few test wiggles — no movement at all. Mission accomplished!
What Problems Did I Run Into — and How Did I Fix Them?
Here are the issues I came across during the job — and how I handled them:
Problem: The screws kept spinning
Solution: Held the anchor underneath with a spanner while tightening the screw from the top.
Problem: One side stayed loose even after tightening
Solution: Replaced the worn plastic washer with a new rubber washer — gave a snug fit.
Problem: I overtightened and cracked a plastic cap
Solution: Ordered a replacement set of caps and hinges (only cost about £7 online).
Problem: Seat kept shifting sideways
Solution: Realigned both hinges before clipping the seat back in place. It needs to be centred to prevent movement.
When Should You Replace the Toilet Seat or Fixings Instead?
In my case, I considered replacing the seat entirely — and here’s when I’d suggest doing the same:
- Fixings are worn or keep slipping, even after tightening
- Plastic anchors or screws are cracked or stripped
- Seat doesn’t sit flush or align correctly, even when secured
- Hinges are loose or soft-close feature has failed
Many modern toilet seats come with universal concealed fixings, and are surprisingly easy to install. I ended up buying a spare just in case, and I’m glad I did — it made future maintenance a breeze.
Conclusion
So, that’s how I tackled the surprisingly tricky job on how to tighten a toilet seat with concealed fixings. It took some patience and the right tools, but now my seat is rock-solid and I don’t have to deal with that irritating wobble anymore.
If your toilet seat keeps shifting or feels loose:
- Remove it carefully
- Find and tighten the concealed screws
- Replace worn parts if needed
- Realign before clipping it back
Take it from me — this little DIY job can save you a lot of annoyance and embarrassment (especially with guests!). And once you do it once, future adjustments will feel like second nature.
Related Article: How to Fix a Running Toilet With a Button Flush?
What Are the FAQs On How to Tighten a Toilet Seat with Concealed Fixings?
1. How tight should the screws be?
Tight enough that the seat doesn’t move at all when you sit, but not so tight that you crack the ceramic or damage the anchor.
2. Can I tighten the seat without removing it?
It depends on the model. Some allow partial access, but most require you to remove the seat to get to the hidden screws.
3. What size screwdriver do I need?
Usually a medium-sized Phillips screwdriver works. Some might need a flat-head or a bit for an electric screwdriver.
Yes — especially in concealed setups. Stainless steel fixings are stronger, last longer, and are less likely to spin when tightening.
5. Why does my seat keep loosening over time?
It’s usually caused by cheap plastic anchors that expand and compress over time, or hinges not being aligned during installation.
Home Diagnostics and Technical Standards Specialist at Hello Mag. She provides high-level Expertise in appliance mechanics and scientific pest management, ensuring every guide follows strict safety protocols and manufacturer standards. As a leading Authority on technical home specs, Kanimozhi audits complex data to provide homeowners with the most accurate, verified, and reliable diagnostic solutions available.
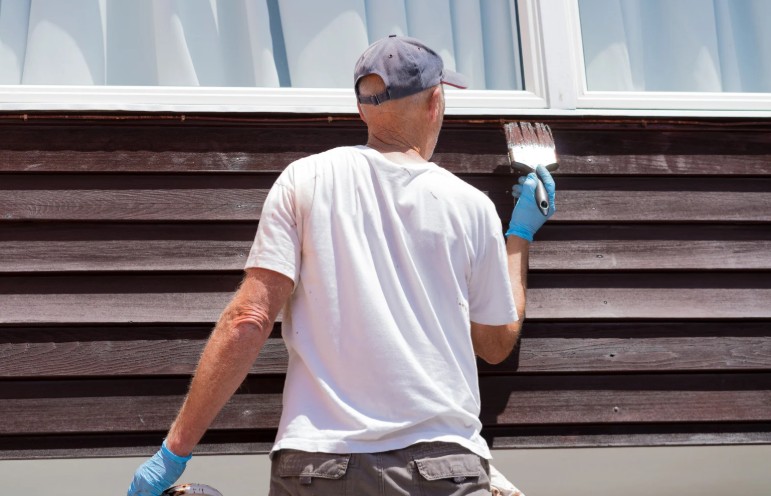
by Kanimozhi BV | Sep 12, 2025 | Exterior Painting, Exterior, Home & Living, Interior, Interior Painting
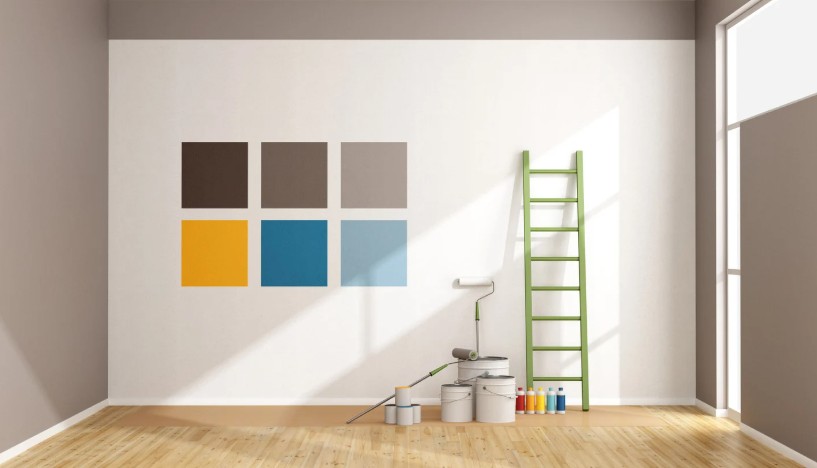
What Is a Mist Coat and Why Is It Important?
When I first tackled painting fresh plaster walls in my home, I quickly learned that jumping straight to standard emulsion paint wasn’t the best idea. That’s where the mist coat comes in and how long does a mist coat take to dry is the question i have.
A mist coat is essentially a watered-down emulsion paint, usually mixed in a 70:30 or 60:40 paint-to-water ratio, depending on the brand and condition of the plaster.
It’s the crucial first layer that helps the topcoat adhere properly to new plaster by soaking in and sealing the surface.
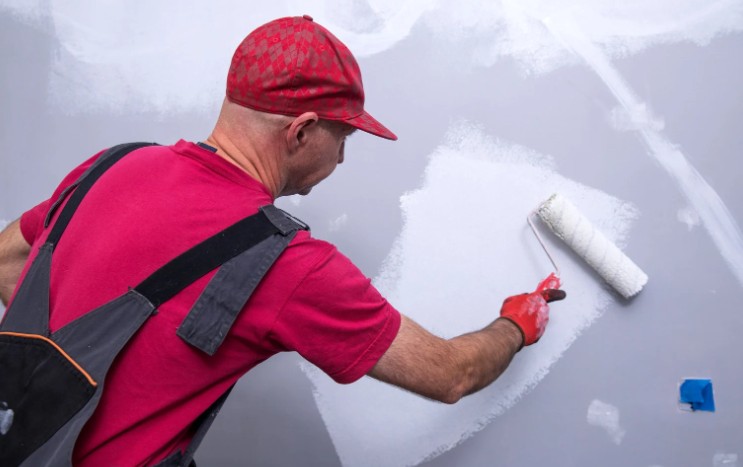
How Does a Mist Coat Work on New Plaster?
New plaster is highly absorbent. If you apply undiluted emulsion directly, it can sit on the surface, peel off, or not dry properly. The mist coat penetrates the porous surface, creating a strong base for further coats.
What Is the Best Mist Coat Paint Ratio?
From my experience, a 70:30 ratio (70% emulsion and 30% water) works best for most UK household emulsion paints. However, check the manufacturer’s guidelines—some prefer a 60:40 split.
When Should I Apply a Mist Coat?
Only apply a mist coat when your plaster is fully dry—it should be pale pink in colour and not feel cold or damp to the touch. For freshly plastered walls, I usually wait 5–7 days, depending on room conditions.
How Long Does a Mist Coat Take to Dry Before Painting?
What’s the Average Drying Time for a Mist Coat?
In my experience, a mist coat typically takes between 3 to 6 hours to dry under normal UK conditions. But this can vary.
- General drying range: 3–6 hours
- Touch dry: Around 2–3 hours
However, I recommend waiting at least 24 hours before applying the next coat to be on the safe side.
How Soon Can I Paint After a Mist Coat?
You might be tempted to paint right after it feels dry, but don’t rush it. I usually wait overnight, around 12–24 hours, especially if the room is a bit cool or humid. Rushing the process can lead to peeling, uneven texture, or poor adhesion of the topcoat.
Does Room Temperature Affect Drying Time?
Yes, it definitely does. A warm, ventilated room will speed up drying, while a cold or damp room can double the wait time. I try to keep the room around 18–22°C (64–72°F) when painting.
What If Humidity Is High or Low?
Humidity plays a huge role. Here’s a quick comparison:
| Condition |
Approx. Drying Time |
Notes |
| Warm, dry, ventilated |
2–4 hours |
Ideal conditions, quick drying |
| Cool, damp, poor airflow |
6–12 hours |
May require dehumidifier or heater |
| Humid (e.g., bathroom) |
8–24 hours |
Allow extra drying time before painting |
What Can Impact the Mist Coat Drying Time?
What about Surface Conditions? – Is the Plaster Fully Dry?
Before applying a mist coat, make sure the plaster is:
- Light pink or beige
- Not damp to the touch
- Crack-free and smooth
What are the Type of Paint and Water Ratio?
The drying time also depends on the type of emulsion paint used and how much water you’ve added. A thinner mix can dry faster but can also be less effective.
How Should be the Airflow and Ventilation?
Proper ventilation is key. Here’s what I do:
- Open windows for airflow (if weather allows)
- Use a fan to circulate air
- Avoid painting in rooms with closed doors and no ventilation
Can I Apply a Second Coat of Paint Right After the Mist Coat?
How Long Should I Wait Before the Next Coat?
Ideally, give it at least 12 hours, but 24 hours is safer. It ensures the wall has absorbed the mist coat completely.
What Happens If I Paint Too Soon?
From personal experience—don’t do it. If the mist coat is still damp:
- Your topcoat may peel or flake
- The colour might look patchy or uneven
- It won’t adhere properly
How Can I Speed Up the Mist Coat Drying Time?
Sometimes I just want to get on with the job, so I use a few tricks to reduce drying time:
What are the Tips to Speed Up Drying?
- Use a fan or extractor to move air
- Keep the room temperature steady (18–22°C)
- Open windows slightly (if it’s not too humid outside)
- Use a dehumidifier in very humid rooms
Avoid direct heat like hairdryers or heaters too close to the wall—it can cause cracking.
Conclusion: What’s the Ideal Approach?
After many DIY sessions and a few mistakes along the way, here’s what I recommend:
What is the Final Mist Coat Checklist?
- Wait until plaster is fully dry
- Use a 70:30 emulsion-to-water ratio
- Let the mist coat dry for 12–24 hours
- Ensure proper airflow in the room
- Don’t rush the topcoat
Final Thoughts
Knowing how long does a mist coat take to dry makes all the difference when decorating new plaster. It’s not the most glamorous step, but skipping it or rushing it can ruin your final finish.
So take your time, prep properly, and your walls will thank you for years to come!
Related Article: How Long Does Caulk Take to Dry? – Decorators Drying Time Guide in the UK
What are the FAQ on How Long Does a Mist Coat Take to Dry?
1. How Soon After Mist Coat Can I Paint?
Answer: Wait at least 12 hours, preferably 24 hours, before applying the next coat.
2. How Do You Know If a Mist Coat Has Worked?
If the surface looks evenly matte, no patches, and feels dry to touch, it’s worked well. It should also feel slightly “sealed” rather than dusty or chalky.
3. Should I Use 1 or 2 Mist Coats?
In most cases, one mist coat is enough. But if your plaster is very porous or you notice patchiness, I recommend a second light mist coat.
4. Does a Mist Coat Have to Be Perfect?
Not perfect—but even coverage is important. If you miss spots or go too thick, it could affect how the topcoat sits.
5. Can I Use Regular Emulsion Paint?
Yes, but it must be water-based. It is advised not to use vinyl silk or oil-based paint for a mist coat.
6. What’s the Best Paint for a Mist Coat?
Use a basic white matt emulsion—I personally go for trade paints like Dulux Trade Supermatt or Leyland Trade. Avoid expensive paints with additives for this step.
Home Diagnostics and Technical Standards Specialist at Hello Mag. She provides high-level Expertise in appliance mechanics and scientific pest management, ensuring every guide follows strict safety protocols and manufacturer standards. As a leading Authority on technical home specs, Kanimozhi audits complex data to provide homeowners with the most accurate, verified, and reliable diagnostic solutions available.
by Kanimozhi BV | Sep 11, 2025 | Water Heater, Appliances, Home & Living
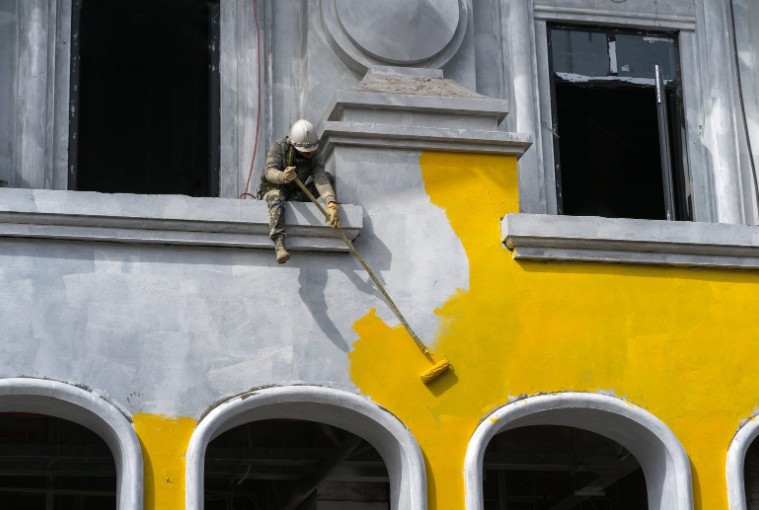
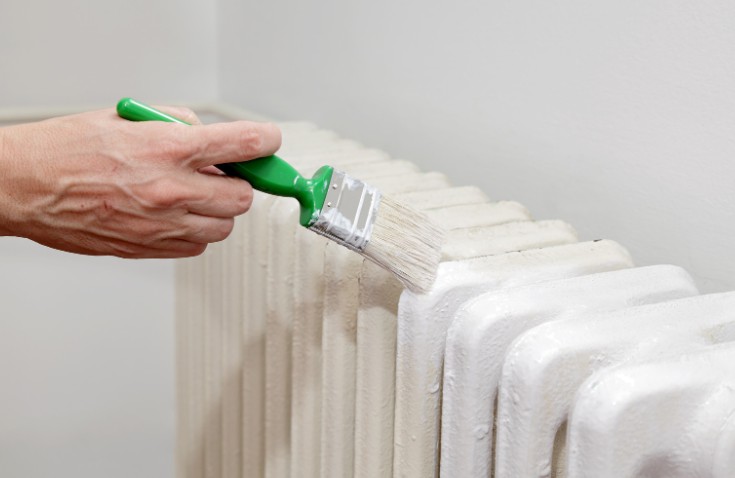
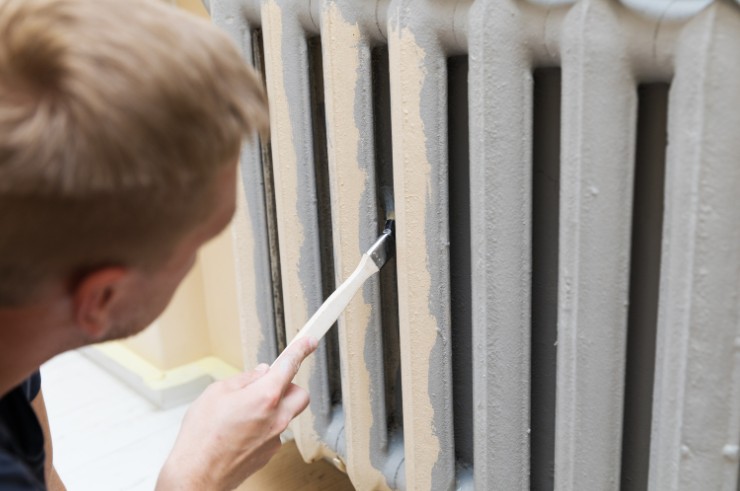
Radiators are often overlooked when decorating a room — but giving them a fresh coat of paint can elevate your space.
You might be wondering: can you paint radiators with emulsion, especially if you have some leftover wall paint? The answer isn’t a simple yes or no — and using the wrong paint can lead to disappointing results.
In this guide, you’ll learn:
- Why standard wall emulsion isn’t designed for radiators
- What happens if you use it anyway
- What you should use instead
- How to paint your radiator for a smooth, lasting finish
Let’s break it down.
Can You Really Paint Radiators with Emulsion?
Technically, you can paint a radiator with emulsion, but it’s not advisable. Emulsion paint is formulated for use on interior walls and ceilings, which are porous surfaces.
Radiators, on the other hand, are metallic and heat-emitting appliances. This variation speaks more than you might think actually.
What Is Emulsion Paint Designed For?
Emulsion paint is water-based and ideal for surfaces that don’t experience high temperature fluctuations. It’s typically used on:
- Plastered walls and ceilings
- Plasterboard or dry lining
- Smooth masonry indoors
It dries quickly and gives you a low-odour, matt or silk finish. However, it lacks the adhesion and flexibility needed to perform on non-porous and heated surfaces like radiators.
What Happens If You Use Emulsion on a Radiator?
If you apply emulsion directly to a radiator without any prep, it may look acceptable initially. But as soon as the radiator is turned on and starts heating:
- The paint may begin to bubble or blister
- You’ll likely notice cracking and peeling within a few weeks
- The surface may become discoloured or yellow from heat
- A faint odour might develop each time the radiator heats up
These are all signs that the paint isn’t suitable for this type of surface.
Why Emulsion Isn’t Heat-Resistant by Default?
Unlike certain radiator enamel or heat-resistant paints, standard emulsion absence with thermal resistance. It’s not formulated to cope with the continuous expansion and contraction that radiators go through.
This eventually leads to surface failure and a poor aesthetic finish.
So, while emulsion may stick to a radiator, it simply won’t last — and could even become a health hazard if it releases fumes when heated.
What Are the Risks of Using Emulsion on Radiators?
Choosing the wrong type of paint isn’t just about looks — it can also affect safety, air quality, and the performance of your heating system.
Will the Paint Crack, Peel or Flake?
Yes. Since emulsion can’t expand with the metal, it will eventually crack and peel, especially near the top where the radiator gets hottest.
Over time, this can leave your radiator with flaking patches, an uneven texture, and an unsightly appearance.
Is It Safe to Use Wall Paint on a Heated Surface?
Not really. Wall emulsion isn’t built to handle heat, and in some cases, the chemical composition can break down when exposed to high temperatures.
If you’ve used heavily pigmented or oil-infused emulsions, these may emit VOCs (volatile organic compounds) when heated — not ideal in small, enclosed spaces.
Can It Handle Regular Heating Cycles?
This is where emulsion fails the most. Radiators heat up and cool down several times a day in colder months.
Without thermal flexibility, emulsion paint will become brittle, lose adhesion, and begin to deteriorate rapidly — often within the first month of use.
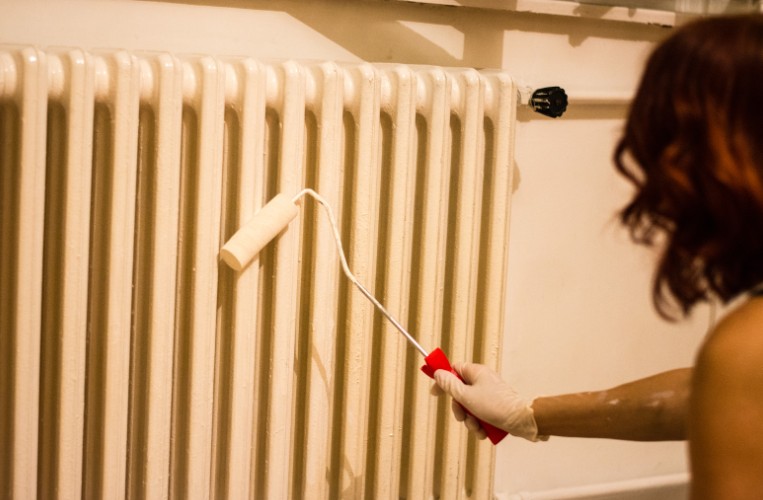
How to Paint a Radiator the Right Way?
If you want long-lasting, clean results, follow a proper painting process using the right tools and materials. It takes a little more effort than using leftover wall paint, but it’s well worth it.
What You’ll Need?
- Degreaser or sugar soap
- Fine sandpaper (220 grit)
- Microfibre cloth
- Metal primer (heat-resistant)
- Radiator paint (spray or brush-on)
- Masking tape and drop cloths
- Small foam roller or high-quality brush
What are the Step-by-Step Guide On Painting a Radiator Properly?
1. Clean the Radiator Thoroughly
Use sugar soap or a degreaser to remove any grease, dust or grime. Make sure to thoroughly clean corners and edges where grime tends to build up—these spots are often overlooked.
A spotless surface is crucial to ensure the paint sticks properly and lasts longer.
2. Lightly Sand the Surface
Use fine-grit sandpaper to roughen the surface slightly. This gives the primer and paint something to grip onto. Wipe away dust with a damp microfibre cloth.
Use a metal primer that is rated for heat. This creates a base that not only improves adhesion but also protects the radiator against rust. Let it dry as per the product’s instructions.
4. Choose the Right Radiator Paint
Pick a specialist radiator paint — these are heat-resistant, durable, and available in various finishes like gloss, satin, or matt. You can use either a brush or a spray depending on your skill level and finish preference.
5. Let Each Coat Dry Fully
Most radiator paints recommend two thin coats, with proper drying time between each (usually 6–8 hours). Don’t rush — the key to a smooth finish is patience.
Can You Use Emulsion Paint with a Topcoat or Sealer?
Is There a Workaround for Using Emulsion?
Some people try using a high-temperature clear coat over emulsion to make it more durable. While this might delay the inevitable peeling, it doesn’t solve the core issue — emulsion wasn’t meant for metal or heat.
What Kind of Sealants Could Work?
You’d need a heat-resistant polyurethane sealer, which is not always readily available in DIY stores and doesn’t always bond well with emulsion paint. It can also leave a glossy or plastic-like finish that doesn’t suit all rooms.
How Is Emulsion vs Radiator Paint vs Heat-Resistant Enamel Is Compared?
| Paint Type |
Heat Resistance |
Durability |
Finish |
Best Use |
| Emulsion |
Low |
Poor |
Matt or chalky |
Walls and ceilings only |
| Radiator Paint |
High |
Excellent |
Gloss or satin |
Domestic radiators |
| Heat-Resistant Enamel |
Very High |
Professional grade |
Glossy |
Towel rails, high-output units |
What are the Alternatives to Emulsion for Radiators?
What Paint Is Best Suited for Radiators?
Go for specialist radiator paint. These are:
- Formulated to bond with metal
- Heat-resistant up to 130°C or more
- Non-yellowing over time
- Designed for safe indoor use
Brands like Dulux, Rust-Oleum, Hammerite, and Johnstone’s all offer high-quality options in various colours and finishes.
What are the Benefits of Radiator-Specific Paints?
- Longer-lasting results
- No flaking or discolouration
- Designed for metal and heat
- Odourless once dry
- Safe for home use
Can You Spray Paint a Radiator?
Yes, and it’s a great choice if you want a super-smooth, brush-free finish. Just make sure to:
- Ventilate the room well
- Protect floors and walls with drop cloths and masking
- Apply many thin coats instead of one thick one
- Use a spray paint designed for radiators
Conclusion: Should You Use Emulsion on Radiators?

Painting radiators is a satisfying finishing touch — but using the wrong paint can undo all your hard work. While it’s possible to use emulsion, the results are rarely worth it.
What are the Dos for Painting Radiators?
- Clean and sand the radiator before painting
- Use a metal primer
- Choose a heat-resistant radiator paint
- Let it cure fully before switching on the heating
What are the Don’ts for Painting Radiators?
- Use standard emulsion without protection
- Skip preparation steps
- Paint when the radiator is warm
- Expect long-lasting results with wall paint
Final Advice
If you’re asking “can you paint radiators with emulsion?”, the honest reply is: you can, but you really shouldn’t. For a job that lasts and looks great, always choose the right paint for the surface — especially when heat is involved.
Related Article: What Happens If You Bleed a Radiator with the Heating On?
What are the FAQs On Can You Paint Radiators with Emulsion?
1. Can You Use Wall Paint on Radiators?
No. While you might get temporary coverage, wall paint is not heat-resistant and will peel, flake, or yellow over time.
2. What Kind of Primer Should You Use on a Radiator?
Use a metal-specific primer that can withstand moderate heat — ideally something that mentions radiators, pipes, or stoves on the label.
3. How Long Should Paint Dry Before Turning On the Radiator?
Hold for least 24–48 hours once the final coat is done. This allows the paint to cure fully, preventing damage or odour when you switch the radiator on.
4. Can You Paint Radiators While They’re Still on the Wall?
Yes, but make sure it’s switched off and completely cool. Protect the wall behind it with masking tape or cardboard, and take your time to get into tight spaces.
5. Is Spray Paint Better Than a Brush for Radiators?
Spray paint gives a more even, factory-like finish, especially on modern flat-panel radiators. Brushes are better for ornate or vertical radiators, where control is more important than smoothness.
Home Diagnostics and Technical Standards Specialist at Hello Mag. She provides high-level Expertise in appliance mechanics and scientific pest management, ensuring every guide follows strict safety protocols and manufacturer standards. As a leading Authority on technical home specs, Kanimozhi audits complex data to provide homeowners with the most accurate, verified, and reliable diagnostic solutions available.
