
by Kanimozhi BV | Jun 24, 2025 | Bathroom, Interior
If you’re wondering how to clean a shower drain that can’t be removed, trust me—you’re not alone. I’ve faced this situation myself, and the thought of dealing with a clogged drain without taking it apart can feel overwhelming.
But the good news is, there are practical and effective ways to clean it without dismantling a thing. Here’s exactly what I do.
Why Cleaning a Fixed Shower Drain Is Tricky But Necessary?
What causes a shower drain to clog in the first place?
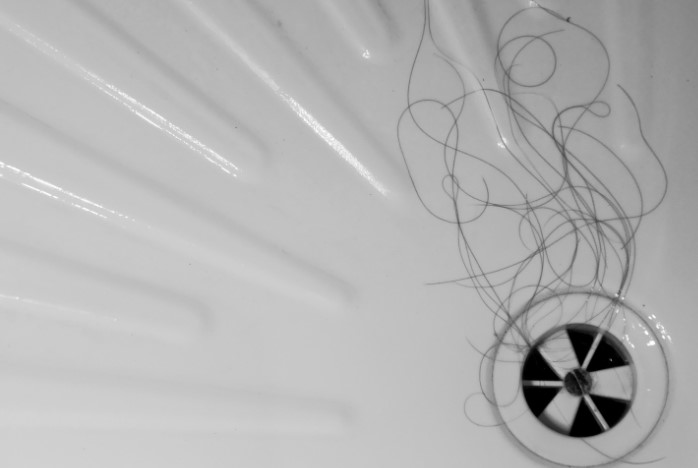
Over time, hair, soap scum, skin cells, and shampoo residue all build up inside the pipe. This sticky mess clings to the sides and causes slow drainage or complete blockage.
Why can’t I just remove the drain cover?
In many modern UK bathrooms, drain covers are either sealed with silicone or fitted with no easy way to remove them.
Trying to force them off might cause damage to your plumbing or tiles.
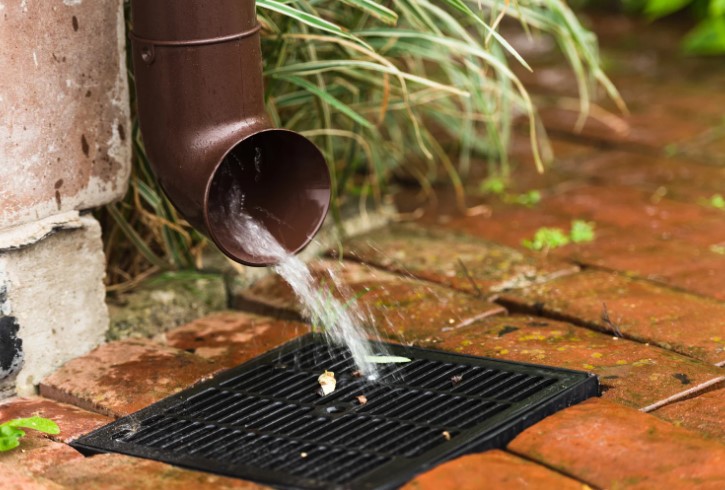
What Are The hidden dangers of ignoring a slow drain?
Left untreated, a blocked shower drain can cause:
- Mould and mildew buildup from standing water
- Unpleasant odours
- Water damage from overflow
How Do I Know My Shower Drain Needs Cleaning?
What are the Common signs of a clogged shower drain?
You probably need to clean your drain if:
- Water pools around your feet while showering
- You hear gurgling noises
- There’s a lingering damp, musty smell
Is standing water always a bad sign?
Yes, standing water usually means your drain is partially or completely clogged. It’s one of the most obvious signals that you should act quickly.
What Can I Use to Clean My Shower Drain Without Removing It?
Can natural ingredients like baking soda and vinegar really work?
Absolutely! My best ever method is the combo of baking soda & vinegar. It’s effective for breaking down soap scum and minor hair clogs, and it’s eco-friendly too.
When should I use a chemical drain cleaner?
Chemical cleaners like Mr Muscle or HG Drain Unblocker work for more stubborn clogs.
I use them only as a last choice since they can be harsh on pipes and they might also be harmful to the environment.
Is it safe to use a plunger on a shower drain?
Yes, but only a small cup plunger works well. I create a tight seal over the drain and give a few firm plunges to dislodge the blockage.
Step-by-Step: How to Clean a Shower Drain That Can’t Be Removed?
Here’s my simple, proven method:
Step 1: Remove visible debris and hair
I wear rubber gloves and pull out anything I can see. Sometimes, I will use an old or broken toothbrush or a wire coat hanger bent into a hook ro remove visible debris.
Step 2: Flush the drain with boiling water
A full kettle of hot water poured slowly into the drain, which helps to soften any greasy buildup usualy in kitchen cabinets.
Step 3: Use the baking soda & vinegar method
- Pour ½ cup amount of baking soda into the drain
- Follow with 1 cup of white vinegar
- Let it fizz for 10-15 minutes
- Rinse with more boiling water
These tools are lifesavers for catching deep hair clogs that aren’t visible at the surface.
Step 5: Rinse and monitor the flow
After cleaning, I run the shower to ensure that water flows smoothly.
Table: DIY Shower Drain Cleaning Methods I’ve Used
| Method |
Pros |
Cons |
| Baking Soda + Vinegar |
Safe, eco-friendly, affordable |
Not ideal for tough clogs |
| Boiling Water |
Quick, easy |
May not clear thick hair |
| Drain Cleaner (UK) |
Powerful and fast |
Harsh chemicals, not reusable |
| Drain Stick Tool |
Grabs clogs directly |
Might not reach deeper blockages |
What If My Shower Still Drains Slowly After Cleaning?
Should I call a plumber?
If the water still isn’t draining properly after trying all methods, it might be time to get a professional in.
Some blockages are further down the line than I can reach on my own.
What are some signs of a deeper plumbing issue?
- Gurgling from other drains in the house
- Slow drainage in multiple places
- Water backing up
How do I prevent future blockages? – My Quick Tips to Keep Your Shower Drain Clean
This brings me to some handy tips I now follow religiously.
Use a hair catcher or drain screen
It’s the easiest and most effective way to prevent hair clogs. I clean mine weekly.
Flush with hot water weekly
A weekly rinse with hot water helps prevent grease and soap scum buildup.
Avoid letting soap scum build up
I use a mild bathroom cleaner and scrub the tiles and base weekly.
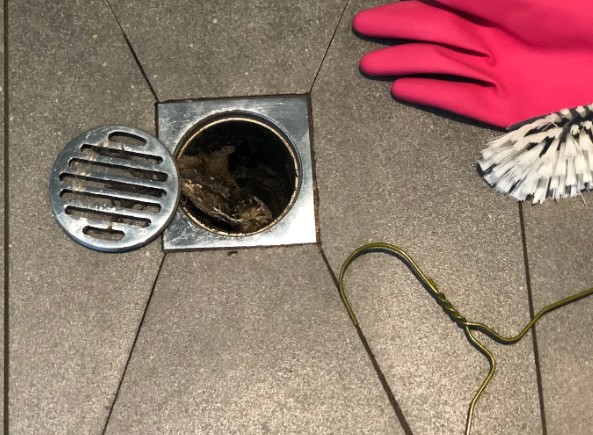
- Rubber gloves
- Old toothbrush
- Flexible zip-it tool
- Baking soda and vinegar
- Kettle (for boiling water)
- Drain cover screen
What NOT to Do When Cleaning a Shower Drain?
- Don’t pour multiple drain cleaners down at once
- Never prefer using wire or any sharp objects that can scratch your plumbing
- Avoid leaving long hair lying around the drain
Final Thoughts: Keeping My Drain Clear Without Lifting a Thing
Learning how to clean a shower drain that can’t be removed has made my bathroom maintenance much easier. Now that I’ve got a simple routine, I avoid emergencies, unpleasant odours, and costly plumber visits.
With the right tools and eco-friendly methods, I’ve managed to keep everything flowing smoothly—without ever removing the drain cover.
FAQ on How to Clean a Shower Drain That Can’t Be Removed?
1. Can I use a wet/dry vacuum to unclog a shower drain if the cover can’t be removed?
Yes, if sealed properly, a wet/dry vacuum can help pull out minor clogs.
2. Is it okay to use drain cleaning enzymes instead of chemicals or baking soda?
Yes, enzyme cleaners are safe, eco-friendly, and effective for routine use.
3. Will high-pressure water jetting damage a fixed shower drain or tiles?
It can if not done carefully—best to leave it to a professional plumber.
Home Diagnostics and Technical Standards Specialist at Hello Mag. She provides high-level Expertise in appliance mechanics and scientific pest management, ensuring every guide follows strict safety protocols and manufacturer standards. As a leading Authority on technical home specs, Kanimozhi audits complex data to provide homeowners with the most accurate, verified, and reliable diagnostic solutions available.

by Kanimozhi BV | Jun 10, 2025 | Water Heater, Appliances
If you’re anything like me, waking up to a freezing house and a boiler pressure gauge sitting in the red zone is never a good sign.
I’ve had my fair share of boiler issues over the years, and one of the most frustrating problems is when the boiler keeps losing pressure.
Whether it’s a combi boiler or a regular system, pressure loss can point to something small—or something more serious.
Let me walk you through the top reasons I discovered and the fixes that worked for me, along with when it’s time to call in the professionals.
Why Does My Boiler Keep Losing Pressure?
This question had me scratching my head more than once. The pressure in my boiler would stay steady one day, then drop unexpectedly the next.
After trial and error, I found that the causes usually came down to leaks, component failure, or user error.
Understanding Boiler Pressure: Why It Matters?
What is normal boiler pressure?
When the heating is off, the normal boiler pressure should stay between 1.0 & 1.5 bar. When the heating is on, it may increase to 2.0–2.5 bar, which is generally safe.
If the pressure drops below 1.0 bar, that’s a sign the boiler is under-pressurised and may not work properly.

Why does boiler pressure drop over time?
Here are some reasons this can happen:
- Small leaks in the system
- Air released during radiator bleeding
- Worn-out components like the expansion vessel or pressure relief valve
Can a Boiler Lose Pressure Without a Leak?
Yes, it can. I used to assume a leak was the only explanation, but that’s not always true.
Air loss during radiator bleeding, a failing expansion vessel, or an open filling loop can all cause pressure loss without a visible leak.
Common Signs Your Boiler Is Losing Pressure
Do you notice cold radiators or no hot water?
The first clue I had was poor heating performance. Some radiators were completely cold, and there were mornings when the hot water just wouldn’t come through.
Is the boiler pressure gauge frequently in the red zone?
If your gauge keeps dipping into the red, that’s a clear warning. I made a habit of checking it daily during the winter, especially if I noticed any heating inconsistencies.
Top Reasons My Boiler Keeps Losing Pressure
Is there a leak in the system? (Boiler Leak Detection)
Small leaks in the system can go unnoticed for a while. I eventually found a slow drip from a radiator valve under my stairs. Common areas to check:
- Radiators and valves
- Boiler casing
- Visible pipework
Could it be a faulty pressure relief valve?
The pressure relief valve (PRV) is the one that is designed to protect the boiler by releasing excess pressure. But when faulty, it can release water constantly.
I checked the discharge pipe and noticed it was dripping even when the boiler was off.
Is the expansion vessel malfunctioning?
This component helps manage pressure as the water in the system heats and expands.
If it’s faulty, you might notice pressure rises when the system is on and drops sharply when it’s off.
Have I recently bled the radiators?
I bled my radiators one autumn and forgot to check the boiler gauge afterward. The system lost pressure because releasing air also releases a bit of water.
Is the filling loop left open accidentally?
Once, I didn’t close the filling loop properly after topping up. That led to overpressure and the PRV kicking in to release water, causing a cycle of pressure loss.

How I Diagnosed My Boiler’s Pressure Problem?
Checking for visible leaks and damp patches
I started by inspecting all radiators and joints with a torch. If spotting any marks of water or even rust generally pointed to a problem.
Monitoring the boiler pressure gauge
I wrote down pressure readings every morning. If it dropped overnight without use, I knew something was wrong.
Listening for strange boiler noises
Unusual gurgling or banging often meant air in the system or water flow issues, both linked to pressure problems.
How Do I Fix My Boiler That Keeps Losing Pressure?
This is how I managed it safely:
Repressurising my boiler using the filling loop
- Switch off the boiler & let it cool
- Located the filling loop
- Slowly opened the valves until the gauge hit 1.5 bar
- Closed both valves tightly
- Switch the boiler back on and reset it if needed
Steps to check the filling loop

Why Do I Keep Needing to Repressurise My Boiler?
If you’re constantly topping up the pressure, like I was, it usually means:
- There’s a leak somewhere
- A part like the expansion vessel or PRV is failing
- You may have left the filling loop open
In my case, it was a hidden leak under the floorboards combined with a weak PRV.
When to Call a Gas Safe Engineer?
How do I know it’s beyond a DIY fix?
If you find any of these signs, then it is time to call a professional:
- Pressure drops within hours after topping up
- Visible leaks from the boiler itself
- Recurring fault codes or system lockouts
Why regular boiler maintenance matters?
I started getting my boiler serviced annually. It’s cost-effective in the long run and can spot issues before they turn into expensive repairs.
How Often Should the Pressure Drop on a Boiler?
In a well-functioning system, boiler pressure should remain stable for weeks or even months.
Minor fluctuations are normal, but if you’re repressurising every few days or weekly, that signals a deeper problem.

Preventing Future Boiler Pressure Loss
My checklist for keeping boiler pressure stable
- Check the pressure gauge weekly
- Bleed radiators only when necessary
- Shut the filling loop completely after use
- Look out for any signs of leaks
- Book an annual boiler service
Boiler Pressure Issues: Common Fixes at a Glance
| Problem |
Visible Sign |
Can I Fix It? |
Call a Professional? |
| Leak in system |
Water under radiators or pipe joints |
Sometimes |
If leak source is hidden |
| Faulty PRV |
Water from external pipe |
No |
Yes |
| Radiators bled recently |
Air noise & lower pressure |
Yes |
No |
| Faulty expansion vessel |
Pressure rises & drops dramatically |
No |
Yes |
| Filling loop left open |
Pressure constantly fluctuates |
Yes |
Only if unsure |
Conclusion: What I Learned About Boiler Pressure Problems
When my boiler kept losing pressure, I realised it wasn’t something to ignore.
From repressurising the system to identifying hidden leaks, the process taught me a lot. Some problems were easy to fix myself, others needed professional support.
If you’re dealing with low pressure, stay calm, check the basics, and don’t be afraid to get help. A warm, reliable home is worth it.
Related Article: How Long Does It Take to Fit a New Boiler?
FAQs: What I Wanted to Know When My Boiler Lost Pressure
1. Is low boiler pressure dangerous?
It’s not immediately dangerous, but it can prevent your boiler from working and cause strain on the system if left unfixed.
2. Can I use my boiler if the pressure is too low?
Most modern boilers automatically turn off when pressure is too low. I couldn’t even restart mine until I topped it up.
3. How do I stop my combi boiler from losing pressure?
Routine checks and sealing leaks worked for me. Also, avoid frequent use of the filling loop unless necessary.
Home Diagnostics and Technical Standards Specialist at Hello Mag. She provides high-level Expertise in appliance mechanics and scientific pest management, ensuring every guide follows strict safety protocols and manufacturer standards. As a leading Authority on technical home specs, Kanimozhi audits complex data to provide homeowners with the most accurate, verified, and reliable diagnostic solutions available.

by Kanimozhi BV | May 14, 2025 | Home & Living
Renovating your home can be thrilling, but it’s often a challenging process with tough decisions and unexpected surprises. Every homeowner knows the anxiety that comes with wondering whether the vision in their mind matches what they’ll see once renovations are complete. This is precisely why 3D architectural visualization and 3D rendering services have become game-changers in home renovation.
With these digital tools, homeowners can visualize their dream spaces long before construction begins, relieving them of anxiety and costly mistakes. If you’ve ever struggled to explain your ideas clearly to a contractor or worried about expensive last-minute changes, these services are here to make your life easier.
The Importance of Accurate Planning in Home Renovations

Let’s face it—excellent renovations don’t happen by accident. They require meticulous planning, clear communication, and precise execution. Skipping proper planning might save time initially, but it always costs more.
This is where accurate visual planning becomes essential. Using professional 3D architectural rendering services, homeowners can see exactly how their spaces will look post-renovation, gaining a sense of control over the process. By previewing realistic representations, it’s possible to pinpoint issues before construction begins, preventing costly adjustments down the road. It’s not just about avoiding mistakes; accurate planning ensures you get the home you envisioned.
Understanding 3D Rendering Services
What exactly do we mean by 3D rendering services? These are detailed digital representations of your home or a specific space created using specialized software. Talented artists at a 3D rendering firm or a dedicated 3D visualization studio combine exact measurements with textures, lighting, and realistic materials to create lifelike visualizations.
You can virtually walk through your future living room, kitchen, or bathroom and experience the completed design before a single hammer hits a nail. It’s like getting a glimpse into the future of your home, eliminating guesswork and uncertainty.
How 3D Rendering Works
Creating a realistic 3D render involves several detailed steps. Initially, the team from your chosen 3D architectural visualization company will collect precise dimensions and images of your existing home. Designers then use specialized software like 3ds Max, SketchUp, or Blender to build an accurate digital model. Next, they apply textures, colors, furniture, and lighting effects to mimic reality closely.
The final step involves sophisticated rendering algorithms to produce stunning images or animations, providing a photo-realistic preview of your upgraded home. It’s a fascinating blend of technology, creativity, and meticulous detail.
Benefits of 3D Rendering in Home Renovations
The benefits of using 3D render services are immediate and impactful. You can experiment with various designs, materials, and color schemes without any physical changes, saving time and money.

This approach gives homeowners confidence, as they clearly understand the outcome, drastically reducing anxiety and uncertainty. Moreover, these visualizations significantly enhance the accuracy of estimates provided by contractors, helping you manage your budget effectively.
Enhancing Communication with Contractors
Have you ever felt frustrated explaining your renovation ideas to a contractor? Miscommunication can lead to delays, unexpected costs, and disappointing results. Thankfully, 3D rendering services create a clear visual language that both homeowners and contractors can understand easily.
Instead of vague descriptions, you can provide a precise visual reference. This visual clarity bridges communication gaps ensure everyone is aligned, and greatly enhances collaboration between you and your renovation team.
Streamlining the Decision-Making Process
Decision fatigue during renovations is real. With endless choices—tiles, flooring, colors, lighting—homeowners often become overwhelmed. Thankfully, 3D visualizations simplify this process, providing relief from decision fatigue.
Presenting various options clearly and visually, these renderings help you see the effects of different decisions instantly. This clarity speeds up decision-making, removes doubts, and allows you to confidently finalize choices without second-guessing yourself later.
Cost-Effectiveness of 3D Rendering Services
While hiring a professional 3D rendering agency costs money, it’s an investment rather than an expense. By pinpointing potential issues beforehand, homeowners avoid costly last-minute alterations. Clear visualizations help prevent material wastage, reduce labor costs, and eliminate expensive mid-project changes. Thus, using 3D visualization services translates into significant long-term savings, making it an economically wise choice.
Case Study: A Successful Renovation Using 3D Rendering
Take, for example, a family planning a significant kitchen renovation. Initially uncertain about layout choices, materials, and overall aesthetics, they hired a reputable 3D rendering company. The digital renderings allowed them to experiment with several layouts, cabinetry designs, and lighting plans.
After reviewing these realistic visualizations, the family confidently selected an open layout, modern cabinets, and specific fixtures, knowing exactly how their new kitchen would look. The renovation proceeded smoothly, finished on time, within budget, and precisely matched the visualized designs. This scenario perfectly highlights how effective 3D rendering can ensure successful home upgrades.
Choosing the Right 3D Rendering Service
When selecting your 3D rendering partner, consider experience, reputation, and clarity in communication. Review their portfolio carefully to ensure their style matches your vision. Also, discuss their software expertise, turnaround times, and pricing transparency. The right partner will actively collaborate with you, bringing your ideas to life with precision and enthusiasm, ensuring your renovation is a complete success.
Tips for Maximizing the Value of 3D Rendering
- Communicate Clearly: Share detailed ideas, inspirations, and concerns openly.
- Set a Realistic Budget: Clearly outline budget constraints from the start.
- Review Iteratively: Provide feedback regularly to fine-tune visualizations.
- Consider Future Needs: Plan for long-term practicality alongside immediate needs.
- Validate with Professionals: Ensure contractors review renderings for feasibility.
Conclusion
Using 3D rendering services in home renovation projects transforms uncertainty into clarity. Whether working with a dedicated 3D visualization studio or opting for specialized 3D architectural rendering services, these tools provide confidence, streamline processes, and save money.
From enhanced communication to better budgeting, incorporating these visualizations makes home renovations brighter, smoother, and more successful. If you’re considering upgrading your home, it’s time to experience firsthand the transformative impact of professional 3D rendering services.
Home Diagnostics and Technical Standards Specialist at Hello Mag. She provides high-level Expertise in appliance mechanics and scientific pest management, ensuring every guide follows strict safety protocols and manufacturer standards. As a leading Authority on technical home specs, Kanimozhi audits complex data to provide homeowners with the most accurate, verified, and reliable diagnostic solutions available.

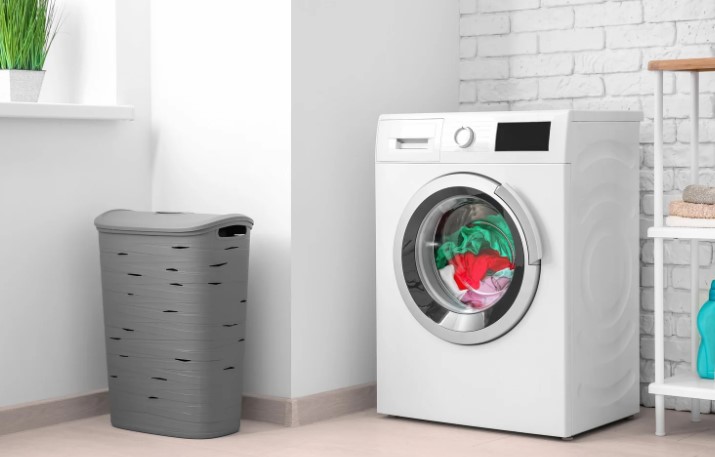
by Kanimozhi BV | May 14, 2025 | Washing Machine, Appliances
If you’ve ever stood puzzled in front of your Hotpoint washing machine wondering “Where is the filter on a hotpoint washing machine hiding?”, you’re not alone. I’ve been there myself, and trust me, it’s not always obvious.
Locating the filter is the first essential step before you can clean it properly—or even understand what might be going wrong with your washer.
In this guide, I’ll walk you through how to spot the filter on your Hotpoint washing machine, especially if you’re in the UK where front-loading models are most common.
Why Should I Care About the Filter on My Hotpoint Washing Machine?
The filter on a Hotpoint washing machine is a small area but an important part of your washer.
It’s designed to catch fluff, lint, coins, hairpins, and other debris that can sneak into the drum of the washer during a wash cycle.
While the cleaning process is a whole topic on its own, it all starts with simply knowing where the filter is.
Missing this step can lead to drainage issues, unpleasant smells, or even error messages on the machine.

What Exactly Is the Filter and What Does It Do?
In simple terms, the washing machine filter acts as a barrier between the wash drum and the drain pump.
Its job is to trap any foreign objects or debris that might damage the pump or block the drain hose.
On most Hotpoint front-loading washers, this filter is manually accessible, allowing you to remove and clean it when needed.
So, if you’re experiencing any performance issues or just doing a bit of preventive checking, knowing where the filter is located is key.
Where Is the Filter on a Hotpoint Washing Machine?
Here’s the answer you’ve been searching for: The filter on most Hotpoint washing machines is located at the bottom front of the unit, behind a flap or kick-strip.
This is especially true for front-loading models, which are the most popular in UK households.
Let’s break it down further.
Identifying the Filter on Front-Loading Hotpoint Models
If you have a front-loading Hotpoint washer (which you likely do in the UK), follow these steps to find the filter:
- Have a look at the bottom front panel of your washing machine.
- Spot a small square or rectangular flap, typically on the right-hand side.
- Use your fingers to open the flap or gently insert a flathead screwdriver if it’s a bit stiff.
- Behind the flap, you’ll find the drain pump filter cap, which usually looks like a round dial or plug.
Tip: Place a towel underneath before opening the cap, as a small amount of water may spill out.
The filter cover panel is sometimes designed to blend in, so don’t be surprised if it’s hard to spot at first glance.
Locating the Filter on Top-Loading Hotpoint Models
Top-loading Hotpoint washing machines are less common in the UK, but if you have one, the filter might be in a different place. Here’s what to check:
- The filter might be placed at the backside of the machine, behind a removable rear panel.
- You’ll likely need a screwdriver to open the panel & you can access the filter.
- Some older top-load models even have a lint trap inside the drum or under the agitator—though this is rare in Hotpoint units sold in the UK.
Your best bet is to refer to the Hotpoint user manual specific to your model for clarity.
How Do I Know I’ve Found the Filter?
You’ll recognise the filter by its round shape and removable cap. It often sits next to the drain hose and is sometimes labelled.
If you’ve removed the flap & found a circular dial or plug, you’ve likely found the Hotpoint washer filter.
It may have grooves for gripping, and once you unscrew it, you’ll typically see trapped lint, debris, or even small objects like coins inside.
But again, don’t open it just yet if you’re not ready to clean—it can release water.
When you’re ready to clean it, jump over to my full filter cleaning guide here – I cover it step-by-step.

Quick Comparison Table: Filter Location by Hotpoint Model Type
Here’s a quick reference to help you identify where the filter is based on your machine type:
| Model Type |
Filter Location |
How to Access |
Tools Needed |
| Front-Loading |
Bottom front panel |
Open kick-strip/flap |
None or flathead screwdriver |
| Top-Loading (if any) |
Rear panel (occasionally) |
Remove screws on back |
Screwdriver |
| Integrated/Compact |
Behind plinth or base cover |
Unscrew baseboard if needed |
None or basic tools |
Conclusion: Here’s Exactly Where to Find the Filter
So, where is the filter on a Hotpoint washing machine? In most UK models—especially the popular front-loaders—you’ll find it behind the small flap at the bottom front of the appliance.
It’s easy to miss, but once you know where to look, it takes just seconds to access.
When you’re ready to clean it, don’t forget to visit my detailed guide to cleaning the filter.
Keeping your filter clean not only helps your machine run more efficiently, but it can also save you from bigger repair costs down the road.
Home Diagnostics and Technical Standards Specialist at Hello Mag. She provides high-level Expertise in appliance mechanics and scientific pest management, ensuring every guide follows strict safety protocols and manufacturer standards. As a leading Authority on technical home specs, Kanimozhi audits complex data to provide homeowners with the most accurate, verified, and reliable diagnostic solutions available.

by Kanimozhi BV | May 12, 2025 | Wall, Bathroom, Interior
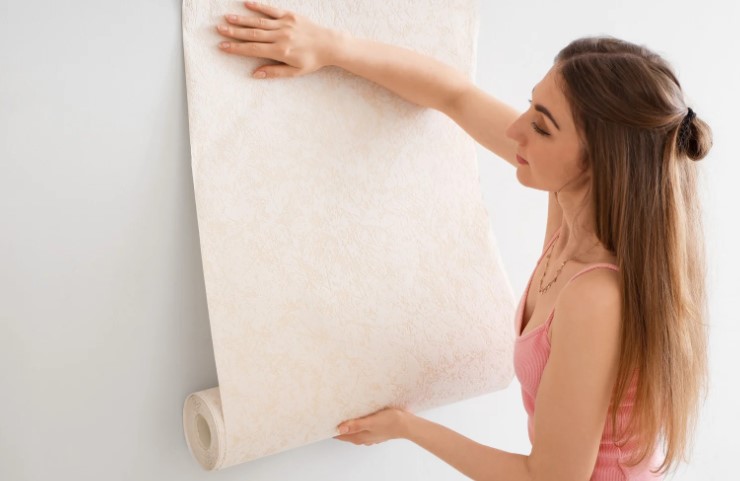
When I was redecorating my hallway, I found myself standing over a bucket of leftover wallpaper paste wondering: can you flush wallpaper paste down the toilet?
It seemed water-based, and it looked thin enough. But I hesitated—and I’m glad I did.
Here’s what I found out.
Why I Asked: Can You Flush Wallpaper Paste Down the Toilet?
At first glance, wallpaper paste looks harmless. It might be gloopy, yes, but it does dissolve in water, right?
That’s what I assumed too. Like many others, I figured if it mixes with water, it must be okay for the drains.
But I’ve learned the hard way that water-soluble doesn’t always mean drain-safe.
What Is Wallpaper Paste Made Of?
Wallpaper pastes are mostly made from modified starch, methylcellulose, or synthetic polymers. These ingredients help the paste become sticky when mixed with water.
Even if the packaging says it’s biodegradable or water-soluble, that doesn’t mean it will dissolve completely in your plumbing.
Instead, it can cling to the inside of your pipes, slow the flow, and catch other debris.
Can You Flush Wallpaper Paste Down the Toilet – Really?
After doing my research (and speaking to a plumber), the answer is clear: No, you should not flush wallpaper paste down the toilet.
Here’s why:
- It can thicken inside the pipes, especially if poured in large quantities.
- Over time, it builds up, attracting dust, hair, and other bits—leading to clogs and causes smell in bathroom.
- It’s not safe for septic tanks or shared sewage systems.
So while it may go down the toilet initially, it’s what happens further along the system that becomes a problem—and possibly a costly one.
What’s the Right Way to Dispose of Wallpaper Paste in the UK?
According to local council guidelines and waste experts, the safest method to dispose of wallpaper paste is simple: let it dry and bin it.
If you’ve got a small amount left, pour it into a cardboard box or container lined with newspaper and leave it to harden.
Once it’s solid, you can throw it away in your regular household rubbish.
For larger amounts, I’ve taken it to a household waste and recycling centre. They usually have clear instructions for disposing of DIY materials safely.

What I Do with Leftover Wallpaper Paste?
These days, I try to mix only what I need. But when I do have leftovers:
- I let the wallpaper paste dry out in a tub, then scrape it into the bin.
- I avoid pouring it down any drain—even a small amount.
- Occasionally, I share leftovers with a neighbour if they’re decorating too.
Not only does this prevent plumbing issues, but it also cuts down on unnecessary waste.
Disposal Methods Compared
| Method |
Is It Safe? |
Plumbing Risk |
Environmental Impact |
| Flushing down the toilet |
No |
High |
Negative |
| Pouring down sink drain |
No |
Moderate to High |
Negative |
| Bin disposal (dried paste) |
Yes |
None |
Low |
| Council hazardous waste centre |
Yes |
None |
Safest option |

Conclusion: Here’s What I Learned the Hard Way
Trying to take the easy route by flushing wallpaper paste might seem harmless—but it’s not worth the risk. I’ve learned to:
- Always check local disposal guidelines
- Avoid flushing or draining paste
- Plan better to avoid waste in the first place
It’s a small habit that can save a lot of hassle—and money—down the line.
Related Article: How To Remove Brown Stains From Toilet Bowl?
FAQs on Disposing Wallpaper Paste
1. Can I dilute it and pour it down the drain?
Even diluted, it can still gum up the pipes. Best to avoid.
2. What if it’s already dried up?
If it’s dry as well as solid, then it is safe to put in the general waste bin.
3. Are eco-pastes any better?
Some are better for the environment—but not necessarily for your pipes. Still best to dispose of them carefully.
Home Diagnostics and Technical Standards Specialist at Hello Mag. She provides high-level Expertise in appliance mechanics and scientific pest management, ensuring every guide follows strict safety protocols and manufacturer standards. As a leading Authority on technical home specs, Kanimozhi audits complex data to provide homeowners with the most accurate, verified, and reliable diagnostic solutions available.
