
by Kanimozhi BV | Oct 13, 2025 | Garden, Exterior, Pest Control
When I first tried to reseed my lawn, I was surprised how quickly birds swooped in and gobbled up the grass seed I had just sown. It felt like all my effort and money was being wasted before the seeds had a chance to germinate.
After several attempts and a lot of trial and error, I found reliable ways on how to stop birds eating grass seed — methods that actually work here in the UK climate.
In this guide, I’ll walk you through what I learned, step by step, so you can successfully protect your newly seeded lawn from hungry birds.
Why Do Birds Eat Grass Seed and Why Is It a Problem in the UK?
In the UK, birds such as sparrows, blackbirds, and pigeons are naturally attracted to freshly sown grass seed.
It’s an easy meal for them — seeds are exposed on the soil surface, and the open garden space gives birds clear access.
This becomes a major issue because:
- Grass seeds are expensive, and you’ll need to reseed if they’re eaten.
- Birds disturb the soil while pecking, which displaces even the untouched seeds.
- If too many seeds are eaten, your lawn won’t establish properly.
Due to the UK’s mild and often wet climate, reseeding is common during spring and autumn — seasons that also see increased bird activity.
How to Stop Birds Eating Grass Seed? – Methods That Actually Work in the UK
After struggling with birds eating my seed multiple times, I discovered a few proven techniques. Here’s what finally worked for me:
- Physical barriers like netting or floating row covers
- Mulching with straw to hide the seeds
- Bird deterrents using shiny or moving objects
- Timing the seeding for early morning or cooler parts of the day when birds are less active
The key is combining more than one method to boost effectiveness.
When Is the Best Time to Sow Grass Seed in the UK Without Attracting Birds?
From my experience, early autumn (late August to mid-October) is ideal. The soil is still warm, rain is more frequent, and birds are slightly less aggressive than in spring.
Spring sowing is also possible (March to May), but the bird population tends to be more active then due to nesting season. If you choose spring, be extra vigilant with your protection methods.

Can I Use Netting or Covers to Protect Grass Seed from Birds?
Yes, netting for grass seed was a game-changer for me.
Here’s what I learned:
- Use lightweight mesh or garden fleece to cover the seeded area.
- Leave enough space above the soil so seedlings can grow.
- Secure the netting at the edges with pegs or stones to prevent birds from lifting it.
Pros:
- Physical protection
- Easy to install
- Can be reused
Cons:
- Needs removal once grass starts sprouting
- May trap leaves or debris
Does Mulching Work to Deter Birds?
Yes — and straw mulch for grass seed is one of the most effective options.
After spreading the seed, I lightly scattered straw across the area until about 50% of the soil surface was covered. This kept the seeds hidden from birds while still allowing sunlight and water through.
Other mulch options:
- Compost (in a light layer)
- Grass clippings (sparingly, to avoid smothering)
- Jute matting (biodegradable and effective)
Important Tip: Don’t use heavy mulch; it can prevent germination.
What Natural or DIY Bird Deterrents Can I Use?
I experimented with a few DIY bird deterrents, and some worked better than others.
Here are some ideas you can try:
- Reflective CDs or foil tape: Hang them from nearby trees or sticks
- Plastic owls or hawks: Move them every few days to maintain their effectiveness
- Wind chimes: The sound deters smaller birds
- Pinwheels or garden spinners: Their movement and shine scares birds off
Pro Tip: Combine at least two of these for better results.

Should I Use Bird Repellent Spray or Pellets?
I personally avoid chemical sprays, especially since I have pets. However, organic bird repellent pellets are available in the UK that are pet- and wildlife-safe.
Things to consider:
- Read labels carefully
- Avoid anything that might affect seed germination
- Reapply after rain
If you’re using pellets or sprays, combine them with other protection methods.
How Long Do I Need to Protect Grass Seed from Birds?
Typically, grass seed germinates in 7 to 21 days, depending on the type and weather.
Here’s a rough germination timeline I follow:
| Grass Type |
Germination Time (Days) |
| Ryegrass |
5–10 |
| Fescue |
7–14 |
| Bentgrass |
10–21 |
| Mixed UK blends |
7–14 |
I usually keep protection in place until the grass reaches 2 inches high. At that point, birds lose interest because the seeds are no longer exposed.
What Mistakes Should I Avoid When Protecting Grass Seed?
Here are some common errors I’ve made (so you don’t have to):
- Skipping soil preparation – compact or poor soil affects germination.
- Overwatering – puddling exposes seeds.
- Leaving large gaps in netting – birds can easily sneak through.
- Using thick mulch – smothers the seed and blocks light.
- Not rotating scare tactics – birds get used to static objects quickly.
My Grass Seed Was Eaten by Birds – What Should I Do Now?
If birds wiped out your seed, don’t worry — I’ve been there.
Here’s how I fixed it:
- Rake the soil lightly to prepare it again
- Reapply fresh seed, and use a roller or board to press it in
- Cover it properly this time (netting + mulch)
- Water consistently, especially in the first two weeks
Avoid reseeding in harsh frost or extreme wet weather — aim for mild, calm days.
What Are My Final Tips for Maintaining a Healthy Lawn in the UK?
Once your lawn is established, keep it healthy to avoid bare spots (which birds target for easy access). My regular UK lawn maintenance routine includes:
- Mowing once a week during growing season
- Fertilising 2–3 times a year
- Overseeding thin patches every spring
- Aerating the lawn each autumn
This not only keeps your grass lush but also reduces future bird-related problems.
Conclusion – How I Successfully Protected My Lawn from Birds?
Looking back, the biggest difference came when I started using multiple protection methods together.
By combining netting, mulching, and simple DIY deterrents, I was finally able to stop birds eating grass seed on my lawn.
It took a little patience, but the result — a thick, green lawn — was absolutely worth it. If I could do it, so can you.
Frequently Asked Questions On How to Stop Birds Eating Grass Seed
1. Can I use fake snakes or owls to scare birds off my lawn?
Yes, but they work best when moved frequently. Birds will learn to ignore them if left in one place too long.
2. Are certain types of grass seed more resistant to birds?
No grass seed is bird-proof, but coated seeds are slightly less appealing. However, they still need protection.
3. Can I sow grass seed in winter in the UK?
It’s not ideal. The cold slows germination, and birds can easily eat the dormant seeds. Wait until early spring or autumn.
4. Is bird damage covered under lawn seed warranties or guarantees?
Typically no. Most seed warranties exclude damage by wildlife, so protecting your seed is up to you.
5. How can I attract birds to my garden without risking my grass seed?
Use bird feeders placed far from the lawn. This gives birds an alternative food source while keeping them away from seeded areas.

by Kanimozhi BV | Oct 9, 2025 | Pest Control
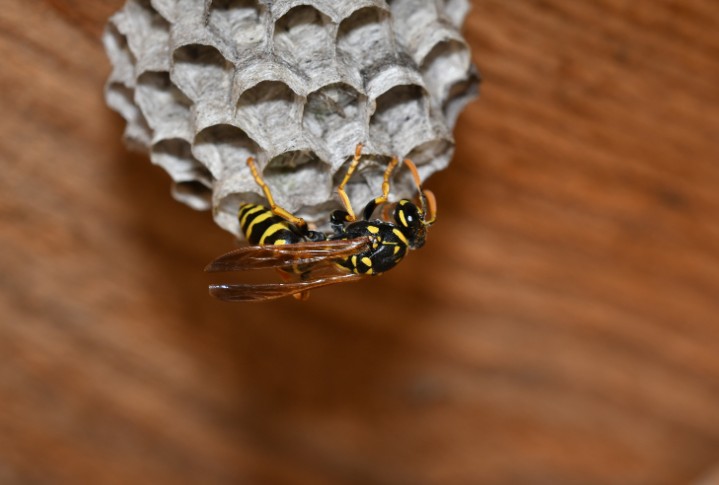
As someone who enjoys gardening, DIY projects, and spending time outdoors, I’ve had more than one run-in with wasps—and trust me, it’s not fun.
Whether it was a hidden nest in the shed, an infestation in the garden, or buzzing intruders under my roof eaves, I’ve learned that knowing how to get rid of wasps properly is essential for peace of mind.
In the UK, wasps are especially active from late spring through early autumn, and they can quickly go from a nuisance to a full-blown safety hazard—particularly if someone in your household is allergic to stings.
While I’m all for letting nature be, there are times when removing a wasp nest becomes unavoidable.
In this comprehensive guide, I’ll walk you through everything I’ve done and learned about dealing with wasps in different parts of the home and garden.
From DIY removal methods to knowing when to call a professional, here’s my personal guide to safe and effective wasp control in the UK.
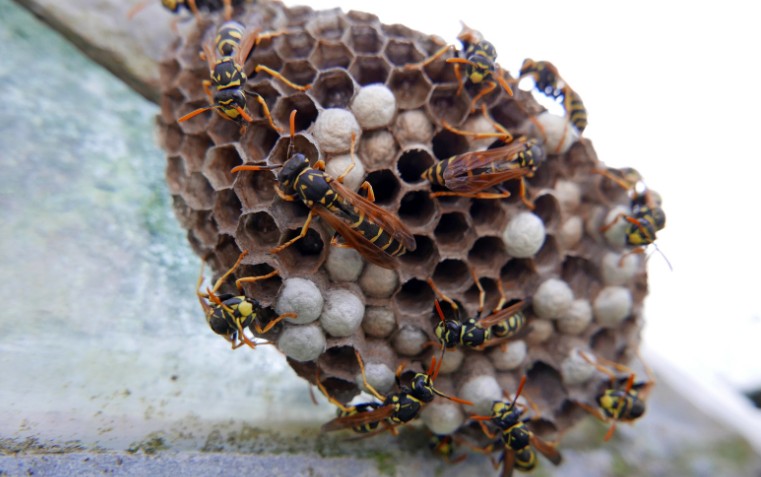
How to Get Rid of a Wasp Nest?
Before doing anything, I always make sure to identify whether the nest is active or abandoned.
An active nest will have constant wasp traffic in and out—usually early morning and late afternoon are the best times to observe this.
What Is the Best Time of Day to Tackle a Nest?
The safest time to approach or remove a wasp nest is late evening or very early morning when the wasps are less active and inside the nest. I always wear protective clothing and keep escape routes in mind.
What Are the Personal Safety Precautions I Always Take?
- Wear long sleeves, gloves, and a face shield or goggles
- Keep children and pets far away from the area
- Never stand directly under a nest
- Always have an exit plan in case things go wrong
How to Get Rid of Wasp Nest in Ground UK?
When I discovered a wasp nest in the ground near my compost bin, I was initially unsure how serious it was. But the activity level quickly increased, and I knew I had to act.
How I Dealt with It?
- Identified the entry hole by watching flight patterns
- Waited until evening when all wasps were inside
- Sprinkled insecticidal dust into the entrance hole
- Covered the area with a clear bowl (traps them inside)
Within a couple of days, the activity stopped completely. Ground nests can be risky—especially if disturbed—so if you’re unsure, I recommend calling a professional.
How to Get Rid of Wasp Nest in Roof?
I once had a nest in the loft insulation, discovered during summer when I heard buzzing in the ceiling.
What I Did?
- Located the external entry point near the fascia
- Sprayed long-range wasp foam spray from a safe distance
- Blocked the entrance 48 hours later with sealant
Roof nests are tricky because of the confined space and fire risk with aerosols. If you’re not confident, don’t take the risk—get a pest control expert involved.
How to Get Rid of Wasp Nest in Wall?
Wall nests are among the hardest to deal with, especially if they’re in a cavity or behind cladding.
What Is My Experience?
- Heard buzzing from the living room wall
- Confirmed it with a thermal camera I borrowed
- Used insecticidal dust in the exterior vent hole
Do not block the entry point until you’re sure the nest is inactive—trapped wasps may find their way indoors, which happened to me once.
How to Get Rid of Wasp Nest in Brick Wall?
Brick walls often have small mortar gaps or weep holes that make perfect entry points for wasps.
What I Found Effective?
- Inserted wasp dust into the entry holes
- Hold by 2 days before sealing with mortar or caulk
- Checked for lingering wasps before closing off completely
Brick wall nests may look harmless, but they can expand inside the structure, so don’t ignore them.
How to Get Rid of Wasp Nest in Roof Eaves?
The most common place I’ve found nests is in the roof eaves—especially where fascia boards meet brickwork.
How I Removed It?
- Used an extendable wasp spray
- Applied at dusk
- Wore full protective gear
- Sealed the gap with mesh to prevent return
Wasp nest in roof eaves can spread very huge if ignored—so the sooner you act, the better.
How to Get Rid of Wasp Nest in Ground?
This may seem like a repeat, but nests can appear in lawns, borders, and even compost heaps, so it’s worth reiterating.
What Are My Tips?
- Don’t stomp or poke the hole—wasps will swarm
- Pouring boiling water doesn’t work and is inhumane
- Use specialised wasp powder like Nippon or Rentokil
How to Get Rid of Wasp Nest in Shed?
I spot a nest once in the neck of my wooden shed roof beam.
What I Did?
- Waited until dark
- Sprayed foam directly into the nest
- Removed the inactive nest after 3 days
- Hung peppermint oil sachets to prevent future nesting
Sheds are popular for wasps due to undisturbed spaces—check them regularly in summer.
How to Get Rid of Wasp Nest in Garden?
Wasps are incredibly resourceful—mine nested in a low shrub one summer.
What Worked for Me?
- Sprayed the nest at dusk using foam insecticide
- Wore full PPE
- Trimmed the bush after removal
- Installed fake wasp nests nearby to deter new colonies
How to Get Rid of a Wasps Nest Naturally?
If you want to avoid chemicals, here are natural remedies I’ve tried.
What Are the Natural Remedies I Used?
- Peppermint oil + water spray (strong deterrent)
- DIY wasp trap: Sugar water, vinegar & washing-up liquid in a bottle
- Clove, lemongrass & geranium oil mix for spraying outdoor furniture
These methods don’t always kill the nest but help reduce activity if used early.
How to Get Rid of Wasps Outside?
Sometimes it’s not about a nest—it’s about too many wasps flying around.
What I Do to Keep Wasps Away Outdoors?
- Keep bins sealed tightly
- Avoid sweet food & drink outside
- Hang fake nests to deter colonisation
- Use citronella candles or peppermint diffusers
Wasps are attracted to protein early in summer and sugar later—adjust your strategy accordingly.

Summary Table: DIY vs. Professional Wasp Removal
| Situation |
DIY Safe? |
Pro Recommended? |
My Verdict |
| Small garden nest |
Yes |
No |
DIY worked well |
| Wasp nest in wall cavity |
No |
Yes |
Called a pro |
| Roof eaves with large nest |
No |
Yes |
Too risky to DIY |
| Ground nest under decking |
Maybe |
Yes |
Tried DIY, called pro |
| Visible nest in shed corner |
Yes |
No |
DIY safe |
Conclusion: Taking Back Control from Wasps
Learning how to get rid of wasps has been a real journey for me. I’ve had to deal with them in just about every place you can imagine—roof spaces, walls, gardens, and sheds.
What I’ve learned is that early detection, the right tools, and safety awareness are key.
Not every situation calls for a pest control expert, but when in doubt, I never risk my safety. Wasps are aggressive when disturbed, and their stings can be dangerous.
Whether you’re trying a natural method or going full DIY with sprays and dust, always have a plan—and respect the power of these small but mighty insects.
Frequently Asked Questions (FAQs) On How to Get Rid of Wasps
1. How do I know if there’s a wasp nest nearby?
I look for regular wasp traffic going in and out of the same spot, often early morning and evening.
2. Will wasps return after nest removal?
They won’t return to the same inactive nest, but they may build nearby if entry points remain open.
3. Is it legal to remove a wasp nest myself in the UK?
Yes, if it’s on your property. But it’s always recommended to call a professional for large or hard-to-reach nests.
4. When is the best time of year to remove wasp nests?
Late spring or early summer is ideal before the nest grows too large.
5. How much does professional wasp nest removal cost in the UK?
On average, between £50–£90, depending on location and nest complexity.

by Kanimozhi BV | Oct 8, 2025 | Exterior Painting, Interior Painting
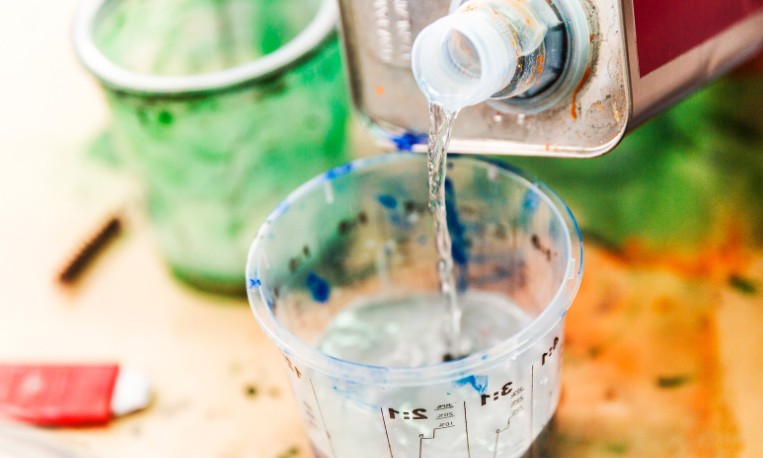
As someone who enjoys the occasional DIY project, especially painting, I’ve often relied on white spirit to clean my brushes after working with oil-based paints.
It’s effective and easily available, but once I’m done with it, I’m always left with a critical question: how to dispose of white spirit after cleaning paint brushes?
It’s a question every UK DIYer should take seriously. White spirit disposal isn’t just about cleaning up properly—it’s about protecting the environment and complying with local waste regulations.
In this guide, I’ll walk you through everything I’ve learned from personal experience, UK government guidelines, and council advice on how to handle this potentially hazardous product responsibly.
What Is White Spirit and Why Does It Require Special Disposal?

Are White Spirits Hazardous?
Yes—white spirits are classified as hazardous substances in the UK. They’re flammable, toxic, and harmful to both human health and the environment.
Because of their chemical makeup, they can contaminate water supplies, pollute soil, and emit harmful vapours if not stored or disposed of properly.
They may seem harmless in small quantities, but improper handling adds up quickly. Just a small amount poured down a drain can cause long-term environmental damage.
How Is the Nature of White Spirit?
White spirit (also known as mineral spirit) is a petroleum-based solvent commonly used in the UK for thinning oil-based paints and cleaning brushes, rollers, and tools.
It has a clear appearance, strong chemical smell, and evaporates quickly, which makes it excellent for cutting through sticky paint residues.
However, its volatile compounds mean it shouldn’t be treated like ordinary liquid waste or household rubbish.
How to Dispose of White Spirit After Cleaning Paint Brushes?
After using white spirit to clean my brushes, I never just throw it away. Here’s the step-by-step method I follow to handle it responsibly:
Step 1: Let It Settle
I pour the used white spirit into a glass jar or metal tin and seal it with a tight-fitting lid. I leave it undisturbed for a few days—usually 5 to 7.
During this time, the paint particles settle to the bottom, and the clearer solvent rises to the top.
Step 2: Decant the Clean Spirit
Once the liquid separates, I carefully pour the clean white spirit into another container to reuse it. This saves money and reduces chemical waste.
Step 3: Dispose of the Sludge
The remaining paint residue (sludge) is hazardous waste and cannot go in the bin. I take it to a local Household Waste Recycling Centre (HWRC) that accepts hazardous materials.
I always check my council’s website for the correct drop-off point and their operating hours.
This three-step process has become part of my DIY routine—it’s simple, safe, and aligns with UK environmental rules.
White Spirit Disposal: What Is The Right Way in the UK?
The UK treats white spirit disposal very seriously. It’s regulated under both domestic hazardous waste laws and environmental protection guidelines.
How To Store Used White Spirit?
I always store my white spirit—used or unused—in its original container or a clearly labelled jar. I write “Hazardous – White Spirit” in bold letters so there’s no confusion. These are my key storage practices:
- Keep it in a cool, well-ventilated place
- Store it away from heat sources and direct sunlight
- Ensure the cap or lid is tightly sealed
- Keep out of reach of children and pets
Correct storage ensures I can transport it safely to a waste centre and reduces the risk of accidental exposure.
How To Take It to a Licensed Waste Centre?
Most UK councils operate HWRCs that accept hazardous household materials like white spirit. I locate mine by searching “hazardous waste recycling [my postcode]” or checking the government’s recycling locator site.
When I visit?
- I keep the container upright and sealed
- I never mix it with other chemicals
- I hand it directly to the site staff, who know how to process it safely
Is It Okay to Put White Spirit Down the Sink?
Absolutely not.
Pouring white spirit down the sink, toilet, or an outside drain is dangerous and illegal in the UK. Here’s why:
- It can pollute rivers and groundwater, threatening ecosystems and drinking water
- It damages your plumbing and corrodes pipes
- It can cause toxic fumes in your home, especially if it evaporates inside closed plumbing
- It’s considered an environmental offence, and you could face penalties
Whenever I’m tempted to take the “easy route,” I remind myself that white spirit disposal isn’t about convenience—it’s about safety and responsibility.
Can I Reuse White Spirit After Cleaning Paint Brushes?
Yes—and it’s encouraged.
By reusing white spirit, I reduce the volume of hazardous waste I generate. Here’s my simple system:
- After cleaning brushes, pour the used spirit into a glass container
- Let it settle for several days
- Carefully pour off the clear top layer into a clean container
- Reuse this for your next cleaning session
- Dispose of the sludge properly
If I ever notice the reused spirit losing its effectiveness, that’s when I know it’s time to replace it completely and take the old liquid to a waste centre.

Are There Eco-Friendly Alternatives to White Spirit?
Yes. In recent years, I’ve tried several eco-friendly and biodegradable paint brush cleaners that are much safer for home use.
These are ideal for water-based and low-VOC paints, though not always as powerful as white spirit for oil-based products.
Here’s a quick comparison of what I’ve used:
| Product |
Eco Rating |
Effectiveness |
Scent |
Best For |
| Eco Solutions Brush Cleaner |
★★★★★ |
★★★★☆ |
Mild citrus |
Water-based paints |
| Bio Strip Brush Cleaner |
★★★★☆ |
★★★★☆ |
Neutral |
Oil & water-based paints |
| Traditional White Spirit |
★☆☆☆☆ |
★★★★★ |
Strong chemical |
Only oil-based paints |
Whenever possible, I choose greener alternatives—they’re easier to clean up and don’t require hazardous waste disposal.
What Are the Quick Dos and Don’ts When Disposing of White Spirit?
DO:
- Store white spirit in a sealed, clearly labelled container
- Reuse settled solvent when possible
- Take remaining waste to a council-approved hazardous recycling site
- Switch to eco-friendly cleaners when suitable
DON’T:
- Pour it down the sink or drain
- Throw it in with general household rubbish
- Leave containers unlabelled or open
- Burn it or mix with other chemicals
Summary Table: White Spirit Disposal Methods (Legal vs Illegal)
| Method |
Is it Legal in the UK? |
Safe for Environment? |
Recommended? |
| Pouring down the sink |
No |
No |
No |
| Taking to recycling centre |
Yes |
Yes |
Yes |
| Storing in original bottle |
Yes |
Yes |
Yes |
| Burning it |
No |
No |
No |
| Reusing filtered spirit |
Yes |
Yes (if done safely) |
Yes |

Conclusion: What Are My Responsibility as a DIYer?
Handling chemicals like white spirit might seem like a minor part of a painting project—but the truth is, how I dispose of white spirit after cleaning paint brushes matters more than most people realise.
By following proper storage, reusing what I can, and disposing of the rest through approved channels, I’m not only complying with UK law—I’m helping to reduce pollution and keep my home safe.
Every DIYer has a role to play. And now that I know the right way to do it, I’m committed to never cutting corners again.
Related Article: Is Methylated Spirit the Same as White Spirit? – A Complete Guide
Frequently Asked Questions On How to Dispose of White Spirit After Cleaning Paint Brushes
1. Is it okay to put white spirit down the sink?
No—it’s harmful, illegal, and damaging to the environment and your plumbing. Always dispose of it at a hazardous waste site.
2. Are white spirits hazardous?
Yes. They’re flammable, toxic, and can harm people, pets, and the environment if mishandled.
3. Can I throw white spirit in my general rubbish bin?
No. It must be taken to a licensed hazardous waste facility.
4. How long can I store used white spirit?
If sealed and labelled properly, you can store it for years—but keep it away from children, pets, and heat.
5. Can I take leftover white spirit to B&Q or other stores for disposal?
No. Retailers don’t accept hazardous waste. Use your local council’s HWRC.

by Kanimozhi BV | Oct 3, 2025 | Home & Living
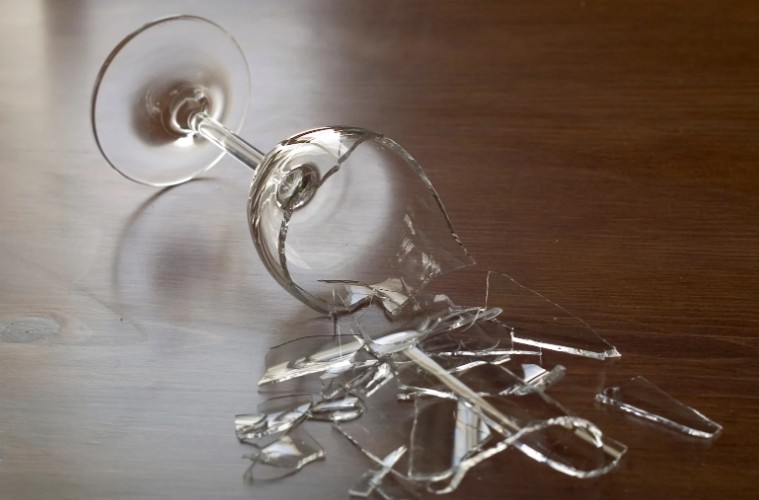
Broken glass can be dangerous—not just to me, but to others, especially when it’s not disposed of correctly.
I’ve found that many people in the UK, like myself, aren’t always sure which bin to use or whether a certain type of glass can even be recycled.
That’s why I decided to put together this simple yet thorough guide on how to dispose of broken glass properly and safely.
Why Is Proper Broken Glass Disposal Important?
What risks does broken glass pose at home?
I’ve had situations where I’ve dropped a glass, and the pieces scattered across the floor. Tiny shards can hide in corners or carpets, posing a real hazard. Improper disposal increases the chances of:
- Injuring waste collectors or anyone handling the rubbish
- Puncturing rubbish bags, leading to spills and contamination
- Causing injury to pets or small children at home
Could improper disposal be illegal or fined in the UK?
Yes, it can. UK councils have clear guidelines for disposing of dangerous or sharp objects.
If I were to toss broken glass into the wrong bin or leave it exposed, I could be fined or receive a warning for violating local waste regulations.
What Kind of Broken Glass Are You Dealing With?
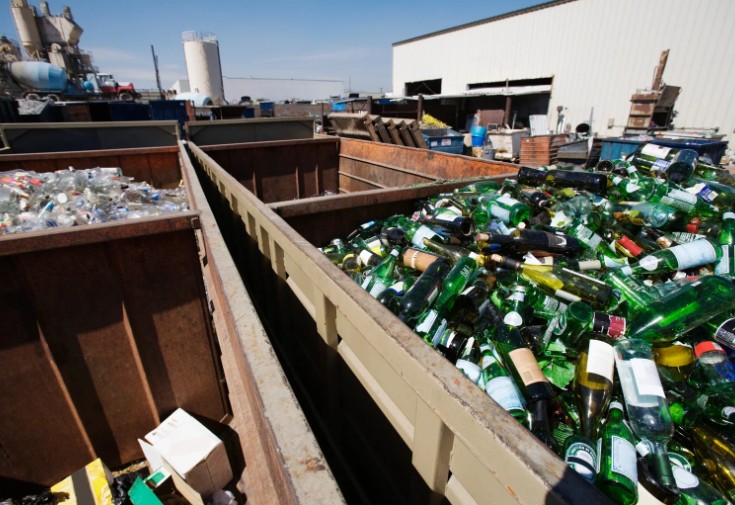
Can all broken glass be recycled in the UK?
Not all glass is created equal. I’ve learned that not all broken glass belongs in the recycling bin. For example:
- Recyclable: Bottles and jars (only if clean and empty)
- Not recyclable: Drinking glasses, window glass, mirrors, light bulbs, and ovenproof dishes
How do I know if my broken glass is recyclable or not?
Here’s a quick way I check:
| Type of Glass |
Recyclable? |
Where It Should Go |
| Wine Bottle |
Yes |
Glass Recycling Bin |
| Drinking Glass |
No |
General Waste (wrapped) |
| Mirror |
No |
Recycling Centre or Waste Site |
| Broken Window |
No |
Contact Council |
| Jam Jar (clean) |
Yes |
Glass Recycling Bin |
How To Safely Prepare Broken Glass For Disposal?
What materials should I use to wrap broken glass?
Safety comes first. I always make sure to protect myself and others by using:
- Thick cardboard or several layers of newspaper
- Heavy-duty duct tape to hold pieces together
- A sturdy, sealable plastic or cardboard box
- A visible label like “Broken Glass – Handle With Care”
How do I label the wrapped glass for collection?
I clearly mark the package with bold writing. I’ve even used a red marker and written “DANGER: BROKEN GLASS” to ensure the collectors know to handle it carefully.
What are the Quick Safety Checklist Before Throwing Away Broken Glass?
- Wear gloves to avoid cuts
- Use a broom and dustpan—not bare hands
- Wrap and seal pieces tightly
- Label the package visibly
- Keep it away from pets or children until collection day
Which Bin Should Broken Glass Go In?

Should I put broken glass in the recycling bin or general waste?
This depends on the type. If it’s a broken jar or bottle, and it’s clean, it can usually go into the glass recycling bin.
But anything like broken dishes, window glass, or mirrors should never be recycled and must go in the general waste, well wrapped.
What are local council rules about glass disposal in the UK?
Each council may differ slightly, but from my experience, most require:
- No broken glass in loose form in bins
- Glass to be securely wrapped and labelled
- Sharp objects to go in general waste, not recycling
I always double-check my local council’s website before disposal.
Are glass jars or bottles treated differently?
Yes! If they’re not broken and are rinsed, they go straight into the recycling bin. But if broken, I wrap them just like any other sharp object.
Can I Take Broken Glass To A Recycling Centre?
When should I visit a recycling centre?
I choose to take larger or more hazardous glass items (like a shattered window or large mirror) to the nearest recycling centre. Most centres accept:
- Window panes
- Mirrors
- Larger glassware not suitable for kerbside collection
How to find your nearest recycling centre in the UK?
I use the gov.uk recycling locator to find local facilities. It tells me what items are accepted and the opening hours.
How To Dispose Of Broken Glass In Flats Or Shared Housing?
Do communal bins have different rules?
Yes, and it’s even more important to be careful. I always:
- Wrap glass extra securely
- Notify the building manager if it’s large or hazardous
- Avoid dumping glass in communal recycling bins unless permitted
What if the building has no recycling system?
In that case, I take responsibility by going to the local recycling centre or calling the council to request a collection.
What NOT To Do When Disposing Of Broken Glass?
Can I put broken glass directly into bin bags?
Absolutely not. I’ve seen bags tear open, causing injury or mess. Always wrap broken glass before putting it in general waste.
Is it safe to flush small pieces down the drain?
Never. Even the smallest glass pieces can block plumbing or cause damage. Plus, it’s dangerous for anyone who has to maintain the pipes.
Summary Table: Ways To Dispose Of Broken Glass In The UK
| Disposal Method |
Suitable For |
Safety Tips |
| General Waste (wrapped) |
Drinking glasses, mirrors |
Wrap tightly & label clearly |
| Glass Recycling Bin |
Clean jars, bottles |
No lids, no ceramics or broken items |
| Recycling Centre |
Windows, large mirrors |
Call ahead to confirm acceptance |
| Council Collection |
Large volumes or hazardous |
Book in advance via local authority |
Conclusion – What’s The Safest & Easiest Way To Get Rid Of Broken Glass In The UK?
When it comes to how to dispose of broken glass, I always prioritise safety, clarity, and responsibility. Here’s a quick recap of what I do:
- DO wrap all glass securely
- DO label it clearly
- DO check with my local council
- DO use recycling centres for large items
- DON’T put broken glass in bins unwrapped
- DON’T recycle items like mirrors or ovenproof dishes
Proper glass disposal isn’t just about throwing something away—it’s about protecting people, pets, and the planet.
FAQs – Quick Answers To How To Dispose Of Broken Glass
1. Can I recycle broken mirrors or window glass?
No, both go in general waste or to the recycling centre—not the recycling bin.
2. What to do if I cut myself on broken glass during disposal?
I rinse the wound, apply pressure with a clean cloth, and seek medical help if it’s deep. Safety should always come first.
3. How do I safely transport large broken glass pieces?
I use a thick cardboard box, wrap the glass with newspaper, and secure it tightly with tape before placing it in my car. I drive slowly and keep the box flat.

by Kanimozhi BV | Oct 2, 2025 | Kitchen, Interior
When I started planning my kitchen renovation, one of the first questions I asked myself was: how much do Wren charge to fit a kitchen?
If you’re asking the same, this guide should help you get clear answers. Based on what I learned during my research and experience, I’ll walk you through the pricing, what’s included, hidden extras, and how to save money — all from a UK homeowner’s perspective.
What Are Wren Kitchens Known For?

Who are Wren Kitchens?
Wren Kitchens is a major UK kitchen retailer, well-known for its contemporary and customisable designs.
They operate over 100 showrooms across the UK, offering everything from budget-friendly styles to high-end luxury ranges.
I personally found their design service and interactive 3D planner extremely helpful during the planning phase.
What services do they offer?
Wren gives you the option to choose between supply-only kitchens, where you arrange your own installation, or a fully-fitted kitchen service that includes delivery and professional fitting.
They also offer optional extras such as appliance installation, removal of your old kitchen, and wall preparation (like plastering or tiling). This flexibility made them a strong contender when I was comparing options.
How Much Do Wren Charge to Fit a Kitchen in the UK?
What affects the cost of fitting a Wren kitchen?
The cost of fitting a kitchen with Wren isn’t fixed — it depends heavily on your kitchen’s layout, the number of units and appliances, and the amount of plumbing or electrical work required.
If you’re reconfiguring your layout, that could mean extra work for the installers, which naturally increases the price.
Material choice also plays a role; for example, granite or quartz worktops often require specialist installation.
So, the more complex your project, the higher the quote will likely be.
What’s the average cost of Wren kitchen installation?
From everything I gathered, Wren typically charges between £2,000 and £5,000 for installation.
This fee generally covers the fitting of kitchen units, standard worktops, and appliances — assuming there’s nothing particularly complex involved.
Here’s a breakdown of typical costs based on kitchen size:
Wren Kitchen Installation Cost by Kitchen Size
| Kitchen Size |
Estimated Cost |
What It Covers |
| Small |
£2,000–£2,500 |
Basic unit fitting and minor plumbing |
| Medium |
£2,500–£4,000 |
Standard fitting with appliance install |
| Large |
£4,000–£6,000+ |
Full layout fitting, appliances, extras like tiling or electrical work |
Remember, these are fitting costs only — not the price of the actual kitchen units.
What’s Included in Wren’s Installation Package?

When I received my quote, I noticed that Wren’s standard installation included fitting all the kitchen units, installing worktops, and integrating appliances (if purchased from them).
Delivery and unpacking were also part of the package. This made the process smoother, especially since I didn’t want to coordinate different trades myself.
However, some services came at an extra cost. Removing the old kitchen, making electrical adjustments, or doing any plastering or tiling weren’t part of the base price.
For example, removing the old kitchen could add around £300 to £500 to your quote, while electrical rewiring might cost another £100 to £500 depending on the complexity.
These optional extras aren’t always mentioned upfront, so it’s essential to ask for a fully itemised quote during your consultation.
Is Wren Kitchen Installation Worth the Price?
What do UK customers say?
From the reviews I read and my own experience, most people find Wren’s installation service convenient and professional.
The benefit of using their approved fitters is that they’re trained to handle Wren’s specific kitchen systems, which gives you some peace of mind. Plus, the service comes with a two-year workmanship guarantee.
That said, I came across a few mixed experiences online. Some customers mentioned delays or miscommunications during delivery and fitting.
So while many have had a smooth experience, others suggest being proactive in checking timelines and what exactly is included.
Should I use Wren or go with an independent fitter?
This was a big decision for me. I compared Wren’s full-service offer with quotes from independent kitchen fitters, and while the independents were often cheaper, they didn’t offer a warranty unless I paid extra. Also, managing multiple tradespeople on my own felt a bit overwhelming.
In the end, I chose Wren’s installation service because I wanted a hassle-free process, even if it meant paying a little more. But if you’re confident coordinating different trades, hiring a local fitter could save you money.
How Can I Save Money on a Wren Kitchen Installation?

While Wren’s installation service is convenient, there are definitely ways to bring the cost down.
Choosing the supply-only option lets you manage the fitting yourself and potentially save hundreds — or even thousands — depending on your project.
You can then hire a local fitter with good reviews and a transparent pricing structure.
Another tip is to avoid changing the kitchen layout if possible. Sticking to the existing configuration means less plumbing and electrical work, which can reduce costs significantly.
Also, if you’re comfortable with basic DIY, consider doing some finishing work yourself, like painting or tiling, which can quickly add up if outsourced.
Wren also offers finance options on both kitchen units and installation. For me, spreading the cost with interest-free monthly payments made the overall price easier to manage.
Final Thoughts: Is a Wren Kitchen Installation Right for Me?
After going through the whole process, I found that Wren charge between £2,000 and £5,000 or more for installation depending on the size of your kitchen and the work required.
For me, the convenience of having everything handled under one roof — from delivery to final fitting — made it worth the cost.
If you’re on a tight budget, going the supply-only route and using your own fitter could save you a fair amount.
But if you want a simpler, less stressful experience, Wren’s full fitting service might be the better choice — especially with the added warranty.
Whatever you decide, make sure to ask for a detailed breakdown of the installation quote so you’re not caught out by hidden extras. That’s one thing I was very glad I did.
What Are the Frequently Asked Questions On How Much Do Wren Charge to Fit a Kitchen?
1. Do Wren use their own installers?
Wren doesn’t employ fitters directly, but they work with a network of Wren-approved independent installers. These tradespeople are vetted and trained to install Wren kitchens to their specifications.
2. Can I fit a Wren kitchen myself?
Yes, you can. Wren kitchens are available as flat-pack or rigid units. If you’re confident in your DIY skills or know a qualified fitter, supply-only might be a good option.
3. Does Wren offer any guarantees with fitting?
Yes. Wren offers a two-year workmanship guarantee if you use their approved installation service. This covers defects related to the fitting work.
4. Is Wren more expensive than other kitchen companies?
Wren is competitive on unit prices, especially during sales. But when you include installation and optional services, it can become more expensive than going with an independent fitter. However, many customers (myself included) are happy to pay a bit more for the all-in-one service and peace of mind.
