by Kanimozhi BV | Feb 11, 2026 | Washing Machine, Appliances
Are you looking for an expert guide on how to stop washing machine smelling? There is nothing more frustrating than spending hours tackling the “Mount Everest” of laundry, only to pull a fresh load out of the drum and realise it smells like a damp dog.
As a homeowner or a busy parent, your washing machine is likely the most hardworking appliance in your house. When it starts to emit a funky odour, it doesn’t just affect the kitchen air; it clings to your family’s clothes.
Modern laundry habits are often the secret culprit. While we try to be eco-conscious by running 30°C or 40°C washes, these lower temperatures fail to kill bacteria or dissolve fats.
Over time, this creates a “biofilm”—a slimy layer of bacteria and undissolved detergent that coats the internal parts of your machine.
In this guide, you will learn exactly how to stop washing machine smelling using expert-verified maintenance tips and simple household hacks.
Quick Comparison: Cleaning Methods for a Fresh Machine
Before we dive into the steps, here is a quick look at how the most popular cleaning agents stack up against the UK’s common laundry issues.
| Method |
Best For |
Cost |
Effort |
| Soda Crystals |
Limescale & Hard Water |
£ (Very Low) |
Medium (Service Wash) |
| White Vinegar & Bicarb |
Natural Sanitising |
£ (Low) |
High (Manual Scrubbing) |
| Commercial Cleaners |
Heavy Mould & Biofilm |
££ (Medium) |
Low (Just Add & Run) |
| 90°C Service Wash |
Killing Bacteria |
£ (Energy Cost) |
Low (Automatic) |
What Is That Smell? Identifying the Source of the Stink
To fix the problem, you first need to identify which type of “stink” you are dealing with.
- The Musty / Damp Dog Smell: This is almost always caused by mould or biofilm growing in the rubber door seal (gasket) or the detergent drawer.
- The Rotten Egg / Sulphur Smell: This usually indicates a buildup of bacteria in stagnant water, often trapped in the drain pump filter or the waste pipe.
- The Sewage Smell: If the smell is persistent even when the machine isn’t running, it might be a plumbing issue where sewer gases are backing up through the standpipe.
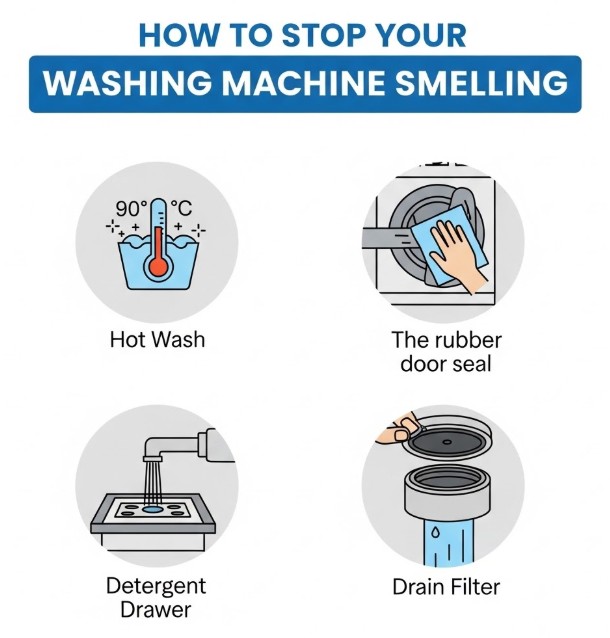
How to Stop Washing Machine Smelling Step-by-Step?
Don’t panic—you don’t need to buy a new appliance. Follow these steps to reset your machine’s freshness.
Step 1: The High-Heat “Service Wash”
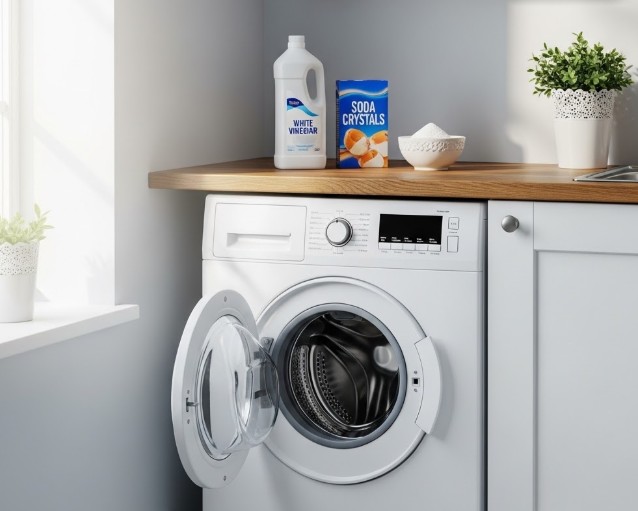
The most effective way to kill bacteria is heat. Run your machine empty on its hottest setting (usually 90°C or a “Coton” cycle). Add 500g of Soda Crystals directly into the drum.
Unlike liquid detergents, soda crystals help break down grease and soften the UK’s notoriously hard water, which prevents limescale from trapping odours.
Step 2: Attacking the Rubber Gasket
The rubber seal is a magnet for hair, coins, and lint. Pull the folds of the seal back. If you see black spots, that’s mould. Wipe this out using a solution of white vinegar and water.
For stubborn mould, soak some kitchen roll in a mild bleach solution, tuck it into the seal for 30 minutes, then scrub and rinse.
Step 3: The Forgotten Detergent Drawer
Most drawers can be completely removed by pressing a small tab in the middle. You will likely find a thick, jelly-like residue of fabric softener underneath.
Soak the drawer in a sink of warm, soapy water and use an old toothbrush to reach the “ceiling” of the drawer compartment in the machine—mould loves to hide there!
Step 4: Draining the Filter
Located behind a small flap at the bottom of the machine, the filter catches everything.
Warning: Have a shallow tray and towels ready, as about a litre of (potentially smelly) water will come out. Clean the debris, rinse the filter, and screw it back in tightly.
What Are the Best Natural Hacks for a Fresh Machine?
If you prefer to avoid harsh chemicals around your children, natural alternatives are highly effective.
- White Vinegar and Bicarb of Soda: Pour 250ml of white vinegar into the detergent drawer and half a cup of bicarbonate of soda into the drum. The chemical reaction helps lift grime and neutralise acidic odours.
- The Power of Soda Crystals: In the UK, limescale is a major contributor to washing machine odours. Adding a tablespoon of soda crystals to every wash doesn’t just stop the smell; it protects your heating element and helps your detergent work better.
How Can I Prevent My Washing Machine Smelling in the Future?
Maintenance is much easier than a deep clean. For busy parents, these three habits will save you hours of scrubbing:
- The “Door Ajar” Rule: Never close the washing machine door immediately after a cycle. Leave it open at least 2 inches to allow the drum to air out. Mould cannot grow in a dry environment.
- Ditch the Excess Fabric Softener: Liquid softener is essentially fat. It coats the pipes and creates the “biofilm” that bacteria feed on. Try using half the recommended amount or swap to white vinegar as a natural softener.
- Monthly Maintenance: Set a recurring reminder on your phone to run a 60°C or 90°C wash once a month—even if the machine doesn’t smell yet.
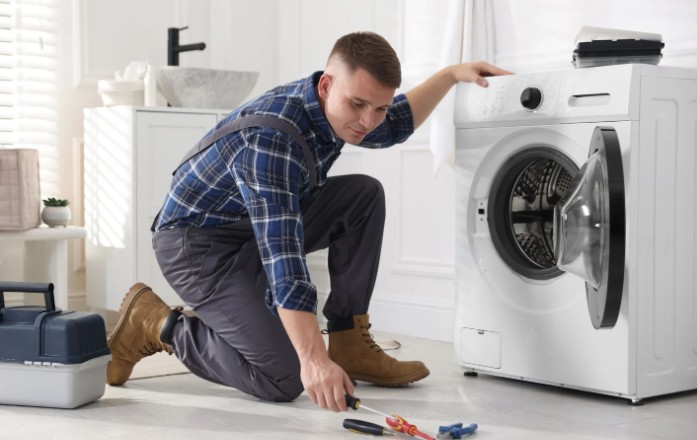
When Should I Call a Professional?
If you have cleaned the filter, drawer, and drum, but the smell remains, you may have a partial blockage in the external drainage pipes or a “u-bend” issue. If you see water backing up into the sink when the machine drains, it’s time to call a plumber.
What are the FAQ about How to Stop Washing Machine Smelling?
1. Can I use bleach in my washing machine?
Yes, but sparingly. Bleach is excellent for killing mould, but it can degrade rubber seals over time if used too frequently. Always run an extra rinse cycle after using bleach to ensure no residue remains on your clothes.
2. How often should I clean my washing machine filter?
For a busy household doing 5+ loads a week, you should check the filter every 3 to 4 months. If you have pets that shed, check it every 2 months.
3. Does white vinegar damage the rubber seals?
Occasional use is fine, but vinegar is an acid. If used in every single wash, it can eventually weaken the rubber components. Stick to using it for a monthly deep clean or as an occasional softener substitute.
4. Why does my machine smell like sewage?
This is often a plumbing issue called “siphoning.” It happens when the waste hose is pushed too far down the standpipe, or there isn’t a proper trap, allowing sewer gases to enter the machine.
By following this guide on how to stop washing machine smelling, you ensure your machine remains a hygienic tool for your family rather than a breeding ground for bacteria. A clean machine means cleaner clothes and a healthier home!
Home Diagnostics and Technical Standards Specialist at Hello Mag. She provides high-level Expertise in appliance mechanics and scientific pest management, ensuring every guide follows strict safety protocols and manufacturer standards. As a leading Authority on technical home specs, Kanimozhi audits complex data to provide homeowners with the most accurate, verified, and reliable diagnostic solutions available.
by Kanimozhi BV | Feb 10, 2026 | Tumble Dryer, DIY Ideas
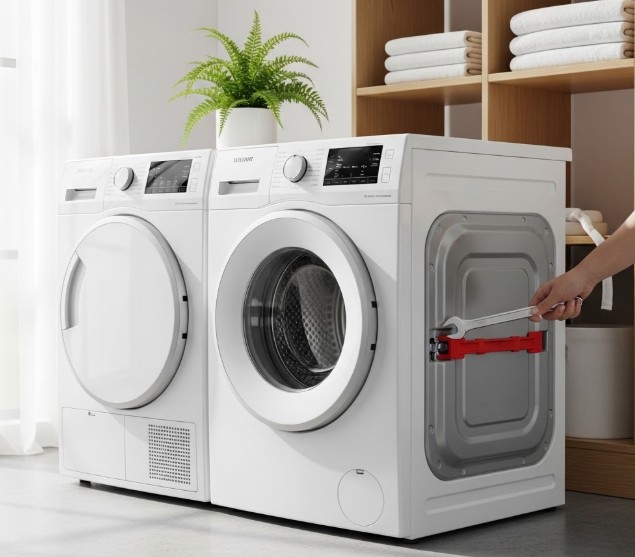
You’ve finally got the keys to your new home, the boxes are piled high, and your new appliances have just been delivered. It’s an exciting time, but if you’ve ever installed a washing machine, you know the golden rule: never turn it on until those heavy-duty transit bolts are removed.
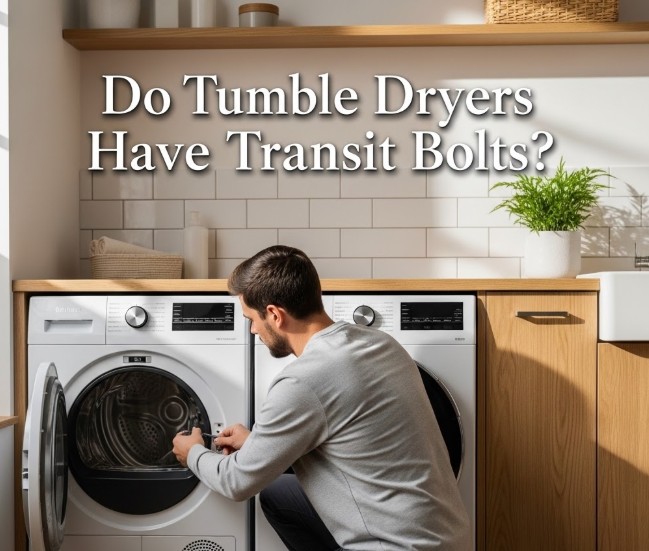
But as you stand behind your new tumble dryer, spanner in hand, you might be wondering: Do tumble dryers have transit bolts too? It’s a common source of confusion for DIY enthusiasts and new homeowners alike. Getting this wrong could lead to a very noisy first laundry load—or worse, a broken machine.
Quick Answer: Do Tumble Dryers Have Transit Bolts?
In most cases, no. Standard standalone tumble dryers do not usually require transit bolts because their drums are lighter and do not have heavy concrete counterweights.
However, washer-dryer hybrids almost always have them, and specific high-end heat pump models (such as those from Miele, Samsung, or Bosch) may use shipping brackets or internal supports.
Always check the rear of the machine for plastic caps or bolts before your first use.
Tumble Dryer vs. Washing Machine: Installation Checklist
Before we dive into the specifics, let’s look at how your dryer compares to its sister appliance, the washing machine.
| Feature |
Washing Machine |
Tumble Dryer |
| Transit Bolts |
Always present (usually 3–4) |
Rarely present (model dependent) |
| Drum Suspension |
Heavy springs and dampers |
Fixed rollers or light bearings |
| Internal Weight |
Concrete blocks (very heavy) |
Lightweight (mostly air/heating elements) |
| Moving Risk |
High (drum can smash the outer tub) |
Low (drum is generally more stable) |
| Primary Packaging |
Bolts and plastic spacers |
Polystyrene blocks and tape |
Wait. Now comes the question, how much does a washing machine weigh acutally.
Why do people think tumble dryers have transit bolts?
The confusion usually stems from two places. First, many of us use a “Washer-Dryer” combo. Because these machines perform a high-speed spin cycle (often up to 1400 or 1600 RPM), they require heavy-duty transit bolts to protect the internal suspension during delivery. If you are installing a hybrid machine, you must remove those bolts or you risk destroying the motor.
Secondly, if you look at the back of a standalone tumble dryer, you’ll often see circular indentations or plastic caps. These aren’t always for bolts; they are often access points for the heating element, moisture sensors, or manufacturing holes. Unlike washing machines, which have heavy concrete counterweights that need to be locked down, a standard tumble dryer drum is relatively light and doesn’t “swing” as violently during transport.

Identifying if your specific tumble dryers have transit bolts
While most standard vented and condenser dryers skip the bolts, the technology in heat pump tumble dryers is more complex. Because these units contain a compressor (similar to a refrigerator), some premium brands include shipping brackets to prevent internal components from shifting.
Expert Tip: Brands like Miele and Samsung are known for using transit supports on their high-end models. If you see bright red or yellow plastic components on the back of the machine, these are transit safety assemblies that must be removed.
To be 100% sure, perform the “Drum Test.” Open the door and try to rotate the drum by hand. It should move smoothly with a small amount of resistance. If it feels completely locked or “fixed” in place, there is likely transit packaging or a shipping bracket still attached.
Always check your user manual for the “Unpacking” section. If your machine does have a “transport safety assembly,” it will be clearly illustrated there.
What happens if you forget to remove transit packaging?
If your dryer is one of the rare models that does include a shipping bracket or if you’ve left the polystyrene base inside, you’ll know about it quickly.
- Excessive Vibration: The machine may “walk” across your utility room floor or make a heavy banging sound.
- Voided Warranty: Manufacturers often won’t cover repairs caused by “user installation error,” which includes leaving transit supports in place.
- Internal Damage: Forcing a locked drum to spin can snap the drive belt, overheat the motor, or damage the delicate sensors required for modern energy-efficient drying.
Moving house? How to secure your dryer for the journey?
If you’re moving house, you don’t typically need to hunt for old transit bolts for a standard dryer. However, you should still take precautions:
- Tape the door shut: Prevent it from swinging open and catching on doorframes.
- Empty the water tank: If it’s a condenser or heat pump model, ensure the reservoir is bone dry to avoid leaks onto the circuit boards during transit.
- Keep it upright: Dryers are best moved in their natural standing position to protect the internal rollers and ensure any remaining condensation doesn’t enter the electronics.
Final Recap for Homeowners
When it comes to the question “do tumble dryers have transit bolts?”, the answer is usually no—but for premium heat pump models and washer-dryer hybrids, the answer is a firm yes.
Always verify the drum moves freely, check for bright plastic “tags” on the back, and consult the manual before you start your first load. Happy moving!
Related Article: Why Is My Indesit Tumble Dryer Not Heating – How to Fix?
FAQ about Do Tumble Dryers Have Transit Bolts
1. Do I need a spanner to install a new tumble dryer?
Generally, no. Most dryers only require you to adjust the levelling feet by hand or with a basic wrench. You won’t need the heavy-duty spanner required for washing machine bolts unless you have a washer-dryer hybrid.
2. Can I reuse washing machine bolts on my dryer?
No. The threads and lengths are specific to the machine’s chassis. If your dryer requires bolts, you must use the ones supplied by that specific manufacturer.
3. Why is my new tumble dryer making a loud vibrating noise?
If there are no bolts, check that the machine is perfectly level. Use a spirit level on the top and adjust the feet. Also, check that you’ve removed the polystyrene block often found underneath the machine or wedged in the lint filter area during shipping.
4. Where can I buy replacement shipping bolts?
If you have a model that requires them (like a washer-dryer hybrid) and you’ve lost them, search by your model number on the manufacturer’s official spare parts website.
Home Diagnostics and Technical Standards Specialist at Hello Mag. She provides high-level Expertise in appliance mechanics and scientific pest management, ensuring every guide follows strict safety protocols and manufacturer standards. As a leading Authority on technical home specs, Kanimozhi audits complex data to provide homeowners with the most accurate, verified, and reliable diagnostic solutions available.
![Why Is There Water in My Washing Machine Drum When Not in Use? [UK DIY Guide]](https://www.hellomag.co.uk/wp-content/uploads/2026/02/Water-in-My-Washing-Machine-Drum-When-Not-in-Use.jpg)
by Kanimozhi BV | Feb 9, 2026 | Washing Machine
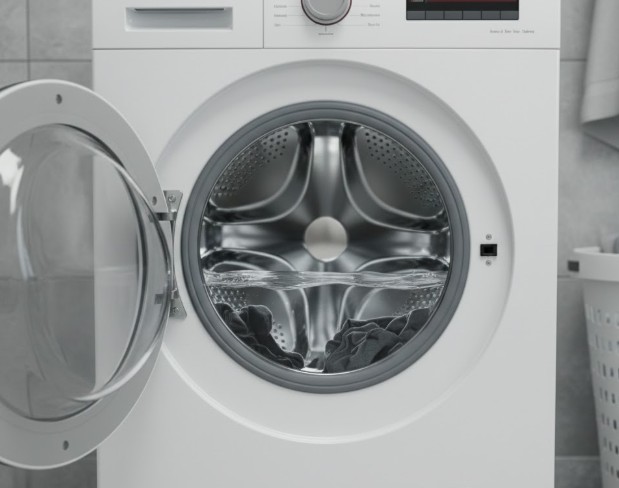
Water in Washing Machine Drum When Not In Use
Quick Answer: If you find water in your washing machine when it is turned off, the cause depends on the water type. Clean water usually indicates a faulty water inlet valve that is leaking supply water into the drum. Dirty or smelly water is typically caused by backflow from your kitchen sink or a drainage issue where waste water siphons back into the machine through the drain hose.
Finding a pool of water in your washing machine drum when you haven’t even run a cycle is a frustrating—and potentially messy—discovery.
In the UK, where washing machines are frequently installed under kitchen counters and share drainage with the sink, this issue is incredibly common.
As an expert in appliance maintenance, I have put together this guide to help you diagnose the problem, fix it yourself where possible, and understand when it’s time to call in a professional.
Diagnostic Table: Is Your Water Clean or Dirty?
Identifying the source of the water is 90% of the battle. Use this table to determine your next steps.
| Water Appearance |
Smell |
Likely Source |
Primary Culprit |
| Crystal Clear |
None |
Fresh water mains |
Faulty Water Inlet Valve |
| Grey/Cloudy |
Musty or soapy |
Previous cycle |
Blocked Pump Filter |
| Dirty/Debris |
Foul/Food waste |
Kitchen sink |
Drainage Backflow (Siphoning) |
Why is Washing Machine Filling With Water When Off?
If the water in your drum is perfectly clear, it is coming from your home’s internal plumbing supply. Even when your machine is off, it is still connected to your mains water.
The Faulty Water Inlet Valve (Solenoid Valve)
The water inlet valve is an electromagnetic component that opens when the machine needs water and shuts tight when it doesn’t. Over time, these valves can perish or become “scaled up.”
- The Limescale Factor: In many parts of the UK (particularly the South and East), “hard water” is a major issue. Limescale deposits can build up inside the valve, preventing it from closing fully. Even a microscopic gap allows a “weeping” leak that fills the drum over several hours.
- The Diagnostic Test: Turn off the manual water isolation valve (usually a blue or red plastic tap behind the machine). If the water stops appearing in the drum, your inlet valve is definitely faulty and needs replacing.
Why is Smelly or Dirty Water Appearing in My Washer?
If the water looks like “dishwater” or smells like sewage, it isn’t coming from the mains—it’s coming from your drain.
This is the most common issue in UK households where the washing machine drain hose is connected to the sink “spigot” (the plastic nozzle under your kitchen sink).
The Siphoning Effect and Sink Backflow
When you empty your kitchen sink, the water travels down the waste pipe. If your plumbing isn’t set up correctly, some of that waste water can be pushed sideways into your washing machine’s drain hose instead of down the drain.
- The “High Loop” Rule: Most DIYers overlook this. Your drain hose must rise above the level of the sink’s water line before it goes down to the drain. If the hose stays low, gravity simply pulls sink water into your machine.
- Blocked U-Bend: If your kitchen sink is draining slowly, the backup will almost certainly find its way into the lowest point—your washing machine drum.
Can a Blocked Filter Cause Water to “Appear”?
Sometimes, the water didn’t “come back” into the machine; it never left.
Modern washing machines can hold several litres of water in the outer tub and internal pipes that you cannot see through the glass.
If your pump filter is partially blocked with coins, lint, or hair, the machine might finish the cycle but fail to expel the last bit of water.
Over an hour or two, this “hidden” water settles into the bottom of the drum, making it look like it appeared out of nowhere.
Statistics on Appliance Failure
According to UK repair data, nearly 35% of washing machine leaks or drainage issues are caused by a blocked pump filter rather than a mechanical failure.
How Can You Fix This at Home? (Step-by-Step DIY)
Fix 1: Cleaning the Inlet Valve Filters
Before replacing parts, try this:
- Turn off the water supply and unscrew the hoses from the back of the machine.
- Look inside the valve entry point; you will see small mesh filters.
- Use pliers to gently remove them, clean off any UK hard water limescale with vinegar, and replace them.
Fix 2: Creating an Anti-Siphon Loop
If you have dirty water backflow:
- Check under your sink.
- Ensure your corrugated drain hose is hooked up high—ideally clipped to the underside of the worktop—before it attaches to the sink pipe. This creates a “gravity break” that prevents sink water from flowing into the washer.
Fix 3: Clearing the Pump Filter
- Locate the small hatch at the bottom front of your machine.
- Lay a towel down (there will be water!).
- Unscrew the filter slowly and remove any debris.

Conclusion
Finding water in your washing machine drum is usually a sign that your machine’s “entry” or “exit” system is compromised.
By identifying whether the water is clean or dirty, you can quickly narrow down the culprit to either a faulty inlet valve or a plumbing siphoning issue.
Pro Tip: Always leave your washing machine door slightly ajar when not in use. This allows the drum to dry out, preventing the build-up of the “smelly water” bacteria that thrive in damp, dark environments.
Disclaimer: If you are unsure about DIY repairs, always consult a qualified appliance engineer. Ensure the appliance is unplugged before attempting any mechanical work.
FAQ about Water in Washing Machine Drum when Not in Use
1. Why does my washing machine smell like rotten eggs?
This is usually caused by stagnant water trapped in the “sump hose” or backflow from the kitchen sink. Run a 90°C service wash with a dedicated cleaner to kill the bacteria.
2. Is it dangerous to have water in the drum?
While not an immediate fire hazard, standing water can damage the drum bearings over time and leads to mould growth which can cause respiratory issues.
3. Should I turn off my water tap after every wash?
If you have a known weeping valve, turning off the isolation tap is a great temporary fix. However, a healthy machine should be able to hold back the water pressure indefinitely.
Home Diagnostics and Technical Standards Specialist at Hello Mag. She provides high-level Expertise in appliance mechanics and scientific pest management, ensuring every guide follows strict safety protocols and manufacturer standards. As a leading Authority on technical home specs, Kanimozhi audits complex data to provide homeowners with the most accurate, verified, and reliable diagnostic solutions available.
by Kanimozhi BV | Feb 9, 2026 | Washing Machine, DIY Ideas
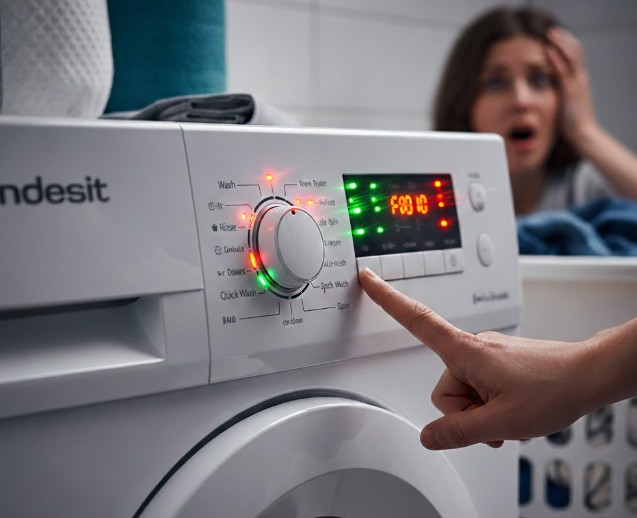
⚡Indesit Washing Machine All Lights Flashing: Try This First
If your Indesit is flashing like a Christmas tree, don’t panic. 90% of “all lights flashing” errors are resolved by a Hard Reset.
- Switch the machine off at the wall plug.
- Leave it unplugged for exactly 10 minutes.
- Plug it back in and hold the Start/Pause button for 5 seconds.
- If the lights are still flashing, check your pump filter for blockages (bottom right of the machine).
If you’ve just walked into your kitchen to find your Indesit washing machine looking more like a Christmas tree than an appliance, you aren’t alone.
Whether it’s an Indesit Ecotime or the newer Innex series, the “all lights flashing” error is one of the most common—and frustrating—issues UK homeowners face.
But what does it actually mean? Does it mean your machine is headed for the scrap heap, or is there a quick fix you can do before the school run?
In this guide, we’ll break down exactly why your Indesit is flashing, how to read the “hidden” binary code, and the steps you can take to fix it today.
Why Are All the Lights Flashing on My Indesit Washing Machine?
When every light on the console starts blinking, it’s usually the machine’s way of saying it has suffered a “System Logic Failure.” Unlike a specific error code (where only one or two lights flash), a total flash usually indicates that the main control board (PCB) has become “confused” or has detected a critical power delivery issue.
The “All Lights” vs. “Specific Lights” Difference
- Specific Lights Flashing: This usually points to a part failure (like a worn motor brush or a blocked pump).
- All Lights Flashing: This is almost always an electronic “glitch” or a hardware failure within the brain of the machine itself. On UK forums like Reddit, many users report this happening specifically after a power surge or mid-cycle interruption.
Quick Fix Checklist: Indesit Light Patterns vs. Fault Codes
Before you reach for your toolbox, use this table to see if your machine is trying to tell you something specific. Many Indesit models use a binary system for their lights.
| Light Position (From Left) |
Numerical Value |
Common Meaning |
| Light 1 |
1 |
F01: Electronic circuit fault |
| Light 2 |
2 |
F02: Motor circuit fault |
| Light 3 |
4 |
F04: Pressure switch (Water level) issue |
| Light 4 |
8 |
F08: Heater relay fault |
| All Lights |
Total System |
F12 / F18: Communication or PCB failure |
Note: If all lights are flashing simultaneously, it often defaults to an F12 or F18 error, indicating the “brain” cannot talk to the “display.”
How Do I Reset My Indesit Washing Machine? (The 5-Minute Fix)
For busy families, time is of the essence. Before calling an engineer, try this “Hard Reset” which clears 60% of flashing light errors.
- The Power Cut: Switch the machine off at the wall socket. Do not just use the “On/Off” button.
- The Wait: Leave it unplugged for at least 10 minutes. This allows the capacitors on the PCB to discharge completely.
- The Sequence: Plug it back in, turn it on, and immediately press and hold the Start/Pause button for 5 seconds.
- The Test: Try a simple “Drain & Spin” cycle. If it completes, you’ve saved yourself a £100 call-out fee!
Is a Blocked Filter Causing the Flashing Lights?
On models like the Indesit Innex, the machine will flash all its lights if it cannot drain water within a specific timeframe (usually 4 minutes).
How to Clean Your Indesit Filter?
- Access: Remove the kick-strip (the plastic panel at the bottom).
- Drain: Have a shallow tray and towels ready. Unscrew the circular filter cap slowly.
- Clear: You’ll likely find coins, hairpins, or “colour catcher” sheets.
- Check the Impeller: Reach into the hole and make sure the little plastic fan (impeller) spins freely. If it feels jammed, there’s your culprit!
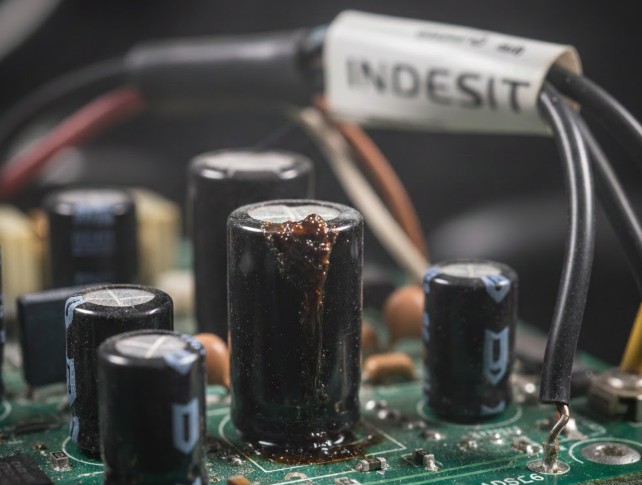
Understanding the Leaky Capacitor Issue
If you have an Indesit Ecotime that is 3–7 years old, there is a technical reason why the lights flash that most manuals won’t tell you. This is a massive topic on UK appliance repair Facebook groups.
Inside the back of the machine is the PCB (Power Control Board). Over time, a specific component called a capacitor (usually a 10V or 25V 680uF) can “bulge” or leak. When this happens, the board can’t get steady power, causing the “Christmas Tree” flashing effect.
- The Component: Engineers often look for the C17 capacitor on the board.
- DIY Fix: If you are handy with a soldering iron, these capacitors cost about 50p from electronics stores. Replacing a bulging one can save a £150 PCB replacement.
- Pro Fix: You may need a replacement board, but be warned: new boards must be “flashed” with a smart card to match your specific model.
Conclusion: Getting Your Laundry Back on Track
Seeing all the lights flashing on your Indesit is stressful, but it doesn’t always mean the end of the machine. Start with a hard reset, check your drain filter, and ensure your door is latched.
If you’ve tried these steps and the “Christmas Tree” returns, it’s likely a PCB issue. For machines under 5 years old, a repair is usually worth it. For older models, it might be time to look at a new energy-efficient upgrade.
Found a weird object in your filter? Tell us what was stopping your wash in the comments below!
FAQ About Indesit Washing Machine All Lights Flashing
1. Why is my Indesit Innex beeping and flashing?
The Innex range washing machine often beeps to indicate a door lock issue. Ensure the door is pushed firmly until you hear a “click.” If the lights flash immediately after the beep, the “Interlock” part likely needs replacing.
2. Can I open the door while the lights are flashing?
Usually, no. The flashing lights often lock the door for safety. If there is water inside, you must drain it manually via the filter at the bottom before the door will release.
3. Is my machine a fire risk?
While flashing lights are usually just an electronic glitch, if you smell burning or see smoke, turn it off at the wall immediately. Older Indesit/Hotpoint models were subject to a recall, so check your model number on the official manufacturer’s portal.
Home Diagnostics and Technical Standards Specialist at Hello Mag. She provides high-level Expertise in appliance mechanics and scientific pest management, ensuring every guide follows strict safety protocols and manufacturer standards. As a leading Authority on technical home specs, Kanimozhi audits complex data to provide homeowners with the most accurate, verified, and reliable diagnostic solutions available.
![Can You Paint Shower Panels [Wet Wall Panels]? Expert Advice for a Stylish Bathroom](https://www.hellomag.co.uk/wp-content/uploads/2026/02/Can-You-Paint-Shower-Panels.jpg)
by Kanimozhi BV | Feb 6, 2026 | Interior Painting, Bathroom, DIY Ideas
Painting your bathroom can be one of the quickest ways to refresh its look — but can you actually paint shower panels or wet wall panels without causing long-term damage or peeling? The short answer is: sometimes… but it depends.
This guide on can you paint shower panels breaks down what works, what doesn’t, and how to get the best possible result if you decide to go ahead.
Can You Paint Shower Panels and Wet Wall Panels?
✔ Yes — but only with the right prep and expectations
Technically, you can paint many types of bathroom wall panels, including acrylic shower panels and PVC wet wall panels, as long as the surface is prepared correctly.
Most shower and wet wall panels are engineered with a smooth, waterproof finish that makes it hard for paint to adhere unless it’s properly prepped.
⚠ But there’s a big caveat
Some manufacturers state that their wet wall panels aren’t designed to be painted at all — especially in areas with direct water or steam contact. Painting these could compromise the waterproof barrier or void any warranty.

Why Painting Shower Panels Is Tricky?
Shower panels and wet wall panels are made to repel water and remain easy to clean. That means:
-
The surface is non-porous, so standard paint won’t grip well
-
Constant moisture and steam can cause blistering or peeling
-
Manufacturer warranties may become void if you alter the finish
Without the right preparation, your paint job may not last. And learn more on how to fit shower panel over tiles with our expert guide.
Step-by-Step: How to Paint Shower or Wet Wall Panels?
If you still want to go ahead, follow these essential steps for a better outcome:
1. Clean the Panels Thoroughly
Use a degreasing bathroom cleaner to remove soap, dirt, and residue.
2. Lightly Sand the Surface
Gently sand the panels using fine-grit sandpaper to remove gloss and help the primer stick.
3. Apply a Suitable Primer
Use a plastic or multi-surface primer formulated for PVC, acrylic, or laminate surfaces.
4. Use the Right Paint
Choose a paint designed for high-humidity environments — preferably acrylic latex or a multi-surface bathroom paint with mould resistance.
5. Optional: Seal the Finish
For added protection, apply a clear waterproof sealant or topcoat over the dried paint, especially in splash zones.
The quick learning on treating wet walls before painting in necessary.

Should You Paint or Replace the Panels?
Painting may be a cost-effective fix — but it’s often not the most durable solution in high-moisture environments.
When Painting Makes Sense?
-
The panels are in good shape
-
You want a short-term refresh
-
The area gets little direct water exposure
When Replacement Is Smarter?
-
The panels are cracked, mouldy, or warped
-
They’re inside the shower area
-
You want long-lasting waterproof performance
What are the Tips for a Better Painted Finish?
-
Ensure the space is well ventilated to reduce steam buildup
-
Use a primer and paint made for slick surfaces
-
Allow for proper drying time between coats
-
Expect to do occasional touch-ups if exposed to steam regularly

Conclusion: What You Should Know Before You Paint?
You can paint shower panels and wet wall panels — but only if you use proper prep, a quality primer, and moisture-resistant paint. Still, it’s not always the best long-term solution, especially for areas with heavy water exposure.
If you’re looking for a budget-friendly short-term update, painting can work well with care. But for a low-maintenance and durable solution, replacing old panels with modern waterproof ones might be a smarter investment.
What are the Frequently Asked Questions About Can You Paint Shower Panels?
1. Can you paint panels inside the shower enclosure?
It’s not recommended. Paint is more likely to peel when exposed to direct water and heat. Instead, consider using a shower curtain or panel covering for aesthetic updates.
2. Does painting void the warranty?
Yes, in many cases it does. Always check with the manufacturer before altering the surface.
3. Is bathroom paint fully waterproof?
No paint is completely waterproof — it’s water-resistant. Proper preparation and ventilation are key to maintaining the finish.
Home Diagnostics and Technical Standards Specialist at Hello Mag. She provides high-level Expertise in appliance mechanics and scientific pest management, ensuring every guide follows strict safety protocols and manufacturer standards. As a leading Authority on technical home specs, Kanimozhi audits complex data to provide homeowners with the most accurate, verified, and reliable diagnostic solutions available.
