by Kanimozhi BV | Apr 30, 2025 | Wall, Interior
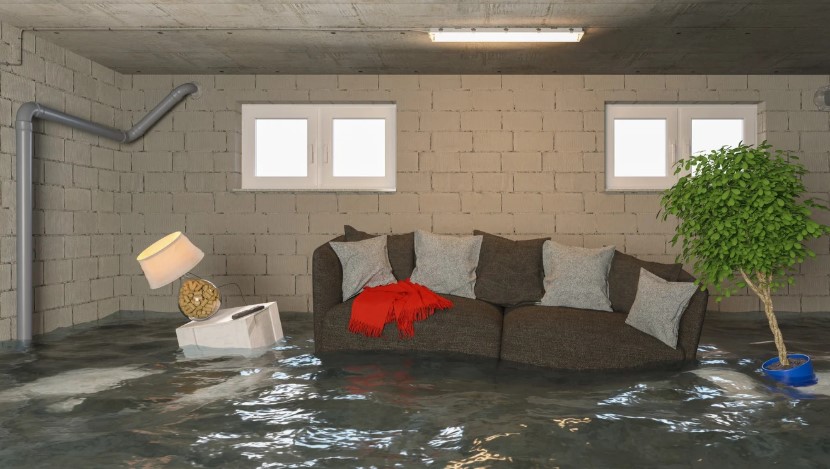
Water leaks that occur behind walls can be a nightmare to identify and fix.
I faced this exact issue in my home, and through trial, error, and expert advice, I managed to trace and solve the problem without tearing down half the house.
In this guide on how to find a water leak inside a wall, I’ll share exactly how I found the leak, the tools that helped, and what to do if you’re dealing with something similar.
Why It’s Important to Find a Water Leak Inside a Wall Early?
Leaks that occur behind walls aren’t always obvious. I learned this the hard way.
By the time I noticed faint water stains near the floor, the internal wall damage was already extensive.
The problem with hidden leaks is that they can silently cause:
- Structural damage to the timber framing
- Plasterboard disintegration
- Electrical hazards if wires are nearby
- Dangerous mould and mildew growth
If a wall leak goes unnoticed for weeks or months, it can lead to repairs that cost far more than the original issue.
How I Noticed the First Signs of a Leak?
My first indication of trouble wasn’t a burst pipe or a flood — it was a subtle, persistent musty smell.
The paint on the lower part of the living room wall started bubbling, and I could hear a faint dripping sound at night when the house was quiet.
Initially, I dismissed it, but when my water bill unexpectedly increased, I knew I had to act.

What Are the Signs of a Hidden Wall Leak?
Based on my experience, here are some red flags that may point to a leak behind a wall:
- Dampness or discoloured patches on the wall
- Peeling or bubbling paint and wallpaper
- Musty or mouldy smells
- Dripping or hissing sounds from the wall
- Unexplained increase in water bills
- Flooring near the wall becoming warped or spongy
Even one of these signs should prompt an investigation. Multiple signs usually confirm the presence of a hidden leak.
I didn’t start by cutting into the wall. Instead, I gathered a few tools to narrow down the location:
| Tool |
Use |
Suitability for DIY |
| Moisture meter |
Measures dampness levels in walls |
Yes |
| Thermal imaging scanner |
Detects temperature differences |
Partially (rental/pro) |
| Water meter monitoring |
Helps confirm ongoing leakage |
Yes |
| Acoustic leak detection kit |
Locates sound from hidden pipe leaks |
No (usually pro use) |
The moisture meter was the most affordable and easiest tool for me. It helped confirm that moisture levels were much higher in one specific section of the wall.

How to Find a Water Leak Inside a Wall? – My Step-by-Step Process
Here’s exactly how I identified the location of the leak without causing unnecessary damage:
Step 1: Visual Inspection
I examined the wall for any visible stains, damp patches, a hole or warped areas.
The area behind the bookshelf felt slightly cooler and looked off-colour — a subtle but telling sign.
Step 2: Checking with a Moisture Meter
I scanned various parts of the wall with a basic moisture meter.
The readings spiked drastically in a particular area, which helped me isolate the problem zone.
Step 3: Water Meter Test
To confirm there was a continuous leak, I turned off all taps and appliances and then monitored the water meter.
The dial was still moving, indicating water loss somewhere in the system.
Step 4: Narrowing Down the Area with Thermal Imaging
I rented a handheld thermal scanner for a few hours. It showed a cooler patch within the wall where water was likely present. This confirmed the moisture meter’s results.
Step 5: Minimal Wall Opening
Only after identifying the likely leak location did I cut into the wall. Behind the plasterboard, a small pinhole leak in a copper pipe had been steadily releasing water.
When I Decided to Call a Professional?
Although I managed to find the leak, repairing the pipe was outside my comfort zone. The leak was near a junction point, and I didn’t want to risk making it worse. I called a licensed plumber who:
- Replaced the damaged section of the pipe
- Sealed the joint to prevent future leaks
- Recommended some insulation to reduce condensation
Calling in a professional helped me avoid a major DIY mistake and ensured the repair would last.
How Much Does Leak Detection and Repair Typically Cost in the UK?
Here’s a breakdown of what I spent and what you might expect to pay:
| Service/Tool |
Estimated Cost in the UK |
| Moisture meter |
£20 – £50 |
| Thermal scanner rental |
£30 – £60 per day |
| Leak detection service |
£120 – £250 |
| Minor plumbing repair |
£150 – £300 |
Prices can vary depending on your location and the severity of the issue, but in most cases, early detection will always save you money in the long run.

What Can Be Done to Prevent Future Leaks Behind Walls?
After fixing the leak, I took a few steps to make sure this wouldn’t happen again:
- I installed smart water leak detectors in key areas of the house
- I scheduled annual plumbing checks with a local plumber
- I made a point to avoid drilling or hammering into walls without first checking for pipes
Preventative action is far cheaper than emergency repairs, and it gives peace of mind.
Final Thoughts on How to Find a Water Leak Inside a Wall
Discovering a water leak inside a wall is stressful, but with the right approach and with the guides help on how to find a water leak inside a wall, it doesn’t have to turn into a full-blown crisis.
My advice is simple: stay alert to early signs like mould or strange sounds, invest in basic detection tools, and don’t hesitate to call in a professional when things go beyond your comfort level.
Taking swift action saved me hundreds in repairs and stopped the damage before it became unmanageable.
Common Questions on How to Find a Water leak inside a Wall
1. Can a water leak behind a wall go away on its own?
No. A leak will continue to cause damage as long as it exists. Even if it seems to dry temporarily, water is likely accumulating deeper within the wall or spreading elsewhere.
2. Does home insurance cover hidden wall leaks in the UK?
It depends on the policy. My insurance covered the resulting damage (like wall repair), but not the cost of locating or fixing the leak itself. Always check your policy details or contact your insurer for clarification.
3. Should I break the wall to find the leak?
Only as a last resort. Try using a moisture meter or thermal imaging first. These tools can narrow down the area and avoid unnecessary damage.
Home Diagnostics and Technical Standards Specialist at Hello Mag. She provides high-level Expertise in appliance mechanics and scientific pest management, ensuring every guide follows strict safety protocols and manufacturer standards. As a leading Authority on technical home specs, Kanimozhi audits complex data to provide homeowners with the most accurate, verified, and reliable diagnostic solutions available.
by Kanimozhi BV | Apr 29, 2025 | Refrigerator, Appliances
What Is the Coldest Setting on a Fridge 1-7?
If you are looking for what is the coldest setting on a fridge 1-7, the answer is:
Number 7 is the COLDEST setting.
On a standard dial, 1 is the warmest and 7 is the coldest. For the best balance of food safety and energy bills, most experts recommend setting your dial to 4.
When I first tried adjusting my fridge, I was surprised by how unclear the temperature dial was. Most fridges don’t show the actual temperature, just a dial marked from 1 to 7. So I did some digging to answer the question: what is the coldest setting on a fridge 1-7?
Is 1 or 7 Coldest on a Fridge?
The logic behind the numbers 1-7 is simple once you know it: the numbers represent cooling power, not specific degrees.
- Setting 7: The maximum cooling power (Coldest).
- Setting 1: The minimum cooling power (Warmest).
By turning your dial to 7, you are telling the compressor to work harder to lower the temperature. This is why 7 is the coldest setting on a fridge 1-7 scale.

Fridge Settings 1-7 Temperature Chart
To help you visualize the temperature of each number, here is a breakdown of the estimated degrees for each setting:
| Dial Setting |
Estimated Temp |
Best For |
| 1 |
7°C – 8°C |
Too warm (Avoid) |
| 4 |
4°C |
Ideal Daily Use |
| 7 |
1°C |
Maximum Cooling |
Which Setting to Use During Summer and Winter?
I adjust based on the season to keep energy bills low and food fresh:
- Summer: I set the dial around 5 or 6 to fight higher room temperatures.
- Winter: I use 3 or 4 to avoid overcooling or freezing certain foods like lettuce.
What are the Step-by-Step Guide to Adjusting the Dial?
- Turn the dial to 4 as this is a safe initial point.
- Place a fridge thermometer on the middle shelf.
- Wait 24 hours and check the temperature.
- Adjust up (colder) or down (warmer) depending on results.
What are the Common Mistakes with the 1-7 Setting?
Many people assume 1 is the coldest because it’s the “first” number, but this leads to spoiled milk and bacterial growth. Always remember: Higher Number = Colder Temp.

What are the FAQs About What Is the Coldest Setting on a Fridge 1-7?
1. Is 1 or 7 colder on a Beko or Samsung fridge?
Almost all brands, including Beko, Samsung, and Bosch, use the same logic: 7 is the coldest setting and 1 is the warmest.
2. What is the safest temperature for a fridge?
In the UK, the Food Standards Agency recommends keeping your fridge at 5°C or below to prevent food poisoning.
3. Should I leave my fridge on setting 7 all the time?
No, setting 7 is the coldest, but it can freeze some foods. I only use it during heatwaves or if the fridge is packed.
Next Step for You: What Number Should My Fridge Be On?
Home Diagnostics and Technical Standards Specialist at Hello Mag. She provides high-level Expertise in appliance mechanics and scientific pest management, ensuring every guide follows strict safety protocols and manufacturer standards. As a leading Authority on technical home specs, Kanimozhi audits complex data to provide homeowners with the most accurate, verified, and reliable diagnostic solutions available.
by Kanimozhi BV | Apr 29, 2025 | Washing Machine, Appliances, DIY Ideas
Opening a Bosch washing machine door sounds simple — until the door jams, the machine won’t unlock after a wash, or worse, an error message appears.
I’ve learned that knowing exactly how to open Bosch washing machine door can save time, prevent damage, and avoid a hefty repair bill. Let me guide you through it step-by-step.
Why Knowing How to Open Bosch Washing Machine Door Matters?
When my Bosch washing machine door refused to open after a cycle, I realised it wasn’t just a minor inconvenience.
A stuck door can mean trapped laundry, possible water damage, or even a faulty lock mechanism.
That’s why understanding the right way to open a Bosch washer door is so important — it keeps my machine and clothes safe.
Understanding the Basics of Bosch Washing Machine Doors
How Does the Locking Mechanism Work?
Most Bosch washing machines use an electronic door lock that stays locked while the machine is operating and during the spin cycle. The door usually remains locked for 2–5 minutes after the cycle ends to ensure all motion inside the washer drum has stopped safely.

When Does the Door Normally Unlock?
Typically, the door unlocks:
- Automatically a few minutes after the cycle completes
- Once the drum has stopped spinning
- After the internal temperature has cooled
If none of these happen, that’s when I know there’s an issue.
How to Open Bosch Washing Machine Door?
When faced with a jammed door, here’s exactly what I do.
Step-by-Step Guide to Opening the Door Safely
- Step 1: Turn off the washing machine and then unplug it.
- Step 2: Wait a few minutes for the internal lock to release naturally.
- Step 3: Gently try pulling the door open.
- Step 4: If it’s still stuck, check for an emergency manual release.
How to Manually Unlock a Bosch Washing Machine Door?
Most Bosch models have an emergency door release hidden behind the lower front panel:
- Remove the lower panel carefully.
- Find the small manual door release cord (usually orange or red).
- Pull the cord gently — this should unlock the door immediately.
If my machine doesn’t have a cord, I usually contact Bosch support before trying anything more forceful.

Common Reasons Why a Bosch Washing Machine Door Won’t Open
When asking myself why won’t my Bosch washer door open, here’s what I found:
Power Failure Issues
If the power is cut off during a cycle, the lock might stay engaged. Restarting the cycle or restoring power often solves it.
Water Still Inside the Drum
If there’s water remaining, the door lock will stay engaged to prevent flooding. In this case:
Door Lock Mechanism Fault
Sometimes the lock itself is broken. In that case, I need professional help to replace the door lock assembly.
What to Do If the Bosch Washing Machine Door Is Stuck?
Emergency Door Release Steps
If the normal methods don’t work, here’s my go-to process:
- Disconnect the machine from the mains.
- Wait at least 5 minutes.
- Use the emergency release cord if available.
- Drain the water manually if the drum is full.
When to Call a Professional
If the door remains stuck after manual attempts, I immediately call an authorised Bosch repair engineer. Forcing the door can break the handle or warp the door frame, making the repair even more expensive.

Troubleshooting Table: Quick Solutions for Different Problems
| Problem |
Possible Cause |
Quick Fix |
| Door won’t unlock after wash |
Normal delay |
Wait 2–5 minutes |
| Door jammed due to power cut |
Electrical failure |
Restart machine / manual unlock |
| Water still in drum |
Drainage issue |
Run drain cycle / manual drain |
| Door lock broken |
Faulty mechanism |
Call a Bosch engineer |
| Door handle broken |
Physical damage |
Professional repair required |
Tips to Prevent Bosch Washing Machine Door Issues in the Future
Regular Maintenance Practices
To keep my Bosch washing machine running smoothly:
Avoid Overloading the Machine
Overloading stresses the lock and can warp the door alignment. I always follow the recommended load size to prevent pressure build-up.
Conclusion – Opening Your Bosch Washing Machine Door with Confidence
Learning how to open Bosch washing machine door has saved me a lot of stress (and wet laundry disasters!). Whether it’s waiting for the lock to release, using the emergency door release, or knowing when to call an expert, I feel confident handling it now.
If you ever find yourself stuck, just remember:
- Stay calm and unplug the machine.
- Use the manual release if needed.
- Seek professional help if things get tricky.
Taking a little time now can save you big problems later!
FAQ On How to Open Bosch Washing Machine Door
1. How do I open a Bosch washing machine door mid-cycle?
You usually can’t open it mid-cycle for safety reasons. Some models allow it briefly after pressing pause, if water levels are low.
2. How to open a Bosch washing machine door without power?
Unplug the machine, open the lower front panel, and pull the emergency release cord to manually unlock the door.
3. How long does a Bosch washing machine door stay locked after a cycle?
The door typically stays locked for 2 to 5 minutes after the cycle ends to allow the drum to stop and water to drain.
Home Diagnostics and Technical Standards Specialist at Hello Mag. She provides high-level Expertise in appliance mechanics and scientific pest management, ensuring every guide follows strict safety protocols and manufacturer standards. As a leading Authority on technical home specs, Kanimozhi audits complex data to provide homeowners with the most accurate, verified, and reliable diagnostic solutions available.
![[Solved] What Number Should My Fridge Be On? (1-5 & 1-7 Dials)](https://www.hellomag.co.uk/wp-content/uploads/2025/04/What-Number-Should-My-Fridge-Be-on-1.jpg)
by Kanimozhi BV | Apr 28, 2025 | Refrigerator, Appliances
Expert-Verified Answer
What number should a fridge be on?
The ideal setting for most household refrigerators is Number 3 or 4. The universal rule for fridge dials is: The higher the number, the colder the fridge.
- On a 1-5 dial scale: Set it to 3.
- On a 1-7 dial scale: Set it to 4.
This setting keeps your food in the “Safe Zone” of 1°C to 5°C.
Note on Food Safety: This guide follows the official 2026 guidelines from the Food Standards Agency (FSA), which recommends keeping chilled food at 5°C or below to prevent bacterial growth.
What Number Should My Fridge Be On? (1-5 & 1-7 Dials)
Decoding the Fridge Dial: Is 1 or 5 Coldest?
One of the most common mistakes is thinking ‘1’ is the coldest setting. On almost all modern fridges (Beko, Samsung, Bosch, etc.), the numbers represent Cooling Power, not degrees. Therefore, a higher number means the compressor works harder to lower the temperature.
| Dial Range |
Warmest |
Recommended |
Coldest |
| 1 to 5 Scale |
1 |
3 |
5 |
| 1 to 7 Scale |
1 |
4 |
7 |
How to Check Your Fridge Temperature (The Master Method)?
Since dials are estimates, use this method to verify your setting is correct. Air temperature fluctuates too much, so testing a liquid is better:
- Fill a glass with water and place a thermometer inside.
- Put the glass on the middle shelf (not the door, as it’s the warmest part).
- Leave it for 24 hours.
- Check the reading first thing in the morning. It should be between 1°C and 5°C.

What are the 5 Expert Tips for Maintaining Optimal Temperature?
- The 70% Rule: Air needs to circulate. Keep your fridge about 70% full; overstuffing blocks vents, while an empty fridge loses cold air every time the door opens.
- Cool Before Storing: Never put hot leftovers directly in the fridge, as this spikes the temperature for all other foods.
- The Door Seal Test: Close the door on a piece of paper. If it slides out easily, your seals are worn, and you are wasting energy.
- Seasonal Adjustments: In hot summer months, move your dial up by one number to help the motor combat external heat.
- Keep it Level: Ensure your fridge is level on the floor so the doors close and seal properly every time.
What are the Frequently Asked Questions (FAQ) About What Number Should My Fridge Be on?
1. Is 1 or 5 colder on a fridge?
On almost all fridge dials, 5 is the coldest setting and 1 is the warmest. The numbers represent “cooling power”—a higher number means the compressor works harder to lower the temperature.
2. Does a higher number mean a colder fridge?
Yes, in nearly every refrigerator model, a higher number equals a colder temperature. Lower numbers (like 1 or 2) are the warmest settings.
Home Diagnostics and Technical Standards Specialist at Hello Mag. She provides high-level Expertise in appliance mechanics and scientific pest management, ensuring every guide follows strict safety protocols and manufacturer standards. As a leading Authority on technical home specs, Kanimozhi audits complex data to provide homeowners with the most accurate, verified, and reliable diagnostic solutions available.
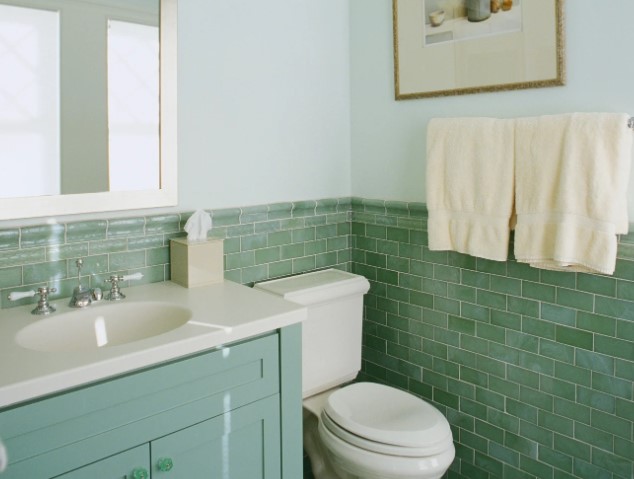
by Kanimozhi BV | Apr 25, 2025 | Bathroom, Interior
When I first asked myself, can you wallpaper a bathroom, I was met with raised eyebrows and plenty of cautionary tales.
In the UK, where the weather is damp more often than not, wallpapering a bathroom might sound like a bold move.
But let me tell you — with the right materials and approach, it’s entirely possible. Here’s my personal guide based on experience, a lot of research, and a few wallpaper rolls later!
Can You Wallpaper a Bathroom in the UK?
Yes, you absolutely can — but it’s not as straightforward as wallpapering your living area or bedroom.
Bathrooms come with unique challenges like moisture, steam, and fluctuating temperatures.
Choosing the right humidity resistant wallpaper and ensuring proper application is the key to making it work beautifully.
What Types of Wallpaper Is Best for a Bathroom?
Is Vinyl Wallpaper the Best Choice?
Definitely! Vinyl wallpaper is my top pick. It’s waterproof, durable, and easy to clean — perfect for steamy bathrooms.
These wallpapers come with a protective coating that shields the design from moisture damage.
Can Traditional Wallpaper Work in a Bathroom?
Technically, yes — but you’ll need to take extra precautions. If you’re set on a non-vinyl style, I suggest applying a clear matt varnish over the surface to seal it against moisture.
Even then, keep it away from high-moisture zones.
How Do You Prepare Bathroom Walls for Wallpapering?
Why Is Wall Preparation Crucial?
Bathroom walls need to be pristine. That means no grease, soap scum, or flaky paint. I always:
- Clean thoroughly with sugar soap.
- Sand down any bumps.
- Use a mold-resistant primer.
What Adhesives Should You Use?
Standard wallpaper paste won’t cut it. Look for wallpaper adhesives for bathrooms — specifically those with mould-inhibiting properties.
I used a strong vinyl paste that stood up brilliantly to steam.
Where Should You Avoid Applying Wallpaper in a Bathroom?
Are There High-Risk Areas?
Yes! Avoid placing wallpaper:
- Inside the shower enclosure
- Behind water taps or directly above sinks
- In areas with frequent water splashes
Can You Combine Tiles and Wallpaper?
Absolutely — and it’s a trendy choice.
I used tiles around the bath and sink, and bathroom wallpaper ideas for the upper walls. It gave me the best of both worlds: protection and style.
How Can You Protect Bathroom Wallpaper from Moisture?
Is Varnishing an Effective Solution?
Yes, and it’s a game-changer.
A clear, water-based varnish adds an invisible layer of protection, sealing the wallpaper from steam and splashes without altering the design.
Why Is Ventilation Important?
Good airflow is essential. I always keep a window slightly ajar and ensure my extractor fan is working properly.
It dramatically reduces moisture build-up and prolongs life of a wallpaper around windows.
Can You Put Wallpaper in a Bathroom? – Some Design Tips
Should You Create a Feature Wall?
Yes, especially in small bathrooms. A feature wall can add depth and style without overwhelming the space.
I chose a bold floral print for the back wall, and it’s the star of the room.
How Do Patterns Affect Small Bathrooms?
Large prints can actually make a room feel more spacious. Just balance them with neutral tiles or fittings.
If you’re unsure, try peel and stick bathroom wallpaper first — it’s removable and easy to experiment with.
What Are the Pros and Cons of Wallpapering a Bathroom?
Here’s what I found from my own experience:
How Long Does Bathroom Wallpaper Last?
With proper care and the right materials, my wallpaper has lasted over 3 years and still looks fresh.
Quality moisture-proof decor and regular ventilation go a long way in increasing its lifespan.
What Are Some Alternatives to Wallpaper in Bathrooms?
If wallpapering isn’t for you, try:
- PVC wall panels
- Moisture-resistant paint
- Ceramic or porcelain tiles
These are all practical options, but I personally love the warmth and character wallpaper adds.
Conclusion: Is Wallpapering Your Bathroom Worth It?
In my experience, yes! As long as you’re strategic with placement, materials, and ventilation, wallpapering a bathroom in the UK is absolutely doable.
It brought personality to a space that’s often overlooked, and with the right care, it’s stood the test of time.
So if you’re still wondering can you wallpaper a bathroom, I say — go for it. Just do it wisely.
FAQ – Can you Wallpaper a Bathroom
1. Can wallpaper last in a bathroom?
Yes, wallpaper can last in a bathroom if it’s the right type, such as vinyl or moisture-resistant styles. Proper installation and good ventilation are key to ensuring durability over time.
2. Is bathroom wallpaper different?
Yes, bathroom wallpaper is specially designed to resist humidity and moisture. These types often feature vinyl coatings or are made from non-woven materials to prevent peeling and mold growth.
3. Does wallpaper mold in bathrooms?
It can, especially in poorly ventilated bathrooms or when using the wrong wallpaper type. To avoid mould, use mould-resistant adhesive, keep the space well-ventilated, and choose wallpapers designed for wet environments.
Home Diagnostics and Technical Standards Specialist at Hello Mag. She provides high-level Expertise in appliance mechanics and scientific pest management, ensuring every guide follows strict safety protocols and manufacturer standards. As a leading Authority on technical home specs, Kanimozhi audits complex data to provide homeowners with the most accurate, verified, and reliable diagnostic solutions available.

