by Kanimozhi BV | Sep 29, 2025 | Garden, DIY Ideas, Exterior
Can White Vinegar Really Kill Weeds in My UK Garden?
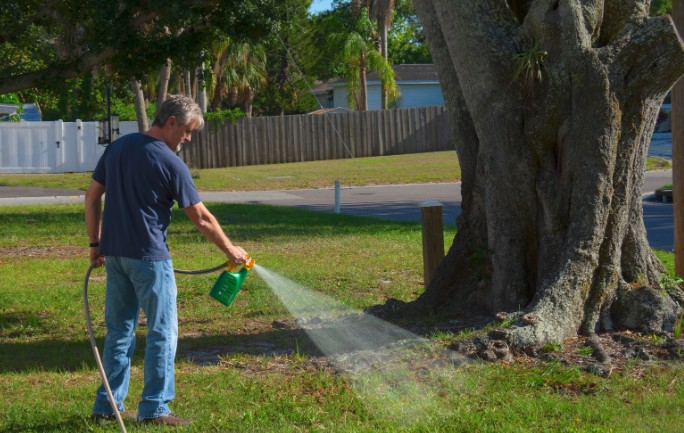
Like many UK gardeners, I’m always on the lookout for natural and affordable ways to manage weeds. The idea of using white vinegar as a weed killer caught my attention – especially as it’s something I already had in the kitchen. But I wanted to know: does white vinegar kill weeds effectively, or is it just another garden myth?
After some trials (and a bit of research), I discovered a few key facts that might surprise you – and they’re definitely worth knowing before you spray anything on your patio, driveway, or flower beds.
What Makes White Vinegar Effective Against Weeds?
The Power of Acetic Acid
The secret behind vinegar’s weed-killing power is acetic acid. Household white vinegar typically contains about 5% acetic acid, which is strong enough to damage the leafy parts of some weeds.
It draws moisture out of the plant, causing it to dry up and die.
Does Household Vinegar Work or Do I Need Horticultural Vinegar?
You can use regular white vinegar from your supermarket, but horticultural vinegar (which contains around 20% acetic acid) is more potent and gives faster results.
However, it’s harder to find in the UK and needs careful handling due to its strength.

How Do I Use White Vinegar to Kill Weeds?
Using vinegar is simple, but timing and method matter. Here’s how I usually prepare it.
What Is DIY Vinegar Weed Killer Recipe?
| Ingredient |
Quantity |
Notes |
| White Vinegar (5%) |
1 litre |
Use stronger vinegar for tougher weeds |
| Salt (table or rock) |
2 tablespoons |
Helps dry out weeds faster |
| Washing-up Liquid |
1 teaspoon |
Acts as a surfactant to stick to leaves |
| Spray Bottle |
As needed |
Avoid spraying on windy days |
Tip: Only apply on dry, sunny days for best results, and try to avoid spraying nearby plants.
Where and When Should I Apply It in to kill in My UK Garden?
I apply it:
- On paths, patios, and driveways
- During midday when the sun is out
- On young weeds that are still small and manageable
Vinegar is non-selective, so avoid using it on lawns or near your flowers and vegetables.
Will Vinegar Kill All Types of Weeds?
Annual vs Perennial Weeds
Vinegar works well on annual weeds like chickweed or crabgrass, especially when they’re young. However, perennial weeds like dandelions or bindweed are more stubborn and may regrow from the roots, since vinegar only kills what it touches above ground.

Does White Vinegar Kill the Roots or Just the Leaves?
This is important: vinegar doesn’t kill the roots—especially with deep-rooted weeds. You’ll often need to reapply or dig them out manually after treating with vinegar.
What Are the Pros of Using Vinegar as a Weed Killer?
- Eco-friendly and chemical-free
- Affordable and easily available
- Quick results on young weeds
- Safe to use in pet and child-friendly gardens (with caution)
What Are the Cons of Using Vinegar as a Weed Killer?
- Doesn’t kill roots (especially in perennial weeds)
- Can harm nearby plants and soil if overused
- May require multiple applications
- Not effective in rainy or shaded conditions
Is Vinegar Safe for My Garden, Soil, and Pets?
Will Vinegar Harm My Soil Health or Nearby Plants?
Vinegar can alter soil pH slightly if used in large amounts, and can damage surrounding plants if sprayed accidentally. I always use a cardboard shield or spray bottle with a narrow nozzle for accuracy.
What About Children and Pets in the Garden?
Once the vinegar dries (usually within an hour), the treated areas are safe for children and pets. I still avoid letting pets near freshly sprayed spots, just to be cautious.
Can I Mix Vinegar with Other Ingredients for Better Results?
Yes! There are several DIY combinations you can try, though be cautious with salt as it can affect the soil long-term.
| Recipe Type |
Ingredients |
Effectiveness |
Notes |
| Basic Vinegar Spray |
Vinegar only |
Moderate |
Best for small, young weeds |
| Vinegar + Salt + Soap |
Vinegar, salt, washing-up liquid |
High |
Stronger, avoid in planting areas |
| Vinegar + Lemon Juice |
Vinegar, lemon juice |
Moderate |
Smells fresh, but milder effect |
Note: Use salt-based mixes sparingly to prevent soil damage.
How Does Vinegar Compare with Commercial Weed Killers in the UK?
Here’s how vinegar stacks up:
| Feature |
White Vinegar |
Commercial Weed Killer |
| Cost |
Low |
Moderate to High |
| Eco-Friendliness |
High |
Low to Medium |
| Root Killing |
No |
Yes |
| Immediate Results |
Yes (on surface) |
Yes |
| Soil Safety |
Moderate |
Depends on product |
In my experience, vinegar is ideal for spot-treating small areas, but chemical weed killers might still be necessary for deep-rooted or widespread infestations.
Final Thoughts – Should I Use White Vinegar to Kill Weeds in My Garden?
For me, white vinegar is a handy, eco-conscious weed control option for smaller jobs in the garden. It’s not a miracle cure – it won’t kill all types of weeds or their roots – but it’s a great first step before reaching for harsher chemicals.
If you’re like me and want to reduce chemical use, give vinegar a try on your patio or pathways – just don’t expect it to solve every weed problem on its own.
Related Article: 5 Star Rated Strongest Weed Killer That Kills Everything (Top 12)
What Are the Common Questions About Does White Vinegar Kill Weeds?
1. How long does it take to work?
Usually within 24 hours on sunny days.
2. Can I spray vinegar on my lawn?
No. It will damage your grass and any other plants it touches.
3. What concentration of vinegar works best?
5% household vinegar works for young weeds. For stronger weeds, use 20% horticultural vinegar (with care).
4. Is it legal to use vinegar as a weed killer in the UK?
Yes, but it’s not an officially registered herbicide, so use it responsibly and on your own property.

by Kanimozhi BV | Sep 26, 2025 | Home & Living
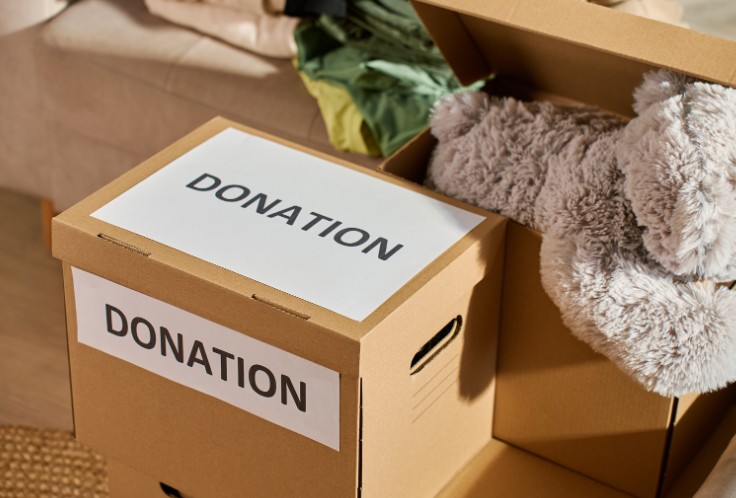
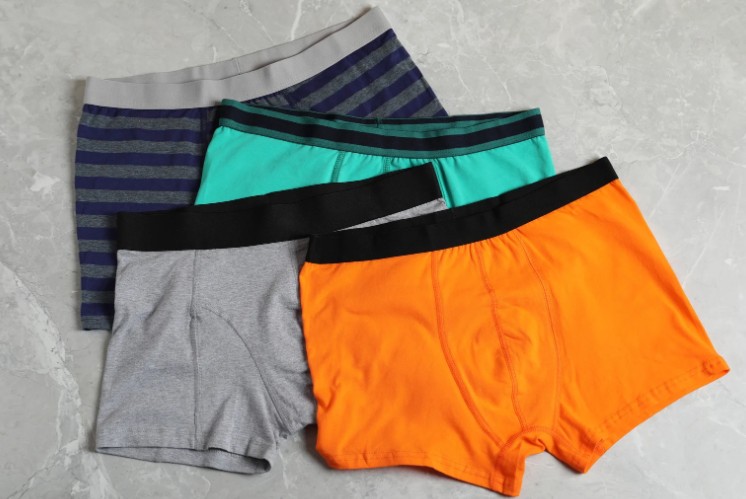
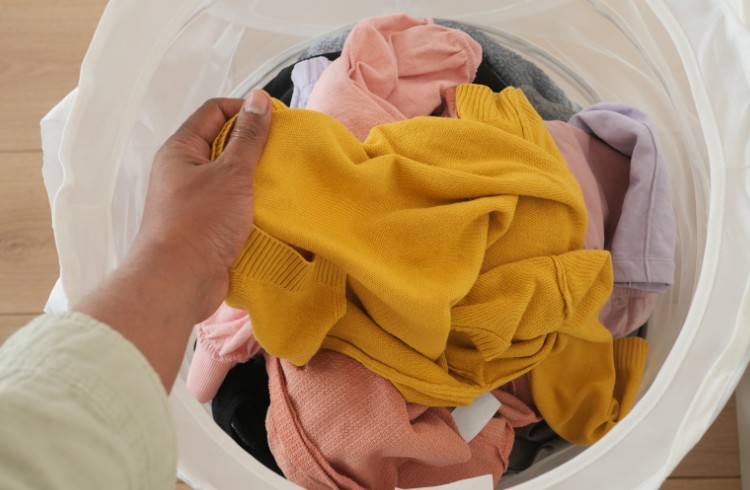
When I recently did a major wardrobe clear-out, I found myself staring at a drawer full of old underwear and asking a simple question: do charity shops take underwear?
While donating clothes is second nature to many of us in the UK, underwear tends to fall into a grey area. So I decided to dig a little deeper, and here’s what I discovered.
Why I Looked Into Donating Underwear in the First Place
Like many people, I’ve become more conscious about sustainability and reducing textile waste. Throwing away perfectly usable items just doesn’t sit right with me.
But when it comes to underwear—especially used pieces—I wasn’t sure what the right approach was. That led me to research charity shop donation policies, recycling options, and hygiene guidelines.
Do Charity Shops Take Underwear?
Generally speaking, most charity shops in the UK do not accept used underwear, regardless of how clean or lightly worn they are.
It’s primarily due to health and hygiene concerns. Underwear, by its very nature, is considered an intimate item, and charities often have strict policies to avoid any potential risk to staff or customers.
However, there are exceptions:
- New and unworn underwear, preferably with tags still attached, is often accepted.
- Some charity shops may take packaged underwear, particularly during clothing drives or for homeless support initiatives.
Always call ahead or check a charity’s website before including underwear in your donation bag.
Which Charities Accept Bras or New Underwear in the UK?
While pants and knickers are usually a no-go, bras are a different story. Several UK-based charities and organisations accept new or gently used bras for donation, and some even send them overseas to women in need.

Here’s a quick comparison of who accepts what:
| Charity Name |
Accepts Bras |
Accepts New Underwear |
Accepts Used Underwear |
| Smalls for All |
Yes |
Yes |
No |
| Against Breast Cancer |
Yes |
Yes |
No |
| Oxfam |
Sometimes |
Yes |
No |
| British Heart Foundation |
Rarely |
Yes |
No |
These organisations often provide postal addresses or donation drop-off points. If you’re unsure, check their websites for up-to-date guidance.
What Should I Do With Used Underwear That Can’t Be Donated?
If your underwear is used, damaged, or just not suitable for donation, don’t throw it in the bin just yet. Textile recycling is a much better alternative to do with the underwear and readily available throughout the UK.
What Are the Common Options for Recycling Underwear?
- Council textile recycling bins – Often located in supermarket car parks or near recycling centres.
- Clothes banks – Many accept all types of clothing for sorting and recycling.
- Retailer take-back schemes – Some brands like H&M or M&S have garment collection points.
These facilities either recycle the fabric or send it to industrial textile reuse centres, where materials are broken down and repurposed into things like insulation, industrial rags, or mattress stuffing.
Is It Safe and Hygienic to Donate Underwear?
It’s a fair concern—and one that charities take seriously. Because of hygiene standards, even clean used underwear is usually declined.
In contrast, new and sealed underwear is considered safe, especially when donated directly to organisations that support refugees, homeless individuals, or vulnerable communities.
If you’re donating new items, make sure:
- They’re still in packaging or have the original tags
- You clearly label the bag
- Items are clean and unused

What Are Tips for Donating Clothing Responsibly in the UK?
Over the years, I’ve learned that donating responsibly means more than just offloading unwanted stuff. Here’s a quick checklist I now follow:
- Wash everything before donating
- Check what your local shop actually accepts
- Separate undergarments from general clothing
- Clearly label bags with “new underwear” if applicable
- Use official donation drop-off points or postal programs
This helps avoid waste and ensures that your good intentions don’t create more work for charity shop volunteers.
Can I Donate Underwear Online or by Post?
Yes! Some brilliant organisations allow you to post donations directly to them—especially when it comes to bras and new underwear. For example:
- Smalls for All has a postal donation program supporting women and girls in Africa.
- Post Your Panties (an initiative from several smaller charities) accepts brand new packaged underwear for distribution to shelters and aid centres.
These are ideal options if you live far from a major charity shop or prefer a more direct route.
What I Learned About Donating Underwear in the UK?
Through this journey, I learned answer for do charity shops take underwear, and it isn’t as straightforward as other clothes, but there are still ethical ways to dispose of or rehome them.
Whether it’s donating new items to specialised charities or recycling used ones responsibly, there’s always a better alternative to throwing them in the bin.
So the next time you’re clearing out your drawers, take a moment to check your options. It’s a small act—but one that can make a meaningful difference.
What Are FAQs About Do Charity Shops Take Underwear?
1. Can I donate socks or tights?
Generally, only new and unworn socks or tights are accepted. Used items should go into textile recycling.
2. Are sports bras and shapewear accepted?
Yes, in many cases! Gently used sports bras are often accepted by bra donation charities. Shapewear, if clean and lightly worn, may be suitable too.
3. What happens to underwear sent for recycling?
Most textiles are shredded and reused in industrial settings. Some may be exported to countries where textile reuse is more common.
by Kanimozhi BV | Sep 25, 2025 | Home & Living
Why Should You Care About Disposing of Underwear Properly?
Wondering what to do with old underwear? When it’s time to part ways with old underwear, your first instinct might be to toss it in the bin. But did you know that millions of pieces of clothing, including underwear, end up in UK landfills every year?
Disposing of underwear responsibly is a small act that contributes to a larger environmental goal—reducing textile waste, conserving resources, and promoting a more sustainable fashion cycle.
What happens to underwear in landfill?
Underwear, especially those made from synthetic fabrics like nylon or polyester, can take decades to break down in landfill. During decomposition, they release microplastics and toxic chemicals into the environment.
The environmental impact of textile waste in the UK
According to WRAP UK, the average household throws away over 30kg of textiles each year, much of which could be recycled or reused. Underwear often gets overlooked in recycling conversations, but it shouldn’t be.
Can old underwear be recycled like other clothes?
Yes—and no. You can’t usually donate heavily worn or damaged underwear, but textile recycling schemes in the UK do accept underwear, especially if they’re clean and sorted properly. Some pieces may even be repurposed or downcycled into industrial materials.
When Is It Time to Get Rid of Old Underwear?
Underwear doesn’t last forever. While some of your favourites might still feel comfortable, there are a few signs it’s time to let go.

Signs your underwear needs replacing
You should consider parting ways with your underwear if:
- It has holes, rips, or worn-out elastic
- The fabric is stained or discoloured
- It no longer fits properly or causes discomfort
- There’s a persistent odour even after washing
Can damaged or stained underwear still be reused?
Absolutely. Even if your underwear can’t be donated, it can still serve other purposes like household cleaning cloths, pet bedding, or fabric crafts—all of which keep them out of the bin.
What to Do With Old Underwear? 10 Smart, Sustainable Options
Here are 10 useful and eco-conscious ways to deal with your worn-out underwear in the UK.
1. Donate (New or Gently Worn Items Only)
If you have new or barely worn underwear, especially in unopened packaging, many UK charities and shelters will accept them.
Organisations that support refugees, women’s shelters, or the homeless often include underwear in their list of most-needed items.
Always check the donation policy first and ensure items are clean and hygienic.
2. Use Textile Recycling Banks
Textile banks, commonly found in supermarket car parks and recycling centres, accept underwear—even damaged or stained ones—as long as they are clean.
The fabrics are sorted, and unusable pieces are often shredded for insulation, stuffing, or industrial cloths. Look for schemes run by The Salvation Army, TRAID, or your local council.
3. Repurpose as Cleaning Rags or Dust Cloths
Cotton underwear, especially old pants or boxers, can be cut up and used for dusting, polishing shoes, or cleaning glass. It’s a simple way to reduce your paper towel usage and give your clothes a second life.
4. Turn Into Padding or Filling for Pet Beds
Soft cotton underwear can be used as filling for homemade pet beds. Animal shelters sometimes accept clean fabric donations to line cages or make bedding. If you’re crafty, you could even sew your own using old clothes and underwear.
5. Upcycle Into Hair Ties or Craft Projects
The elastic and fabric in your underwear can be repurposed into hair ties, scrunchies, or even quilt patches.
Stretchy materials are ideal for DIY projects, and there are plenty of online tutorials that show how to get creative with minimal tools.
6. Send to a Specialist Recycling Service
If you want to ensure your underwear is disposed of ethically, companies like TerraCycle offer fabric recycling services—even for items most council collections won’t accept.
Some fashion retailers also run take-back schemes, allowing you to return old garments in exchange for store credit.
7. Compost 100% Cotton Underwear
If your underwear is labelled as 100% cotton and doesn’t contain elastic or synthetic dyes, it can be cut into small pieces and composted. Remove waistbands or tags and mix with other compostable material.
This method only works for natural, undyed fabrics, so check the label before tossing it in your compost bin.
8. Reuse the Elastic Bands for Household Fixes
The elastic waistbands can be useful long after the fabric is no good. You can use them to:
- Bundle cables
- Secure loose lids or containers
- Tie up garden plants
It’s a simple form of creative reuse that reduces waste and saves you from buying new household items.
9. Swap or Share in Local Freecycling Groups
Believe it or not, some people collect fabric scraps or use clean underwear for art, fashion school, or upcycling projects. Platforms like Freegle, Olio, or Facebook Marketplace often have users looking for such materials.
Always be clear about the condition and intended use when listing.
10. If All Else Fails, Bin Responsibly
If your underwear is heavily soiled, mouldy, or made of mixed materials that can’t be recycled, then landfill may be your only option. In that case, cut it into smaller pieces to reduce bulk and avoid putting it in public textile bins unless accepted.
Never flush or burn underwear as it can harm plumbing systems or release harmful toxins.
Comparison Table – Best Disposal Options for Different Underwear Types
| Underwear Type |
Best Option |
Compostable |
Recyclable |
| Cotton briefs |
Compost or textile bank |
✅ |
✅ |
| Synthetic lace items |
Textile bank |
❌ |
✅ |
| Sportswear (nylon) |
Specialist recycling |
❌ |
✅ |
| Seamless/stretch knickers |
Repurpose |
❌ |
⚠️ |
| New/unused items |
Donate |
❌ |
✅ |
Check the fabric label to confirm if your underwear contains synthetic fibres.
Final Thoughts – Make the Sustainable Choice
Getting rid of underwear doesn’t mean it has to go to waste. By donating, repurposing, or recycling old underwear, you’re helping reduce landfill waste and supporting a more sustainable fashion ecosystem in the UK.
The next time you’re clearing out your drawers, remember—you have more options than just the bin. A little thought goes a long way when it comes to the environment.
Related Article: How To Remove Stagnant Water Smell From Clothes?
What Are the FAQs On What to Do With Old Underwear?
1. Can you put underwear in clothes donation bins?
Some donation bins allow underwear, especially those run by The Salvation Army or other textile recyclers. Always check the bin’s label or contact your local authority.
2. Is it hygienic to donate used underwear?
Donating used underwear is generally not accepted unless it’s unused or in excellent condition. However, textile recycling services do accept washed underwear in any condition.
3. What fabrics are compostable?
Only 100% natural fabrics like cotton, hemp, or bamboo can be composted. Avoid composting underwear with elastic, polyester, or synthetic dyes.
4. Should you cut up underwear before throwing it out?
Yes. Cutting up underwear before disposing helps reduce its volume and makes it unusable for identity theft or misuse, especially for intimate apparel.
by Kanimozhi BV | Sep 25, 2025 | Pest Control
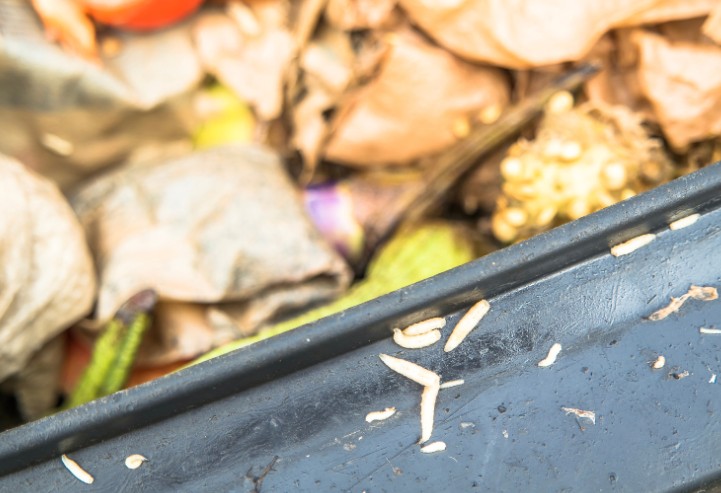
What Are Maggots and Why Do They Appear?
Maggots are the larval form of flies, most commonly the housefly. They hatch when flies lay eggs in decomposing organic material like food waste.
I’ve noticed they’re particularly active in the warmer months here in the UK, especially in outdoor bins or food caddies that aren’t emptied or cleaned regularly. Here is how to get rid of maggots.
What exactly are maggots?
Maggots are small, white or cream-coloured larvae that emerge from fly eggs. These eggs can hatch within just 24 hours, which means if food waste is exposed, it doesn’t take long before you’re dealing with a maggot infestation.
Where do maggots come from in the UK?
In the UK, maggots typically show up in kitchen bins, outdoor wheelie bins, or compost heaps—anywhere warm and damp where flies can lay their eggs.
They thrive in conditions where bin hygiene is poor, or where food waste sits exposed for extended periods.
Why do maggots infest bins and homes?
Warm temperatures, food residue, and moist environments create the perfect conditions for flies to breed. Once flies lay eggs on waste, it only takes a day or two before you’ll start seeing maggots wriggling around.
If your bin smells bad or isn’t emptied frequently, it becomes a magnet for fly larvae.
How Can I Tell If I Have a Maggot Problem?
You don’t need to be an expert to spot a maggot issue. If you open your bin and see clusters of tiny white worms, it’s a clear sign.
Signs of a maggot infestation
From my experience, the key indicators include:
- Increased fly activity around the bin area, especially bluebottles and houseflies
- A strong foul odour from decomposing waste
- Visible maggots crawling along the rim or inside the bin
If left unchecked, the infestation can spread quickly, especially during hot spells.

How serious is a maggot problem in your rubbish bin?
While maggots themselves don’t bite or sting, they’re still a health hazard. They can carry bacteria like Salmonella and E. coli, and they attract more flies, making the problem worse. A few maggots can escalate into a full-blown infestation in just a couple of days.
What Are 6 Effective Ways On How to Get Rid of Maggots?
Over the years, I’ve found these six methods to be the most effective when it comes to maggot removal. Each one targets the larvae directly and is suitable depending on how severe the infestation is.
1. Pour Boiling Water Over the Maggots
This is my go-to method because it’s fast, chemical-free, and effective. I boil a kettle and pour the hot water directly onto the maggots in the bin.
The high temperature kills them instantly. Once done, I rinse the bin thoroughly with clean water. This method is ideal for small outbreaks and works best when followed by a good disinfecting rinse.
2. Use White Vinegar or Lemon Juice
If you prefer a natural solution, vinegar or lemon juice is excellent for killing maggots and neutralising odours. I usually mix equal parts of white vinegar and hot water and pour it over the affected area. After letting it sit for about 15 to 20 minutes, I rinse it out.
Not only does it kill the maggots, but it also discourages flies from returning because they hate the acidic scent.
3. Apply Salt Generously to Affected Area
Salt works by dehydrating maggots. When boiling water isn’t an option, I sprinkle table salt over the maggots and leave it for a few hours.
While it’s not as quick as other methods, it does the job effectively overnight. Once the maggots die, I sweep them up and dispose of them in a sealed bag.
4. Try a Household Bleach Solution
For larger infestations, I resort to bleach. I mix one part household bleach with two parts hot water and pour it into the bin. It’s important to do this in a well-ventilated area and wear gloves for safety.
Bleach not only kills maggots on contact but also sanitises the bin and prevents future breeding.
5. Use a Commercial Fly Spray
When I need something strong and fast, I go for a fly spray labeled for use on larvae. I spray it directly on the maggots, close the bin lid, and wait 15 minutes. These products usually contain larvicides that kill the maggots and repel adult flies too.
Always read the label carefully and ensure it’s safe for indoor or outdoor use depending on where you’re treating.
6. Hire a Professional Pest Control Service
If none of the above methods work, or if the maggots keep returning, I call in a professional. Pest control services in the UK have access to industrial-grade treatments that eliminate the larvae and destroy any fly breeding grounds.
This is the best option for severe or recurring infestations, especially in compost bins or commercial premises.
How Do I Prevent Maggots in the Future?
Once you’ve removed the maggots, it’s crucial to prevent them from coming back. Here’s what I do to keep my bins maggot-free year-round.
How to store food waste properly?
I make it a habit to wrap meat and fish scraps in newspaper or compostable bags before tossing them into the bin.
If I know there’s going to be a delay before bin collection day, I sometimes freeze smelly waste to prevent it from decomposing and attracting flies.
What are the Best practices for bin hygiene in UK homes?
Clean bins don’t attract flies. I rinse my kitchen and outdoor bins weekly using either a vinegar solution or a diluted bleach mixture. Keeping the lids shut tight is also essential, as flies only need a tiny gap to enter and lay eggs.
Should I clean my bin weekly?
Absolutely. Regular cleaning removes residue and odours that attract flies. I also sprinkle baking soda at the bottom of the bin occasionally—it helps absorb smells and keeps things dry, making it less appealing for maggots.

Comparison Table – Chemical vs Natural Maggot Killers
| Method |
Type |
Pros |
Cons |
| Boiling Water |
Natural |
Instant kill, eco-friendly |
Needs careful handling |
| Vinegar/Lemon Juice |
Natural |
Safe, readily available |
May not kill all larvae |
| Salt |
Natural |
Cheap, easy to apply |
Slower acting |
| Bleach |
Chemical |
Highly effective and sanitising |
Strong fumes, needs dilution |
| Fly Spray |
Chemical |
Quick, also kills adult flies |
Contains chemicals, indoor caution |
Final Thoughts: Don’t Panic – Just Act Fast
Dealing with maggots is never pleasant, but once you know what to do, the process is straightforward. Personally, I find that boiling water, vinegar, and regular cleaning do the trick most of the time. When that’s not enough, commercial products or pest control services are there to help.
The key takeaway? Act quickly, clean thoroughly, and prevent the conditions that attract flies in the first place. That’s how I stay ahead of the problem—and you can too.
What Are the Frequently Asked Questions On How to Get Rid of Maggots?
1. Can maggots live in sealed bins?
Yes, if flies have already laid eggs before the bin was sealed, maggots can hatch and survive as long as there’s food waste inside. That’s why regular cleaning is essential, even if the lid is kept shut.
2. Is it safe to handle maggots?
It’s safe with gloves, but I avoid touching them with bare hands. Maggots can carry bacteria from decaying waste, which can lead to contamination if you’re not careful.
3. Are maggots harmful to pets or humans?
While they don’t bite, they can transfer bacteria that lead to food poisoning and infections. Pets might try to eat them out of curiosity, so I always keep affected areas clean and covered until the maggots are removed.
4. Why do I keep getting maggots even when the bin is clean?
Sometimes, even clean bins can have tiny food residues that attract flies. It’s also possible that flies are entering during bin usage. I’ve found that using citrus-scented sprays or bin deodorisers helps keep flies away.
by Kanimozhi BV | Sep 24, 2025 | DIY Ideas
Batteries power everything from our TV remotes to our electric cars, but when they’re spent, they don’t just vanish into thin air.
I used to think tossing them into the bin was no big deal—until I realised how much damage that one small action could cause to the environment and public health.
In this guide on how to dispose of batteries, I’ll walk you through the safest and most eco-friendly ways to dispose of batteries in the UK, drawing from personal experience, government advice, and best recycling practices.
Let’s break it down, step by step.
Why Is Proper Battery Disposal So Important?
What happens if I throw batteries in the bin?
When I learned that used batteries contain heavy metals like lead, mercury and cadmium, it shocked me.
Throwing them in the general waste means they often end up in landfills, where these toxic substances can leak into soil and groundwater, harming ecosystems and potentially our drinking water.
How do batteries affect the environment and health?
Improper disposal can lead to chemical fires, release of greenhouse gases, and contamination of food chains. It’s not just about pollution—these chemicals pose real health risks including neurological damage and reproductive issues in humans.
Are there UK laws about battery disposal?
Yes. Under the Waste Batteries and Accumulators Regulations 2009, retailers selling over 32kg of batteries annually must provide free battery recycling in-store. It’s also illegal to throw industrial or automotive batteries in general waste. Trust me—ignorance isn’t a defence if you get caught.
What Types of Batteries Do I Need to Dispose of?
Not all batteries are the same, and knowing which type you’re dealing with is the first step to responsible disposal.
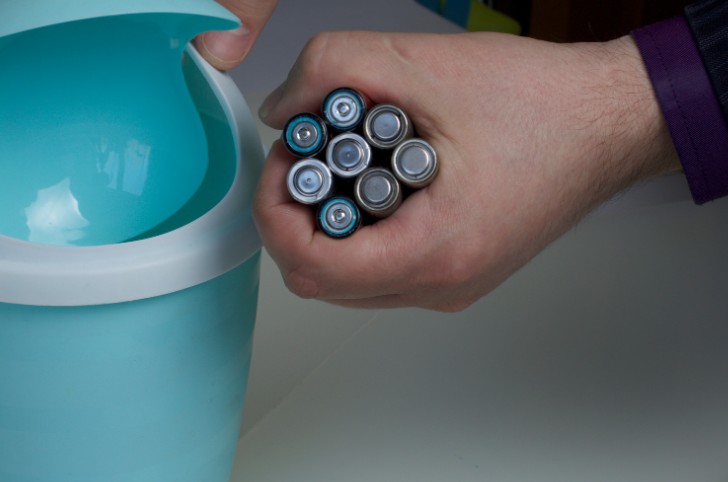
What are Household batteries? – AA, AAA, etc.
These are the most common. I usually collect mine in a jar near the kitchen, then take them to the local battery recycling point once full.
What are Rechargeable batteries? – NiMH, lithium-ion, etc.
These are in phones, power tools, cameras, and laptops. While they last longer, they also pose a higher fire risk if damaged or improperly stored.
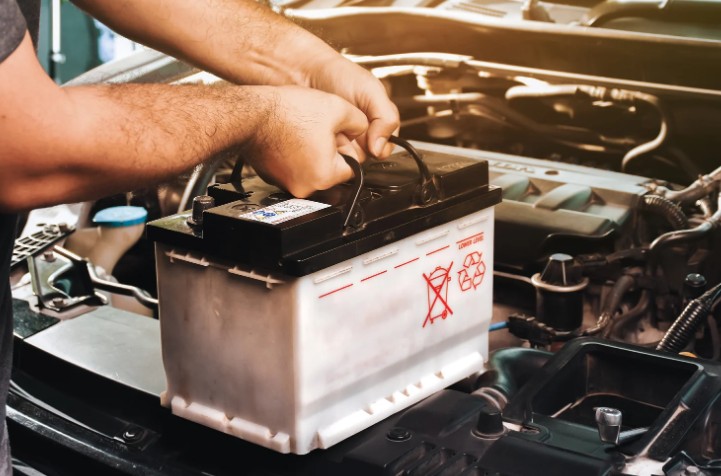
What are Car and vehicle batteries?
These lead-acid batteries are classed as hazardous waste. I found that most garages and scrap yards accept them for free—or even pay a small fee for returns.
Used in watches, hearing aids and toys. They often contain mercury, so I always store these separately in labelled containers.
How can I tell what type of battery I have?
Look for labels like Li-ion, NiMH, or Pb. If you’re unsure, it’s safer to assume the battery needs specialist handling.
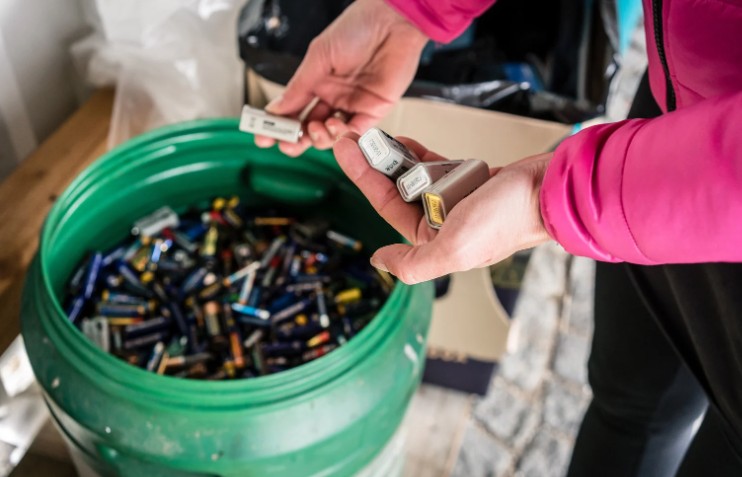
Where Can I Recycle Batteries in the UK?
There are more options than you might think. Here’s what I’ve personally used:
Where is Local council battery recycling points?
My council provides small battery bins at libraries, schools and town halls. You can check your local authority’s website for a nearby collection point.
Is there Retail stores with battery collection bins?
Shops like Tesco, Asda, B&Q, and Curry’s offer free drop-off points, typically near the entrance or customer service area. It’s become part of my routine grocery run.
How Is Household Waste Recycling Centres HWRCs?
If I’ve got multiple types of batteries (especially larger ones), I take them to the nearest HWRC. Staff are usually helpful, and signage makes it clear where everything goes.
National battery recycling services (e.g. Recycle Now)
Recycle Now has an excellent postcode search tool to find battery recycling locations. I use this if I’m travelling or in an unfamiliar area.
Do all councils offer free battery recycling?
Most do, but not all. If you live in a rural area, you might need to use retail stores or recycling centres instead. It’s worth a quick online check.
How Do I Prepare Batteries for Safe Disposal?
It’s not just about where you recycle—but how.
Should I tape the terminals or separate types?
Yes! Especially with lithium-ion and button cell batteries, I always tape the terminals with non-conductive tape (like electrical tape). This prevents short circuits or sparks, particularly during transportation.
How do I store used batteries safely before recycling?
I use a dedicated, labelled plastic container with a lid—kept in a cool, dry place, out of reach of pets and children. Never store old batteries near metal objects or heat sources.
Are there any batteries I shouldn’t recycle?
Damaged or swollen batteries (especially from phones or laptops) should be taken directly to a recycling centre or electronics store. Never put them in battery bins—they pose a fire risk.
How to Dispose of Batteries? – Safe Eco – Friendly Ways
Disposing of large batteries, like those from vehicles or solar panels, is a different ballgame.
Garage and auto part store take-back schemes
Many garages will take back your old car battery for free when you buy a new one. I once received a small discount for returning mine—always ask!
Paying a fee for hazardous waste collection
Some councils offer home collection for hazardous waste, though they may charge a fee. I used this when replacing a solar battery system—it was convenient and safe.
Can I recycle car batteries myself?
No. Due to the risk of acid spills and heavy metals, you should always use an authorised recycling centre.
What Are Some Eco-Friendly Tips for Battery Use and Disposal?
Being sustainable isn’t just about recycling—it’s also about prevention.
Switching to rechargeable batteries
I now use NiMH rechargeables for almost everything—TV remotes, torches, wireless keyboards. Over time, they’ve saved me money and reduced my waste.
Reducing battery consumption at home
Simple swaps like solar-powered garden lights and USB-rechargeable devices can cut battery use significantly.
Supporting battery recycling initiatives in the UK
I try to support brands and shops that promote proper battery disposal or run recycling campaigns. It makes a difference when consumers show they care.
What Are the List Of Battery Types & Disposal Methods?
| Battery Type |
Common Use |
Disposal Method |
Special Instructions |
| AA / AAA (alkaline) |
Remotes, clocks |
Retail bins / Council points |
Store safely, no terminals taping needed |
| Lithium-ion (Li-ion) |
Phones, laptops, power tools |
HWRC or electronics shop |
Tape terminals, avoid damage |
| Button cells |
Watches, hearing aids |
Council points or jewellers |
Store separately, tape if needed |
| Car/Lead-acid batteries |
Vehicles, solar systems |
Auto shops, recycling centres |
Never bin them—hazardous waste |
| Rechargeables (NiMH) |
Toys, torches |
Same as alkaline; recycle at collection points |
Tape terminals if damaged |
What are the Do’s on Battery Disposal?
- Use council or retailer battery bins
- Store used batteries safely in non-metal containers
- Tape terminals on rechargeable and lithium batteries
- Check labels to identify battery type
- Use Recycle Now to locate disposal points
What are the Dont’s on Battery Disposal?:
- Never throw batteries in general waste or recycling bins
- Don’t mix damaged or leaking batteries with others
- Avoid hoarding old batteries at home—they degrade over time
Proper battery disposal isn’t just a legal obligation—it’s an environmental responsibility. Since making it part of my routine, I’ve realised how easy and impactful it is. From storing them safely to using local collection points, every little action helps protect the environment and keeps harmful chemicals out of landfills.
Let’s face it: we all use batteries, and it’s on each of us to ensure they’re disposed of the right way.
Related Article: How to Dispose of Paint in UK? – Smart Tips To Get Rid Of It
What Frequently Asked Questions On How to Dispose of Batteries?
1. Can I throw batteries in the bin in the UK?
No, you should never throw batteries in the general waste bin. Batteries contain harmful chemicals and heavy metals that can leak into the environment, polluting soil and water. Use designated battery recycling points instead.
2. Where is the best place to dispose of household batteries in the UK?
You can dispose of AA, AAA, and other small batteries at supermarkets, electrical retailers, local council buildings, or Household Waste Recycling Centres. Use the Recycle Now website to find a drop-off point near you.
3. How do I safely store used batteries before recycling them?
Store used batteries in a non-metallic, sealed container in a cool, dry place. For rechargeable or lithium-ion batteries, tape the terminals with non-conductive tape to prevent fire hazards.
4. Are all types of batteries recyclable?
Most common batteries can be recycled, including alkaline, lithium-ion, NiMH, and button cells. However, damaged or leaking batteries and certain industrial batteries require special handling by authorised centres.
