
by Kanimozhi BV | Feb 6, 2026 | Bathroom, Interior
Why Narrow Ensuite Bathrooms Can Be a Design Challenge
Are you looking for narrow small ensuite bathroom ideas? Designing suchbathroom in a UK home can be surprisingly difficult. You’re not only working with limited square footage, but also with awkward proportions—especially when the room is long and thin. Traditional fixtures don’t always fit neatly, and storage can become nearly impossible if you don’t plan ahead.
But the good news? With a bit of creativity and the right layout, even the tightest ensuite can become both stylish and practical.
What Counts as a Narrow or Small Ensuite?
In the UK, a compact ensuite typically measures around 1.2 m x 2.0 m, though you’ll find some even tighter. What defines a narrow ensuite is more about proportion than overall size—long and thin rooms under stairs or in converted lofts, for example.
You’ll want to:
-
Allow for 60 cm in front of each fixture
-
Ensure minimum clearance for safe movement
-
Prioritise shower-over-bath setups only if absolutely necessary
Understanding these layout basics helps you plan realistically from the start.
How to Plan Your Layout for Maximum Space?
The layout is everything. Here’s how to get it right from the start:
-
Install sliding or pocket doors to eliminate door swing issues
-
Place the toilet at the far end to lead the eye
-
Use shallow or wall-mounted basins to open up floor space
-
Consider a wet room layout if waterproofing and drainage allow—it saves both width and visual space
Your goal should be a layout that feels natural to move around in, despite being narrow.

Space‑Saving Fixture Ideas for Narrow Ensuites
The right fixtures can transform a cramped space. You’ll want to look for space‑efficient alternatives to standard bathroom pieces:
-
Wall‑mounted toilets and sinks – give the illusion of floating space
-
Corner sinks or basins – perfect for ultra-narrow rooms
-
Slimline showers – available as 700 mm wide options
-
Vertical towel rails – multifunctional and space-savvy
Choosing compact, multi-purpose, and slimline options will instantly free up room to breathe.
Clever Storage Solutions You Can Use
You may not have floor space, but your walls are full of potential. Here’s how you can turn them into smart storage zones:
- Install recessed shelving inside your shower for shampoo and soap
- Use mirrored cabinets above the sink for dual function
- Mount a shelf over the door for items you rarely use
- Opt for tall, narrow cabinets to fit in corners
- Fit storage under floating vanities without touching the floor
These solutions reduce clutter and help your narrow ensuite feel open rather than overcrowded.
Colours, Lighting & Finishes That Make Space Feel Bigger
Your choice of finishes can dramatically alter the perception of space.
-
Stick with light colours: white, pale greys, soft sage greens
-
Use large mirrors to double the sense of depth
-
Choose glossy or reflective tiles to bounce light around
-
Install LED strip lighting under floating vanities or along walls
Also, avoid using too many contrasting colours or textures, as these can visually “break up” the space, making it feel more boxed in.

Design Mistakes to Avoid in a Narrow Ensuite
Here’s a quick comparison table so you don’t fall into common design traps:
| ❌ Mistake |
😬 Why It Doesn’t Work |
✅ Better Alternative |
| Freestanding bathtub |
Requires too much floor space |
Walk-in shower or corner unit |
| Dark paint or tiles |
Makes walls feel closer together |
Soft neutrals and whites |
| Chunky vanity units |
Bulky and interrupts movement |
Wall-mounted compact vanity |
| Ceiling spotlights only |
Too harsh and narrow |
Layered lighting and wall sconces |
A few small tweaks make a huge difference in how open and functional the space feels.
Inspirational Layout & Design Examples for Tight Spaces
1. Wet Room Ensuite in a Loft
An L-shaped attic room converted into a wet room with skylight and wall-hung toilet.
2. Narrow Ensuite with Corner Shower
Shower placed at one end, with a floating sink and mirrored wall to enhance brightness.
3. Small Ensuite With Double Mirrors
Strategic use of two mirrors on facing walls creates an illusion of depth.
Let these inspire you to think beyond just function—style is possible, even when space is tight.
Your Checklist Before You Start Renovation
Make sure your planning includes the essentials:
-
Accurate measurements of the room (length, width, ceiling height)
-
Decide what’s essential vs. optional (do you really need a bath?)
-
Map out electrical points early
-
Think about natural and artificial light
-
Plan for ventilation—moisture is a real issue in small ensuites
-
Always allow some buffer in your budget for bathroom unexpected tweaks
Conclusion: Make Your Narrow Ensuite Feel Spacious & Stylish
Even the most awkward ensuite can be made functional—and even beautiful—when you combine clever planning, the right fixtures, and thoughtful styling.
By incorporating space-saving designs, light-enhancing materials, and smart storage, you can make your narrow bathroom feel larger than it really is.
So don’t be discouraged by tight dimensions—embrace them with confidence and creativity.
Common Questions About Narrow Small Ensuite Bathroom Ideas
1. Can a bath fit into a narrow ensuite?
While baths usually require more width, there are compact or shower-over-bath combos that work in certain setups. However, most small ensuites function better with a walk-in or corner shower.
2. What’s the best type of door?
A pocket door or sliding barn door saves space and avoids awkward swing zones—perfect for hallways or under-stairs ensuites.
3. Is a wet room a smart option in a small space?
Yes, if your floor can handle the waterproofing and drainage. It opens up the floor plan and removes barriers like shower enclosures.
Home Diagnostics and Technical Standards Specialist at Hello Mag. She provides high-level Expertise in appliance mechanics and scientific pest management, ensuring every guide follows strict safety protocols and manufacturer standards. As a leading Authority on technical home specs, Kanimozhi audits complex data to provide homeowners with the most accurate, verified, and reliable diagnostic solutions available.

by Kanimozhi BV | Feb 5, 2026 | Bathroom, Interior
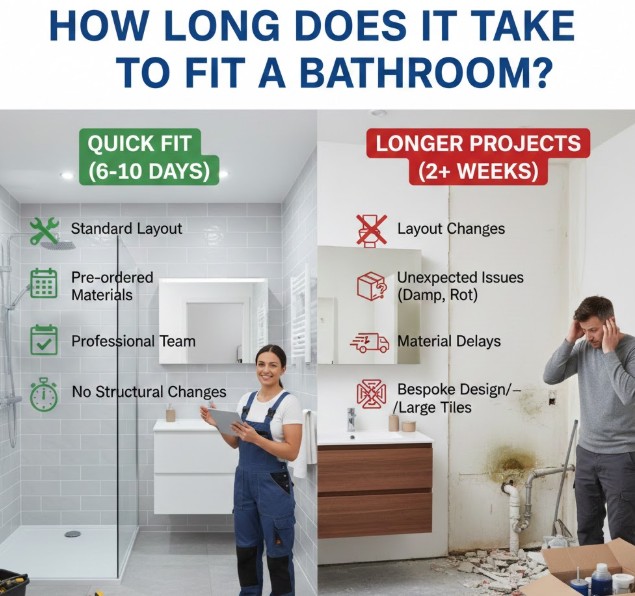
Quick Answer: How Long Does It Take to Fit a Bathroom?
Yes. A standard UK bathroom can be completed in 6 to 7 working days, provided you keep the existing layout and have all materials on-site. The process follows a strict 24-hour cycle of removal, prep, tiling, and installation. While bespoke designs or structural repairs can push the timeline to 14+ days, a professional “like-for-like” swap is easily achievable in a single week.
Can a Bathroom Really Be Fitted in Just 7 Days?
You’ve probably heard that fitting a bathroom takes two to three weeks, right? But in reality, a standard UK bathroom installation can often be completed in just 6 to 7 working days — without cutting corners.
The key lies in planning ahead, keeping to a simple layout, and working with professional, well-coordinated tradespeople.
Yes — And Here’s Why
Here’s how a bathroom can be completed within 7 days:
-
Most UK bathrooms are compact, making fitting quicker
-
No changes to layout means less plumbing and electrical work
-
Skilled fitters can tile, install, and finish back-to-back without idle time
-
Fixtures and tiles are often standard sizes and easily available
-
Professionals typically schedule their team to work efficiently in sequence
When everything is prepared in advance, including your bathroom suite, tiles, and design decisions, the work becomes a tightly managed project rather than a drawn-out renovation.
Why Do Some People Say It Takes 2 Weeks or More?
Longer timelines usually occur when:
-
You manage trades individually instead of using one contractor
-
There are delivery delays or backordered materials
-
The bathroom requires structural repairs or plumbing reroutes
-
You uncover hidden problems like damp, poor wiring, or rot
-
You opt for a bespoke design with special finishes or large-format tiling
That’s why understanding your specific job requirements matters — and why some projects stretch beyond a week.
How Long Does It Take to Fit a Bathroom? – A Day-by-Day Fitting Timeline
Here’s a realistic day-by-day breakdown for a standard installation:
Day 1 – Removal of Old Bathroom Suite
-
Strip out toilet, bath, basin, and any old units
-
Remove old tiles and flooring
-
Dispose of waste
-
Inspect surfaces for issues
Day 2 – Plumbing & Electrical Preparations
-
Adjust or extend pipework
-
Install cables or move electrical points
-
Mark out layout for fittings and tiles
Day 3 – Wall Prep & Plastering
-
Repair or reboard walls
-
Skim where necessary
-
Prepare floor for tiling
Day 4 – Begin Wall and Floor Tiling
Day 5 – Grouting & Tile Finishes
Day 6 – Install Bathroom Fixtures
Day 7 – Final Touches & Testing
-
Install lighting, extractor fan, mirror, towel rail
-
Test water flow, drainage, and electrics
-
Perform snag checks and fix any issues
Standard Bathroom Installation Timeline Table
| Stage |
Time Required |
| Strip-out & disposal |
1 day |
| Plumbing & electrics (1st fix) |
1 day |
| Wall prep & plastering |
1 day |
| Tiling work |
2 days |
| Suite installation |
1 day |
| Finishing and snagging |
1 day |
| Total Duration |
6–7 working days |
What are the Key Factors That Add or Reduce Days?
What Might Add Days to Your Fit?
-
Changing bathroom layout – Moving toilets or sinks
-
Old plumbing or wiring – Needs updating or replacing
-
Delivery delays – Waiting on custom tiles or taps
-
DIY or trade scheduling gaps – Longer wait between each stage
-
Hidden damage – Leaks, mould, or rotten joists

What Helps You Save Time?
-
Using a single bathroom fitting team
-
Pre-ordering everything you need
-
Keeping the existing layout
-
Avoiding last-minute design changes
-
Choosing standard, in-stock items
What Is the Hardest Part of a Bathroom Renovation?
You might think it’s ripping everything out or moving the plumbing — and that’s partly true. But some of the most time-consuming and challenging aspects are:
-
Precision tiling – Especially with patterned or large tiles
-
Plumbing reconfiguration – When fixtures move locations
-
Dealing with hidden issues – Like damp walls or broken subfloors
-
Finishing details – Getting perfect silicone lines or fitting accessories right
-
Scheduling trades – Delays when one trade can’t start until another finishes
⚠️ The hardest parts are often the ones you can’t see coming — that’s why preparation matters.
Conclusion
A full bathroom fit in the UK can absolutely be completed in 6–7 working days, especially if:
-
You’re not changing the layout
-
All materials are ready on-site
-
You hire an experienced, well-organised team
That said, allow a small buffer if your bathroom is older, your layout is changing, or you’re adding extras like underfloor heating or custom-built cabinets.
By understanding what goes into the bathroom installation cost and timeline, you’ll feel more confident managing your project — and won’t be caught off guard if things run over by a day or two.
Home Diagnostics and Technical Standards Specialist at Hello Mag. She provides high-level Expertise in appliance mechanics and scientific pest management, ensuring every guide follows strict safety protocols and manufacturer standards. As a leading Authority on technical home specs, Kanimozhi audits complex data to provide homeowners with the most accurate, verified, and reliable diagnostic solutions available.
by Kanimozhi BV | Feb 4, 2026 | Wall, Interior
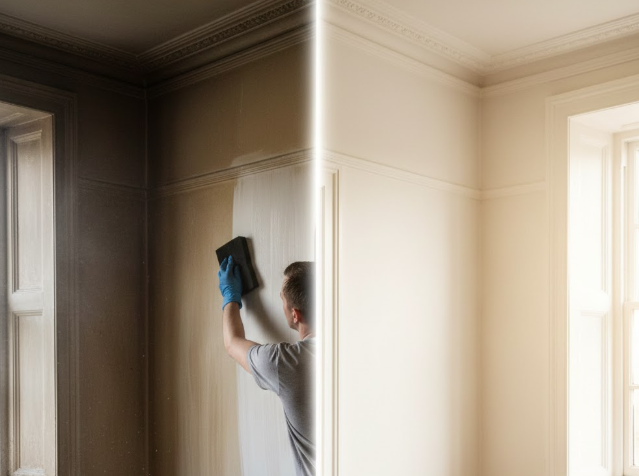
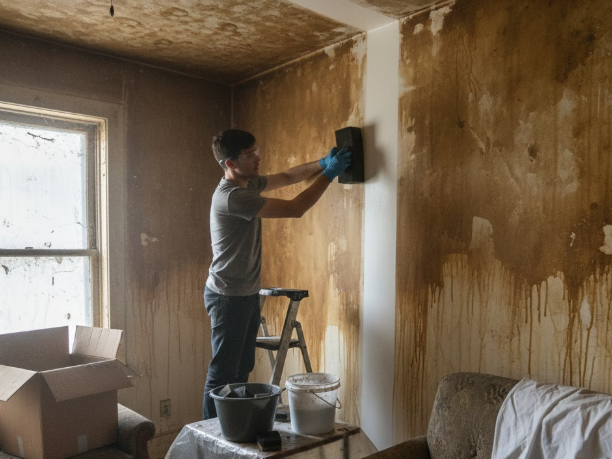
Smoke-stained walls and ceilings can make your space feel dingy and smell unpleasant. Whether it’s from cigarettes, candles, or a one-time kitchen mishap, knowing how to clean smoke off walls and ceilings can restore your home’s freshness and visual appeal.
This guide walks you through effective, safe, and UK-friendly methods to remove smoke damage thoroughly.
What Is Smoke Damage?
Smoke damage is more than just discolouration. It consists of soot, nicotine residue, and oily particles that cling to walls and ceilings. If left untreated, these can permanently stain paint, create odours, and potentially affect your indoor air quality.
Smoke particles also rise with heat, so ceilings and upper wall areas often bear the brunt of the damage. That’s why understanding how to clean smoke damage on walls and ceilings is essential for proper home care.
What You Need to Know Before You Start?
Protective Gear
Before cleaning, be sure to wear:
How To Prepare the Room?
-
Open windows and doors to ventilate the space.
-
Lay down plastic sheets or drop cloths to protect flooring and furniture.
-
Remove pictures, shelves, and anything attached to the walls.
How to Clean Smoke Off Walls and Ceilings: Step-by-Step
Let’s break down the cleaning process using proven, effective techniques. Always start with dry cleaning before moving to liquids to avoid smearing soot deeper into the surface.
Step 1: Dry Cleaning Sponge (Chemical Sponge)
Use this before any liquids:
-
Gently wipe walls and ceilings in straight downward strokes.
-
Don’t scrub in circles — it pushes the soot further in.
-
Replace sponge sides as they get dirty.
Step 2: Vacuuming
Attach a soft-bristle brush to your vacuum:
Step 3: Wet Cleaning Solutions
Here are some effective cleaners based on the severity of the damage:
| Solution |
Best For |
Application Tip |
| Vinegar + Warm Water (1:1) |
Light smoke stains |
Cuts through odours and minor soot |
| Sugar Soap |
General UK household use |
Available in UK stores, great for walls |
| Trisodium Phosphate (TSP) |
Heavy smoke damage |
Use gloves and goggles; rinse well |
| Ammonia + Water (1:4) |
Cigarette & tar stains |
Ventilate heavily; never mix with bleach |
Step 4: The Correct Cleaning Technique
- Start from the ceiling and work downward.
- Wipe in vertical sections about 1 metre wide.
- Rinse your cloth or sponge frequently with clean water.
- Let each section dry fully before inspecting or repeating.
Tip: Use a white cloth — it shows how much soot you’re removing.
How to Get Rid of Smoke Smell After Cleaning?
Even if your walls look clean, lingering odours can still remain. Here’s what you can do:
Natural Deodorisers
Air Circulation

Can You Paint Over Smoke-Damaged Walls?
You can, but only after thorough cleaning and priming. Otherwise, stains and smells will resurface.
What are the Painting Tips?
-
Use a shellac-based stain-blocking primer (e.g., Zinsser B-I-N).
-
After the primer dries, paint with washable, low-VOC emulsion.
-
Always test a small patch to check for bleed-through.
When Should You Call a Professional?
Sometimes, DIY isn’t enough. Consider a professional if:
-
The smoke damage is from a fire.
-
Ceilings are textured or hard to reach.
-
Odours persist despite multiple treatments.
-
You’re dealing with delicate surfaces or heritage paintwork.
Here’s a quick table of useful tools and where you might find them:
| Product |
Use |
Where to Buy |
| Dry Cleaning Sponge |
Removes soot without smearing |
Screwfix, Amazon |
| Sugar Soap |
General wall cleaner |
B&Q, Wilko |
| Odour-Blocking Primer |
Before painting |
Dulux Decorator Centre |
| White Vinegar |
Natural deodoriser & cleaner |
Tesco, Asda |
| Activated Charcoal |
Air purification |
Lakeland, online retailers |

Conclusion
Tackling how to clean smoke off walls and ceilings may seem overwhelming at first — but with the right prep, products, and methods, you’ll make your home feel fresher, look brighter, and even extend the life of your paintwork.
Don’t rush it. Take your time, be thorough, and if in doubt — especially with heavy smoke damage — call in the pros. You’ve got this.
What are the FAQs About How to Clean Smoke Off Walls?
1. How long does it take to clean smoke off walls?
Light damage may take 2–3 hours. Heavier or whole-room smoke stains could take a full day or more.
2. What’s the safest solution to use on painted walls?
Vinegar and warm water is gentle and effective. For washable paint, sugar soap is widely used in the UK.
3. Will steam cleaners work?
Yes, especially on washable painted walls and tiles. But avoid using them on porous or plastered surfaces.
Home Diagnostics and Technical Standards Specialist at Hello Mag. She provides high-level Expertise in appliance mechanics and scientific pest management, ensuring every guide follows strict safety protocols and manufacturer standards. As a leading Authority on technical home specs, Kanimozhi audits complex data to provide homeowners with the most accurate, verified, and reliable diagnostic solutions available.
by Kanimozhi BV | Feb 4, 2026 | Garden, Exterior
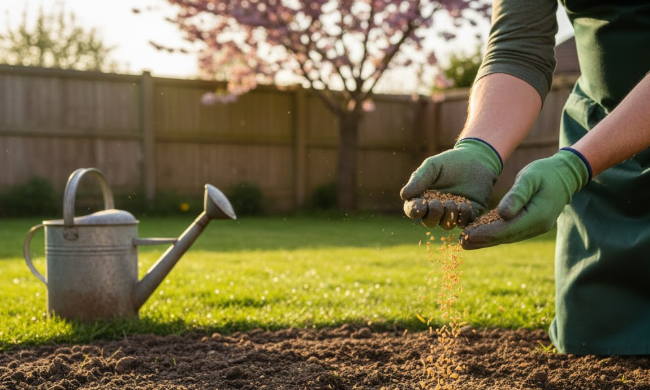
Quick Note: Can You Sow Grass Seed in October?
Yes, you can! Early October is one of the best times to sow grass seed in the UK because the soil is still warm and natural rainfall is consistent. For success, remember:
- The Window: Aim for the first three weeks of October.
- Temperature: Soil must stay consistently above 8°C.
- The Risk: Avoid sowing if a hard frost is forecast within 7 days.
Best Seed: Look for Perennial Ryegrass or Red Fescue.
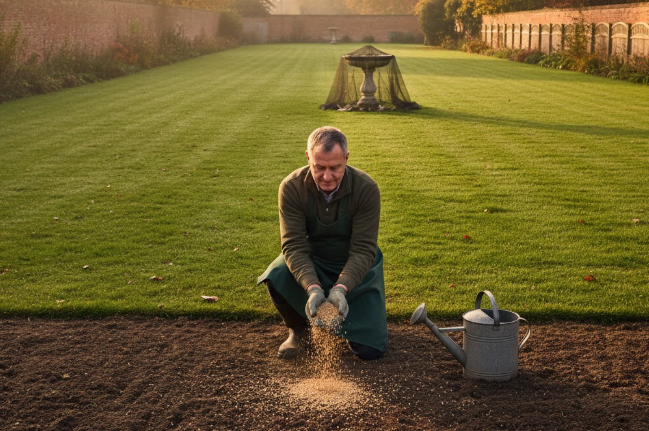
As autumn rolls in and leaves begin to fall, many UK homeowners ask: can you sow grass seed in October? Or perhaps you’ve wondered: can you plant grass seed in October or even can I sow grass seed in October myself, or is it too late?
The short answer? Yes, you can — and October might be one of the best times to do it, if you follow the right steps. This guide will show you how to make the most of autumn conditions to establish a healthy, green lawn before winter sets in.
Is October a Good Time to Sow Grass Seed in the UK?
What’s the Best Season to Plant Grass Seed in the UK?
While spring is a popular choice, autumn — especially September and early October — is considered ideal for sowing grass seed in the UK.
Why? Because the soil is still warm from summer and there’s more natural rainfall. This creates the perfect conditions for germination without needing constant watering.
Why Early October Works Well?
-
Soil temperatures are still above 8°C, helping quick germination.
-
Regular rainfall reduces the need for manual watering.
-
There’s less competition from weeds than in spring.
-
Cooler air helps seedlings grow stronger roots.
However, timing is everything. Planting grass seed in late October comes with a higher risk of frost, which can damage young seedlings before they properly root.
How Does Grass Seed Germinate in October?
To grow successfully, grass seed needs three things: warmth, moisture, and good soil contact.
What Grass Seeds Require in Autumn?
| Requirement |
Ideal Condition (October UK) |
| Soil temperature |
8–18°C (typical in early October) |
| Water |
Consistently moist, not waterlogged |
| Light |
Partial sun — shorter daylight okay |
If the soil gets too cold (below 6°C), germination slows or stops altogether, so keep an eye on weather forecasts. You may doubt on grass seed germinate on the soil inorder to ensure the safe growth.

How to Sow or Plant Grass Seed in October?
Want to plant or sow grass seed this month? Here’s how to boost your chances of success:
Step-by-Step Lawn Seeding Tips:
- Clear the Area – Remove dead grass, moss, and weeds.
- Loosen and Level the Soil – Rake the soil for good texture and drainage.
- Sow Evenly – Use a spreader or your hand to broadcast seed.
- Rake Lightly – Gently press seeds into soil with a rake.
- Water Lightly – Keep the topsoil moist until germination (usually 7–21 days).
Tip: Avoid heavy foot traffic for at least 4 weeks to let roots settle.
What Type of Grass Seed Should You Use in Autumn?
Not all grass seeds grow equally well in October. For autumn sowing, choose cool-season grass types:
| Grass Type |
Benefits in Autumn |
| Perennial ryegrass |
Fast germination, durable, great for play areas |
| Red fescue |
Fine texture, handles shade well |
| Tall fescue |
Deep roots, drought-resistant once mature |
Look for a UK autumn mix designed specifically for cooler weather.
What are Common Mistakes to Avoid When Sowing Grass in October?
Even though October is a great month, certain missteps can ruin your lawn plans:
-
Planting too late in the month — frost can ruin early growth.
-
Using the wrong seed type — summer seeds may not germinate.
-
Not watering enough — October rainfall helps, but dry spells still happen.
-
Skipping soil prep — compacted or weedy soil reduces success.
Quick Recap: When and How to Sow Grass in October?
Here’s a handy checklist for your October seeding project:
-
Choose early October for best soil temperature
-
Prepare soil by raking, leveling, and clearing debris
-
Use cool-season grass seed suited to UK climate
-
Keep soil moist but not soaked
-
Watch for frost and cover seed if needed

Conclusion
So, can you sow grass seed in October in the UK? Yes — and you absolutely should if conditions are right.
Whether you’re asking, can you plant grass seed in October or can I sow grass seed in October myself, the answer remains: October offers a golden opportunity to give your lawn a strong start before winter.
With the right prep and timing, your efforts this autumn will lead to lush green grass by spring — making all the raking and watering totally worth it.
What are the FAQs About Can You Sow Grass Seed in October?
1. Can you sow grass seed in October if there’s frost forecast?
It’s best to sow before frost becomes regular, usually early-mid October in the UK. If frost hits right after sowing, seedlings may struggle.
2. Can I plant grass seed myself or do I need a professional?
Absolutely, you can sow grass seed yourself — just follow the right steps and choose the correct seed.
3. How late in October can I plant grass seed?
You can sow grass seed until the third week of October, provided daytime temps are above 8°C and the ground is workable.
Home Diagnostics and Technical Standards Specialist at Hello Mag. She provides high-level Expertise in appliance mechanics and scientific pest management, ensuring every guide follows strict safety protocols and manufacturer standards. As a leading Authority on technical home specs, Kanimozhi audits complex data to provide homeowners with the most accurate, verified, and reliable diagnostic solutions available.
![When to Sow Grass Seed UK? – The Best Time for a Perfect Lawn [Expert Advice]](https://www.hellomag.co.uk/wp-content/uploads/2026/02/When-to-Sow-Grass-Seed-UK.png)
by Kanimozhi BV | Feb 3, 2026 | Garden, Exterior
Quick Note: When to Sow Grass Seed UK?
In the UK, the best times to sow grass seed for optimal germination are:
- Autumn (Late August – Mid-October): Often considered the best due to warm soil and consistent rainfall.
- Spring (Mid-April – May): Excellent as soil warms, with good moisture and increasing daylight.
With the UK’s unpredictable weather, getting the timing right when sowing grass seed can be the difference between a thriving lawn and wasted effort.
If you’re wondering when to sow grass seed in the UK, you’re in the right place. This guide walks you through the best seasons, weather conditions, and practical steps to make your lawn renovation a success.
Why Timing Is Key for Lawn Success?
Timing is everything when it comes to sowing grass seed. The UK’s mild, maritime climate means that both spring and autumn can work well — if you catch the right window.
Grass seeds germinate only when soil temperatures are consistently above 8°C, and conditions are neither too dry nor too wet. The goal is to ensure strong, quick germination and deep root establishment before the more extreme seasons of winter and summer.
UK Grass Seed Sowing Seasons – Quick Comparison
Here’s a handy table to help you quickly compare the pros and cons of sowing in different UK seasons:
| Season |
Ideal Months |
Soil Temp |
Germination Speed |
Pros |
Cons |
| Spring |
March – May |
8–12°C |
Moderate (7–14 days) |
Warming soil, steady rain, low weed growth |
Risk of late frosts |
| Autumn |
Late Aug – Mid Oct |
10–14°C |
Fast (5–10 days) |
Warm soil, consistent rain, fewer weeds |
Shorter days, limited recovery time |
| Summer |
June – Early Aug |
15°C+ |
Fast (3–7 days) |
Fast growth if irrigated |
Drought risk, requires daily watering |
| Winter |
Nov – Feb (dormant only) |
<8°C |
Germinates in spring |
Low competition, early spring start |
Risk of frost, slow/no immediate growth |
Spring: A Popular Time to Sow Grass Seed
When in Spring Should You Sow?
You can sow grass seed as early as late March, but it’s safer to wait until mid-April, when frost risk is low and soil has started to warm up. Watch the weather: a few mild weeks make all the difference.
What are the Benefits of Spring Seeding?
-
Soil starts to warm up naturally
-
Daylight hours increase, boosting photosynthesis
-
Frequent light rainfall helps maintain moisture without overwatering
-
Ideal for those doing lawn renovation after winter damage
Autumn: Often the Best Choice in the UK
When in Autumn Should You Sow?
Late August to mid-October is often the best period to sow grass seed in the UK. During this time:
-
The soil retains warmth from summer
-
Rainfall becomes more consistent
-
Weed growth begins to die back
Why Autumn Works So Well?
-
Seeds germinate quickly in warm, moist soil
-
Reduced competition from weeds
-
Fewer birds and pests looking for seed
Tip: If you’re overseeding, autumn gives existing grass a chance to repair before winter.
Can You Sow in Summer or Winter?
What are Pros & Cons of Summer Seeding?
Sowing in June or July is possible, but be aware of the extra care needed:
-
Pros: Quick germination in warm soil, longer daylight
-
Cons: Grass dries out quickly, requires frequent watering, and young shoots are easily scorched
You’ll need to water daily, sometimes twice a day, especially in heatwaves.
How about Winter Seeding (Dormant Seeding)?
Dormant seeding involves sowing just before the ground freezes, allowing seeds to settle and germinate in early spring.
-
Pros: Seed stays dormant and is protected from pests
-
Cons: No growth until spring, high risk of being washed away or compacted by frost
What Soil and Weather Conditions to Check Before Sowing?
Before sowing, test:
-
Soil temperature: Must be consistently above 8°C
-
Moisture: Soil should be damp but not soggy
-
Forecast: Aim for 7–10 mild days with occasional light rain
Avoid sowing:
How to Prepare Your Lawn Before You Sow?
Preparation is crucial for strong seed germination. Follow these steps:
-
Clear debris and weeds
-
Scarify the lawn if you’re overseeding
-
Aerate compacted areas
-
Rake and level the soil surface
-
Firm the seedbed gently with your feet or a roller
Good seed-to-soil contact increases germination success dramatically.
Once you have prepared the seedbed, it is time to scatter your seeds. However, many UK homeowners wonder: will grass seed germinate on top of soil, or do you need to cover it? The answer depends on your local birds and weather conditions.

Overseeding vs. New Lawn: Does Timing Change?
Overseeding:
-
Can be done in either spring or autumn
-
Works best when grass is actively growing
-
Requires mowing existing grass short before applying seed
New lawn seeding:
What Top Mistakes People Make When Sowing Grass Seed?
Avoid these common missteps:
-
Sowing too early in spring or too late in autumn
-
Ignoring soil conditions — poor drainage equals poor germination
-
Using the wrong seed mix for your garden’s conditions
-
Neglecting post-sow care like watering and protection from birds
What are the Quick Tips for Better Germination in the UK?
-
Choose a UK climate-adapted seed mix
-
Rake lightly after sowing to protect seed
-
Use netting or straw to deter birds
-
Water lightly but frequently during first 2 weeks
Conclusion
Knowing when to sow grass seed in the UK can dramatically improve your lawn’s success. Aim for spring (April–May) or autumn (September–October), prepare your soil well, and keep an eye on the weather forecast.
With the right timing, your garden will reward you with a lush, resilient lawn that thrives through every season.
Choose your season, prep your ground, and let nature do the rest.
What are FAQs on When to Sow Grass Seed UK?
1. What is the best month to sow grass seed in the UK?
September is often ideal due to warm soil and consistent rainfall.
2. Can you sow grass seed all year round in the UK?
Technically yes, but spring and autumn offer the best conditions. Winter and summer sowing require special care.
3. Should I sow grass seed when it’s rainy?
Light rain helps, but avoid sowing before heavy downpours, which can wash seeds away.
4. Is autumn better than spring for grass seeding?
Often yes. Autumn has less weed growth, warmer soil, and natural moisture — perfect for germination.
5. Can I sow grass seed in summer heat?
Only if you can irrigate regularly. Heat and dry soil can kill seeds quickly if left dry.
Home Diagnostics and Technical Standards Specialist at Hello Mag. She provides high-level Expertise in appliance mechanics and scientific pest management, ensuring every guide follows strict safety protocols and manufacturer standards. As a leading Authority on technical home specs, Kanimozhi audits complex data to provide homeowners with the most accurate, verified, and reliable diagnostic solutions available.
