by Kanimozhi BV | Feb 19, 2026 | Washing Machine, Appliances, DIY Ideas
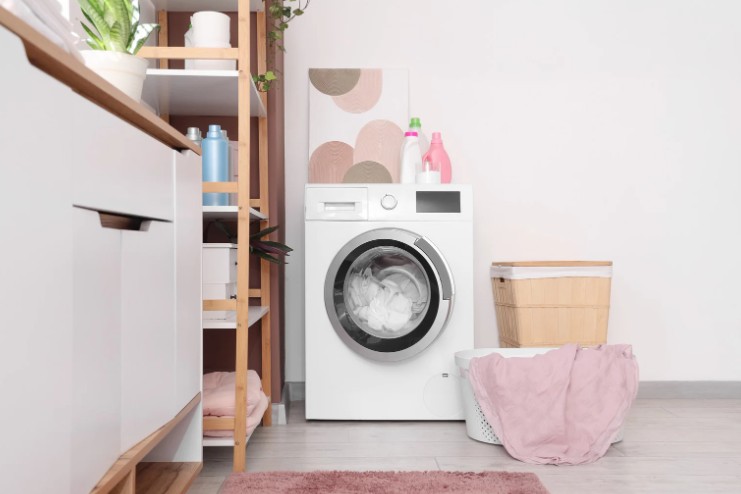
If you are a first-time homebuyer or a DIY enthusiast planning a kitchen refresh, you might assume that buying a new washing machine is as simple as picking a brand and hitting ‘buy’.
After all, most kitchen gaps look roughly the same. However, the short answer to “are all washing machines the same size?” is a resounding no.
While the industry follows certain “standard” benchmarks, a variation of just 10mm can be the difference between a seamless installation and an expensive appliance sitting in the middle of your hallway because it won’t fit the gap.
In this guide, we will break down everything you need to know about dimensions, hidden clearances, and the DIY pitfalls to avoid.
Quick Reference: Standard UK Washing Machine Dimensions
Before we dive into the technical details, use this comparison table to understand the typical footprints of different machine types found in the UK market.
| Machine Type |
Standard Width |
Standard Height |
Typical Depth |
Ideal For |
| Freestanding |
60cm |
85cm |
50cm – 65cm |
Most UK Kitchens & Utility Rooms |
| Integrated (Built-in) |
59.5cm – 60cm |
82cm |
54cm – 56cm |
Seamless Kitchen Designs (behind a door) |
| Slimline |
60cm |
85cm |
40cm – 45cm |
Shallow Units or Small Flats |
| Large Capacity (10kg+) |
60cm |
85cm |
60cm – 70cm |
Large Families / Heavy Loads |
Is There A “Standard” Size For UK Washing Machines?
In the UK, the “standard” width for a washing machine is 60cm. This is designed to match the standard width of kitchen units and worktop configurations.
The standard height is generally 85cm, which allows the machine to slide under a standard-height worktop (usually set at 90cm including the worktop thickness).
However, “standard” is a loose term. While width and height are relatively consistent to fit the architecture of British kitchens, depth is the wild card. Depending on the drum size and the design of the door, the depth can fluctuate significantly.
Why Does Washing Machine Depth Vary So Much?
As a first-time buyer, you might notice two machines that look identical from the front but have vastly different price tags and specs. Often, this is down to the drum capacity.
A machine with a 7kg drum is physically shallower than one with a 12kg drum. Manufacturers increase the depth of the machine to accommodate a larger internal cylinder.
If you are a DIYer retrofitting a machine into an older kitchen, you must be careful; modern “A-rated” energy machines often have deeper drums and more insulation, meaning they may stick out further than the machine you are replacing.
Do Larger Capacity Machines (10kg+) Need More Space?
A common misconception is that a 10kg machine must be wider than a 7kg machine. In reality, they are almost always 60cm wide. The extra volume is found by making the machine deeper.
If you are opting for a high-capacity machine, you must measure the “full depth.” This includes the curvature of the front door and the control knobs. A “60cm deep” machine on a spec sheet often measures 64cm once you include the door handle.
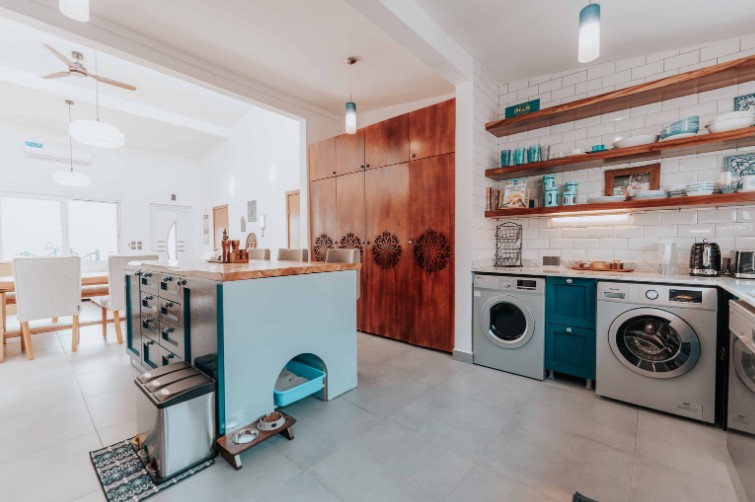
What Is The Difference Between Freestanding And Integrated Sizes?
If you want your kitchen to have a sleek, uniform look, you might be looking at integrated washing machines. These are designed to sit behind a cupboard door.
- Height: Integrated machines are slightly shorter (usually 82cm) because they sit on the floor but need to clear the underside of the cabinet frame and the “plinth” (the wooden board at the bottom of your kitchen units).
- Depth: They are significantly shallower (approx. 55cm) to allow room for the cupboard door to close flush with the rest of your kitchen.
- DIY Tip: You cannot easily put a freestanding machine into an integrated gap. Freestanding machines are too tall and their vibration profile is different, which could cause your kitchen units to rattle or damage the cupboard door.

How Much Extra Clearance Do You Really Need For Hoses And Pipes?
This is where most DIY enthusiasts get caught out. If your gap is 60cm deep and your machine is 60cm deep, it will not fit.
You must account for:
- The Plumbing (5-7cm): The cold water fill hose, the waste-water standpipe, and the power cable all sit behind the machine. If you push the machine flush against the wall, you risk kinking the hoses, which leads to drainage errors or floods.
- Vibration Gap (0.5cm each side): Washing machines spin at up to 1,600 RPM. They need a tiny bit of “breathing room” so they don’t bang against your kitchen cabinets during the spin cycle.
Can You Fit A Modern Machine Into An Older Kitchen Gap?
For those moving into an older property, you might encounter two specific issues:
1. The “Countertop Sag”
Over time, heavy laminate or wooden worktops can sag in the middle. If your gap was exactly 85cm twenty years ago, it might be 84.5cm today. Always measure the height at the left, centre, and right of the gap.
2. Flooring Changes
If you have recently laid luxury vinyl tiles (LVT) or laminate over an old floor, you have raised the floor level. This reduces the height of your appliance gap. Ensure you measure from the finished floor to the underside of the worktop.
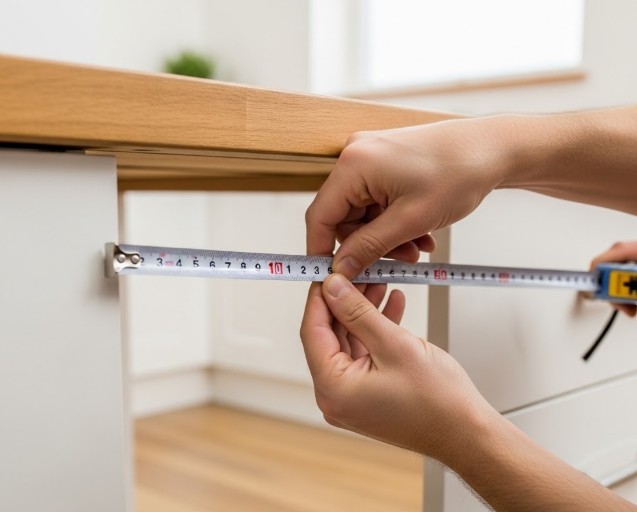
Step-By-Step DIY: How Do You Measure Your Space Like A Professional?
- Measure the Width: Take measurements at the top and the bottom of the gap. Walls are rarely perfectly straight. Use the smallest measurement.
- Measure the Height: Measure from the floor to the lowest point of the worktop. If the floor is uneven, check multiple spots.
- Measure the Depth: Measure from the back wall (or the pipes) to the front of the cabinets.
- Check the “Swing”: Ensure there is enough room for the machine door to open fully without hitting a wall or a radiator.
Conclusion: The First-Time Buyer’s Checklist
To ensure your first appliance purchase isn’t a headache, remember these three golden rules:
- Don’t trust the “Standard”: Always pull out the tape measure yourself.
- Factor in the Pipes: Add 7cm to the depth of the machine for a safe installation.
- Check the Type: Ensure you aren’t buying an integrated machine for a freestanding gap, or vice versa.
By following this guide, you’ll ensure your new washing machine fits perfectly, runs quietly, and lasts for years to come.
What are the FAQ about Are all washing machines the same size?
1. Will a washing machine fit in a car?
Most standard washing machines will fit in a medium-sized hatchback (like a VW Golf or Ford Focus) if the back seats are folded flat. However, you must keep it upright to avoid damaging the internal suspension springs.
2. How wide is a slimline washing machine?
Interestingly, “slimline” usually refers to depth, not width. A slimline washer is still 60cm wide but only 40cm to 45cm deep, making it ideal for shallow kitchen units.
3. Can I adjust the height of my washing machine?
Yes. Almost all machines have “levelling feet.” These can usually be screwed in or out to adjust the height by about 1cm to 2cm, helping you level the machine on uneven floors.
Home Diagnostics and Technical Standards Specialist at Hello Mag. She provides high-level Expertise in appliance mechanics and scientific pest management, ensuring every guide follows strict safety protocols and manufacturer standards. As a leading Authority on technical home specs, Kanimozhi audits complex data to provide homeowners with the most accurate, verified, and reliable diagnostic solutions available.
by Kanimozhi BV | Feb 17, 2026 | Microwave Oven, Appliances, DIY Ideas
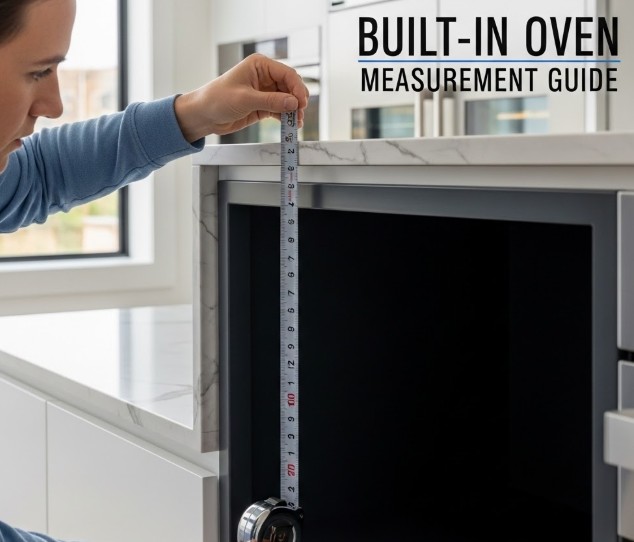
How to measure for a built in oven correctly is the most important skill you can master before clicking ‘buy’ on a new appliance. Upgrading your kitchen with a sleek, integrated look starts with one critical task: getting the measurements right.
Whether you are a homeowner embarking on a DIY project or a kitchen renovator planning a full overhaul, an error of just 5mm can be the difference between a seamless finish and a costly return.
In the UK, while we often ask are built-in ovens a standard size, the reality is that “built-in” and “built-under” models have distinct requirements. This guide will walk you through exactly how to measure for a built in oven in your space to ensure your new appliance fits like a glove.
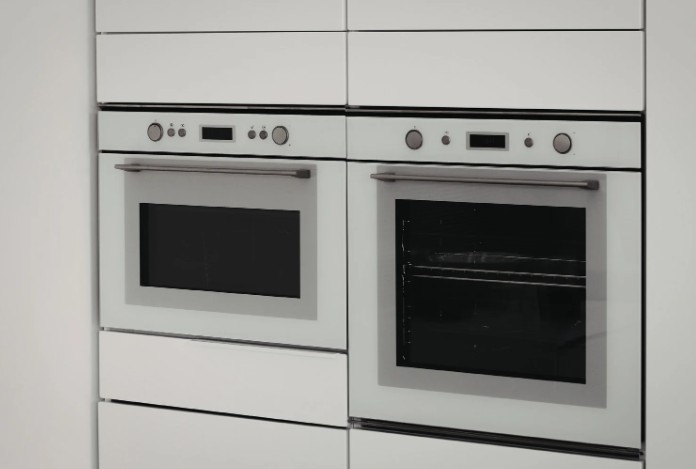
At A Glance: UK Standard Built-In Oven Dimensions
Before you reach for the tape measure, consult this comparison table to understand the typical space requirements for UK kitchen carcasses.
| Oven Type |
Typical Width (mm) |
Typical Height (mm) |
Typical Depth (mm) |
Installation Type |
| Single Oven |
595 – 600 |
590 – 600 |
550 – 570 |
Eye-level or Under-worktop |
| Compact Oven |
595 – 600 |
450 – 455 |
550 – 560 |
Eye-level |
| Double (Built-In) |
595 – 600 |
880 – 900 |
550 – 570 |
Eye-level (Tall Housing) |
| Double (Built-Under) |
595 – 600 |
700 – 720 |
550 – 570 |
Under-worktop |
Note: If you are opting for a Compact Oven (which often doubles as a microwave), maintenance is key to keeping the cavity fresh. If you run into issues after installation, see our guide on how to remove a burnt smell from a microwave oven.
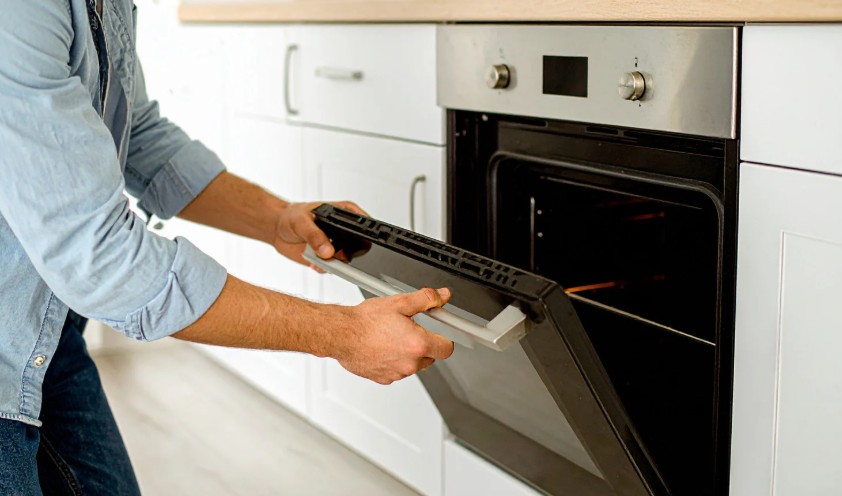
How To Measure For A Built In Oven? A Step-By-Step For Your Oven Housing Unit
When measuring for a built-in oven, you aren’t just measuring the old appliance; you are measuring the aperture (the hole) and the carcass (the cupboard).

1. How Do You Measure The Width?
In the UK, the vast majority of kitchen units are 600mm wide (external measurement). However, the oven sits inside this. You must measure the internal width of the housing.
- The Rule: Standard ovens are designed to fit into a 600mm wide cabinet, meaning the oven itself is usually 595mm wide to allow for the thickness of the cabinet walls.
2. How Do You Determine The Correct Height?
The height is where most mistakes happen, particularly with double ovens.
- Single Ovens: Usually require a 600mm high aperture.
- Built-In Double Ovens: These are designed for tall housing units at eye level and usually measure around 880-900mm.
- Built-Under Double Ovens: These are shorter (700-720mm) because they must fit beneath a standard UK worktop height while allowing for a plinth at the bottom.
3. What Depth Is Required For Modern Built-In Ovens?
Standard kitchen units have a depth of 600mm. Most ovens have a depth of 550mm to 570mm.
- The Gap Matters: You must ensure there is at least 20mm to 30mm of space behind the oven for ventilation and to accommodate the power cable or gas pipe. If your cupboard has a back panel, you may need to remove it or cut a hole.
How Do You Account For Ventilation and Electrical Connections?
A common content gap in many guides is the technical “fitment” requirements. It isn’t just about the box fitting the hole; it’s about safety and airflow.
Does Your Oven Need a 13-Amp Plug or a 32-Amp Connection?
Before buying, check the “Total Connected Load”.
- Many modern single ovens are “Plug and Play” (under 3kW) and use a standard 13-amp socket.
- Most double ovens and powerful single ovens (over 3kW) require a dedicated 32-amp circuit and must be hardwired by a qualified electrician. Make sure your measurements allow for the placement of the “cooker outlet” box—it shouldn’t be directly behind the oven if space is tight.
How Much Ventilation Space Do You Need?
Built-in ovens draw air from the bottom and expel it through the front or top. If you don’t have the recommended 20mm+ rear clearance, the oven can overheat, potentially damaging your kitchen carcass or shortening the lifespan of the appliance’s electronics.
How Do You Avoid Common Measuring Mistakes?
- Don’t Measure the Old Oven: Manufacturers change designs. Always measure the internal cabinet space rather than the dimensions of the appliance you are replacing.
- Check for Level Ground: If your kitchen floor is uneven, your housing unit might be slightly tilted. Use a spirit level on the base shelf where the oven will sit. If it isn’t level, the oven door may not seal correctly, leading to heat loss.
- Watch the “Lip”: Remember that the front face of the oven (the control panel and door) is designed to sit on top of the cabinet edges. Only the “body” of the oven goes inside the hole.
Conclusion
Measuring for a built-in oven is a “measure twice, cut once” scenario. By focusing on the internal width, height, and depth of your carcass—and ensuring you have the correct electrical and ventilation clearances—you can shop with confidence. If you are in doubt, always download the manufacturer’s specification sheet before making your purchase.
What are the FAQ About How To Measure For A Built In Oven?
1. Are all built-in ovens a standard size in the UK?
While 600mm width is the standard, heights vary significantly between single, compact, and double models. Always check the specific “Technical Drawing” provided by the manufacturer.
2. Will a 60cm oven fit in a 60cm gap?
Yes. A “60cm oven” is actually roughly 59.5cm, specifically designed to fit into a standard 60cm wide (external) kitchen carcass.
3. What are the cutout dimensions for a single oven?
Generally, you need a width of 560mm (internal), a depth of 550mm, and a height of 585-590mm.
4. How do I measure for a built-under double oven?
Measure from the underside of your worktop to the top of the plinth. You typically need a 700mm to 720mm high aperture. Ensure you aren’t buying a “Built-in” double oven (900mm) by mistake, as it will not fit under a worktop.
Home Diagnostics and Technical Standards Specialist at Hello Mag. She provides high-level Expertise in appliance mechanics and scientific pest management, ensuring every guide follows strict safety protocols and manufacturer standards. As a leading Authority on technical home specs, Kanimozhi audits complex data to provide homeowners with the most accurate, verified, and reliable diagnostic solutions available.
by Kanimozhi BV | Feb 13, 2026 | Microwave Oven, Appliances
If you are currently browsing showroom floors or scrolling through appliance websites, you’ve likely asked yourself: are built in ovens a standard size?
When you are a first-time homebuyer or a kitchen renovation enthusiast, the terminology can be overwhelming. You’ll hear terms like “integrated,” “built-under,” and “standard 60cm,” but assuming everything is “standard” is a shortcut to a very expensive mistake.
In the UK, while there is a general industry standard for width, heights and depths can vary enough to make your new oven stick out like a sore thumb—or simply not fit at all.
This guide will walk you through everything you need to know about UK oven dimensions, the “standard size” myth, and the hidden measurements that will ensure your renovation goes off without a hitch.
Standard Oven Size Comparison Table (UK)
To help you get started, here is a quick-reference table of the standard dimensions you will find across major UK retailers like Neff, Bosch, and Beko.
| Oven Type |
Standard Height |
Standard Width |
Standard Depth |
Typical Capacity |
| Single Oven |
59cm – 60cm |
59.5cm |
55cm – 57cm |
60 – 75 Litres |
| Double (Built-in) |
88cm – 90cm |
59.5cm |
55cm – 57cm |
100+ Litres |
| Double (Built-under) |
70cm – 72cm |
59.5cm |
55cm – 57cm |
90 – 100 Litres |
| Compact Oven |
45cm |
59.5cm |
55cm |
35 – 50 Litres |
Are Built in Ovens a Standard Size in the UK?
The short answer is: Yes, for width, but no for height.
In the UK, the vast majority of built-in ovens are designed to fit into a standard 600mm (60cm) wide cabinet. However, if you measure the actual appliance, you will notice it usually measures 595mm.
This 5mm difference is intentional; it allows the oven to slide into the cabinet housing with a tiny bit of “wiggle room” while the front fascia covers the edges of the cabinetry for a seamless look.
The Depth Standard
Most ovens have a depth of around 55cm to 58cm. This is designed to fit inside a standard 60cm deep kitchen unit. However, as a renovator, you must account for what is behind the oven.
If your gas pipe or a bulky electrical socket is positioned directly behind the appliance, the oven may protrude forward, preventing it from sitting flush with your cupboard doors.
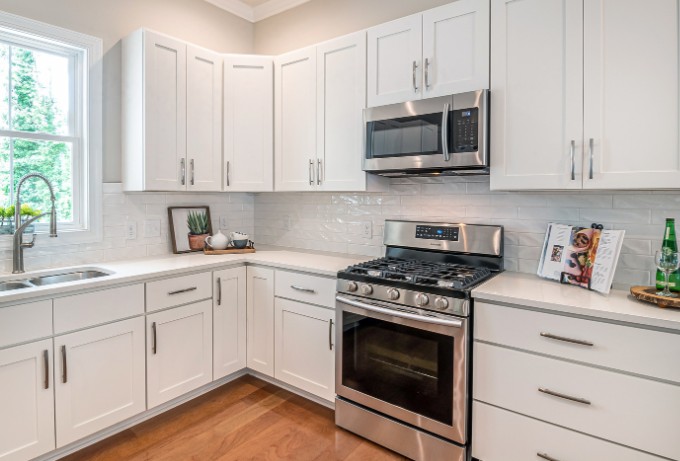
How Do Single Oven Dimensions Work for Your Cabinetry?
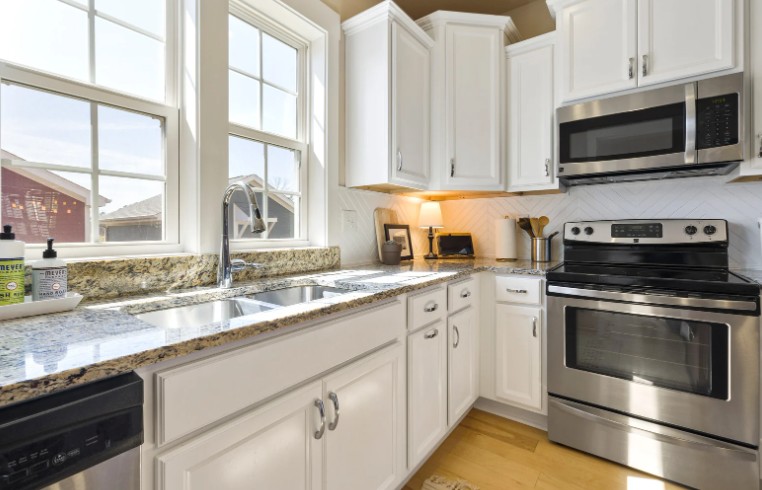
Single ovens are the most popular choice for UK kitchens. They are versatile because they can be installed at eye-level (in a tall housing unit) or built-under a standard worktop.
- Appliance Height: Usually 59.5cm.
- The Housing Unit: While the oven is 60cm wide, the wood of your cabinet has a thickness (usually 18mm). Therefore, the internal “cut-out” width of your cabinet is typically 56cm to 56.4cm.
When you are buying a replacement, don’t just measure the front of the oven. You need to ensure the “carcass” (the box that sits inside the cupboard) matches the internal dimensions of your existing housing.
What Are the Dimensions for Built-in vs Built-under Double Ovens?
This is where many first-time buyers get confused. In the UK, there are two distinct types of double ovens, and they are not interchangeable.
1. Built-in Double Ovens (Tall Units)
These are designed to be installed at eye-level. They typically measure 90cm in height. Because they are so tall, they cannot fit under a standard kitchen worktop. If you want one of these, you must have a “tall housing unit” in your kitchen plan.
2. Built-under Double Ovens
These are specifically designed to fit beneath a standard worktop. To allow for the height of the worktop and the plinth (kickboard) at the bottom, these ovens are shorter, usually measuring around 72cm in height.
The Content Gap Fix: If you currently have a single oven under your worktop and you want to upgrade to a double, you must buy a “built-under” model. You cannot simply squeeze a 90cm double oven into that space.
What Are Compact Ovens and When Should You Choose Them?
If you have a small kitchen or you are a serious “foodie” who wants three or four different cooking zones, compact ovens are your best friend.
- Height: 45cm.
- Function: They often double as microwaves or steam ovens.
Because these smaller units are frequently used for reheating, it is vital to keep them fresh; if you encounter any lingering odours, knowing the tips for removal burnt smell from microwave oven units will help maintain your kitchen’s environment.
For a high-end renovation look, many enthusiasts “stack” a 45cm compact oven on top of a 60cm single oven in a tall unit. This creates a professional-looking “cooking tower” that remains within the standard 60cm width.
Do You Need to Leave Space for Ventilation?
One of the biggest mistakes DIY renovators make is pushing the oven as far back as possible without considering airflow.
Built-in ovens generate significant heat. If that heat cannot escape, it can damage the glue in your MDF cabinetry, causing the laminate to peel (delaminate). Most manufacturers require a minimum 10mm to 20mm gap at the rear of the appliance.
Additionally, some ovens require a small ventilation cut-out in the plinth or at the top of the housing unit to allow cool air to circulate. Always check the “technical drawing” PDF on the manufacturer’s website before finalizing your cabinetry.
What Electrical Requirements Should You Check Before Buying?
Before you fall in love with a high-spec pyrolytic oven, you need to check your kitchen’s “juice.”
- 13 Amp Ovens: These can often be fitted with a standard UK 3-pin plug. These are “plug-and-play” and are perfect for simple kitchen updates.
- 32 Amp Ovens: Many modern, powerful ovens require more power than a standard socket can provide. These must be “hardwired” into a dedicated cooker circuit by a qualified electrician.
If you are upgrading from a basic single oven to a powerful double oven, you might need to have a new cable pulled from your fuse board. Factor this into your renovation budget!
Conclusion: Your Renovation Checklist
When you are planning your kitchen, remember that “standard” is a guideline, not a guarantee. To ensure your oven fits perfectly:
- Check the Type: Decide between a single, built-under double, or eye-level double before buying cabinets.
- Verify the Depth: Ensure your plumber or electrician hasn’t placed pipes or sockets directly behind the oven space.
- Confirm the Power: Check if your chosen model requires a 13A plug or a 32A hardwired connection.
- Mind the Gap: Ensure your kitchen fitter leaves the required ventilation space to protect your beautiful new cabinets.
By following these steps, you’ll ensure that your new oven doesn’t just look great, but performs safely for years to come.
FAQ about Are Built in Ovens a Standard Size
1. Will a 60cm oven fit in a 60cm gap?
Yes. A “60cm oven” is actually designed to fit a 60cm external width cabinet. The oven itself will be slightly narrower (approx. 59.5cm) to ensure it slides in easily.
2. How do I measure my current oven for a replacement?
Open the oven door and measure the height and width of the aperture (the hole in the cabinetry), rather than just the front glass of the oven. Also, measure the depth from the front of the carcass to the back wall.
3. Can I put a gas hob over a standard built-in oven?
Usually, yes. However, you must check the depth of the hob. Some “slimline” worktops (20mm or 12mm) don’t provide enough clearance between the bottom of the gas hob and the top of the oven. You may need a heat shield or a deeper worktop.
4. Are Bosch, Neff, and Siemens ovens the same size?
Generally, yes. These three brands are part of the BSH group and often share the same “chassis” dimensions, making them very easy to swap if you are loyal to those brands.
Home Diagnostics and Technical Standards Specialist at Hello Mag. She provides high-level Expertise in appliance mechanics and scientific pest management, ensuring every guide follows strict safety protocols and manufacturer standards. As a leading Authority on technical home specs, Kanimozhi audits complex data to provide homeowners with the most accurate, verified, and reliable diagnostic solutions available.
by Kanimozhi BV | Feb 12, 2026 | Interior Painting, Exterior Painting, Wall
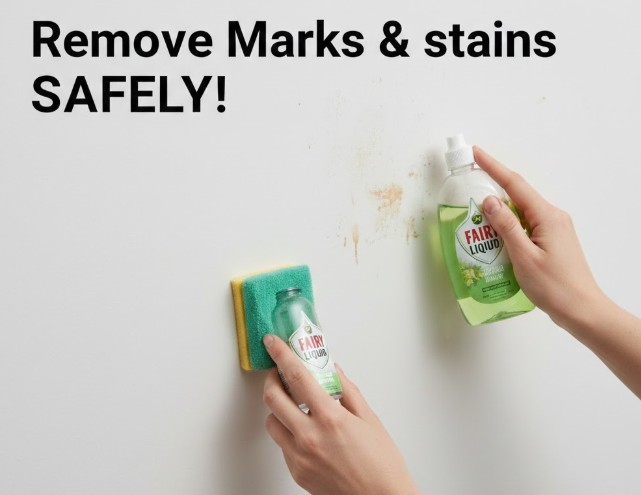
How to Get Marks Off Painted Walls? – Quick Guide
- Dry Buff: Use a clean, dry white microfibre cloth to gently rub away loose dust or rubber scuffs.
- Mild Soapy Water: Mix warm water with a drop of washing-up liquid. Dip a cloth, wring it until nearly dry, and lightly wipe the area.
- Bicarbonate of Soda: For stubborn scuffs, apply a paste of 3 parts bicarb to 1 part water. Massage gently and wipe clean with a damp cloth.
- Specialist Solutions: Use diluted sugar soap for grease or nicotine, or a pencil eraser for graphite marks.
⚠️ Essential Rule: Never scrub matt paint. This causes “burnishing” (permanent shiny spots). If you have a flat finish, use the lightest touch possible and avoid “Magic Erasers” which act like fine sandpaper.
Whether it’s a dark scuff from a rogue vacuum cleaner, a “masterpiece” by a toddler with a crayon, or mysterious greasy finger marks in the hallway, dirty walls can quickly make a beautiful home feel neglected.
For homeowners, it’s about pride and maintenance. For renters, it’s about something much more immediate: your tenancy deposit. However, “scrubbing” is often the worst thing you can do.
One over-zealous rub with a damp cloth on a matt finish can leave a permanent “shiny” patch—a phenomenon known as burnishing—which is often harder to fix than the original mark.
In this guide, we’ll walk you through the professional, “gentle-first” approach to wall cleaning using UK-standard products and techniques.
The Ultimate Wall Cleaning Compatibility Matrix
Before you reach for the sponge, identify your paint finish. Cleaning a durable “scrubbable” emulsion is very different from cleaning a traditional flat matt.
| Paint Finish |
Common Areas |
Durability |
Recommended Cleaning Agent |
Risk Level |
| Matt / Flat |
Living Rooms, Ceilings |
Low |
Plain water or Bicarb paste |
High (Polishes easily) |
| Silk / Satin |
Hallways, Bedrooms |
Medium |
Warm soapy water |
Medium |
| Eggshell |
Woodwork, Kitchens |
High |
Diluted Sugar Soap / Vinegar |
Low |
| Gloss |
Skirting, Doors |
Very High |
All-purpose cleaner / Sugar Soap |
Very Low |
| Durable Matt |
Kitchens, Bathrooms |
High |
Dish soap / Specialised cleaners |
Medium |
Why You Must Identify Your Paint Finish First?
In the UK, the two most common interior wall finishes are Matt and Silk (or Satin).
The Matt Paint Dilemma
Matt emulsion is loved for its velvety, non-reflective finish that hides lumps and bumps in the plaster. However, it is porous. When you rub matt paint, you are essentially “sanding” the microscopic peaks of the paint surface.
This creates a smooth, reflective spot—the dreaded shiny patch. If you are a renter, these patches can be classed as damage rather than “fair wear and tear.”
The “Curing” Rule
Did you recently repaint? Do not attempt to clean a mark if the paint is less than 28 days old. While paint feels dry to the touch within hours, it takes nearly a month to “cure” and reach its maximum hardness. Cleaning fresh paint will almost certainly result in the paint lifting off the wall.
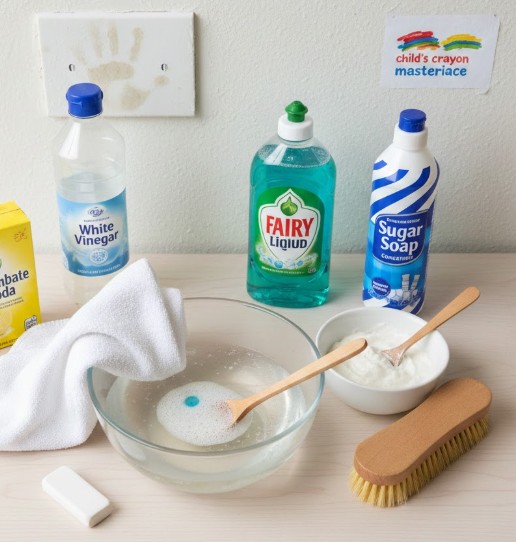
You don’t need expensive “as seen on TV” gadgets. Most professional decorators in the UK rely on a few household staples:
- Microfibre Cloths: Essential. They lift dirt rather than pushing it around. Use white cloths to ensure no dye transfers to your walls.
- Washing-up Liquid: Specifically a grease-cutting one like Fairy Liquid.
- Sugar Soap: The professional’s secret. It’s a mild alkali that cuts through nicotine, grease, and heavy grime.
- Bicarbonate of Soda: A gentle abrasive for stubborn scuffs.
- White Vinegar: Perfect for greasy kitchen splatters.
- Magic Erasers (Melamine Sponges): Use with extreme caution (see below).
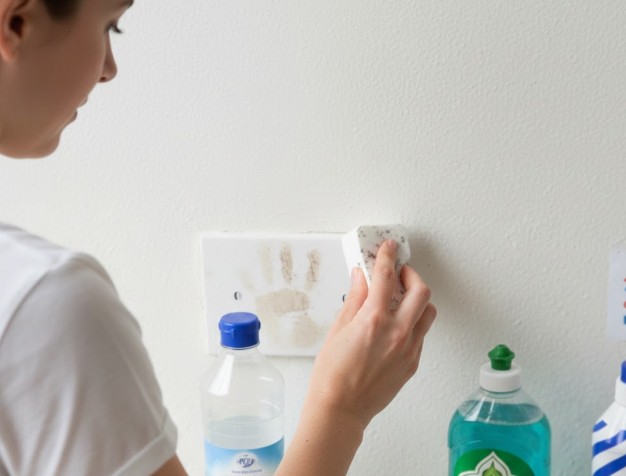
How To Get Marks Off Painted Walls Using The “Step-Up” Method?
Always start with the least aggressive method. Only move to the next step if the mark persists.
Step 1: The Dry Dust
Sometimes a scuff mark is just loose dust or rubber transfer. Use a clean, dry microfibre cloth to gently buff the area. If the mark is loose, it will come off without any moisture, which is the safest result for your paint.
Step 2: Warm Soapy Water
Mix a few drops of washing-up liquid in a bowl of lukewarm water.
- Technique: Dip the cloth, then wring it out until it is damp, not dripping.
- The Wipe: Lightly wipe the mark in a circular motion. Do not scrub.
- The Rinse: Use a second cloth dampened with plain water to “rinse” the soap residue away. If soap stays on the wall, it will attract more dust later.
Step 3: The Bicarbonate Of Soda Paste
For tougher scuffs (like those from shoes or furniture), make a paste using 3 parts bicarb and 1 part water.
- Dab a tiny amount onto the mark.
- Gently “massage” the paste into the mark with a cloth.
- Wipe away with a clean, damp cloth.
Step 4: Diluted White Vinegar
For greasy finger marks near light switches or kitchen splatters:
- Mix 1 tablespoon of white vinegar with 500ml of warm water.
- The acidity helps break down the oils without stripping the paint.
Can You Use A Magic Eraser On Every Wall?
“Magic” erasers are made of melamine foam, which acts like extremely fine sandpaper.
- On Gloss or Silk: They can be effective for stubborn marks.
- On Matt Paint: STOP. They will almost certainly leave a visible “ghost” mark or a shiny patch.
Renter’s Tip: If you must use one, use it with plenty of water and the lightest touch possible. Never use it dry.
How To Remove Specific Stains?
How To Get Crayon Off Walls?
Crayons are wax-based. To remove them, you need to break down the wax.
- Hairdryer Method: Use a hairdryer on a low setting to soften the wax, then wipe it away with a soapy cloth.
- Toothpaste: Non-gel white toothpaste has mild abrasives that can lift crayon pigment. Apply with a cotton bud and wipe away.
How To Get Pencil Marks Off Walls?
Before using water, reach for a high-quality white pencil eraser. Often, “cleaning” a pencil mark with a wet cloth just smears the graphite deeper into the paint pores. Erase it dry first.
How To Avoid “Shiny Patches” (Burnishing) While Cleaning?
If you are cleaning a large area or a stubborn mark, you risk creating a “halo” effect. To avoid this:
- Feather the Edges: Don’t just clean the square inch where the mark is. Gradually lighten your pressure as you move away from the mark to “blend” the cleaned area with the rest of the wall.
- Top to Bottom: If you are washing a whole wall, always start at the bottom and work up. This sounds counter-intuitive, but it prevents dirty water from “streaking” down dry paint, which can leave permanent marks.

Summary For Renters: Protecting Your Deposit
If a mark won’t come off after Step 3, consider a touch-up rather than more scrubbing. If you have the original paint, a small artist’s brush can “stipple” a tiny amount of paint over the mark.
This is usually much less noticeable to a landlord than a large, shiny, scrubbed patch in the middle of a wall.
Related Article: How to Dispose of Paint in UK? – Smart Tips To Get Rid Of It
FAQ About How To Get Marks Off Painted Walls
1. Does WD-40 work on wall marks?
While some “hacks” suggest WD-40 for crayon, we advise against it on painted walls. It is an oil-based lubricant and can leave a permanent grease stain that is harder to fix than the original crayon.
2. Can I use baby wipes to clean walls?
Baby wipes often contain oils and lotions. On a glossy surface, they might be fine, but on matt emulsion, they can leave greasy streaks. Stick to a damp microfibre cloth.
3. What if the paint actually comes off?
If the paint is flaking or lifting, the wall likely wasn’t primed properly, or the paint is very old. At this stage, cleaning is no longer the solution—you will need to sand the area lightly and apply a fresh coat of paint.
4. Does sugar soap remove scuffs?
Yes, sugar soap is excellent for “all-over” cleaning, but it is quite strong. Always dilute it according to the bottle instructions and rinse well.
About the Author: Hello Magazine UK’s lifestyle team explores the best ways to maintain a beautiful, stress-free home.
Home Diagnostics and Technical Standards Specialist at Hello Mag. She provides high-level Expertise in appliance mechanics and scientific pest management, ensuring every guide follows strict safety protocols and manufacturer standards. As a leading Authority on technical home specs, Kanimozhi audits complex data to provide homeowners with the most accurate, verified, and reliable diagnostic solutions available.
by Kanimozhi BV | Feb 11, 2026 | Refrigerator, Appliances
Many homeowners often ask, “why is there water in my fridge?” when they discover unexpected moisture inside their appliance.
Finding a puddle at the base of your appliance is a common frustration for many UK households. Whether you are a homeowner, a tenant, or a DIY enthusiast, the sight of water pooling around your groceries is never welcome.
Key Takeaways: Quick Troubleshooting
- Most Common Cause: A blocked defrost drain hole (the “gully”).
- Quick Fix: Ensure food isn’t touching the back wall.
- Safety First: Always unplug the appliance before attempting internal repairs.
- UK Context: Check your door seals with the “Banknote Test.”
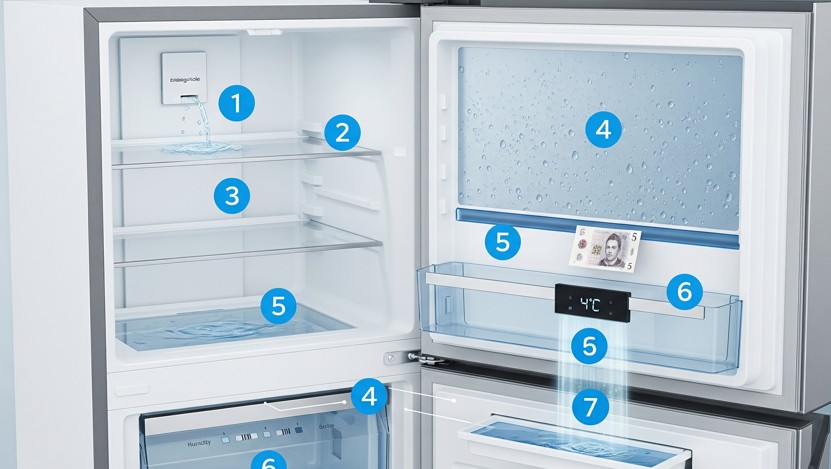
Understanding the Problem: Why is there water in my fridge?
To understand why is there water in my fridge, we first need to look at how modern “auto-defrost” appliances work. Most fridges in the UK feature a “wet wall” at the back. As the fridge cools, moisture in the air condenses on this cold surface, forming water droplets.
How the Defrost System Works?
Under normal conditions, this water:
- Runs down the back wall.
- Collects in a small gully.
- Exits through a drainage hole.
- Evaporates in a tray sitting atop the warm compressor.
If any part of this journey is interrupted, you end up with a soggy salad drawer.
| Common Issue |
Difficulty |
Tools Needed |
Estimated Time |
| Blocked Drain Hole |
⭐ (Very Easy) |
Pipe cleaner / Straw |
10 Minutes |
| Obstructed Airflow |
⭐ (Very Easy) |
None (Rearranging) |
5 Minutes |
| Faulty Door Seal |
⭐⭐ (Easy) |
Warm water / Cloth |
15 Minutes |
| Cracked Drip Tray |
⭐⭐⭐ (Moderate) |
Screwdriver |
30 Minutes |
| Incorrect Leveling |
⭐⭐ (Easy) |
Spirit Level |
10 Minutes |
Why is there water at the bottom of my fridge?
If you notice that the puddles are specifically gathering under your vegetable crisper, you are likely asking: why is there water at the bottom of my fridge?
While a blocked drain hole is still a possibility, water at the very bottom often points to a combination of two specific UK kitchen factors: airflow and humidity.
1. The Blocked Defrost Drain Hole
The most frequent answer to “why is there water in my fridge” is a blocked defrost drain. Over time, crumbs or mould can clog the small hole.
- The Fix: Use a dedicated fridge-clearing tool or a flexible pipe cleaner. Avoid using sharp metal objects like screwdrivers, as these can puncture the internal casing.
2. Food Touching the Rear Wall
In smaller UK kitchens, we often “overstuff” our fridges. If items like milk cartons touch the back wall, they act as a bridge.
- The Fix: Maintain a 2-inch gap between your food and the back wall. This allows the air to circulate correctly.
3. Incorrect Salad Crisper Management
Vegetables “breathe” through transpiration. If your drawer is airtight, moisture builds up and turns into liquid water.
- The Fix: Open the humidity slider slightly for leafy greens and avoid using non-breathable plastic bags.

What are the Secondary Causes of Fridge Leaks?
4. Faulty or Dirty Door Seals (The Banknote Test)
In the UK, our kitchens can get quite humid. If yourfridge door seal (the gasket) is warped, warm air enters, causing excessive condensation.
- The Fix: Perform the “Banknote Test.” Place a £5 note halfway inside the door and close it. If it slides out easily, clean the seal with warm, soapy water or replace it.
5. Your Fridge Isn’t Level
Fridges should be tilted slightly backward (by a few millimetres) so the door closes under its own weight and water flows toward the drain.
- The Fix: Adjust the front “feet” until the appliance has a very slight backward lean.
6. Internal Temperature Settings
The ideal temperature for a UK fridge is between 3°C and 5°C.
- The Issue: If set too cold, condensation freezes into ice, which later melts and overwhelms the drain hole.
7. The Evaporation Tray is Cracked
If the water is underneath the fridge on your kitchen floor, the issue might be the evaporation tray located above the compressor at the back.
- The Fix: Inspect the plastic tray for cracks and replace if brittle.
Tenant vs. Homeowner: Who is Responsible for Repairs?
In the UK, the responsibility for fridge maintenance depends on your contract:
- Homeowners: You are responsible for all maintenance and repairs.
- Tenants: Under the Landlord and Tenant Act 1985, landlords are generally responsible for “fair wear and tear.” However, if the water is caused by a blockage you haven’t cleaned, the landlord may charge you for the repair call-out.
Conclusion: Preventing Future Puddles
Solving the mystery of “why is there water in my fridge” usually doesn’t require a professional. By unblocking the drain hole and ensuring proper airflow, you can resolve most issues in minutes.
What are the FAQ about Why is there water in my fridge?
1. How do I unblock a fridge drain hole?
Use a flexible pipe cleaner or a straw to clear debris. Flush the hole with a teaspoon of bicarbonate of soda mixed with warm water to prevent mould regrowth.
2. Is it normal to have water on the back wall?
Yes. Tiny droplets are a sign of healthy cooling. However, a thick sheet of ice or water pooling at the base indicates a problem.
3. Why is there water at the bottom of my fridge after cleaning the drain?
Check your door seals. If warm air is leaking in, the fridge produces more moisture than the drainage system can manage.
4. Can I use bleach to clean the drainage gully?
No. It is better to avoid bleach inside a fridge due to food safety and strong odours. Stick to white vinegar or bicarbonate of soda.
Home Diagnostics and Technical Standards Specialist at Hello Mag. She provides high-level Expertise in appliance mechanics and scientific pest management, ensuring every guide follows strict safety protocols and manufacturer standards. As a leading Authority on technical home specs, Kanimozhi audits complex data to provide homeowners with the most accurate, verified, and reliable diagnostic solutions available.
