
by Kanimozhi BV | Sep 23, 2025 | Exterior Painting, DIY Ideas, Interior Painting
Disposing of leftover paint might seem straightforward, but in the UK, there are strict rules on how to do it properly.
Having done a few home makeovers myself, I’ve learned that tossing half-used paint tins in the bin is not just careless—it can be illegal and harmful to the environment.
So let me guide you on how to dispose of paint through the smart, safe, and eco-conscious ways to get rid of unwanted paint across the UK.
Why Is Proper Paint Disposal Important in the UK?
What happens if paint is dumped incorrectly?
Improper paint disposal can contaminate soil and water sources. Leftover paint, especially oil-based varieties, contains harmful chemicals and volatile organic compounds (VOCs) that can damage ecosystems and human health.

How does leftover paint impact the environment?
Even small amounts of paint can pollute local waterways or leach toxins into landfills. This affects wildlife, vegetation, and drinking water.
Is it illegal to throw paint in the bin?
Yes—liquid paint is classified as hazardous waste in the UK. Throwing it into household waste bins is not permitted. If caught, you could face fines or penalties.
Know Your Paint: What Type Are You Disposing Of?
How to identify water-based vs oil-based paints?
Water-based paints like emulsion are easier to clean and safer for the environment. Oil-based paints, such as gloss, contain solvents and require specific disposal due to their flammability and toxicity.
A quick test: Add a little water. If it mixes easily, it’s water-based. If not, it’s oil-based.
Why does paint type affect disposal method?
Because oil-based paint is more hazardous, it often needs to be taken to a specialist waste centre. Water-based paint, on the other hand, can sometimes be dried out and disposed of more simply.
Where and How Can I Dispose of Old Paint in the UK?
How to Dispose of Paint at Home?
If you’ve got a small amount of water-based paint left, the simplest method is to dry it out before disposal.
Can I dry out paint and put it in household waste?
Yes, if it’s water-based paint and fully dried. Leave the lid off the tin for several days or mix in materials like:
Once the paint is solid, it can usually go in the general waste bin—but always check with your local council.
What should I do with leftover water-based paint?
If there’s too much to dry out, consider storing it for touch-ups or donating it. Alternatively, take it to a Household Waste Recycling Centre (HWRC) that accepts paint.
How to prepare tins for disposal?
Make sure the lid is secured, and avoid mixing paint types in one tin. Keep labels visible for identification.

How to Dispose of Old, Unwanted Paint Safely?
Throwing paint down the drain or into the garden is never a safe option.
You should:
- Keep paint in its original container with the lid secure
- Avoid storing paint where it may freeze or overheat
- Contact your local council for guidance on hazardous waste days or drop-off points
What Is the Best Way to Dispose of Leftover Paint?
The best option is to use it up or donate it. This keeps paint out of landfills and helps someone else in the process.
If the paint is still in good condition:
- Use it for another project or retouch
- Offer it to local charities, schools, or neighbours
- Take it to a reuse scheme if available in your area
Only choose disposal when the paint is no longer usable.
Can You Take Paint to the Dump or Local Recycling Centre?
What are Household Waste Recycling Centres (HWRCs)?
These are council-managed facilities where residents can dispose of large or hazardous items, including paint—if the centre accepts it.
Do all local councils accept paint?
No. Paint disposal varies between councils. Some require booking in advance; others may not accept liquid paint at all. Always check with your local authority before turning up.
How to locate your nearest paint disposal facility?
Use your postcode on your council’s website to find details of the nearest centre and what it accepts. Many have designated days for paint or hazardous waste.
This UK-based scheme collects unwanted but usable paint and redistributes it to charities, low-income families, and community groups.
How does it work?
- Drop off usable paint at a participating centre
- Paint is sorted, checked, and offered to those in need
This not only helps others but keeps paint out of the waste stream.

Can I Reuse, Recycle or Donate Leftover Paint?
Yes—and I highly recommend this as a first option.
What conditions must the paint be in?
- Original sealed container
- Not separated or hardened
- Clearly labelled and under 2 years old
Where can I donate leftover paint?
Local reuse centres, community groups, schools, or art studios may welcome donations. Contact them directly to check.
Paint Disposal Do’s and Don’ts
Do’s:
- Dry out water-based paint before binning
- Store tins safely until disposal
- Use or donate reusable paint
- Follow your council’s hazardous waste rules
Don’ts:
- Don’t pour paint down drains or toilets
- Don’t dump paint in general waste (unless dry)
- Don’t mix different paints together
Table: Comparison of Disposal Options by Paint Type
| Paint Type |
Disposal Method |
Accepted At |
Key Notes |
| Water-based (Emulsion) |
Dry and bin, or donate if usable |
HWRC or reuse schemes |
Must be solid if binning |
| Oil-based (Gloss) |
Hazardous waste only |
Specialist HWRCs |
Must never go in general waste |
| Spray paint |
Hazardous waste |
HWRC with chemical waste facilities |
Do not puncture cans |
Conclusion – Smart, Legal, and Eco-Friendly Paint Disposal
Disposing of paint in the UK is all about making informed choices. Whether you’re clearing out the garage or finishing a DIY project, think twice before tossing out that half-full tin.
As someone who’s been through this process more than once, I’ve learned that the smartest way to dispose of paint is to reuse it, donate it, or dispose of it responsibly.
With a little effort, we can all keep harmful chemicals out of landfills—and do our part for the planet.
What Are Frequently Asked Questions On How to Dispose of Paint in UK?
1. Can I pour paint down the drain?
No, paint should never go down the drain. It harms water systems and can cause plumbing issues.
2. Will my council collect paint?
Some councils offer hazardous waste pickups or drop-off events. It varies by location, so check directly with your local authority.
3. Is dried paint still considered hazardous?
For water-based paint, dried contents are generally safe for disposal in regular bins. Oil-based paint, even when dry, must go to hazardous waste.

by Kanimozhi BV | Sep 23, 2025 | Home & Living
Are you questioning is it illegal to smoke weed? In the United Kingdom, weed (cannabis) remains illegal for recreational use. Despite increasing public support for legalisation, cannabis is still classified as a Class B drug under the Misuse of Drugs Act 1971.
This means it is unlawful to possess, smoke, grow, or distribute cannabis without specific medical authorisation.
The UK government continues to take a strict stance on drug enforcement, and this includes cannabis. Even small amounts can lead to legal consequences, including fines, warnings, or a criminal record.
| Action |
Legal Status |
Possible Penalty |
| Possession |
Illegal |
Up to 5 years in prison, unlimited fine |
| Supply or Distribution |
Illegal |
Up to 14 years in prison |
| Growing Cannabis |
Illegal |
Considered drug production, heavy penalties |
| Smoking at Home |
Illegal |
Same as possession |
| Medicinal Use (Prescribed) |
Legal |
Strictly regulated through NHS or private clinics |
While legalisation has occurred in several other countries, the UK has yet to follow suit in 2025.
Is It Illegal to Smoke Weed in the UK – Even at Home?
Yes, it is illegal to smoke weed anywhere in the UK, including inside your own home or private property. Many people believe that what you do in private doesn’t concern the authorities, but UK law doesn’t draw a line between public and private cannabis use.
Smoking cannabis — even in your own bedroom, garden, or flat — still constitutes possession and use of a controlled substance, which is a criminal offence.
Additionally, if the smell of weed travels into neighbouring homes and they report it, the police may investigate. For a closer look at how authorities respond to these situations, read our detailed guide:
Will the Police Do Anything About My Neighbors Smoking Weed UK?
Why Is Weed Illegal in the UK Despite Public Support?
This is a question many people are asking, especially as countries like Canada, Germany, and several US states have moved towards legalisation.
The UK government’s continued prohibition of cannabis is based on several factors:
- Public health concerns, especially related to mental health issues like psychosis and dependency
- Cannabis is still viewed as a gateway drug, potentially leading to harder substances
- The government believes that legalisation may increase social and health-related harms
- Ongoing caution around drug regulation and misuse among minors
Despite growing advocacy and public polls favouring reform, the legal framework hasn’t changed. The UK’s stance remains conservative, and there are no official plans for recreational legalisation as of 2025.
What Happens If You’re Caught with Weed in the UK?
What happens depends largely on how much cannabis you’re caught with, your prior criminal history, and the discretion of the officers involved.
If it’s a small amount for personal use, you may receive a:
- Cannabis warning (verbal or written)
- Fixed Penalty Notice of £90
- Formal police caution (which can stay on your record)
However, repeat offences or larger amounts can lead to arrest and criminal charges. If police suspect intent to supply, even a moderate quantity could result in serious legal consequences, including jail time.
Even a minor drug offence can affect:
- Future job opportunities
- University admissions
- Travel (especially to the US or Australia)
Is Medicinal Cannabis Legal in the UK?
Yes, but it’s heavily restricted.
Medicinal cannabis was legalised in the UK in 2018, but only under specific clinical circumstances. This includes conditions such as:
- Rare forms of epilepsy
- Chemotherapy-induced nausea
- Multiple sclerosis (MS) spasticity
Access to medical cannabis on the NHS remains limited. Most patients seek private clinics, which are legal but expensive. Even then, not all cannabis-based products are allowed — only those approved by UK regulators.
It’s important to note: using cannabis without a prescription for any condition is still illegal.

Can You Get Arrested for Smoking Weed in Public?
Yes, absolutely. Smoking cannabis in public places — such as streets, parks, festivals, or even your own car — is considered a criminal offence.
If you’re caught, the police can:
- Issue a fine or warning
- Confiscate the substance
- Arrest you, especially if you’re being disorderly or if minors are nearby
Public cannabis use is treated more seriously because it may encourage others, especially young people, and because of public nuisance complaints.
Is Recreational Cannabis Legal in Any UK Regions?
No. As of 2025, no part of the United Kingdom permits recreational cannabis use. There have been discussions and some pilot schemes around decriminalisation, particularly in areas like London and Bristol, but these do not equate to legalisation.
Even in Scotland and Wales, where devolved governments have expressed more openness, drug law remains a reserved power of Westminster — meaning only the UK Parliament can change the law.
So regardless of where you live — London, Cardiff, Belfast, or Edinburgh — the law on cannabis remains the same.
Table: Key Cannabis Offences and Their Consequences
| Offence |
Legal Status |
Typical Consequences |
| Possessing a small amount |
Illegal |
Warning, £90 fine, or arrest |
| Smoking at home |
Illegal |
Police involvement, possible charge |
| Smoking in public |
Illegal |
Fine, arrest, confiscation |
| Growing cannabis plants |
Illegal |
Up to 14 years in prison |
| Supplying or dealing cannabis |
Illegal |
Long-term imprisonment |
| Medicinal cannabis (prescribed) |
Legal |
Only for certain conditions |
Is the Law Likely to Change Soon?
While there is mounting pressure from advocacy groups, healthcare professionals, and sections of the public, no significant legal reforms are expected in the near future.
The current UK government has made it clear that it does not support the legalisation of recreational cannabis.
However, the conversation around decriminalisation and reviewing the drug classification system is growing louder — especially among younger voters and opposition parties.
Until legal reform happens, it’s important to understand your rights and responsibilities under the current law.

Conclusion: What Are the Risks to be known Before Lighting Up?
To summarise:
- Yes, weed is still illegal in the UK in 2025
- Smoking it — even in private — can result in fines, criminal records, or even imprisonment
- Medicinal cannabis is legal but only in exceptional, controlled cases
- The law does not vary by region — it’s UK-wide
- Legal change is being debated, but not imminent
If you’re considering using cannabis, make sure you’re fully informed of the legal, social, and health consequences.
What Are The Frequently Asked Questions On Is it illegal to smoke weed?
1. Is it illegal to have cannabis even if I don’t smoke it?
Yes. Possession alone is a criminal offence, whether or not you consume it.
2. Can I legally grow one plant for personal use?
No. Growing cannabis is considered drug production, regardless of the quantity or intent.
3. What if I have a prescription for medical cannabis from another country?
It depends. Most foreign prescriptions are not valid in the UK unless recognised by UK authorities. Always check with a solicitor or your doctor.
4. Can landlords evict tenants for smoking weed in a rental property?
Yes. Most tenancy agreements prohibit illegal activity, and drug use is a breach of contract.
5. Is there any safe way to report someone using or dealing cannabis?
Yes. You can contact police via 101 or report anonymously through Crimestoppers.
6. Are CBD products legal in the UK?
CBD (cannabidiol) is legal if it contains less than 0.2% THC and is marketed appropriately. However, not all “CBD” products meet this legal threshold.

by Kanimozhi BV | Sep 22, 2025 | Home & Living
My Neighbour Smokes Weed and It Comes in My House – What Should I Do?
I first noticed the smell of cannabis drifting into my living room during the evenings. At first, I brushed it off, assuming it was a one-off.
But when the weed smell started to fill my home regularly, I realized I couldn’t just ignore it anymore. I really wondered will the police do anything about my neighbors smoking weed.
My windows were closed, but the smell still came through vents and cracks in the walls — especially in a terraced house where properties are closely built.
Aside from the unpleasant odour, it also started to affect my family’s comfort and well-being.
I began to worry about how this exposure might impact our health — particularly for my children. I also started to feel anxious about guests noticing the smell, or worse, assuming it was coming from me.
Is It Illegal for Someone to Smoke Weed in the UK in 2025?
Yes, absolutely. In the UK, cannabis remains a Class B drug under the Misuse of Drugs Act 1971.
Despite changing attitudes and international trends toward legalization, it is still illegal to possess, use, grow, or supply cannabis in any form without a prescription.
Here’s a quick breakdown:
| Action |
Penalty |
| Possession |
Up to 5 years in prison, an unlimited fine, or both |
| Supply and production |
Up to 14 years in prison, an unlimited fine, or both |
| Police warning or on-the-spot fine |
First-time possession offences may result in a warning or £90 fine |
Even if your neighbour is only using it for personal recreational use, the law does not allow it — especially when it impacts others, like causing a nuisance through smell.

Can You Report Someone for Smoking Weed in the UK?
Yes, you can report someone for smoking cannabis, especially if it’s affecting your quality of life. I learned there are several ways to go about this:
- Call 101 (non-emergency police number)
- Report online through your local police force website
- Contact Crimestoppers at 0800 555 111 to report anonymously
- Use the “Report a crime” tool on the UK police website
I personally chose to report anonymously because I was concerned about possible retaliation or awkwardness with my neighbour. Crimestoppers didn’t ask for my name or address, and I was able to give details discreetly.
Will the Police Do Anything About My Neighbour Smoking Weed?
This is the big question — and the answer is: it depends.
When I reported the issue, I expected immediate action, but here’s what I learned:
- If it’s just the smell, and there’s no evidence of dealing or danger, police may log the complaint but not act immediately
- If the same person is reported multiple times, the police may investigate further
- If children are exposed, or if cannabis is being grown or supplied, the police are more likely to act quickly
In my case, they logged the complaint but said unless there were signs of criminal activity or repeated incidents, they wouldn’t take direct action right away.
What Can I Do About Neighbors Smoking Weed in the UK?
I found myself wondering if police were my only option. Thankfully, they’re not.
Here are some practical steps I took:
- Recorded the dates and times I smelled cannabis
- Logged the impact (headaches, sleepless nights, children affected)
- Spoke to my housing association (they sent a warning letter)
- Contacted Environmental Health about the ongoing smell
Many councils take antisocial behaviour seriously, especially in social housing. Mine was willing to act once I provided enough evidence.

Can the Smell of Weed Alone Lead to Police Action?
This was something I really wanted to know — and it’s a bit of a legal grey area.
Here’s what I found out:
- Smell alone is not usually enough to enter a home without a warrant
- However, it can be used as part of a broader justification to investigate further
- If police suspect drug dealing or see other evidence (like lots of foot traffic), they may seek a search warrant
So while the smell of cannabis coming into your house is unpleasant, it may not be sufficient grounds for immediate police action. But it helps to log it regularly — that way, if something escalates, you’ve got a solid record.
What Legal Rights Do I Have if a Neighbor Smokes Cannabis?
As a resident, I have the right to live in a peaceful, safe, and nuisance-free environment. Persistent cannabis use by neighbors can fall under:
- Statutory nuisance (especially if the smell is strong and constant)
- Antisocial Behaviour as defined under the Anti-social Behaviour, Crime and Policing Act 2014
- Breach of tenancy agreement, if they’re in social or rented housing
I consulted a local solicitor through a free legal advice clinic, who confirmed that tenants can be evicted for repeated complaints — even if police don’t prosecute.
Yes — especially if you’re not getting a response from the police.
When I contacted my housing association, they took it more seriously than I expected. They already had other complaints about the same neighbour and sent a formal warning. Repeated violations can even lead to eviction proceedings.
Local councils also have teams that deal with:
- Noise and environmental nuisance
- Neighbourhood safety
- Housing enforcement
If your neighbour rents privately, you can try contacting the landlord directly as well. In many tenancy agreements, drug use on the property is a violation of terms.
Are There Safe Ways to Handle This Without Involving the Police?
Yes — and sometimes these alternative routes are more effective and less confrontational:
- Neighbour mediation services (many councils offer this for free)
- Contacting a local PCSO (Police Community Support Officer)
- Writing a respectful anonymous note (be cautious)
That said, I don’t recommend direct confrontation unless you feel completely safe. Some people react poorly, especially when drugs are involved.
When Does Cannabis Use Become a Criminal Offence Worth Reporting?
Although smoking weed is illegal, the severity of the offence changes depending on circumstances. Here are a few examples:
| Situation |
Severity |
Recommended Action |
| Occasional smell, no other signs |
Low |
Council/housing association |
| Heavy traffic in/out, loud noise |
Moderate |
Report to police (101) |
| Suspected dealing or cultivation |
High |
Report immediately to police or Crimestoppers |
Can I Stay Anonymous When Reporting Weed-Smoking Neighbors?
Absolutely. This was important for me too. Here’s how I did it safely:
- I called Crimestoppers on 0800 555 111
- I avoided sharing personal details
- I documented everything in a private log, including photos and timestamps (where appropriate)
No one ever followed up with me directly, but I later heard that the police had visited the property for a general welfare check — so something came from it.

Conclusion: What I Did When My Neighbour Smoked Weed and It Affected Me
Dealing with a neighbour who smokes weed that seeps into your home is frustrating — and it can feel like no one wants to take responsibility. But here’s what I learned:
- You have legal rights to report drug use and antisocial behaviour.
- The police may not act immediately, but your complaint is logged.
- Housing associations and councils can be more proactive.
- You don’t need to confront anyone or put yourself at risk — anonymous reporting works.
- Keeping a record helps build a case over time.
If you’re facing a similar situation, know that you’re not alone — and you don’t have to live with it. Take measured steps, stay calm, and use the support systems available. It’s your home too.
Related Article: How To Remove Cigarette Smell From Room Instantly?
1. Can I get into trouble for reporting my neighbour for smoking weed?
No, you won’t get into trouble for reporting illegal activity, especially when it’s affecting your home environment.
If you’re concerned about privacy or retaliation, you can report anonymously through Crimestoppers at 0800 555 111 or use your local police force’s online form without providing personal details.
2. Will the police really take action over just the smell of weed?
Not always. The smell alone often isn’t enough to justify police entry or serious action, unless it’s accompanied by other signs like loud parties, constant foot traffic, or children being exposed.
However, if complaints build up or there’s suspicion of drug dealing, police may escalate their response.
3. What if my neighbour retaliates after I report them?
This is a valid concern, which is why anonymous reporting is strongly recommended. If you fear harassment or threats after making a complaint, you should inform the police immediately.
In some cases, councils and housing associations may offer community mediation services or additional protections under antisocial behaviour laws.
by Kanimozhi BV | Sep 19, 2025 | Garden, Exterior
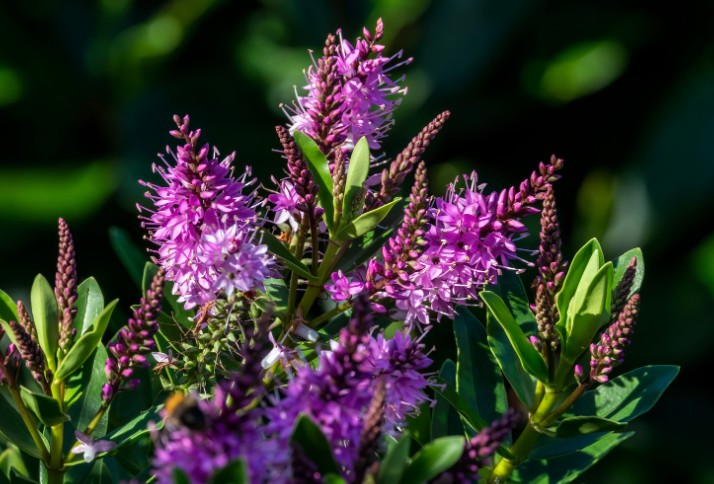
Over the years, I’ve grown hebes in all sorts of spaces — from tiny patios to sprawling country borders.
If you’ve ever wondered, how big do hebes grow?, you’re not alone. It’s a common question, especially since hebes come in such a wide range of shapes and sizes.
In this guide, I’ll walk you through everything I’ve learned about hebe plant sizes, how quickly they grow, and how to choose the right one for your garden — whether you’re working with a few pots or planning a low-maintenance hedge.
Why I Love Hebes for Any-Sized Garden?
One of the first things that drew me to hebes is their versatility. These evergreen shrubs aren’t just pretty — they’re practical.
- In smaller gardens, I love using compact hebes like ‘Red Edge’ in pots or front borders.
- In larger spaces, taller varieties like ‘Great Orme’ create structure without overwhelming the design.
- No matter the size, hebes bring year-round greenery and pops of colour in summer or early autumn.
Because they grow slowly and don’t need much fuss, hebes are also ideal if you want something low maintenance but still visually rewarding.
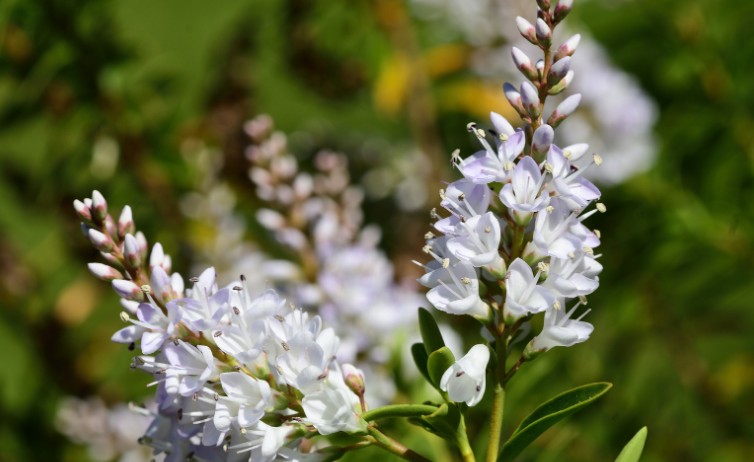
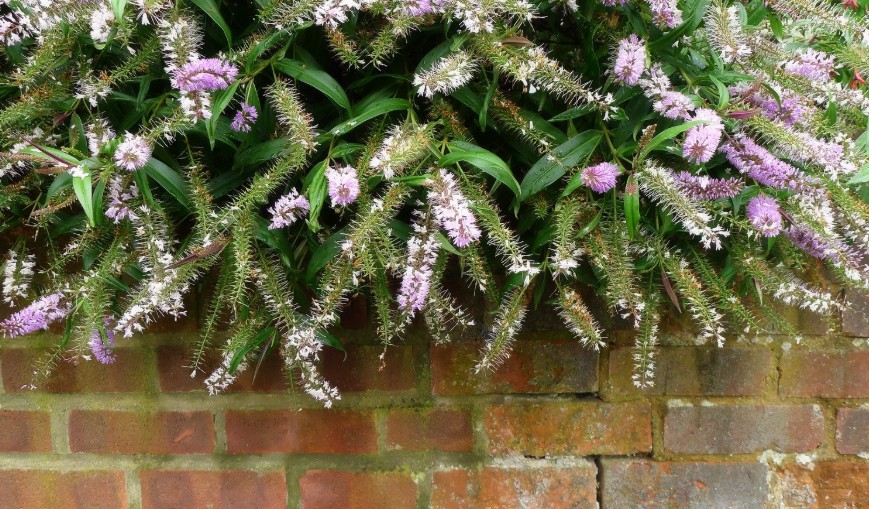
How Big Do Hebes Grow in the UK?
In the UK, most hebes will grow anywhere between 30 cm to 2 metres tall, depending on the variety. Some stay small and compact for years, while others can become substantial, rounded shrubs if left unpruned.
What Is The Average Hebe Plant Size by Type?
Here’s how I typically categorise them based on their mature size:
- Dwarf or compact hebes: Grow 30–60 cm tall and wide
- Medium hebes: Reach around 75 cm to 1.2 m
- Large hebes: Can grow up to 2 metres high and just as wide
How Is the Small, Medium, and Large Hebes Looks?
I’ve found that size isn’t just about height — it’s also about how much space each variety takes up.
- Dwarf hebes are ideal for edging or rockeries.
- Medium-sized hebes work well in mixed borders or containers.
- Larger types provide background structure and look great in informal hedges.
Do Hebes Grow Tall or Stay Bushy?
Hebes are naturally mounded or rounded in shape, and most varieties tend to grow outward as much as upward. I’ve never had a leggy or overly tall hebe — even the big ones tend to keep a pleasing, domed form with a bit of pruning.
How Is The Popular Hebes Varieties in Height, Spread, Growth Rate?
Here’s a handy comparison based on what I’ve grown and observed in UK gardens:
| Hebe Variety |
Height (UK) |
Spread |
Growth Rate |
Notes |
| Hebe ‘Red Edge’ |
40–60 cm |
60 cm |
Slow |
Great in containers or rockeries |
| Hebe ‘Heartbreaker’ |
50–75 cm |
75 cm |
Moderate |
Striking variegated foliage |
| Hebe ‘Great Orme’ |
1.5–2 m |
1.5 m |
Fast |
Fast-growing, needs space |
| Hebe ‘Midsummer Beauty’ |
1.8–2 m |
1.5 m |
Fast |
Flowers into autumn |
This chart is based on average growth in southern UK conditions, but in sheltered microclimates, they can occasionally grow even larger.
How Fast Do Hebes Grow?
In my garden, hebes are moderate to slow growers, depending on the variety.
- Dwarf types like ‘Red Edge’ take 3–5 years to reach full size.
- Larger types like ‘Great Orme’ can surprise you — I’ve had them grow nearly a metre in just two years with proper feeding and pruning.
What Affects Hebe Growth Rate?
I’ve noticed a few key things that influence how quickly they fill out:
- Sunlight: Full sun encourages bushier, faster growth
- Soil In Lawn: Free-draining soil is crucial — they hate sitting in wet ground
- Feeding: A spring feed with slow-release fertiliser helps boost growth
- Pruning: Light trimming after flowering of hebes keeps them compact and vigorous
How I Choose the Right Hebe Size for My Space?
The size of the hebe is usually the first thing I consider when choosing one for a new planting area. Here’s how I match variety to space:
Is Hebes for Pots, Patios & Rockeries?
For small spaces or containers, I always go with:
- Hebe ‘Red Edge’
- Hebe ‘Baby Marie’
- Hebe ‘Caledonia’
These stay compact and don’t need much maintenance. I prune lightly each autumn to keep their shape.
Is Medium-Sized Hebes for Borders?
If I need something with a bit more height in the middle of a border, I use:
- Hebe ‘Heartbreaker’
- Hebe ‘Purple Shamrock’
- Hebe ‘Pascal’
They provide colour without overpowering nearby plants.
Is Taller Hebes for Structure or Hedging?
When I want height or a semi-formal edge to a pathway, I reach for:
- Hebe ‘Great Orme’
- Hebe ‘Midsummer Beauty’
These grow larger and work brilliantly when spaced out properly.
What Are Quick Sizing & Spacing Tips for Hebes?
When I plant hebes, I always keep spacing in mind to let them fill out naturally without overcrowding.
- Dwarf hebes: 30–40 cm apart
- Medium hebes: 50–70 cm apart
- Large hebes: 1–1.5 m apart
- In pots: Use a container that’s at least 30 cm wide
- Prune lightly after flowering to manage size
Spacing them properly also reduces disease and keeps airflow around the plants, especially important during wet British summers.
Can I Control How Big My Hebe Grows?
Absolutely — pruning is your best friend here.
I lightly prune my hebes once a year, right after flowering. This keeps them tidy and stops them from getting too woody or leggy. It also encourages fresh growth and more compact shape.
How I Prune to Control Size?
- I remove around 10–15% of the plant’s growth after flowering.
- For larger varieties, I cut back up to 30 cm, but never into old wood.
- I avoid cutting hebes in winter or early spring — they don’t bounce back well in cold weather.
Get to know about do hebes die back in winter with this guide.
Final Thoughts: Big or Small, Hebes Always Fit the Garden
Whether you’re working with a balcony or a back garden, there’s a hebe for your space. Knowing how big hebes grow has helped me design smarter borders and avoid overcrowding. Their evergreen structure, low maintenance, and range of sizes make them an ideal shrub for UK gardens.
If you’re just getting started with hebes, my advice is to:
- Start with a compact variety in a pot
- Observe how it behaves over a year
- Then experiment with larger types if you have the room
They’re easygoing, look great year-round, and once established, they’ll quietly become one of your garden’s hardest-working shrubs.
Related Article: Daisy Like Flower: Top 10 Easy-Growing Plants for UK Climate
What Are The FAQs On How Big Do Hebes Grow?
1. Can I grow tall hebes in containers?
Yes, but choose a large, heavy pot, and be prepared to prune more often to control growth.
2. Do hebes grow more in width or height?
Most hebes grow in a rounded, mounding shape, so expect them to spread as much as they grow tall.
3. What’s the tallest hebe I can grow in the UK?
Varieties like ‘Midsummer Beauty’ or ‘Great Orme’ can grow over 2 metres tall in mild UK climates.
4. How far apart should I plant hebes for a hedge?
For a loose, informal hedge, I plant them 60–80 cm apart depending on the variety.
by Kanimozhi BV | Sep 19, 2025 | Garden, Exterior
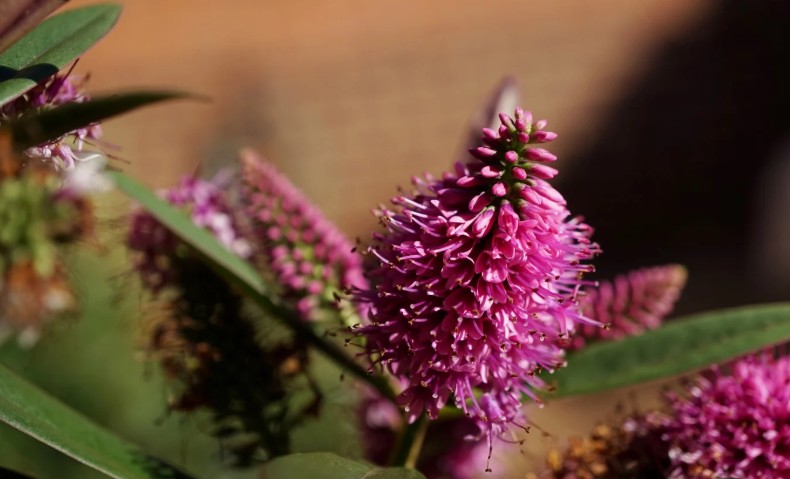
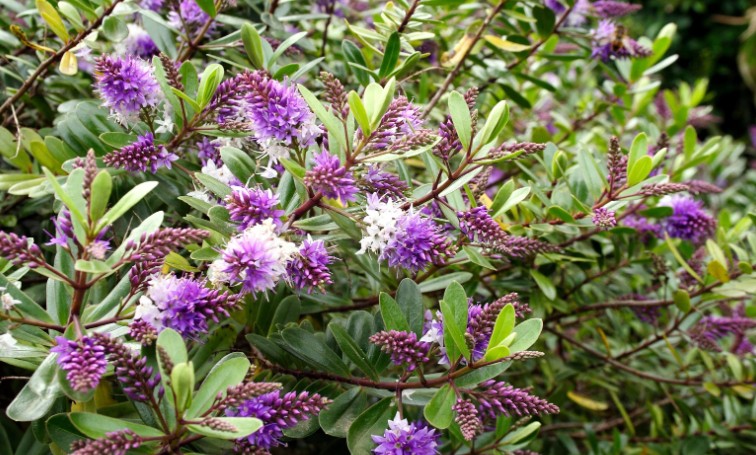
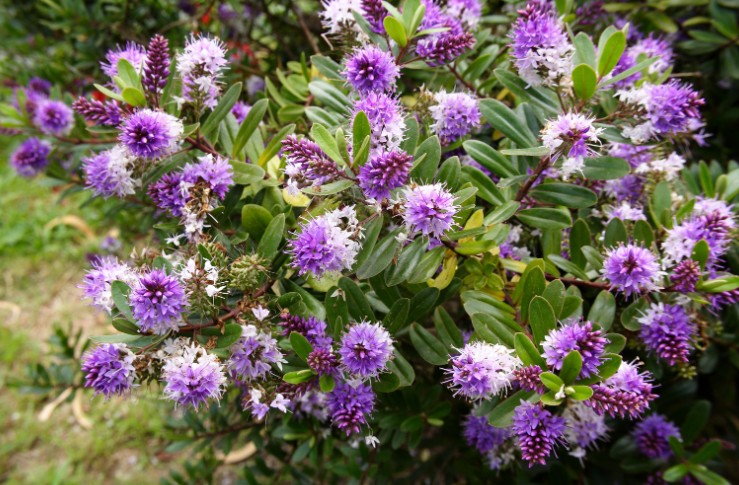
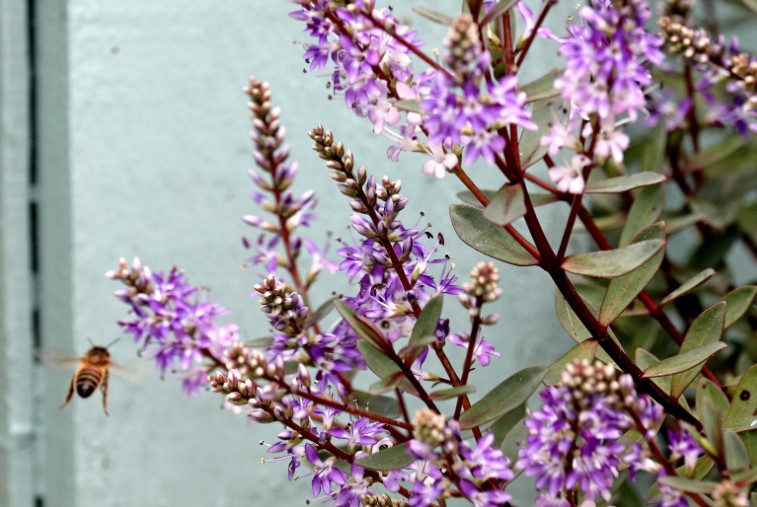
I’ve always had a soft spot for hebes — they’re the kind of shrub that asks for very little but gives back so much.
From their tidy evergreen structure to their bursts of flowers that draw in bees and butterflies, hebes have earned their spot in nearly every garden I’ve designed.
One of the most common questions I get from fellow UK gardeners is: when do hebes flower?
The answer varies a little depending on the variety and location, but I’ll break down everything I’ve learned from growing these dependable beauties in British soil.
What Are Hebes and Why I Love Them in My UK Garden?
Hebes are evergreen shrubs, mostly native to New Zealand, but they’ve adapted beautifully to UK gardens.
You’ll find them in a range of sizes — from small mounding varieties perfect for pots, to larger, more sprawling types ideal for mixed borders.
Here’s why hebes have a permanent place in my garden:
- They flower through the warmer months, adding colour when other shrubs are green-only
- Their foliage stays lush all year round
- They’re low-maintenance, ideal for beginner gardeners or busy ones like me
- Many varieties attract pollinators, making them great for wildlife-friendly gardens
When Do Hebes Flower in the UK?
This is the big question, and the answer is: most hebes flower from late spring through to autumn, depending on the variety and weather conditions.
What Are Typical Flowering Season by Variety?
In my experience, here’s a rough guide to when different types of hebes bloom in the UK:
- Late spring to early summer: Varieties like Hebe ‘Paula’ and ‘Red Edge’
- Mid to late summer: The more popular garden hybrids like Hebe ‘Great Orme’
- Late summer to early autumn: Extended flowering from varieties like ‘Autumn Glory’
These timeframes can shift slightly depending on your local climate — my hebes in sheltered, sunny spots often flower earlier and for longer.
How UK Weather Affects Blooming?
Living in the UK means our weather is never predictable. In cooler, northern regions, flowering may start later. A wet spring can sometimes delay blooms, while a dry, sunny spell can trigger an early show.
That said, hebes are incredibly adaptable. I’ve seen them push out flowers even after a poor spring, especially if they’ve been pruned and fed properly the year before.
Can Hebes Flower More Than Once a Year?
Yes, they can! Especially the long-flowering hybrids. While they don’t tend to have multiple flushes like roses, I’ve had some hebes throw out a second wave of blooms in late summer if I deadhead them after the first show.
How Long Do Hebes Flower For?
Most of the hebes in my garden flower for around 6 to 8 weeks, though some hold their blooms longer if the weather is right.
What Are The Factors That Affect Flowering Duration?
- Sun exposure – Full sun encourages longer flowering
- Feeding – Overfeeding with nitrogen can reduce blooms
- Deadheading – Encourages fresh flower spikes
- Pruning – Light pruning of hebes in late autumn keeps the plant vigorous
When conditions are ideal, I’ve seen summer-flowering hebes continue into September.
How I Encourage My Hebes to Flower More?
If you want a spectacular hebe display, there are a few things I’ve learned over the years that make all the difference.
How Soil, Sunlight & Feeding Helps Hebes?
- Soil in lawn: I always make sure the soil is free-draining. Hebes hate wet feet, and poor drainage can lead to root rot.
- Sunlight: At least 6 hours of sun a day helps develop strong flower buds.
- Feeding: I feed mine with a balanced fertiliser in spring (not too high in nitrogen), followed by a mulch of compost or well-rotted manure.
What is Pruning Hebes After Flowering?
This is essential. I lightly trim the tips of flowering stems once they fade. It keeps the plant bushy and encourages fresh shoots that will carry next year’s flowers.
Don’t prune too hard — they don’t regenerate well from old wood.
What Are the Quick Tips to Maximise Hebe Flowering?
Here are the main things I do every year to get the most out of my hebes:
- Plant in a sunny, sheltered spot
- Ensure well-draining soil
- Feed with a low-nitrogen fertiliser in early spring
- Deadhead faded blooms to extend the display
- Prune lightly after flowering ends
- Add a mulch layer in spring to improve moisture retention
These small habits go a long way toward getting a longer and more vibrant bloom.
How Is The Hebe Flowering Referenced?
Here’s a table I put together based on what I grow in my own garden:
| Hebe Variety |
Flowering Season |
Flower Colour |
Notes |
| Hebe ‘Paula’ |
Late Spring |
Purple |
Compact, hardy, low-growing |
| Hebe ‘Great Orme’ |
Summer |
Lilac |
Long-lasting bloom, ideal for borders |
| Hebe ‘Autumn Glory’ |
Late Summer–Autumn |
Violet |
Extends colour into autumn |
| Hebe ‘Red Edge’ |
Early Summer |
White |
Stunning winter foliage colour |
Learn about the frost damage recovery of hebes with my experiential guide.
Final Thoughts: Why Hebes Are My Go-To Shrub for Flower Colour
If you’re looking for a plant that brings reliable colour, low effort, and year-round interest, then hebes are well worth considering.
Over the years, they’ve become my go-to shrub for filling gaps, softening edges, and keeping the garden buzzing with life.
Whether you’re a beginner or an experienced gardener, knowing when do hebes flower — and how to keep them blooming — makes all the difference.
With just a little care, you’ll be rewarded with months of soft, beautiful colour that returns year after year.
What Are the FAQs On When Do Hebes Flower?
1. Do hebes flower in their first year?
Yes — if planted in spring or early summer, most hebes will establish quickly and produce flowers within their first year. Just make sure they’re in a sunny, well-drained spot.
2. Are hebes evergreen all year round?
Absolutely. One of the things I love most about hebes is that they retain their foliage year-round, making them useful even outside of flowering season.
3. Should I prune hebes before or after flowering?
After flowering is best. Pruning beforehand can remove the buds. I prune lightly in late summer or early autumn, shaping the plant and encouraging next year’s growth.
4. Can hebes grow in pots and still flower?
Yes, I grow several varieties in terracotta and ceramic pots. Just make sure the pot has good drainage, use a loam-based compost, and keep the pot in a sunny spot.
