Are you confused and looking for how to choose wallpaper for living room? Here are the top 12 ideas. Choosing the right wallpaper for your living room can transform the entire ambiance of the space.
If you want to create a cozy atmosphere, make a bold statement, or simply freshen up the decor, wallpaper offers a unique and versatile way to personalize your home.
In this guide, I’ll walk you through 12 DIY ideas that will help you choose the perfect wallpaper for your living room. From selecting the right color scheme to installation tips, let’s dive into the world of wallpaper.
Why Is Choosing the Right Wallpaper Important for Your Living Room?
Your living room is the heart of your home, where family & friends gather, and its design plays a vital role in setting the tone for the space.
The right wallpaper acts as a backdrop that ties together lighting, decor and furniture for garden or room. It can make a room feel larger, brighter, or cozier, depending on your choice.
When choosing wallpaper, it’s essential to consider key metrics to make sure your selection is both stylish and practical:
Room Size & Layout: Lighter tones make small rooms feel spacious, while bold patterns work best in large areas.
Lighting: Bright wallpapers enhance darker rooms, while darker hues add depth to well-lit spaces.
Durability: Vinyl wallpaper is durable and very easy to clean, ideal for high-traffic areas.
Style & Aesthetic: Choose a design that complements your room’s overall theme and decor.
Color Scheme: Ensure the wallpaper harmonizes with your furniture and flooring.
Pattern Scale: Large patterns are better suited for expansive walls, while smaller ones fit cozy spaces.
Installation Ease: Peel-and-stick wallpaper is ideal for DIY, while traditional pasted wallpaper may require professional help.
Maintenance: Opt for washable wallpaper.
By keeping these factors in mind, you’ll ensure the wallpaper not only looks great but also functions well for your lifestyle.
How To Choose Wallpaper For Living Room?
What Are the Best Wallpaper Styles for Living Rooms?
When deciding on wallpaper for your living room, it’s essential to consider the various styles available. Let’s explore few top options:
Bold Wallpaper Patterns
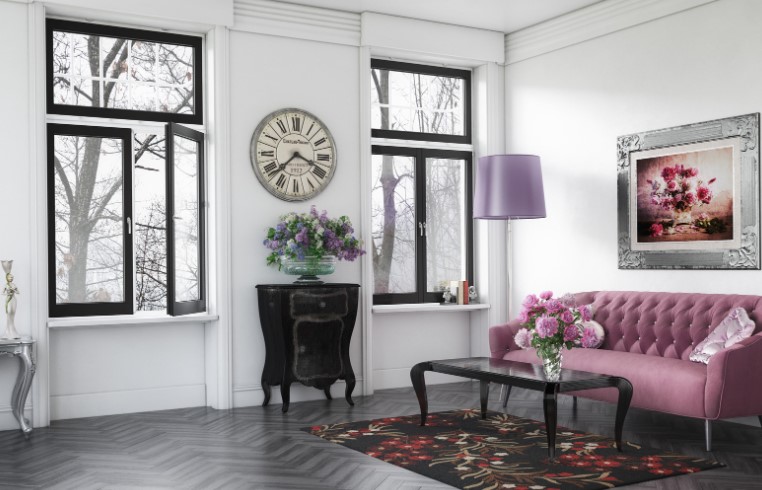
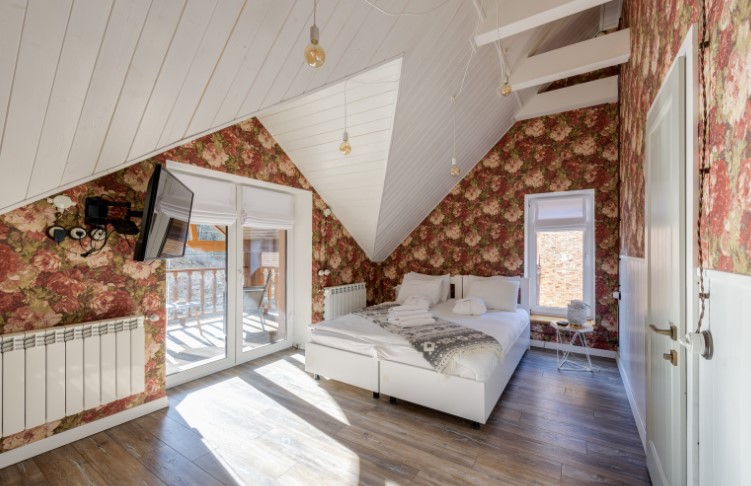
Bold, vibrant patterns like florals or stripes can be a great way to create a feature wall in your living room. These designs add energy and personality, perfect for those who want a statement piece in their home.
Floral Designs: Large or intricate floral patterns add a dramatic flair.
Stripes: Vertical stripes can elongate a room, whereas horizontal ones add width.
Statement Pieces: Use bold patterns on one wall to avoid overwhelming the room.
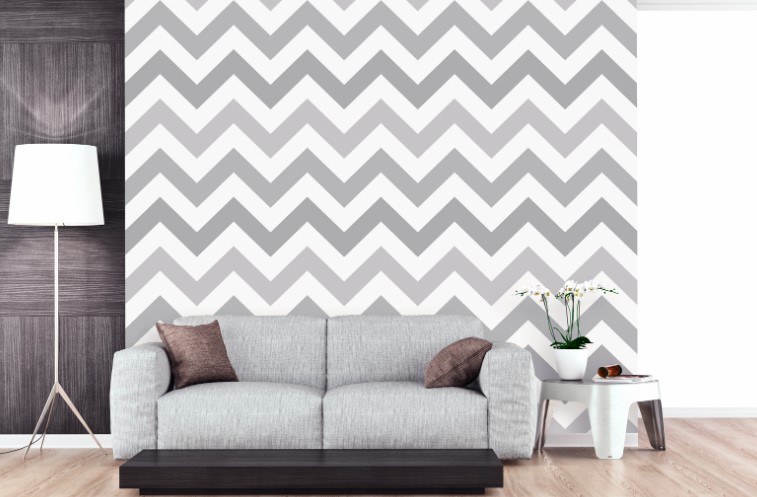
Geometric and Modern Designs
For a more contemporary look, geometric wallpaper designs are trending in 2024. Think clean lines, modern shapes, and neutral tones or bold color contrasts.
Abstract Shapes: Perfect for minimalist or modern homes.
Neutral and Bold Options: These designs can suit a variety of tastes, from understated to eye-catching.
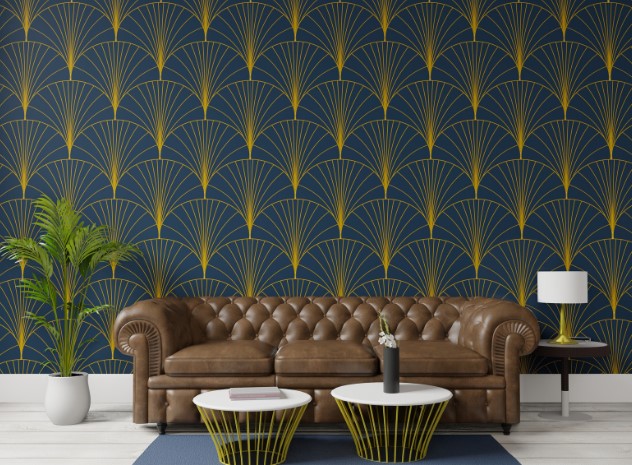
Textured Wallpaper
If you’re looking for something more tactile, consider using textured wallpaper. Designs like faux brick, linen, or metallic textures add depth and dimension to your space.
Faux Materials: Options like faux wood or brick offer a rustic, industrial feel.
Metallic Touches: Incorporating metallic textures adds luxury and light to a room.
How to Choose the Perfect Color Scheme for Your Living Room Wallpaper?
Choosing the right color for your wallpaper can significantly impact the mood of your living room.
Harmonizing with Furniture
One of the most critical aspects of selecting wallpaper is ensuring it complements your furniture. The color of the wallpaper should either contrast or harmonize with your furniture.
Dark Furniture: Pairs well with light, neutral-colored wallpaper.
Bold Furniture: Looks striking against accent wall wallpaper in softer tones.
Choosing Neutral Tones vs. Bold Colors
When deciding between neutral tones and bold colors, consider the size of your room and the amount of natural light it receives.
Neutral Colors: Make small spaces appear larger and more open.
Bold Colors: Create a cozy, intimate atmosphere in larger living rooms.
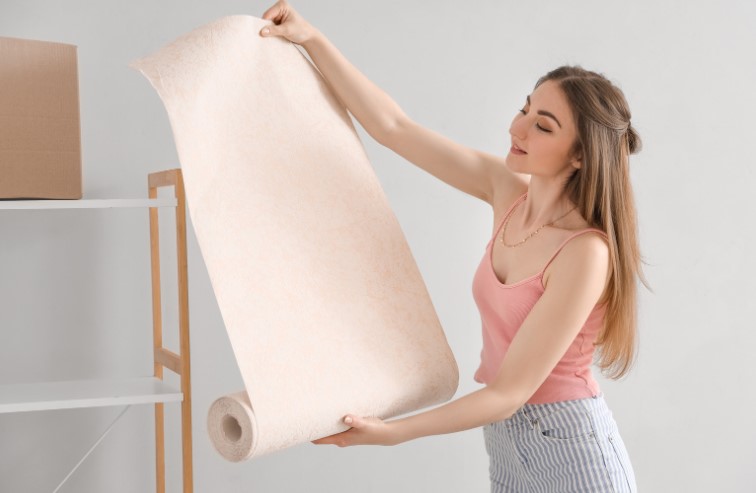
DIY Tips: How Do You Install Living Room Wallpaper?
Installing wallpaper can be fun and make you enjoy it. Here’s a quick guide on how to install wallpaper like a pro:
Preparing Your Walls
Before applying wallpaper, it’s essential to clean and prime your walls to ensure the wallpaper sticks well. Make sure the surface is smooth, free of dust, and dry.
Clean the Surface: Remove any dirt, dust, or old paint to prevent bubbles.
Prime the Walls: Use a primer to help the wallpaper adhere better.
How to Measure and Cut Wallpaper?
Wallpaper measurement includes measuring the height along with the width of your walls carefully before cutting the wallpaper. Remember to always cut slightly longer pieces to allow for adjustments.
Measure Twice: Ensure accuracy before cutting.
Leave Extra: Always leave an inch or two extra at the edges for trimming.
Installing Wallpaper: Step-by-Step
Apply Paste: If needed, apply paste evenly to the back of the wallpaper or directly on the wall for peel-and-stick options.
Start from the Top: Begin at the top of the wall and smooth out as you go, using a wallpaper brush to avoid air bubbles. You might think wallpapering around a window is crucial, but you can achieve it easily.
Trim Excess: Cut away any extra wallpaper at the bottom or around edges using a sharp utility knife.
What Are the Current Wallpaper Trends for 2024?
Wallpaper trends in 2024 are evolving toward both sustainability and bold, maximalist choices.
Sustainability and Eco-Friendly Materials
Eco-conscious homeowners are increasingly choosing sustainable wallpapers made from recycled or natural materials.
Recycled Materials: Wallpapers made from recycled fibers reduce waste.
Natural Fibers: Options like grasscloth or hemp offer texture and are eco-friendly.
Maximalism with Bold Colors
Maximalism is back, with homeowners embracing bold wallpaper colors and patterns that showcase personality.
Dramatic Colors: Bright, bold colors make a room feel unique and energetic.
Layered Patterns: Don’t be afraid to mix patterns for a richly decorated space.
Wallpaper vs. Paint: Which One Should You Choose?
If you’re debating between wallpaper vs. paint for your wall, consider these factors:
Feature
Wallpaper
Paint
Durability
High, especially with vinyl options
Moderate, needs retouching over time
Customization
Unlimited patterns and textures
Limited to colors and paint techniques
Ease of Application
DIY-friendly with peel-and-stick options
Easier, but less intricate
Cost
Moderate to high, depending on material
Lower cost, but depends on quality
Durability: Wallpaper, especially vinyl, lasts longer than paint.
Customization: Wallpaper offers endless patterns and textures, while paint is more limited to customization.
Cost: While paint is generally cheaper, wallpaper adds more customization and longevity.
Top 12 Smart DIY Wallpaper Ideas for Your Living Room
Now that you know the basics, here are 12 DIY wallpaper ideas to inspire your living room transformation:
Feature Wall with Bold Patterns: A feature wall with a bold pattern creates a striking focal point while keeping the other walls neutral.
Nature-Inspired Wallpaper: Bring the outdoors inside with botanical or floral designs that evoke calm and relaxation.
Geometric Shapes: Add a modern and stylish touch with simple geometric wallpaper designs.
Textured Wall Coverings: Consider textured wallpaper like faux brick or wood to add depth and a cozy, rustic vibe.
Vintage Floral Wallpaper: Traditional floral prints bring warmth and a touch of nostalgia.
Stripes for Visual Height: Vertical or horizontal stripes can help manipulate the room’s visual dimensions.
Metallic Accents: Add a bit of glamour with wallpapers that have a metallic sheen, creating a luxurious look.
Custom Peel-and-Stick Designs: Perfect for DIY beginners, peel-and-stick wallpaper is easy to apply and remove.
Bohemian Patterns: For a more eclectic, vibrant feel, try bold and intricate bohemian designs.
Scandinavian Minimalism: Simple and clean designs in neutral tones create a light, airy look.
Mural Wallpaper: Large-scale murals act as a statement piece, turning your wall into art.
Conclusion
Choosing the right wallpaper for your living room is a fun and creative process with our guide on how to choose wallpaper for living room. By considering the style, color scheme, and texture, you can transform your living room into a space that reflects your personality.
Whether you opt for a bold wallpaper pattern or a more subtle textured design, the ideas in this guide will help you make the right choice. Embrace your DIY spirit, and get ready to create a living room that truly feels like home!
Home Diagnostics and Technical Standards Specialist at Hello Mag. She provides high-level Expertise in appliance mechanics and scientific pest management, ensuring every guide follows strict safety protocols and manufacturer standards. As a leading Authority on technical home specs, Kanimozhi audits complex data to provide homeowners with the most accurate, verified, and reliable diagnostic solutions available.
Wallpapering around a window can be tricky, but with the right approach, tools, and patience, you can achieve professional-looking results. Windows often require precise cutting, careful pasting, and seamless pattern matching to ensure a smooth finish and a beautiful look when hanging paintings on walls.
This detailed guide will help you master, how to wallpaper around a window, whether they are standard rectangular windows, bay windows, or have a deep recess.
Step-By-Step Guide On How To Wallpaper Around a Window
Step 1: Gather Your Tools
Before you begin, make sure you have all the tools necessary to complete the job efficiently.
Wallpaper and paste
Sharp wallpaper scissors or utility knife
Tape measure and ruler
Seam roller (optional but useful)
Sponge and water bucket for cleaning excess paste
Wallpaper smoother or brush
Plumb line or laser level (to ensure wallpaper is straight)
Having these tools at hand will ensure that the process runs smoothly and avoids any delays.
Measure the window area: Measure the area above and below the window frame, including the depth of the recess if you have one. This makes you to decide on how many rolls of wallpaper is needed.
Cut the wallpaper strip: Cut the wallpaper strip slightly longer than needed, leaving extra paper for trimming. Always cut it long enough to cover the window area plus a few extra inches to ensure a perfect fit. This gives you more room to adjust the paper as needed.
Mark and cut around the window: For no-recess windows, hang the wallpaper straight across the window, making small slits in the wallpaper where the window’s corners meet. If the window has a recess, cut extra strips for this area, ensuring that they extend slightly beyond the recess for trimming later.
Step 3: Start Wallpapering
Once your wallpaper is measured and cut, it’s time to hang it.
Hang the first strip: Begin at the top of the wall and work your way down, using a plumb line to ensure the wallpaper hangs straight.
Press and smooth the paper: Gently press the wallpaper against the wall, smoothing out air bubbles with a brush or smoother as you go.
Make relief cuts around the window: As you reach the window, make small diagonal cuts at the corners to allow the wallpaper to fold into the recess neatly.
Tips for smoother application:
Always work from the top down to prevent the wallpaper from sagging.
Use a sharp utility knife for cutting precise edges around the window frame and sill.
Don’t forget to double-check for air bubbles by smoothing from the center out toward the edges.
Step 4: Wallpaper the Window Recess (If Applicable)
For windows with recesses, extra care is needed.
Cut strips for the recess: Measure the depth of the window recess and cut strips to fit. Leave an extra inch or so around the edges to allow for adjustments.
Paste and hang: Apply paste to the wall inside the recess and gently hang the wallpaper strips inside. Smooth the edges with a seam roller for a neat, crisp finish.
Trim excess paper: Use a sharp utility knife to trim the excess wallpaper where it meets the window frame. Make sure that you press the paper into the corners before cutting for the best result.
Step 5: Finish Around the Window Frame
Now that the wallpaper is positioned around the window, you can focus on getting clean edges.
Trim the excess: Use a straight edge or ruler to press the wallpaper into the corners of the window frame and then trim the excess with a sharp knife.
Tuck in edges: Use a seam roller or the back of your scissors to firmly press the wallpaper along the window frame’s edges.
Clean up: Wipe away any excess paste or blu tack in walls with a damp sponge, especially around the window frame, to ensure a clean finish.
Step 6: Smooth Out the Seams
Once the wallpaper is in place, focus on the seams:
Butt the seams together: Avoid overlapping wallpaper seams. Instead, butt them tightly together for a seamless look.
Use a seam roller: If necessary, run a seam roller over the edges to ensure they stick well and won’t peel over time.
Step 7: Check for Air Bubbles and Final Adjustments
After hanging the wallpaper, check the entire area for air bubbles or wrinkles.
Smooth the wallpaper: If you notice any bubbles, use a smoother or dry sponge, pressing them outwards toward the edge of the paper.
Let the wallpaper dry: Allow the wallpaper to fully dry before making any further adjustments, especially if you plan to install curtain poles or blinds. This ensures that the wallpaper doesn’t rip or peel.
Tips for Wallpapering Different Window Types
Different windows may require slightly different approaches:
Rectangular Windows: The most straightforward to wallpaper around, just ensure you make precise cuts around the frame.
Bay Windows: Treat each panel of the bay window as a separate wall and be extra cautious when matching patterns at the corners.
Sash Windows: Pay close attention to the moving parts of the window, trimming neatly around the sash without getting paste on the mechanism.
Skylights: Secure the wallpaper firmly around skylight edges to prevent peeling over time.
Arched Windows: Cut the wallpaper into sections to fit the curve, and use relief cuts to prevent tearing.
Conclusion
Wallpapering around windows can be a challenging task, but by following these step-by-step instructions on how to wallpaper around a window, you can achieve a polished, professional finish.
The key is careful measurement, precise cutting, and taking your time to smooth out the paper and align patterns. With patience and the right tools, even tricky window areas can look flawless.
FAQs
1. What should I do if I get air bubbles while wallpapering?
To remove air bubbles, gently smooth them out from the center of the wallpaper towards the edges using a wallpaper smoother or a dry sponge. Make sure to apply even pressure to avoid creasing the paper.
2. Can I wallpaper over a window with a radiator underneath?
Yes, you can wallpaper above a radiator. However, make sure the radiator is turned off and has cooled down before applying wallpaper to avoid drying the paste too quickly.
3. How do I wallpaper around a deep window recess?
For a deep window recess, measure the depth and cut smaller strips of wallpaper to fit the recess. Apply extra paste to ensure it adheres properly, and smooth it out with a seam roller for a crisp finish.
4. Should I overlap wallpaper at the corners?
In general, it’s better to butt wallpaper seams together to avoid visible overlaps. However, for tricky areas like corners or deep recesses, a slight overlap of about 5mm can help create a neat finish.
Home Diagnostics and Technical Standards Specialist at Hello Mag. She provides high-level Expertise in appliance mechanics and scientific pest management, ensuring every guide follows strict safety protocols and manufacturer standards. As a leading Authority on technical home specs, Kanimozhi audits complex data to provide homeowners with the most accurate, verified, and reliable diagnostic solutions available.
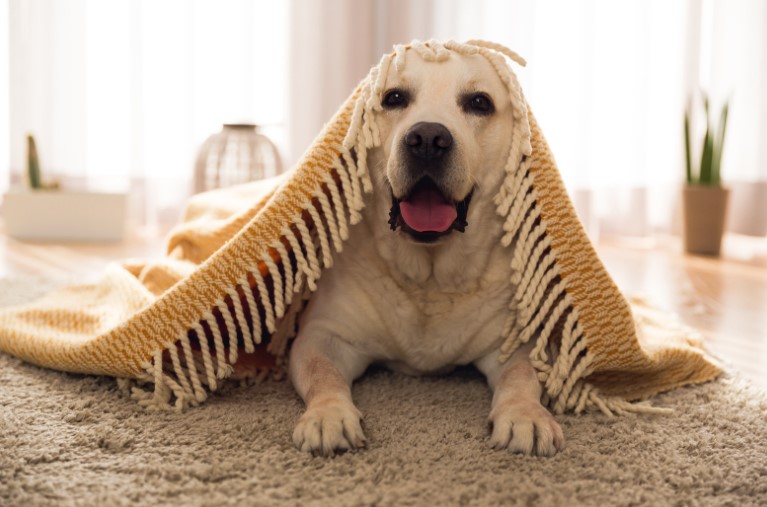
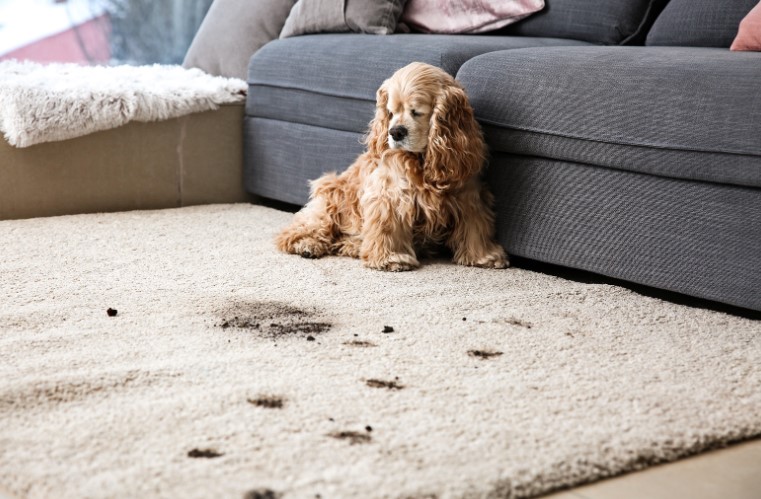
Need tips on how to get dents out of carpet? Carpet dents from heavy furniture are an annoying but common problem.
When furniture rests in one place for too long, the carpet fibers get compressed, leading to noticeable indentations. But don’t worry, these dents aren’t permanent!
You can easily restore your carpet to its original state with a few simple tricks. In this guide, we’ll walk you through 5 smart DIY hacks that can remove dents from your carpet and prevent future damage.
What Causes Carpet Dents?
Carpet dents usually occur when heavy furniture, like sofas, beds, or bookshelves, sits in the same spot for an extended period.
The weight of the furniture compresses the carpet fibers, flattening them against the backing and making the indentations more noticeable. If left unaddressed, these dents can become more permanent as burns in the carpet, especially with high-pile carpets.
While regular vacuuming can help maintain your carpet’s fluffiness, it’s not enough to prevent dents entirely. The best strategy is a combination of DIY fixes and preventive measures, which we’ll cover below.
5 DIY Hacks on How To Get Dents Out Of Carpet – How To Remove?
How to Use Ice Cubes to Fix Carpet Dents?
One of the simplest and easiest methods to lift carpet dents is the ice cube method. This trick is particularly effective for small, shallow dents caused by furniture legs.
Materials Needed:
Ice cubes
A spoon or blunt tool
A vacuum cleaner
Steps:
Place several ice cubes directly on the dent. Use enough to cover the entire indentation.
Let the ice melt completely over several hours (or overnight).
Once the water has been absorbed, use a spoon or blunt tool to gently fluff the carpet fibers back into place.
After the area dries, vacuum the spot to further lift the fibers, remove stagnant water smell and restore the texture.
This method works by rehydrating the carpet fibers, making them swell and return to their original shape. It’s safe for most carpets and doesn’t involve heat or chemicals, making it a go-to option for homeowners.
How Does Steam Ironing Work for Carpet Dent Removal?
For more stubborn dents, a steam iron can be the best powerful solution. This method uses heat and moisture to relax the carpet fibers, helping them spring back to life.
Materials Needed:
A steam iron
A damp cloth
A vacuum cleaner
Steps:
Dampen a clean cloth & place it right over the stubborn dent.
Set your steam iron to a medium heat setting (no higher).
Without letting the iron touch the carpet directly, gently press it over the damp cloth for about 10-15 seconds. The steam will enhance the carpet, loosening the fibers.
Remove the cloth and use your fingers or a spoon to lift the carpet fibers.
Finally, vacuum the area to complete the process and restore the texture.
Caution: Avoid direct contact between the iron & the carpet to prevent synthetic fibers from getting damaged. This method is best suited for synthetic carpets like nylon or polyester.
Can Vacuuming Help Remove Dents?
If you’re looking for a quick and simple solution, vacuuming can help remove minor dents, especially if they’ve just started forming.
Steps:
Vacuum over the dented area using a brush attachment or standard vacuum head.
Go over the spot multiple times, as vacuuming helps lift the carpet fibers by drawing them upward.
For extra effect, fluff the fibers manually with your fingers after vacuuming.
This method works best on light dents that haven’t set deeply into the carpet. For older or larger dents, consider pairing this with one of the other methods mentioned here.
Does a Hairdryer Work for Small Dents?
A hairdryer can provide a quick fix for small dents by using heat to lift compressed carpet fibers.
Materials Needed:
Hairdryer
Spray bottle with water
A comb or spoon
Steps:
Lightly spray the dented area with water to dampen it.
Set your hairdryer on a medium heat setting, holding it about 6 inches away from the carpet.
As you apply heat, gently fluff the carpet fibers with a spoon or comb.
Allow the area to dry fully before using the carpet again.
This method is effective for minor dents and is a low-risk option for delicate carpets.
How Can You Use a Plunger to Fix Carpet Dents?
A plunger may seem like an unusual tool, but it can help create suction to lift deep carpet dents, especially for larger or more persistent indentations.
Steps:
Place the plunger over the dent & press down to create suction.
Slowly pull up on the plunger to lift the carpet fibers.
Repeat the process if needed, & fluff the fibers manually afterward.
This method works best on dense carpet fibers and is a quick option for pulling up compacted areas.
How to Prevent Carpet Dents in the Future?
Prevention is always better than cure. To avoid dealing with carpet dents in the future, try these effective strategies:
Use Furniture Pads or Coasters: These distribute the weight more evenly, preventing pressure from building up in one spot.
Move Your Furniture Regularly: Shifting the position of heavy furniture every few months can help prevent permanent indentations.
Use Area Rugs or Carpet Protectors: Placing a rug or protector under heavy furniture can reduce the impact on the carpet.
Install Furniture Gliders: These help furniture slide more easily, reducing the pressure that causes dents.
These small steps can save you from dealing with frustrating dents and help prolong the life of your carpet.
Conclusion
Removing carpet dents doesn’t have to be a daunting task. With these 5 simple DIY hacks, you can restore your carpet’s appearance and maintain its texture for years to come.
Whether you’re using the ice cube method or opting for a steam iron, these methods are practical, affordable, and effective.
By following the preventive tips on how to get dents out of carpet, you can also avoid the hassle of dealing with dents in the future. Now that you’re equipped with these solutions, say goodbye to unsightly dents and hello to a fresh-looking carpet!
FAQs:
Q1: How long does it take for ice to remove carpet dents?
It typically takes a few hours to overnight for ice to melt and fully rehydrate the carpet fibers. After the ice melts, it’s important to blot up any excess water and allow the area to dry completely.
Q2: Can you use a steam cleaner to remove dents from carpets?
Yes, a steam cleaner can be very effective for dent removal, especially for large areas. The steam helps relax the carpet fibers, allowing them to return to their natural shape.
Q3: Will carpet dents go away on their own?
Minor dents may gradually fade over time with regular vacuuming and foot traffic. However, deeper dents usually need one of the DIY methods described here to fully lift.
Q4: Can I use a clothes iron instead of a steam iron to fix carpet dents?
Yes, you can use a regular iron, but make sure to always use a damp cloth as a barrier between the iron and the carpet to prevent direct heat damage.
Q5: Are these methods safe for all carpet types?
Most methods, like the ice cube and vacuuming techniques, are safe for most carpet types. However, for delicate carpets made from natural fibers, it’s better to avoid direct heat or excessive water.
Home Diagnostics and Technical Standards Specialist at Hello Mag. She provides high-level Expertise in appliance mechanics and scientific pest management, ensuring every guide follows strict safety protocols and manufacturer standards. As a leading Authority on technical home specs, Kanimozhi audits complex data to provide homeowners with the most accurate, verified, and reliable diagnostic solutions available.
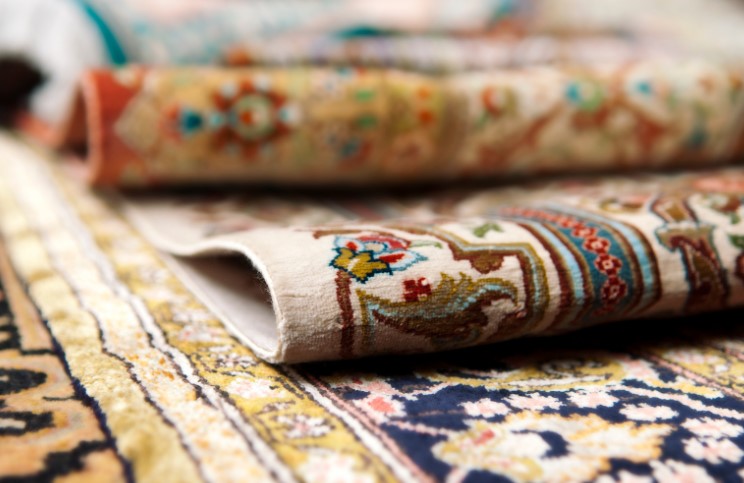
Need tips on how to fix burnt carpet? Carpet burns, whether from cigarettes, irons, or other hot objects, can severely affect the appearance of your home. But with the right tools and techniques, it’s possible to repair burnt carpet without having to replace the entire thing.
In this guide, I’ll walk you through the steps on how to fix burnt carpet, from minor marks to larger, more severe damage, and help you restore your carpet’s beauty.
What Tools and Materials Do You Need to Fix a Burnt Carpet?
Scissors or utility knife
Sandpaper for minor burns
Vacuum cleaner
Carpet adhesive or superglue
Replacement fibers (taken from hidden areas of your carpet)
Heavy book or object for securing patches
Optional tools for larger burns:
Carpet remnant for patching
Carpet repair kit if you don’t have matching spare fibers
How Do You Fix Small Carpet Burns?
Step 1: Trim the Burnt Fibers
For smaller burns (like cigarette burns), carefully cut the damaged fibers using scissors.
Be sure not to remove too much, as you want to avoid creating a visible gap.
Step 2: Replace with New Fibers
Take fibers from a hidden section of the carpet. Use superglue to attach these fibers to the burnt area.
Once dry, trim them to the right length and blend them with the surrounding carpet by gently brushing.
How to Fix Larger Burns Using Patching Techniques?
Step 1: Cut Out the Burnt Area
For larger burns, like those caused by irons, use a utility knife to cut around the damaged area.
Cut a square or rectangular shape to make patching easier and avoid visible seams.
Step 2: Create and Apply the Patch
If you have a matching carpet remnant, cut it to the same size as the hole. Apply carpet adhesive to the patch and the edges of the hole.
Press the patch into place and secure it with a heavy object like a book overnight to ensure a strong bond.
Step 3: Blend the Patch
Once the patch is secure, vacuum the area in multiple directions to help blend the new piece with the surrounding carpet fibers.
What About Iron Burns on Carpet?
How to Assess the Severity of Iron Burns?
Iron burns can cause deep scorch marks or surface-level burns. For superficial burns, lighter methods like sanding or cleaning may suffice.
However, deeper burns will require patching or replacing fibers.
How to Remove Discoloration from Light Iron Burns?
For surface burns:
Use sandpaper to lightly sand the burnt area.
Follow with a vacuum to remove debris.
If there is still discoloration, apply a diluted vinegar solution to lighten the area.
How to Repair Deep Iron Burns?
For deeper burns:
Trim the burnt fibers and use carpet filler to level the area.
Alternatively, cut out the damaged section and apply a matching patch as described above.
Should You Try DIY or Call a Professional for Carpet Burn Repair?
While minor burns can be easily handled with DIY methods, more extensive damage may require a professional. Professional carpet repair is recommended if:
The burn covers a large area.
You lack spare carpet remnants or matching fibers.
You’re not confident about achieving a seamless result.
However, DIY methods can save both time and money for smaller issues, so give it a try before considering professional help.
How to Prevent Carpet Burns in the Future?
Preventing burns is always easier than repairing them. Here are some tips:
Use heat-resistant mats under irons, curling tongs, or candles.
Avoid smoking near carpets.
Ensure that hot objects like straighteners are kept on protective surfaces rather than directly on the floor.
Conclusion
Fixing burnt carpet doesn’t have to be complicated. Whether it’s a small cigarette burn or a larger iron scorch mark, you can tackle most issues with a little time, patience, and the right tools.
Following this guide on how to fix burnt carpets, will help you restore your carpet and keep your home looking fresh without the need for a costly replacement.
FAQs
1. Can I repair a burnt carpet on my own?
Yes, for smaller burns, you can use simple DIY methods like trimming fibers or patching small areas with adhesive and replacement fibers.
2. What if I don’t have spare carpet for a patch?
You can take fibers from hidden areas like under furniture or use a carpet repair kit with color-matching patches and adhesive.
3. Is it possible to fix a light burn mark without cutting?
Yes, you can try sanding the area or using a diluted bleach solution to lighten the mark on light-coloured carpets.
4. Should I try DIY repair for large burns?
For larger burns, it’s best to attempt a DIY patch, but if the damage is extensive, hiring a professional is recommended for a seamless finish.
5. Can I prevent carpet burns in the future?
Use heat-resistant mats under hot objects and keep irons, candles, or curling tongs away from carpets to prevent burns.
Home Diagnostics and Technical Standards Specialist at Hello Mag. She provides high-level Expertise in appliance mechanics and scientific pest management, ensuring every guide follows strict safety protocols and manufacturer standards. As a leading Authority on technical home specs, Kanimozhi audits complex data to provide homeowners with the most accurate, verified, and reliable diagnostic solutions available.
I’ve spent over fifteen years as a professional decorator in the UK, and if there is one thing that haunts landlords and tenants alike, it’s the sight of greasy blue circles left behind on a freshly painted wall.
I’ve seen countless walls ruined by people trying to “pick” at old adhesive—here is the manual-free, expert-tested way I remove Blu Tack and its stains in minutes without losing your housing deposit.
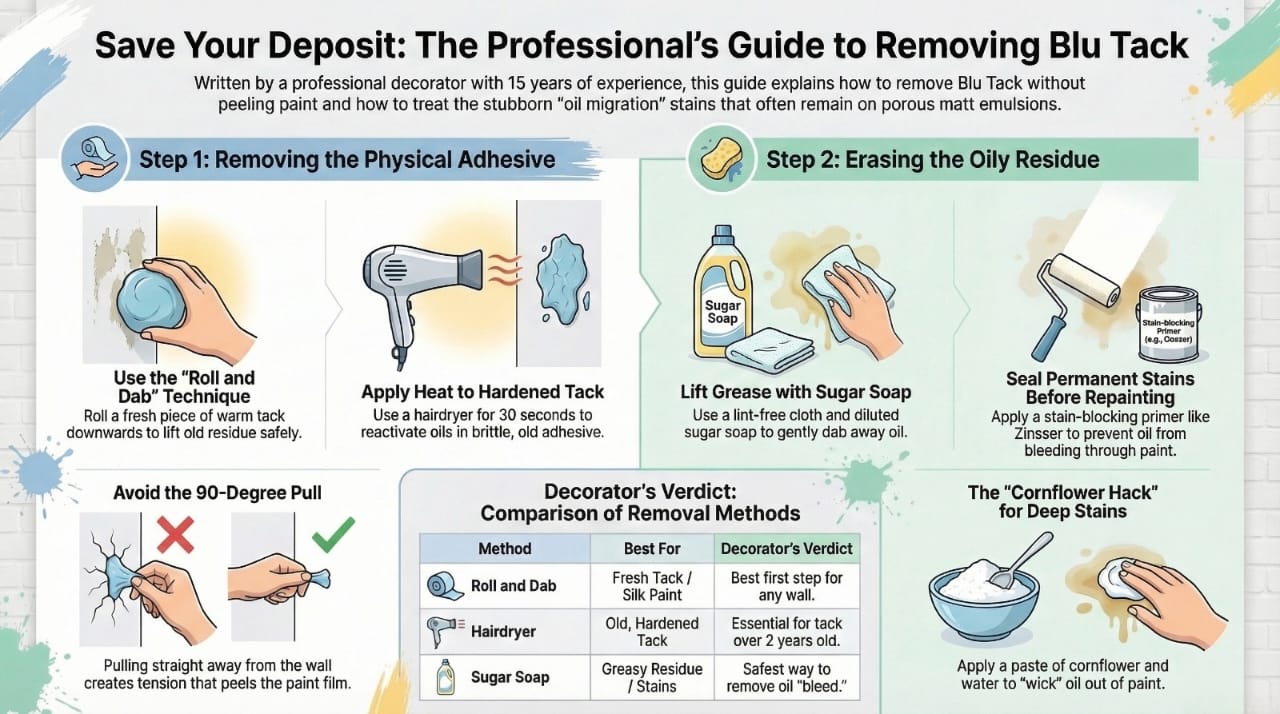
⚡ The Short Answer: How to Remove Blu Tack From Walls?
If you’re in a hurry to save your paintwork and protect your deposit, follow these expert steps:
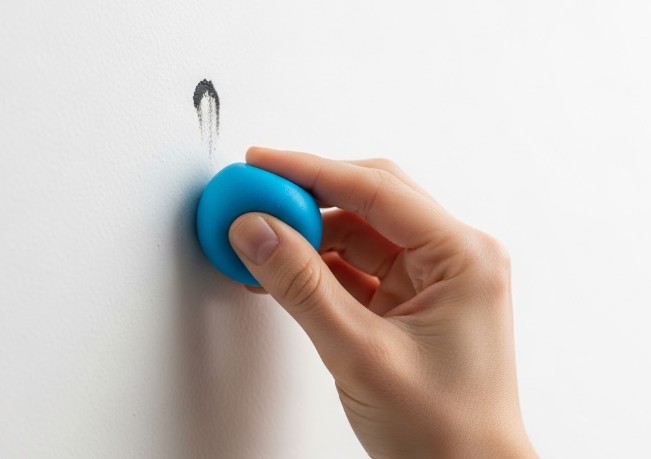
• The “Roll and Dab” Method: Use a fresh piece of warm tack to pull away residue rather than picking at it.
• Apply Heat: Use a hairdryer on a low setting for 20 seconds to soften hardened tack before removal.
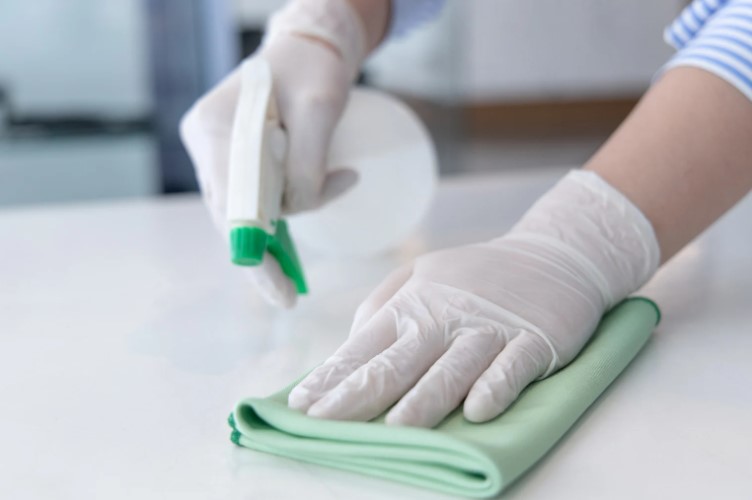
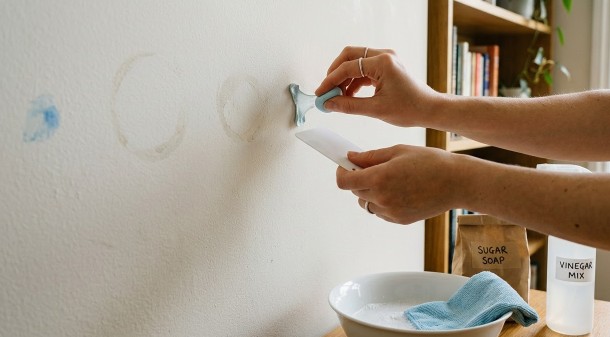
• Lift the Grease: Use Sugar Soap or a 50/50 white vinegar mix to remove oily “bleed” marks.
• Seal the Stain: For permanent shadows, use a stain-blocking primer (like Zinsser B-I-N) before touching up.
Why Does Blu Tack Leave Those Annoying Greasy Marks?
As a decorator, I often explain to my clients that Blu Tack is essentially a mixture of synthetic rubber and mineral oil. Over time, especially in warm rooms or on porous surfaces, that oil “bleeds” into the paint.
Modern UK matt emulsions, which are highly popular for their flat finish, are unfortunately the most vulnerable. Unlike silk or eggshell paints, matt paint is porous, meaning it sucks up the Blu Tack oils like a sponge, creating those permanent-looking dark spots.
Does Sugar Soap Remove Blu Tack Marks?
One of the most frequent questions I get during a “refresh” job is: Does sugar soap remove Blu Tack marks? The answer is a resounding yes, but with a caveat.
Sugar soap is a mild detergent specifically designed to cut through grease and tobacco film before painting. Since Blu Tack marks are oil-based, sugar soap is my go-to “hack” for cleaning the wall before I even think about touching up the paint.
Comparison Table: Removal Methods vs. Surface Types
How To Remove Blu Tack From Walls Without Peeling The Paint?
The mistake most people make is trying to pull the tack away at a 90-degree angle. This creates tension that pulls the paint film away from the plaster.
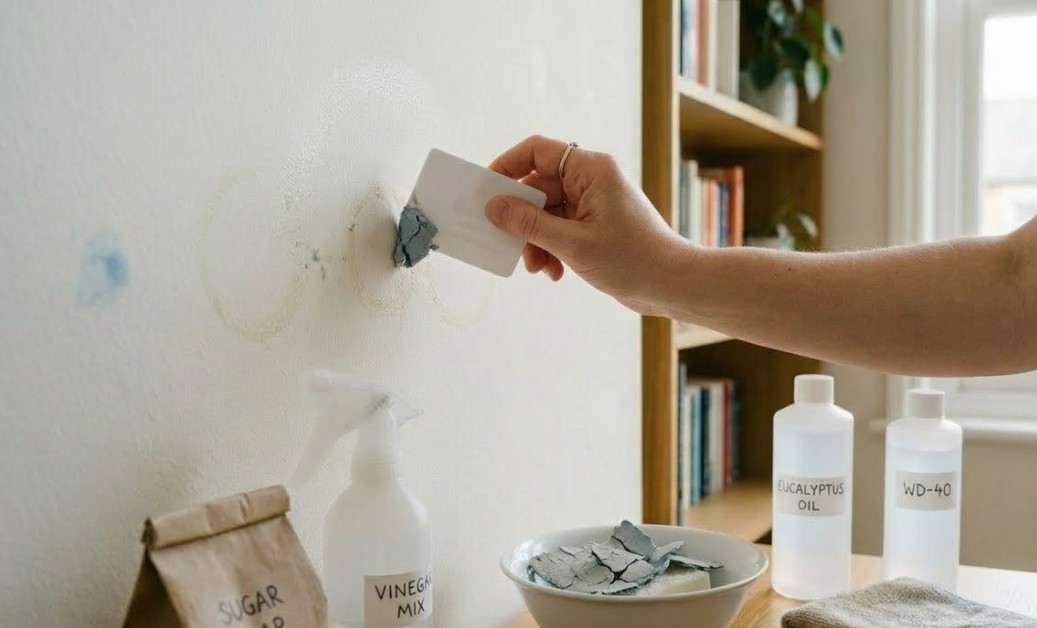
Instead, use the “Roll and Dab” technique:
Take a fresh, clean piece of Blu Tack and warm it up in your hands until it’s stretchy.
Press it firmly against the edge of the tack on the wall.
Slowly “roll” the fresh tack downwards. The adhesive property of the new tack will pull the old tack away from the wall without tugging on the paint.
How Can You Get Rid Of Hardened, Old Blu Tack Residue?
When Blu Tack has been on a wall for years, it dries out and becomes brittle. If you try to roll it, it will simply snap, or worse, take the top layer of paint with it.
Pro-Tip 1: Use a hairdryer on a medium heat setting. Hold it about 10cm away from the tack for 30 seconds. This softens the mineral oils and reactivates the adhesive, making it pliable enough to “roll and dab.” Be careful not to get too close, or you might cause the paint to blister.
How To Remove Blu Tack Stains From Wall UK Homes Often Have?
If you’ve removed the tack but the dark mark remains, you are dealing with “oil migration.” This is the primary reason tenants lose their deposits.
The Sugar Soap Method: Mix a small amount of liquid sugar soap with warm water. Using a lint-free cloth, gently dab the stain. Do not scrub, as this will create a “shiny” spot on matt paint.
The Cornflower Hack: For very deep oil stains on light-coloured walls, I often recommend making a thick paste of cornflower (or talcum powder) and a tiny drop of water. Apply it to the stain, let it dry for two hours, then brush it off. The powder “wicks” the oil out of the paint.
Pro-Tip 2: If you are dealing with Silk or Eggshell paint, a simple mix of white vinegar and water on a microfibre cloth works wonders for a streak-free finish that lifts the grease instantly.
What are the Hacks To Get Blu Tack Off Walls When It’s Stubborn?
If the standard methods fail, here are two industry secrets I use:
The “White Tack” Trick: If you have white walls, always use White Tack instead of Blue. It doesn’t contain the blue dye that can occasionally stain.
Citrus Cleaners: A tiny drop of a citrus-based adhesive remover (like Goo Gone) on a cotton bud can dissolve the tack. However, you must immediately wash the area with soapy water to prevent the cleaner itself from staining.
Can You Paint Straight Over Blu Tack Stains?
No. I cannot stress this enough. If you paint directly over a Blu Tack oil stain with standard emulsion, the oil will eventually “bleed” through the new layer. You will end up with the same dark spot six months later.
Pro-Tip 3: If the stain is permanent, you must use a Stain-Blocking Primer. In the UK, I always keep a tin of Zinsser B-I-N or Bulls Eye 1-2-3 in my van. A quick dab of this “seals” the oil. Once dry, you can paint over it with your topcoat, and the mark will never return.
What To Use Instead Of Blu Tack On Walls?
To avoid these headaches entirely, I recommend my clients look at alternatives that are kinder to British plasterwork:
Command Strips: These use a stretch-release adhesive that leaves zero residue.
Washi Tape: Great for posters; the adhesive is much weaker and doesn’t contain mineral oils.
Hook and Loop (Velcro) Pads: Better for heavier items, though they require more care during removal.
Conclusion
Knowing How To Remove Blu Tack From Walls is an essential skill for any UK renter or homeowner. By using the “roll and dab” method combined with the heat of a hairdryer, you can save your paintwork from unnecessary damage.
If you are left with those dreaded oily shadows, remember that Sugar Soap is your best friend for lifting the grease before it becomes a permanent feature.
Follow these professional steps, and you’ll keep your walls looking pristine and your deposit safely in your pocket. Happy decorating!
What are the FAQ About How To Remove Blu Tack From Walls?
1. Does WD-40 remove Blu Tack?
While WD-40 will dissolve the adhesive, I strongly advise against it on painted walls. WD-40 is an oil itself; you are essentially replacing one oil stain with a much larger, more difficult one.
2. Will a Magic Eraser take the paint off?
On silk paints, a Magic Eraser is fine. On matt emulsion, it acts like very fine sandpaper. It will remove the mark but might leave a “burnished” or shiny patch that is visible when the light hits it.
3. How long do Blu Tack stains last?
Unfortunately, oil stains are permanent unless they are chemically lifted (with sugar soap/cleaning agents) or sealed with a primer.
4. Can you use Blu Tack on freshly painted walls?
Never. You must wait at least 4 weeks for the paint to “cure” fully. If the paint is still “outgassing,” the Blu Tack will bond to it permanently.
Kani
Lead Technical Researcher
Kanimozhi BV
Kanimozhi is a professional decorator, home improvement and diagnostics specialist at Hello Magazine UK. With a background in technical research, she bridges the gap between professional trade standards and practical DIY solutions. From troubleshooting complex appliance error codes to ecological pest control and modern interior design, Kanimozhi provides evidence-based guides to help UK homeowners maintain safe, efficient, and beautiful living spaces.
Home Diagnostics and Technical Standards Specialist at Hello Mag. She provides high-level Expertise in appliance mechanics and scientific pest management, ensuring every guide follows strict safety protocols and manufacturer standards. As a leading Authority on technical home specs, Kanimozhi audits complex data to provide homeowners with the most accurate, verified, and reliable diagnostic solutions available.