
by Kanimozhi BV | Aug 30, 2024 | DIY Ideas
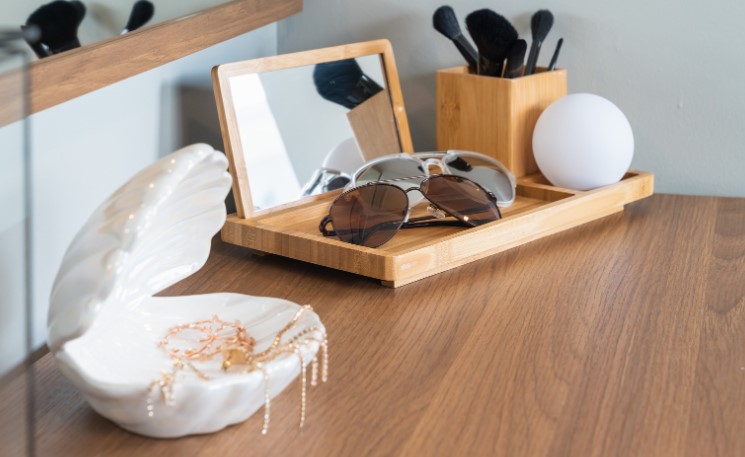
Are you looking for top ideas on how to clean silver chain at home? Here it is. Silver chains are a timeless accessory, but they can lose their shine over time due to tarnish and dirt build-up.
Keeping your silver chain looking as good as new is easier than you might think, especially when you have a few DIY tricks up your sleeve. In this guide, I’ll share some of the best ways to clean your silver chain at home using simple household items.
Why Do Silver Chains Tarnish?
Silver chains tarnish when exposed to air and moisture, which results in a chemical reaction that darkens the metal. Factors like sweat, perfumes, and air pollutants can speed up this process, leaving your once-shiny chain looking dull and dirty. Regular cleaning is essential to maintain your silver’s sparkle and prevent long-term damage.
What Materials Do You Need for Cleaning Silver Chains at Home?
Before you start cleaning, gather these common household items:
- Baking soda: Great for gently removing tarnish.
- White vinegar: Effective for deep cleaning.
- Lemon juice: Natural cleaner with a fresh scent.
- Olive oil: Adds shine while cleaning.
- Toothpaste: A quick fix for mild tarnish.
- Soft cloth: For applying cleaners and polishing.
- Bowl of warm water: For rinsing.
- Soft-bristle toothbrush: To reach small crevices.
Step-by-Step Process on Cleaning Silver Chain At Home
How to Clean a Silver Chain with Baking Soda?
One of the easiest ways to clean a silver chain is by using baking soda. It’s gentle on the silver and works well to remove tarnish.
- Create a paste: Mix two parts baking soda with one part water until it forms a paste.
- Spread the paste: Gently rub the paste onto your silver chain using a soft cloth.
- Gently rub the chain: Rub the paste into the chain, focusing on areas with tarnish.
- Rinse with warm water: After rubbing, rinse the chain under warm water to remove the paste.
- Dry with a soft cloth: Pat the chain dry with a clean, soft cloth, and enjoy its restored shine.
How to Clean a Silver Chain with Vinegar?
Vinegar is another excellent option for cleaning silver. It’s especially useful for chains that have developed a lot of tarnish.
- Immerse the chain in vinegar: Submerge your silver chain in a bowl of white vinegar.
- Let it sit: Allow the chain to soak for 2-3 hours.
- Rinse under warm water: After soaking, rinse the chain thoroughly with warm water.
- Dry and polish: Use a soft cloth to dry and polish the chain, bringing back its natural luster.
How to Use Lemon Juice and Olive Oil to Clean a Silver Chain?
Lemon juice is a natural acid that helps remove tarnish, while olive oil adds a protective shine.
- Mix lemon juice with olive oil: In a small bowl, combine equal parts lemon juice and olive oil.
- Dip a soft cloth into the mixture: Use the cloth to apply the mixture to your silver chain.
- Rub gently: Gently rub the chain to remove tarnish and dirt.
- Rinse with warm water: Wash off the mixture under warm water.
- Dry thoroughly: Pat the chain dry with a soft cloth to reveal a bright, shiny finish.
What Are Some Quick Tips for Maintaining Your Silver Chain?
Everyday Care Tips
Regular care can help prevent tarnish and keep your silver chain looking its best:
- Store in a cool, dry place: Moisture accelerates tarnishing, so keep your chain in a dry area.
- Use anti-tarnish paper: Place anti-tarnish paper or cloth in your storage box to protect the silver.
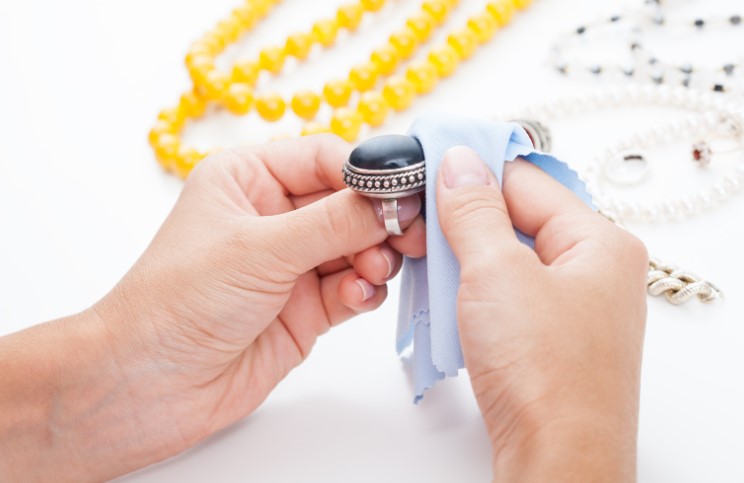
- Wipe after wearing: After wearing your chain, wipe it with a soft cloth to remove oils, sweat, and other residues.
What Common Mistakes Should You Avoid When Cleaning Silver Chains?
Avoid these pitfalls to keep your silver chain in great condition:
-
Using Harsh Chemicals:
- Bleach and other strong chemicals can damage silver, leaving it dull and discolored.
-
Over-Scrubbing:
- Aggressive scrubbing can scratch the silver, so always clean gently.
-
Ignoring Tarnish:
- Leaving tarnish untreated for too long can cause permanent damage to the silver.
Conclusion
Keeping your silver chain clean and shiny at home is easy with the right DIY methods. Whether you’re using baking soda, vinegar, or lemon juice, these household items can restore your chain’s sparkle without the need for expensive products.
Remember, regular care and gentle cleaning will keep your silver chain looking its best for years to come. Try these methods if you are looking for how to clean silver chain at home and let me know how they work for you.
FAQs About Cleaning Silver Chain at Home
1. Can I Use Toothpaste to Clean My Silver Chain?
Yes, but use a non-gel toothpaste. Apply it gently to avoid scratching the silver.
2. How Often Should I Clean My Silver Chain?
Clean your silver chain every few months or when you notice tarnish starting to form.
3. What If My Silver Chain Has Gemstones?
Avoid soaking the chain if it has gemstones. Instead, clean it carefully with a cloth dipped in a mild cleaner.
Home Diagnostics and Technical Standards Specialist at Hello Mag. She provides high-level Expertise in appliance mechanics and scientific pest management, ensuring every guide follows strict safety protocols and manufacturer standards. As a leading Authority on technical home specs, Kanimozhi audits complex data to provide homeowners with the most accurate, verified, and reliable diagnostic solutions available.

by Kanimozhi BV | Aug 28, 2024 | Roof, Exterior, Interior, Loft
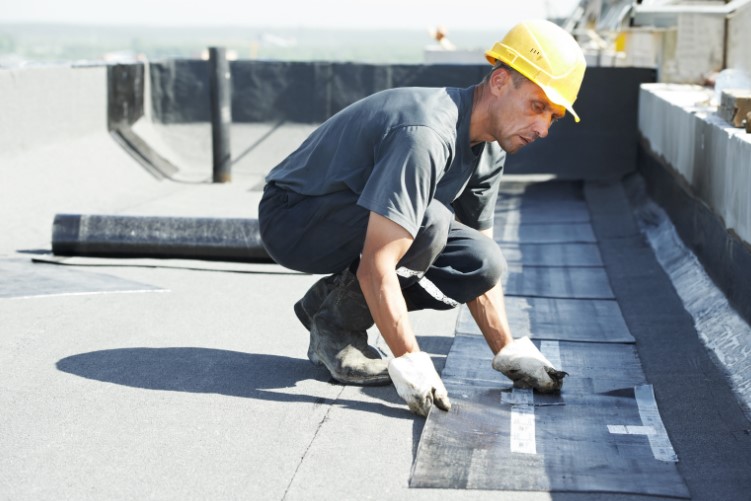
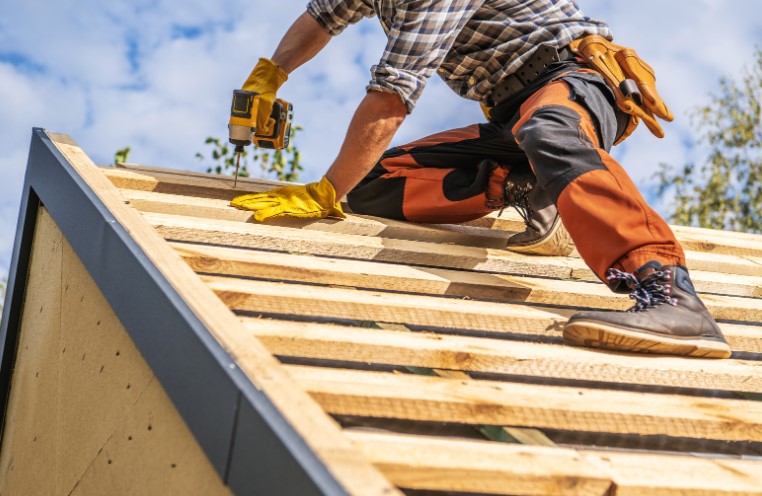
How to repair roof felt from inside loft? Roof felt plays a crucial role in protecting your home from the elements, acting as a barrier against water and wind. Over time, however, roof felt can wear down or become damaged, leading to leaks and other issues.
If you’ve noticed signs of damage in your loft, you might be wondering how to fix it without getting on the roof. Fortunately, it’s possible to repair roof felt from inside the loft, and I’m here to guide you through the process step by step.
What is Roof Felt and Why is it Important?
Roof felt, also known as underlayment or tar paper, is a layer of material that sits between your roof’s structural elements and the external roofing material, like tiles or shingles. Its primary function is to provide an extra layer of waterproofing, protecting your home from water infiltration. Roof felt also helps to protect against wind-driven rain and contributes to the overall durability of your roof.
When roof felt becomes damaged, it can compromise the integrity of your roof, leading to leaks, dampness, and even structural damage if left unaddressed. That’s why it’s essential to keep an eye on the condition of your roof felt and repair any issues as soon as they arise.
What are the Signs to Find that Your Roof Felt Needs Repair?
Before diving into the repair process, it’s important to identify whether your roof felt is indeed in need of repair. Here are 4 common signs to look out for:
- Water Stains on the Ceiling: If you notice water stains or discolouration on the ceiling inside your home, it could be a sign of a roof felt issue.
- Dampness in the Loft: Damp or musty smells in your loft might indicate that water is seeping through damaged roof felt.
- Visible Tears or Gaps: During a loft inspection, check for any visible tears, gaps, or holes in the roof felt.
- Dripping Water: If you see water dripping inside the loft during or after rain, it’s likely that your roof felt has been compromised.
If you notice any of these signs, it’s time to take action and repair the roof felt before the problem worsens.
Before you begin the repair, you’ll need to gather a few essential tools and materials. Here’s what you’ll need:
- Utility Knife: For cutting the roof felt and the patch material to size.
- Roofing Adhesive or Sealant: To securely attach the patch to the damaged area.
- Roof Felt Patch: You can purchase a small roll of roof felt or use a patch kit specifically designed for repairs.
- Tape Measure: To measure the area that needs to be patched.
- Ladder: For accessing the higher parts of the loft if necessary.
- Safety Gear: Wear Gloves, safety glasses to protect you.
What are the Step-by-Step Guide to Repair Roof Felt from Inside the Loft?
Now that you’re equipped with the necessary tools, let’s get started with the repair.
Step 1: Locate the Damaged Area
The first step is to locate the exact spot where the roof felt is damaged. This might be obvious if you can see a tear or hole, but if not, look for signs of water ingress, such as damp patches, drips, or water stains. Once you’ve found the damaged area, you’re ready to begin the repair.
Step 2: Prepare the Area for Repair
Before you apply any patches, it’s important to prepare the area properly:
- Clear the Area: Remove any insulation or debris around the damaged area to ensure you have a clear workspace.
- Dry the Area: If the area is wet, use a cloth or towel to dry it out as much as possible. Roofing adhesive works best on dry surfaces.
- Cut Away Damaged Felt: Use your utility knife to carefully cut away any loose or severely damaged sections of felt. This will give you a clean surface to work on.
Step 3: Cut and Apply the Felt Patch
Next, you’ll need to cut a piece of roof felt that’s large enough to cover the damaged area with a bit of overlap:
- Measure the Area: Use your tape measure to determine the size of the patch needed. It should be slightly larger than the damaged area to ensure full coverage.
- Cut the Patch: Cut a piece of roof felt to the required size using your utility knife.
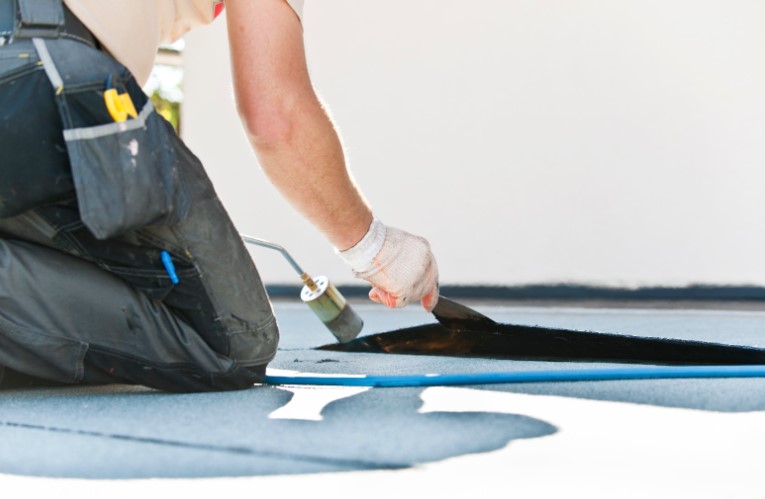
- Apply Roofing Adhesive: Apply a generous amount of roofing adhesive around the edges of the damaged area and on the underside of the patch.
- Position the Patch: Carefully position the patch over the damaged area, pressing it firmly into place.
Step 4: Secure the Edges and Seal the Patch
To ensure the patch holds and remains waterproof:
- Seal the Edges: Apply additional roofing adhesive around the edges of the patch, pressing it down firmly to ensure a good seal.
- Smooth Out the Patch: Use your hands or a flat tool to smooth out any wrinkles or air bubbles in the patch, ensuring it adheres properly to the roof felt.
Step 5: Inspect and Test the Repair
After completing the patch, it’s important to inspect your work:
- Check the Patch: Make sure the patch is securely attached with no gaps or loose edges.
- Test for Leaks: The next time it rains, check the loft to ensure no water is getting through the repair. You can also simulate rain by spraying water onto the roof from the outside and checking for leaks inside.
What are the Alternative Methods for Repairing Roof Felt?
If the standard patch method doesn’t work for your situation, here are a few alternative methods:
What are Temporary Fixes?
If you’re not able to make a permanent repair right away, you can use a temporary fix to stop water ingress. A tarpaulin or heavy-duty plastic sheet can be secured over the damaged area as a temporary barrier.
How to Use Roofing Tape?
Roofing tape is a quick and easy option for small tears or cracks. It’s self-adhesive and can be applied directly over the damaged area to create a waterproof seal. This method works best for minor repairs.
When to Call a Professional?
If the damage is extensive or if you’re not confident in your ability to repair it yourself, it might be best to call a professional roofer. They can assess the situation and make the necessary repairs safely and effectively.
What are the Safety Tips for Working in the Loft?
Working in the loft can be tricky, so it’s important to follow some basic safety precautions:
- Ensure Proper Ventilation: Make sure the loft is well-ventilated, especially if you’re using adhesives or sealants.
- Use Adequate Lighting: Ensure you have enough light to see clearly while you work. A headlamp or portable light can be helpful.
- Watch Your Step: Be mindful of where you step to avoid damaging insulation or losing your balance.
- Wear Protective Gear: Always wear gloves, safety glasses, and a dust mask to protect yourself from dust and debris.
What are the Common Mistakes to Avoid When Repairing Roof Felt?
Even with the best intentions, mistakes can happen. Top 3 pitfalls to avoid:
Improper Patch Application
Applying the patch incorrectly can lead to leaks and further damage. Ensure the patch is large enough and fully sealed around the edges to prevent water from getting in.
Ignoring Small Leaks
Small leaks might seem insignificant, but they can lead to bigger problems if not addressed. Always take the time to repair even minor damage to prevent it from worsening.
Using Inappropriate Materials
It’s tempting to use whatever materials you have on hand, but it’s important to use the right materials for roof felt repairs. This ensures the repair is durable and effective.

Conclusion
Repairing roof felt from inside the loft is a practical and effective way to address leaks and damage without the need to climb onto the roof. By following these steps on how to repair roof felt from inside loft and by taking the necessary precautions, you can make a durable repair that protects your home from water damage.
Remember to use the right tools and materials, take your time to ensure a proper seal, and always prioritise safety. With a little effort, you can keep your roof in top condition for years to come.
FAQs About Repairing Roof Felt from Inside the Loft
1. Can I repair roof felt in the rain?
It’s best to wait for dry conditions, as adhesives and sealants may not work properly on wet surfaces.
2. How long does a roof felt repair last?
A properly done repair can last for several years, but it’s always a good idea to check it regularly for signs of wear.
3. Is it safe to repair roof felt myself?
Yes, as long as you take proper safety precautions and use the correct materials. If you’re unsure, consider consulting a professional.
Home Diagnostics and Technical Standards Specialist at Hello Mag. She provides high-level Expertise in appliance mechanics and scientific pest management, ensuring every guide follows strict safety protocols and manufacturer standards. As a leading Authority on technical home specs, Kanimozhi audits complex data to provide homeowners with the most accurate, verified, and reliable diagnostic solutions available.
by Kanimozhi BV | Aug 28, 2024 | DIY Ideas
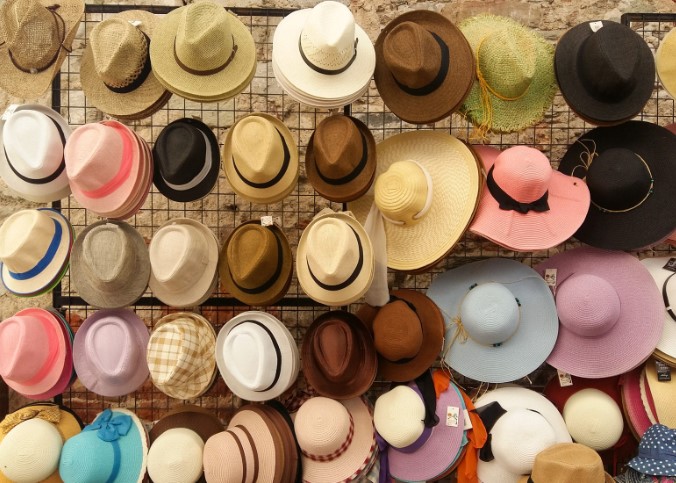
Whether it’s a classic baseball cap for a casual weekend look or a sophisticated wool fedora reminiscent of the Royal family’s race-day style, your hats are an investment in your personal brand. However, nothing ruins a sharp outfit faster than the unsightly white salt marks or yellowing “tide marks” caused by perspiration.
At Hello Magazine UK, we understand that your accessories are more than just functional—they are style statements. If you have ever wondered if your favourite headpiece is beyond saving, you are in the right place.
In this expert guide, we will walk you through exactly how to remove sweat stains from hats without compromising their shape or fabric integrity, ensuring your wardrobe stays as impeccable as the stars we feature.
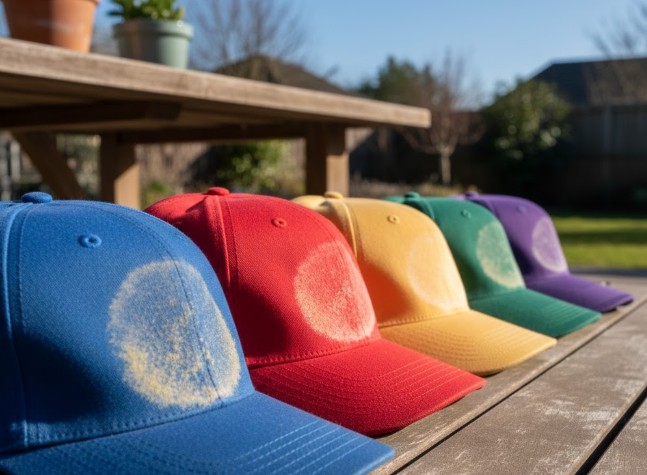
Why do sweat stains appear on your hats and can they be removed?
Sweat stains are more than just moisture; they are a complex combination of water, salt, proteins, and natural body oils. When the water evaporates, the minerals and oils remain trapped within the delicate fibres of the fabric.
Over time, these components can oxidise, leading to that stubborn yellowing on white hats or distinct, crusty white lines on darker fabrics.
The good news? Most sweat stains can be removed if caught early. The secret lies in matching the cleaning method to the specific material of your hat.
Whether it’s a high-performance gym cap or a designer sun hat, the restoration process requires a touch of patience and the right technique.
Have you checked your hat’s care label?
Before you reach for the detergent, you must identify exactly what you are working with. Much like a bespoke suit or a silk gown, different headwear materials react differently to water and cleaning agents. Most modern caps have a care label tucked inside the crown.
- Cotton or Polyester: These are generally hardy and can handle mild agitation and water.
- Wool or Felt: These are highly delicate. These natural fibres can shrink, “felt,” or “pill” if they get too wet or are exposed to heat.
- The Brim Check: This is the most crucial step. Does the brim feel like plastic or cardboard? If it’s cardboard (common in vintage or cheaper hats), you must avoid soaking it at all costs, as it will lose its structure permanently and become “mushy.”
Cleaning Methods Comparison Table
To help you decide which route to take, we’ve summarised the best approaches for different hat types below:
| Hat Material |
Recommended Method |
Risk Level |
Key Ingredient |
| Cotton Baseball Cap |
Hand-Wash / Spot Clean |
Low |
Mild Detergent |
| Performance/Gym Hat |
Gentle Machine Wash (in cage) |
Medium |
Sport-Specific Wash |
| Wool / Felt Fedora |
Steam & Blot |
High |
White Vinegar |
| Straw Sun Hat |
Damp Cloth Wipe |
Medium |
Mild Soapy Water |
| Vintage (Cardboard Brim) |
Surface Spot Clean Only |
Very High |
Microfibre Cloth |
How do you remove sweat stains using the hand-wash method?
For the majority of your collection, hand-washing is the “gold standard.” It allows you to target the stains with precision while protecting the hat’s delicate structure.
What you will need?
- A clean basin or sink.
- Cool or lukewarm water (never hot!).
- A mild laundry detergent (e.g., Woolite or a delicate silk wash).
- A soft-bristled brush (an old toothbrush is perfect for detailed work).
What are The Step-by-Step process to remove sweat stains?
- Spot Test: Apply a tiny amount of detergent to an inconspicuous area (like the inside rim) to ensure the dye doesn’t run.
- Pre-treat the Sweatband: This is where the most oils accumulate. Dip your brush into a mixture of water and detergent and gently scrub the inner band in a circular motion.
- The Soak: Submerge the hat in the soapy water. Let it sit for 30 to 60 minutes. Check every 15 minutes to ensure the shape is holding.
- Rinse: Run cool water through the hat until no bubbles remain. Important: Do not wring or twist the fabric, as this will snap the internal fibres and ruin the silhouette.
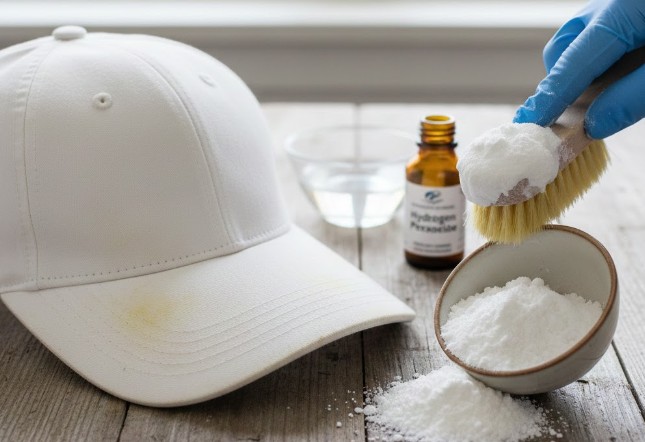
Can you use bicarbonate of soda for stubborn yellow stains?
If you are dealing with older, set-in yellow stains on a light-coloured hat, standard detergent might not be enough. This is where a classic British household staple comes in: Bicarbonate of Soda.
The “Bicarb” Paste Method: Mix four tablespoons of bicarbonate of soda with about 50ml of warm water to create a thick, grittier paste.
Apply the paste directly onto the stains using a spoon or your fingers. Gently work it into the fibres and let it sit for at least an hour—preferably in a cool, dry place.
The alkaline nature of the bicarb helps break down the acidic proteins in the sweat. Afterwards, rinse with cool water and watch the yellowing vanish.
What is the best way to clean delicate designer hats like felt or wool?
Luxury headwear, such as a Stetson or a Lock & Co. Hatters piece, requires a “less is more” approach. You should never submerge a wool or felt hat in water.
- Steam and Brush: For light salt marks, use a garment steamer (or a kettle) to lightly dampen the area with steam. This opens the fibres. Use a soft hat brush to sweep the salt away, always brushing in one direction (usually anti-clockwise).
- Vinegar Solution: For tougher stains on wool, mix equal parts white vinegar and cool water. Use a microfibre cloth to “blot” the stain. Never rub, as this pushes the stain deeper into the felt.
- Cornflour for Oils: If the stain is fresh and oily (perhaps from hair products), sprinkle cornflour on the area and leave it overnight to absorb the oils before brushing it off the next morning.
Should you ever put your hat in the washing machine or dishwasher?
You may have seen “hacks” suggesting the dishwasher or washing machine. At Hello Magazine UK, we generally advise against this for your cherished items.
The high heat in a dishwasher can “cook” the stains into the fabric and melt plastic brims. Washing machines, meanwhile, provide aggressive agitation which can crush the crown. However, if you must use a machine for a standard cotton gym hat:
- Place it in a “hat cage” (a plastic frame designed to hold the shape).
- Use a delicate, cold cycle with a low-spin or no-spin setting.
- Place it inside a mesh laundry bag for an extra layer of protection.
How do you dry your hat without losing its iconic shape?
Drying is where most people go wrong, leading to a “shrunken” look that never quite fits the same again. Never put your hat in the tumble dryer.
To keep that perfectly rounded crown:
- Pat Dry: Use a clean, light-coloured towel to pat away excess moisture. Avoid dark towels as the lint can transfer.
- The Stuffing Trick: Stuff the inside of the hat with a small, dry towel or clean, acid-free tissue paper to mimic the shape of a head. This supports the crown as it dries.
- Air Dry: Place it in a well-ventilated area away from direct sunlight (which can bleach the fabric and cause fading) and radiators (which can shrink the material).
How can you prevent sweat stains from returning?
Maintenance is far easier than a deep clean. To keep your hats looking “front-row ready”:
- Hat Liners: You can buy disposable, adhesive “sweat guards” that stick to the inner band. These are a favourite among celebrities who need to keep their headwear fresh under hot studio lights.
- The Post-Wear Wipe: After a warm day or a trip to the races, wipe the inner sweatband with a damp cloth to remove salt before it has a chance to dry and crystallise.
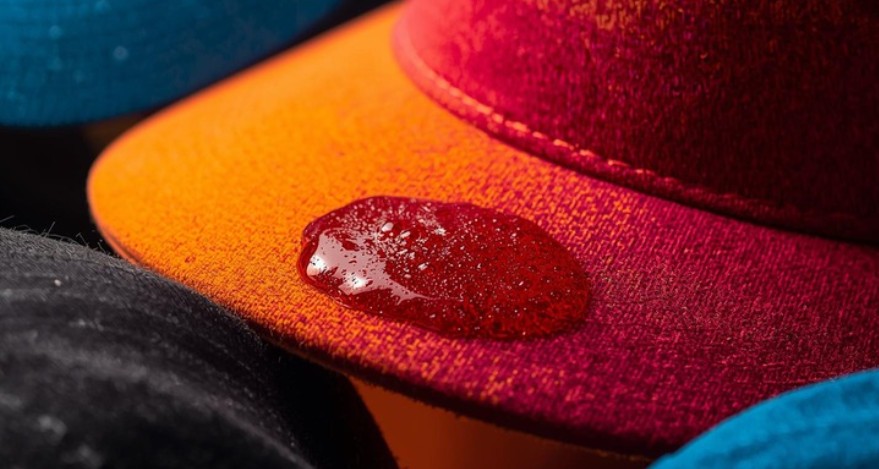
- Fabric Protector: Consider using a high-quality water and stain repellent spray. Ensure it is specifically designed for the material of your hat (e.g., a specific suede protector for suede brims).
Conclusion
Your headwear is a reflection of your personal style and attention to detail. By taking the time to hand-wash and air-dry your hats correctly, you ensure they remain a staple of your wardrobe for years to come.
Remember, the key to a pristine hat is patience—never rush the drying process and always treat the fabric with the respect it deserves. Now, you can step out with confidence, knowing your favourite cap or designer fedora looks as fresh as the day you bought it!
For more fashion care tips and the latest royal style guides, stay tuned to Hello Magazine UK.
FAQ about how to remove sweat stains from hats
1. Can I use Fairy Liquid to clean my hat?
Yes, in a pinch, a mild dish soap like Fairy Liquid is excellent for breaking down the lipids and oils found in sweat. However, ensure it is completely rinsed out; any residue left behind will actually attract more dirt over time.
2. How do I know if my hat has a cardboard brim?
Tapping the brim is the easiest way. If it feels stiff, “hollow,” and sounds like paper when flicked, it is likely cardboard. If it is flexible, dense, and snaps back immediately, it is likely a modern plastic insert.
3. Will the sweat smell go away after cleaning?
The bicarbonate of soda method mentioned above is a natural deodoriser. If a stubborn smell persists, a 50/50 mix of water and unflavoured vodka sprayed on the lining is a professional costume designer trick used in the West End for neutralising odours without damaging fabrics.
Home Diagnostics and Technical Standards Specialist at Hello Mag. She provides high-level Expertise in appliance mechanics and scientific pest management, ensuring every guide follows strict safety protocols and manufacturer standards. As a leading Authority on technical home specs, Kanimozhi audits complex data to provide homeowners with the most accurate, verified, and reliable diagnostic solutions available.
by Kanimozhi BV | Aug 28, 2024 | Roof, DIY Ideas, Exterior
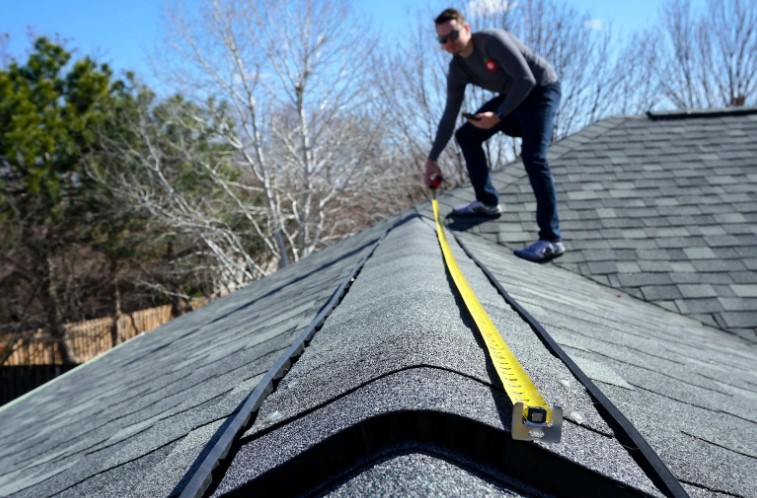
How to measure roof slope from the ground? Here it is. When it comes to home maintenance or planning a DIY project, knowing your roof’s slope is essential. The slope, or pitch, of your roof affects everything from drainage or rain gutters to the type of materials you should use. But what if you need to measure the slope and don’t want to climb up on the roof? Don’t worry—I’ve got you covered. In this guide, I’ll walk you through several safe and effective methods to measure roof slope from the ground.
What is Roof Slope?
Roof slope, also known as roof pitch, refers to the steepness or incline of your roof. It’s typically expressed as a ratio (like 4:12), which represents the rise of the roof for every 12 inches (or a foot) of horizontal distance. For instance, a 4:12 slope means the roof rises 4 inches for every 12 inches it extends horizontally. Understanding your roof’s slope is crucial for proper drainage, material selection, and overall roof health.
Why is Measuring Roof Slope Important?
Accurately measuring your roof slope is more than just a technical detail; it’s vital for ensuring the longevity and functionality of your roof. Here’s why:
- Material Selection: Certain roofing materials are better suited for specific slopes. For example, shingles work best on steeper roofs, while flat roofs may require rubber or asphalt materials.
- Drainage: A well-measured slope ensures proper drainage, preventing water accumulation that can lead to leaks or structural damage.
- Energy Efficiency: The slope can affect insulation and ventilation, which in turn impacts your home’s energy efficiency.
Knowing your roof’s slope helps you make informed decisions, whether you’re installing new gutters, planning a solar panel installation, or simply performing routine maintenance.
Before you start measuring, you’ll need a few basic tools. Don’t worry—you won’t need anything fancy, and some of these items you might already have at home:
- Tape Measure: Essential for measuring distances and heights.
- Level: A standard spirit level works well for ensuring accurate measurements.
- Protractor or Angle Finder: Helps in calculating the angle of the slope.
- Smartphone with a Slope Measurement App: Modern technology offers apps that can assist in measuring slope directly.
- Ladder (Optional): While this guide focuses on ground-based measurement, a ladder may help if you need a closer look at certain angles.
These tools will make it easier to measure your roof slope accurately and safely from the ground.
Step-by-Step Guide to Measuring Roof Slope from the Ground
Now, let’s dive into the process. Here’s how you can measure your roof slope from the ground in just a few steps.
Step 1: Choose Your Measurement Method
First, decide how you want to measure the slope. The most common methods include using a tape measure and level or using a smartphone app designed for measuring angles. Both methods are effective, so choose the one you’re most comfortable with.
Step 2: Measure the Roof Height and Horizontal Distance
To measure the slope, you’ll need to determine two key distances: the vertical rise and the horizontal run.
- Measure the Height: Stand at the edge of the roof and use the tape measure to determine the vertical distance from the roof’s edge down to the ground. Record this measurement.
- Measure the Horizontal Distance: Measure the horizontal distance from the base of the house (directly below the roof edge) out to a point on the ground that aligns with the edge of the roof. This is your run.
Step 3: Calculate the Roof Slope
Now that you have your measurements, it’s time to calculate the slope:
- Slope Ratio: Divide the rise (height) by the run (horizontal distance) to get the slope ratio. Multiply the result by 12 to get the slope ratio (e.g., a 2-foot rise over a 10-foot run would give you a slope of 2.4:12).
- Angle in Degrees: If you prefer to know the slope in degrees, use a calculator to find the arctangent (inverse tangent) of the rise/run ratio. This provides you the angle of the slope.
Step 4: Double-Check Your Measurements
Accuracy is key. Double-check both your rise and run measurements to ensure they’re correct. Even small errors can lead to incorrect slope calculations, so take your time to get it right.

Alternative Methods for Measuring Roof Slope
If the above method doesn’t work for you or if you’re looking for a quicker option, here are a few alternatives:
Using a Smartphone App
There are several smartphone apps available that can measure roof slope by using your phone’s built-in sensors. Simply place your phone along the roofline or against a vertical edge, and the app will calculate the slope for you. This is a convenient and accurate way to get a quick measurement.
Using a Roof Slope Calculator
If you already have some basic measurements, you can use an online roof slope calculator. Input the rise and run, and the calculator will provide you with the slope ratio and angle. This is a handy tool if you’re not confident in manual calculations.
Hiring a Professional
Sometimes, it is good to leave it to the pros. If your roof is particularly high or difficult to measure, hiring a professional to take accurate measurements is a safe and reliable option.
Common Mistakes to Avoid When Measuring Roof Slope
Even with a straightforward task like measuring roof slope, there are a few common pitfalls to watch out for:
Inaccurate Measurements
Taking inaccurate measurements is considered as one of the most common mistakes. This can happen if you don’t use a level correctly or if you measure the rise or run from an incorrect starting point. Always check twice your work to ensure precision.
Ignoring Safety Precautions
Safety should always be your top priority. Avoid standing directly under the roof edge where debris might fall, and be cautious when using tools near the roofline. If you need to use a ladder, ensure it’s stable and placed on a level surface.

Not Considering Roof Overhang
When measuring the horizontal distance (run), make sure to account for any overhangs or extensions of the roof beyond the walls of the house. Ignoring this can lead to incorrect slope calculations.
Conclusion
Measuring your roof slope from the ground might seem tricky at first, but with the right tools and a bit of patience, it’s definitely doable. Whether you’re planning a DIY project, checking your roof’s drainage capabilities, or just curious about your home’s structure, knowing how to measure roof slope from the ground is a valuable skill. Remember to double-check your measurements, consider safety at all times, and use the method that works best for you.
FAQs About Measuring Roof Slope
1. What is the standard roof slope?
Most residential roofs have a slope between 4:12 and 9:12, depending on the design and climate.
2. Can I measure roof slope in rainy or windy conditions?
It’s best to avoid measuring in poor weather conditions, as it can affect both your safety and the accuracy of your measurements.
3. How do I convert roof slope ratio to degrees?
To convert a slope ratio to degrees, you can use the arctangent function on a calculator. For example, a 4:12 slope is approximately 18.4 degrees.
Home Diagnostics and Technical Standards Specialist at Hello Mag. She provides high-level Expertise in appliance mechanics and scientific pest management, ensuring every guide follows strict safety protocols and manufacturer standards. As a leading Authority on technical home specs, Kanimozhi audits complex data to provide homeowners with the most accurate, verified, and reliable diagnostic solutions available.

by Kanimozhi BV | Aug 26, 2024 | DIY Ideas
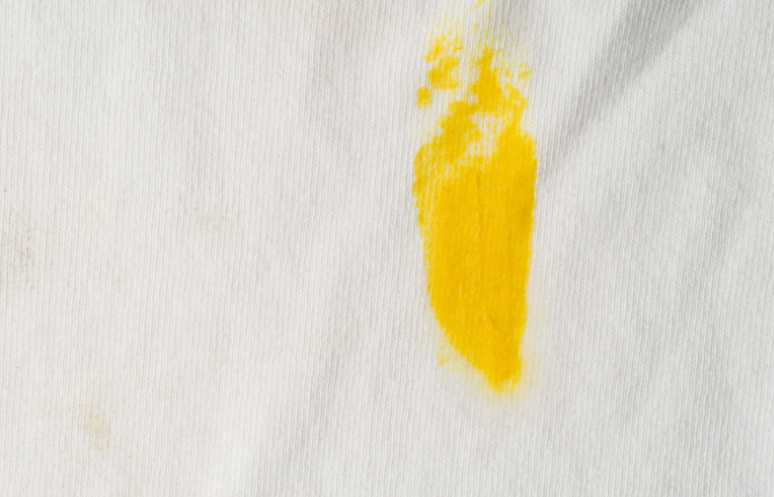
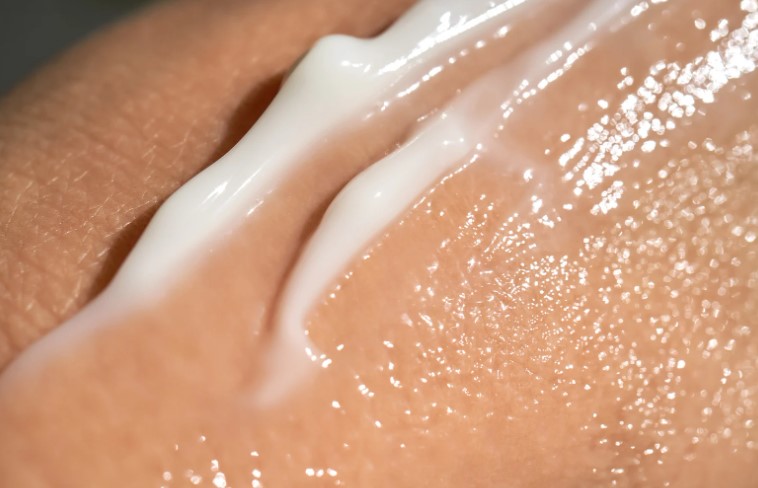
Sunscreen is crucial for protecting our skin from harmful UV rays, but it often leaves behind stubborn yellow stains on white clothes. These stains are tough to remove due to the oily ingredients found in most sunscreens. This guide on how to remove yellow sunscreen stains from white clothes provides practical methods to help you eliminate these unsightly marks and restore your white garments to their original brightness.
Why Does Sunscreen Stain White Clothes?
The yellow stains from sunscreen are mainly caused by the interaction between the oil-based ingredients in the sunscreen and the fabric of your clothes. When these oils come into contact with water or sweat, they can cause a chemical reaction that results in yellow discoloration, especially on white fabrics. To reduce the chances of staining, it’s advisable to let the sunscreen absorb fully into your skin before putting on clothes. Additionally, applying only the necessary amount of sunscreen can help prevent excess product from transferring to your clothing.
Essential Preparations Before Stain Removal
Check the Care Label
Before attempting to remove any stain, it’s necessary to check the care label on your garment. This will guide you on the appropriate cleaning methods and prevent any potential damage to the fabric.
Remove Excess Sunscreen
To start, gently scrape off any excess sunscreen from the fabric using a spoon or a dull knife. This step is crucial to avoid spreading the stain further or pushing it deeper into the fabric.
Conduct a Patch Test
Before fully applying any stain removal method, it’s wise to test it on a small, hidden area of the fabric. This ensures that the method won’t cause additional damage or discoloration.
Step-by-Step Guide on How To Remove Yellow Sunscreen Stains From White Clothes
Method 1: Using Household Soap
Household soap is a simple yet effective solution for tackling sunscreen stains.
Step-by-Step Process:
- Dampen the stained area with warm water.
- Apply a generous amount of household soap directly onto the stain.
- Gently scrub the area with a soft brush or cloth to work the soap into the fabric fibers.
- Allow the soap to sit on the stain for a few minutes before rinsing it off with warm water.
- Wash the garment as usual. If the stain persists, repeat the process until the stain is fully removed.
Method 2: Washing Up Liquid
Washing up liquid, designed to cut through grease, is another effective option for removing sunscreen stains, given that these stains are often oil-based.
How It Works?
- Moisten the stained area with warm water.
- Apply a few drops of washing up liquid directly onto the stain.
- Use your fingers to gently work the liquid into the fabric.
- Let the liquid sit for approximately 15 minutes to break down the oils.
- Rinse thoroughly and wash the garment in your washing machine, following the care instructions.

Method 3: White Vinegar
White vinegar is well-known for its natural cleaning properties, making it an excellent option for removing stubborn sunscreen stains.
Step-by-Step Guide:
- Pour white vinegar directly onto the stained area, ensuring it covers the entire stain.
- Allow the garment to soak in the vinegar for about 30 minutes to break down the oils.
- Wash the garment in the hottest water that is safe for the fabric, as per the care label instructions.
Method 4: Bicarbonate of Soda
Bicarbonate of soda, commonly known as baking soda, is a versatile household item that can effectively lift tough sunscreen stains.
Applying the Bicarbonate of Soda:
- Generously sprinkle bicarbonate of soda over the stain until it is fully covered.
- Let it sit for at least 30 minutes to absorb the oils and break down the stain.
- Rinse the area with warm water to remove the baking soda.
- Wash the garment as you normally would in your laundry cycle.
Method 5: Lemon Juice and Sunlight
Lemon juice, combined with sunlight, acts as a natural bleaching agent that can help remove yellow stains from white fabrics.
Natural Bleaching:
- Apply fresh lemon juice directly to the stain, ensuring it is well saturated.
- Hang the garment in direct sunlight for several hours. The combination of lemon juice and sunlight works to naturally bleach the yellow stain out of the fabric.
- After a few hours, check the stain. If it’s still visible, repeat the process or wash the garment as usual.
Additional Tips for Delicate Fabrics
Delicate fabrics, such as silk or wool, may require a gentler approach to stain removal. For these fabrics:
- Always try to follow the care instructions provided on the garment’s label for better experiences.
- Use a specialized stain remover designed for delicate materials.
- If unsure, consider taking the garment to a professional cleaner to avoid potential damage.
Preventive Measures
Choosing the Right Sunscreen:
- Opt for sunscreens labeled as “stain-resistant” or those containing fewer oils, as these are less likely to cause staining.
Application Tips:
- Apply sunscreen at least 15 minutes before getting dressed, allowing ample time for it to fully absorb into the skin and reduce the risk of staining your clothes.
Common Mistakes to Avoid
Using Hot Water on Fresh Stains:
- Avoid using hot water on fresh sunscreen stains as it can cause the oils to set into the fabric, making the stain more difficult to remove. Start with cold or lukewarm water to treat the stain.
Ignoring Care Labels:
- It is to pay attention to the care labels on your clothes. Using incorrect stain removal methods or washing at the wrong temperature can cause irreversible damage to your garments.
Conclusion
Although yellow sunscreen stains on white clothes can be frustrating, they are not impossible to remove. By acting quickly and using the appropriate methods, you can successfully eliminate these stains and keep your white garments looking fresh and clean. If the stain doesn’t come out on the first try, don’t be discouraged—repeat the process until you achieve the desired result. With patience and persistence, you’ll have your clothes looking as good as new in no time!
Home Diagnostics and Technical Standards Specialist at Hello Mag. She provides high-level Expertise in appliance mechanics and scientific pest management, ensuring every guide follows strict safety protocols and manufacturer standards. As a leading Authority on technical home specs, Kanimozhi audits complex data to provide homeowners with the most accurate, verified, and reliable diagnostic solutions available.
