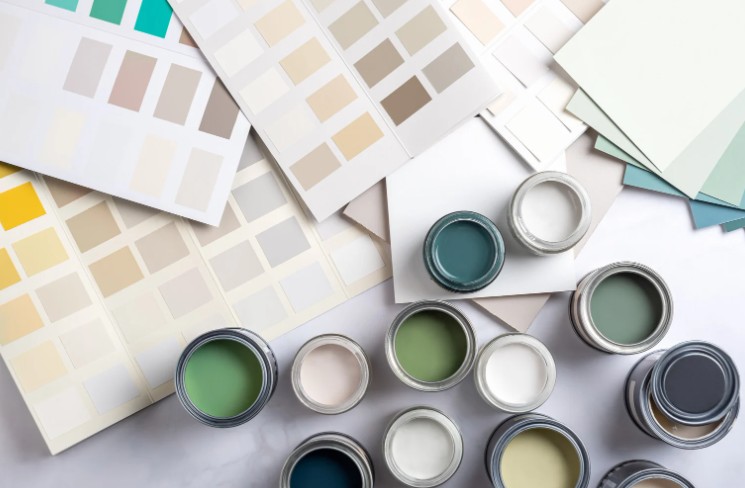
by Kanimozhi BV | Sep 3, 2025 | Interior
Why I Decided to Investigate Silicone Drying Times?
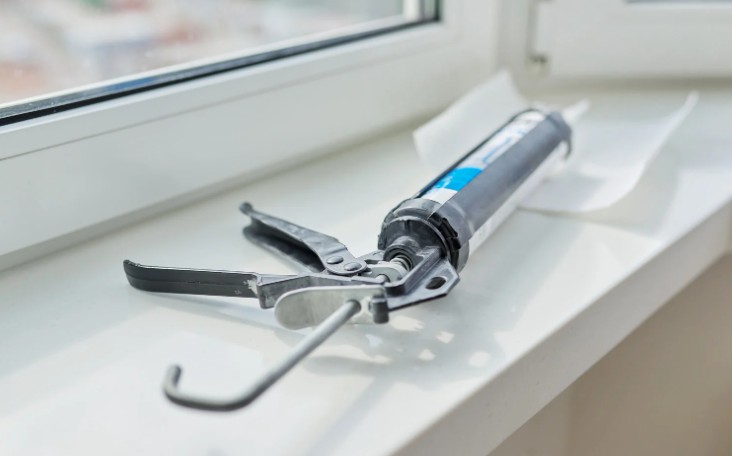
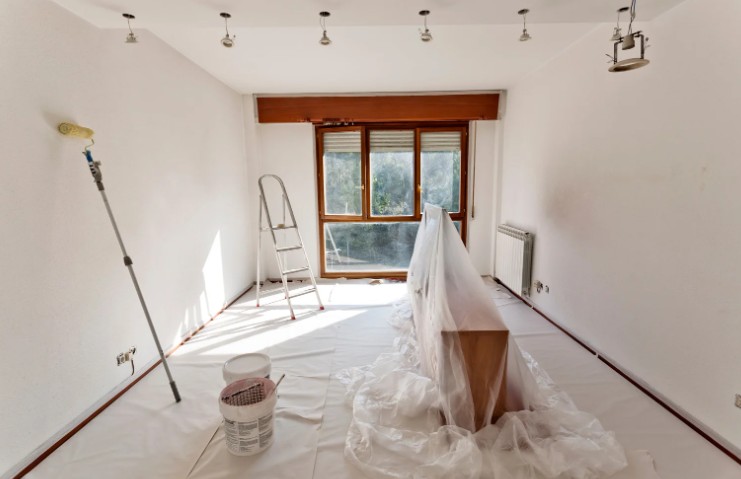
A while back, I sealed the edge of my bathroom shower thinking I’d done a perfect job—until I used it just six hours later.
The next morning, the silicone had bubbled and separated. Turns out, it hadn’t cured properly. That mistake cost me both time and money, and taught me a valuable lesson: curing time matters more than most DIYers realise.
Since then, I’ve paid close attention to drying and curing times, experimented with different sealants, and learned how to make silicone dry effectively—especially in UK conditions.
If you’re wondering how long does silicone take to dry, this guide breaks it all down with real-world experience, facts, and product-specific advice.
So, How Long Does Silicone Take to Dry?
In most cases, silicone sealant becomes surface dry in 30 minutes to 1 hour, but takes 24 to 48 hours to fully cure. This timeline can vary depending on the product formula, environment, and how thickly it’s applied.
From my experience, standard acetoxy-cure silicones (the kind you find at B&Q or Screwfix) dry fastest—usually tack-free in 30 minutes.
Neutral-cure silicones take longer, but are better for delicate surfaces like metal or mirrors. Fast-drying formulas are great in a pinch but may sacrifice some flexibility or long-term durability.
Here’s a product-based overview I use for reference:
What are the Average Drying & Curing Times by Silicone Type?
| Silicone Type |
Touch-Dry Time |
Full Cure Time |
Ideal Use |
| Standard Acetoxy Cure |
20–60 minutes |
24 hours |
Kitchens, bathrooms |
| Neutral Cure Silicone |
30–120 minutes |
36–48 hours |
Mirrors, metals, uPVC |
| Fast-Dry Sealant |
10–30 minutes |
3–6 hours |
Quick fixes, temporary seals |
| Anti-Mould Bathroom Sealant |
30–60 minutes |
24–36 hours |
Wet areas like showers and baths |
Even if the surface feels dry to touch, don’t expose it to water or pressure until it’s fully cured.
Get to know about the removal of black mould from silicon sealant here.
What Factors Affect Silicone Drying Time?
When it comes to drying time, product instructions only tell part of the story.
In the real world, several environmental and technical factors influence how quickly silicone sets—especially in the UK, where indoor conditions vary wildly between seasons.
How Room Temperature Affect Silicone Drying Time?
Silicone cures fastest in warm environments—ideally between 20°C and 25°C. In cooler rooms (under 10°C), the chemical curing process slows down considerably.
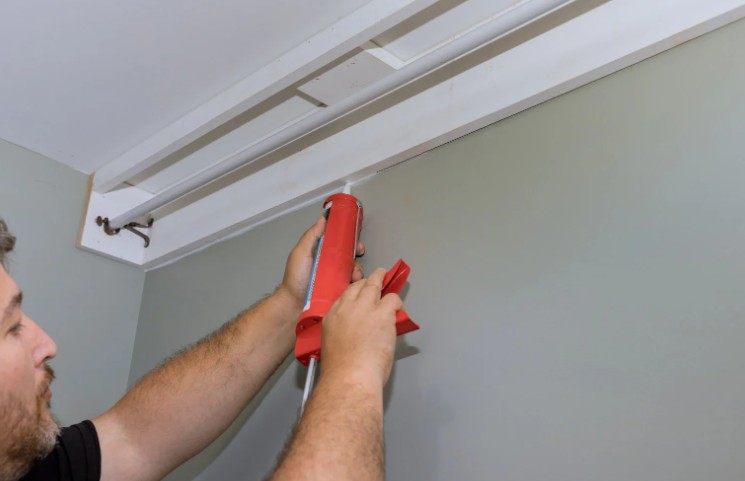
I once sealed a window in January, and it took nearly 48 hours to fully harden.
How Humidity Levels Affect Silicone Drying Time?
Contrary to what many think, higher humidity can speed up curing. Silicone reacts with moisture in the air during the curing process.
So, on warm and humid days, you might notice it setting faster. However, if it’s excessively humid and cold (like a poorly ventilated winter bathroom), curing may stall.
How Ventilation Affect Silicone Drying Time?
Ventilation ensures fresh air circulates around the sealant, aiding solvent evaporation and speeding up curing.
I learned this the hard way when sealing behind a washing machine in a poorly ventilated room—it stayed tacky overnight. Adding a fan or opening windows now makes a big difference in my setup.
How Thickness of the Application Silicone Drying Time?
More isn’t always better. If you lay the silicone too thick, especially in deep joints or large gaps, the surface may dry while the inside stays uncured for days.
These thick applications also trap moisture, slowing down internal curing. I now use just enough to form a smooth, even bead, and it cures much more reliably.
How Surface Material Silicone Drying Time?
Silicone bonds better and cures faster on smooth, non-porous surfaces like glass, ceramic tiles, and enamel.
On absorbent materials like raw wood or natural stone, it takes longer to set due to moisture interaction and adhesive resistance.
How Do I Know When Silicone Is Fully Cured?
One of the most misleading things is when the silicone feels dry after 30–60 minutes—it’s not ready yet. Curing is a deeper chemical process, and a “skin” on top doesn’t mean the inside has set.
A fully cured bead of silicone:
- No longer smells strongly (acetoxy types have a vinegar-like odour until cured)
- Feels firm to the touch, not squishy
- Doesn’t dent when pressed
In wet areas like showers or baths, I now wait a full 24 hours minimum, regardless of what the packaging says. For neutral cure products or cold conditions, I give it 48 hours to be safe.
Quick Comparison Table – Drying Time by Silicone Type
| Silicone Type |
Touch-Dry |
Fully Cured |
Common Use |
| Acetoxy Cure |
30 minutes |
24 hours |
Bathrooms, kitchens |
| Neutral Cure |
1–2 hours |
48 hours |
Glass, mirrors, metals |
| Quick-Dry |
15–30 minutes |
3–6 hours |
Emergency repairs |
| Anti-Mould |
45 minutes |
24–36 hours |
Showers, wet corners |
Does Silicone Dry Faster in Heat or with a Hairdryer?
Many people ask whether they can speed up silicone drying using heat, and I’ve tested this myself.
Silicone does dry faster in a warm room, especially with good airflow. However, using a hairdryer or fan heater directly on the sealant isn’t a good idea.
Once, I used a hairdryer to “speed up” the process, and while the top layer skinned over quickly, the inner layer didn’t cure—leading to cracking days later.
Instead, I suggest sealing in the evening, allowing it to cure undisturbed overnight in a warm, ventilated room.
For quicker results, use a fast-cure product, but even then, always check that the full curing time is complete before using the sealed area.
What are the Common Mistakes That Delay Silicone Drying?
Here are the most common missteps that I’ve seen—and made myself—that can cause long drying times or failed seals:
- Applying too much silicone – Thick beads don’t cure evenly, especially inside.
- Sealing in cold or damp conditions – Below 10°C or in high-humidity rooms, drying slows significantly.
- Skipping surface prep – Dust, grease, soap, or old sealant prevents proper adhesion.
- Poor ventilation – Airflow is essential for curing. Without it, solvents can’t evaporate efficiently.
- Using expired sealant – Always check the date. Old product won’t cure properly and may separate.
What are My Personal Tips for Getting the Best Sealant Finish?
I’ve sealed everything from kitchen sinks to shower trays, and a few techniques have helped me get reliable results every time.
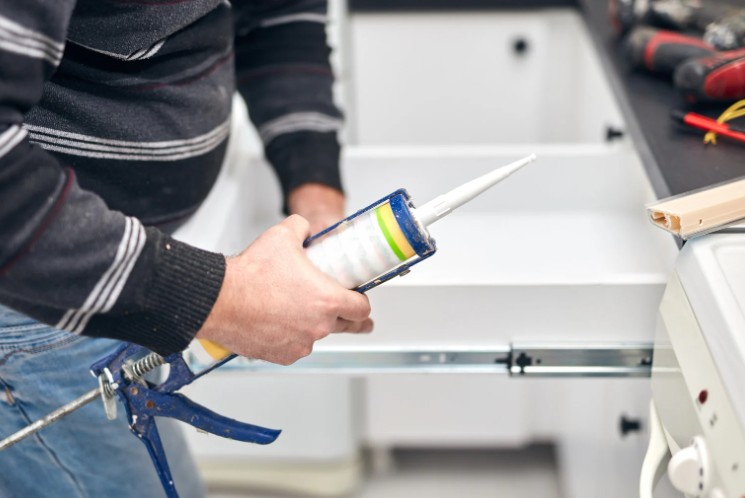
First, I always clean surfaces thoroughly with methylated spirit or isopropyl alcohol. This ensures there’s no grease, dust, or old residue that could interfere with bonding.
Then I apply masking tape along the joint edges for a cleaner finish and use a smoothing tool—or my finger dipped in washing-up liquid—to smooth the line.
From all the brands I’ve tested, here are some that consistently deliver in UK conditions:
Table: Best UK Silicone Sealants I’ve Used
| Brand |
Product |
Dry Time |
Notes |
| UniBond |
Anti-Mould Sealant |
24 hrs |
Excellent for bathrooms |
| Everbuild |
Everflex 500 |
24–36 hrs |
Great for general purpose |
| No Nonsense |
Quick-Dry General Purpose Silicone |
3–6 hrs |
Fastest drying for light work |
| Dow Corning |
785+ Sanitary Silicone |
24 hrs |
Reliable and durable in wet areas |
Conclusion – Be Patient and Let the Silicone Work
So, how long does silicone take to dry? While it may feel dry to the touch in under an hour, most silicones need 24 to 48 hours to fully cure—especially in colder or poorly ventilated UK homes.
My advice, after years of trial and error, is simple: don’t rush it. Follow the curing time on the label, consider your room conditions, and let the silicone cure fully before exposing it to water or stress.
Patience pays off with a strong, long-lasting seal—and fewer redos.
Related Article: How Long Does Caulk Take to Dry?

by Kanimozhi BV | Aug 23, 2025 | Garden, Exterior
When I first asked myself, “Can you grow ginger in the UK?” I assumed the answer would be no. After all, ginger is a tropical plant – the kind you’d expect to find thriving in humid climates, not in our cool and rainy British weather.
But here’s the good news: yes, you absolutely can grow ginger in the UK, even indoors. In fact, with a bit of care and patience, growing your own ginger at home can be surprisingly easy—and incredibly rewarding.
In this guide, I’ll walk you through how to grow ginger UK successfully, even if you’re planting in your kitchen or greenhouse.
Why Grow Ginger in the UK?
Can You Really Grow Ginger in the UK Climate?
Yes, you can. Although ginger (Zingiber officinale) is native to warm, tropical regions, it can adapt to indoor or sheltered environments in the UK.
The key is to simulate the warm, humid conditions it loves—either in a pot, a greenhouse, or a sunny windowsill.
Why I Decided to Try Growing Ginger at Home?
After years of buying ginger from the supermarket, I wanted to try something new. I love the idea of home-grown produce, and ginger was a fun challenge. Plus, it’s:
- Low-maintenance
- Grows well in containers
- Perfect for a small kitchen garden
- A unique plant with beautiful, tropical-looking foliage
What Are the Benefits of Home-Grown Ginger?
Growing your own ginger means:
- Fresh, organic roots whenever you need them
- You avoid plastic packaging and imports
- You can replant and propagate new rhizomes each year
- Ginger leaves are edible and can be included in tea or stir-fries!

Understanding Ginger Before You Plant
What Is a Ginger Rhizome?
Ginger is grown from its underground stem – the rhizome. That’s the knobby piece of root you buy in supermarkets.
With the right conditions, this root will sprout, develop shoots and leaves, and eventually grow into a full ginger plant.
What Conditions Does Ginger Need to Grow?
Ginger loves:
- Warmth (20–30°C ideally)
- Indirect sunlight
- Moist, well-drained soil
- High humidity
Since UK gardens don’t always provide these conditions, indoor growing or greenhouses are ideal.
Is Ginger a Tropical Plant? – and Can It Adapt to the UK?
Yes, ginger is tropical—but you can mimic its native environment at home. In fact, ginger thrives indoors as long as you give it warmth, moisture, and space to grow.
How to Grow Ginger UK? – Step-by-Step Guide
Here’s exactly how I planted ginger successfully in my UK home.
Step 1 – Choosing and Preparing Your Ginger Root
You can start with shop-bought ginger, as long as it’s:
- Firm
- Plump
- Has visible “eyes” or buds
Tip: Dip the ginger root in warm water overnight to get rid of any growth inhibitors.
Step 2 – When Is the Best Time to Plant Ginger in the UK?
I start planting in early spring (March or April). This gives the plant plenty of time to grow before autumn. Ginger needs upto 8 to 10 months to mature.

Step 3 – Selecting the Right Pot or Container
Choose a wide, shallow pot—not deep—because ginger grows horizontally.
🪴 Ideal container features:
- Minimum 30cm wide
- Good drainage holes
- A tray to catch water
Step 4 – The Perfect Soil Mix for Ginger
Use a rich, well-draining compost with added organic matter.
My DIY Ginger Potting Mix:
| Ingredient |
Ratio |
| Multi-purpose compost |
2 parts |
| Perlite or sand |
1 part |
| Aged manure or compost |
1 part |
Step 5 – Watering and Sunlight Needs
Ginger needs to stay moist but not soggy.
- Water if the top inch of soil looks dry
- Place it in a warm, bright spot (but avoid direct midday sun)
- Mist occasionally to boost humidity
Indoor vs Outdoor Planting in the UK
Can I Grow Ginger Outside in the UK?
Yes, but only during the warmest months (late May to August). The UK’s outdoor climate is often too cold or unpredictable for ginger to thrive. You’ll need to bring it indoors before the temperature drops below 10°C.
Should I Use a Greenhouse or Grow Indoors?
I had the best results indoors, but if you have a greenhouse, you’ll get faster growth and larger rhizomes. Greenhouses help maintain consistent warmth and humidity.
What Are the Advantages of Growing Ginger Indoors?
- Full control of light and temperature
- No risk of frost damage
- Easy to monitor and water
- Beautiful foliage adds greenery to your home
Caring for Your Ginger Plant
How to Encourage Strong Rhizome Growth?
- Feed monthly with a balanced liquid fertiliser
- Don’t harvest too early—wait at least 8 months
- Avoid overwatering, especially in cooler months
What Pests or Problems Should I Watch For?
- Fungus gnats (use sticky traps)
- Root rot (from overwatering)
- Leaf yellowing (may indicate poor drainage or low humidity)
How Do I Know If My Ginger Is Healthy?
A healthy ginger plant will have:
- Bright green, upright leaves
- Steady growth
- No foul smell from soil (sign of rot)

Harvesting and Using Your Home-Grown Ginger
When and How Do I Harvest Ginger in the UK?
Start checking around 8–10 months after planting.
- Gently dig around the base
- Snap off what you need
- Leave part of the rhizome to continue growing
How to Store and Replant Ginger for Future Harvests?
- Store harvested ginger in a cool, dry place
- Save a few sprouted pieces for next season
- You can replant them in early spring again

Fun Ways to Use Your Fresh Ginger at Home
- Brew ginger tea with fresh slices
- Add to stir-fries, soups, and smoothies
- Use grated ginger for anti-inflammatory tonics
Conclusion – Yes, You Can Grow Ginger in the UK!
Growing ginger in the UK might seem unusual at first, but once I gave it a try, I was amazed at how simple it really was.
With the right pot, the right spot, and just a bit of patience, you can grow ginger in the UK just like I did—and enjoy fresh, fragrant rhizomes from your very own home.
So go on—get your hands on some ginger root and give it a go! 🌱
✅ Quick Ginger Growing Checklist
- Choose organic ginger with visible buds
- Plant in early spring in wide pots
- Use rich, free-draining soil
- Keep warm and moist
- Harvest after 8+ months
Related Article: How and When to Prune Hebe? A Step-by-Step Guide for Beginners
Common Questions On How to Grow Ginger UK
1. Can I Grow Ginger from Shop-Bought Root?
Yes! Just make sure it’s organic or untreated. Many grocery store roots are sprayed with chemicals to prevent sprouting.
2. Will Ginger Survive Winter in the UK?
Not outdoors. Ginger is not frost-hardy. You must bring it inside or keep it in a greenhouse over winter.
3. Do I Need Artificial Heat or Grow Lights?
Only if your home is particularly cold or dark. A sunny windowsill or heated conservatory works just fine in most UK homes.

by Kanimozhi BV | Aug 22, 2025 | Interior Painting, Exterior Painting, Interior
If you’re planning a home makeover, one of the most common questions you’ll ask is: “1 litre of paint covers how many square meter?”
It’s a smart question—and the right answer can help you save time, money, and wasted materials. In this guide, you’ll discover how to calculate paint coverage properly, what affects it, and how much you’ll really need for your UK home or room.
How Much Area Does 1 Litre of Paint Cover? – The Basics
On average, 1 litre of paint covers between 10 and 16 square metres, depending on the paint type, surface condition, and number of coats needed.
This range is printed on most paint tins in the UK and is a good starting point. However, you’ll need to consider other factors to make a more accurate estimate.
What’s the Average Paint Coverage Per Litre?
Here are rough averages for commonly used paints:
- Matt emulsion: 13–16 m² per litre
- Silk/satin emulsion: 12–15 m² per litre
- Gloss paint: 10–12 m² per litre
- Exterior masonry paint: 6–10 m² per litre
Remember, these are single-coat estimates on smooth, sealed surfaces.
What Factors Affect Paint Coverage?
Surface Texture and Porosity
Rough or porous surfaces (like bare plaster or textured walls) will absorb more paint, reducing coverage per litre significantly.
Type of Paint Used
Some paints are thicker or more pigmented than others. For example:
- Emulsions cover more area than gloss
- Oil-based paints may require thinner coats
- Specialist paints (e.g. stain blockers) tend to have lower coverage
Number of Coats Required
A new or patchy wall often needs two coats. Some surfaces may also need a primer or undercoat, which affects how much paint you’ll need.
Paint Coverage for Different Types of Surfaces
Here’s a quick reference for different wall and ceiling conditions in UK homes:
| Surface Type |
Average Coverage (1 Litre) |
| Smooth, sealed wall |
12–16 m² |
| Textured/Artex surface |
6–10 m² |
| New plaster (unprimed) |
5–8 m² |
| Ceiling (standard finish) |
10–14 m² |
Always check the tin—paint manufacturers often specify the exact spreading rate.

How Many Square Metres Will You Paint?
Before heading to the shop, you need to calculate the size of your painting area:
Steps to Measure Your Space
- Step 1: Just make a measurement of height × width for each wall in metres
- Step 2: Add all wall areas together
- Step 3: Subtract the area of windows & doors
- Step 4: Decide how many coats you’ll apply
Tip: Always round up slightly to allow for touch-ups or surface imperfections.
Do You Need One Coat or Two?
In most decorating projects, two coats are recommended, especially for:
- Brand-new plaster
- Colour changes (light to dark or vice versa)
- Patchy or uneven surfaces
Paint tins usually list their per-litre coverage for one coat, so remember to double the amount for two coats.
How Much Paint Do You Need Per Room? – UK Examples
Here’s a practical table to help estimate how much paint you’ll need for typical UK room sizes.
| Room Type |
Approx. Wall Area (m²) |
Paint Needed (1 Coat) |
| Small Bedroom (3x3m) |
25–30 m² |
2–3 Litres |
| Medium Living Room |
40–45 m² |
3.5–4.5 Litres |
| Large Kitchen |
50–60 m² |
4.5–6 Litres |
Planning two coats? Just double the litre estimate above.
Common Mistakes That Lead to Underestimating Paint
Avoid these costly errors when calculating your paint needs:
- Not accounting for ceilings or second coats
- Forgetting to subtract windows or large doorways
- Overlooking how porous your walls are (e.g. fresh plaster)
- Switching between different types of paint (some cover more/less)
Conclusion – Estimate Smarter and Paint Better
So, how many square metres does 1 litre of paint cover? That depends on:
- The type of paint
- The surface you’re painting
- Whether you’re applying one coat or two
But on average, you can expect 10–16 square metres per litre on smooth walls. Take time to measure your space, account for multiple coats, and choose your paint wisely.
Doing so ensures you’ll avoid extra trips to the DIY store, stay within budget, and enjoy a high-quality finish that lasts.
FAQs On 1 Litre of Paint Covers How Many Square Meter
1. How do I know if I have enough paint?
Use the coverage per litre listed on the tin, multiply by litres, also collate to your total m². Always round up.
2. Do all paints have the same coverage?
No—paint coverage varies by type, brand, and surface condition. Always read the manufacturer’s label.
3. Is it better to buy too much or too little paint?
It’s better to buy slightly more. Leftover paint can be used for touch-ups or future repairs. Paint batches may also differ in tone.
4. Can I mix different paint types to extend coverage?
No—it can cause inconsistent colour, texture, and drying issues. Always stick to the same paint type and brand.
by Kanimozhi BV | Aug 22, 2025 | Home & Living, Exterior Painting, Interior Painting
When you’re in the middle of a decorating job or a DIY project, knowing how long caulk takes to dry can be the difference between a smooth, professional finish and a messy disaster.
Whether you’re sealing gaps or preparing surfaces for paint, understanding the drying and curing times for different types of caulk is essential.
In this guide on how long does caulk take to dry, you’ll learn everything you need to know about caulk drying time, including what affects it, how long you should wait before painting, and smart tips to speed things up—perfect for both decorators and DIYers in the UK.
Understanding Caulk Drying Time – What You Need to Know?
Not all caulks are created equal. Some dry in under an hour, while others may need a full day—or more—to fully cure.
And if you’re using decorators caulk, the drying time may be shorter, but you still need to follow best practices for lasting results.
What Affects How Long Caulk Takes to Dry?
Several environmental and material factors can influence how long caulk takes to dry.
Temperature and Humidity
- Warm temperatures generally help caulk dry faster.
- High humidity can extend the drying process, mainly for water-based caulks.
Ventilation and Airflow
- Poor airflow can trap moisture, delaying drying.
- Using fans or opening windows can significantly reduce drying time indoors.
Surface Material and Porosity
- Porous surfaces like wood/drywall may soak up moisture from the caulk, supporting it dry faster.
- Smooth, non-porous surfaces (like tiles) can extend drying times.

What’s the Difference Between Drying and Curing?
It’s easy to confuse the two, but drying and curing aren’t the same:
| Term |
What It Means |
Why It Matters |
| Drying |
When the caulk feels dry to the touch |
You can touch or paint over it (if allowed) |
| Curing |
When the caulk has completely set chemically |
It’s fully sealed, waterproof, and durable |
Even if caulk is dry, it might not be cured—so always check the product label.
How Long Does Each Type of Caulk Take to Dry?
Different caulks have different drying and curing times. Here’s what you need to know:
How Long Does Decorators Caulk Take to Dry?
Decorators caulk—usually acrylic or latex-based—is specially designed for interior use and is paintable.
- Touch dry: 1 to 2 hours
- Fully cured: 12 to 24 hours
You’ll often see “paintable in 1 hour” on the tube, but always follow the manufacturer’s advice for best results.
Silicone Caulk Drying Time
Silicone caulks are more flexible and waterproof, ideal for bathrooms and kitchens.
- Touch dry: 30 minutes to 1 hour
- Cured: 24 to 48 hours
Not suitable for painting.
Acrylic Latex Caulk Drying Time
Common in general decorating tasks.
- Touch dry: 30 minutes to 2 hours
- Cured: 12 to 24 hours
- Paintable: Often within 1–2 hours
Quick-Dry and Paintable Caulk Options
Some brands offer fast-drying formulas designed for express jobs.
- Touch dry: 15 to 30 minutes
- Cured: 6 to 12 hours
- Paintable: In as little as 30 minutes
| Type of Caulk |
Touch Dry Time |
Fully Cured Time |
Paintable? |
| Decorators Caulk |
1 – 2 hrs |
12 – 24 hrs |
Yes |
| Silicone |
30 min – 1 hr |
24 – 48 hrs |
No |
| Acrylic Latex |
30 min – 2 hrs |
12 – 24 hrs |
Yes |
| Quick-Dry Varieties |
15 – 30 min |
6 – 12 hrs |
Yes |
Can You Speed Up Caulk Drying Time?
Yes, there are several ways to reduce drying time—handy when you’re on a tight schedule:
- Increase room temperature (use a space heater)
- Improve ventilation with fans or open windows
- Use a dehumidifier in damp spaces
- Apply thin, even beads of caulk
- Choose fast-drying or quick-set caulks
Just be careful—speeding things up too much can cause cracking or improper adhesion.

How Long Does Caulk Take to Dry Before Painting?
If you’re wondering how long does caulk take to dry before painting, the answer depends on the type of caulk you’re using.
- Decorators caulk: Often paintable in 1 to 2 hours
- Acrylic latex caulk: Typically paintable in 2 to 4 hours
- Silicone caulk: Not paintable
📌 Pro Tip: Even if the label says “paintable in 1 hour”, wait longer if you’ve applied thick layers or are working in a cool or damp space.
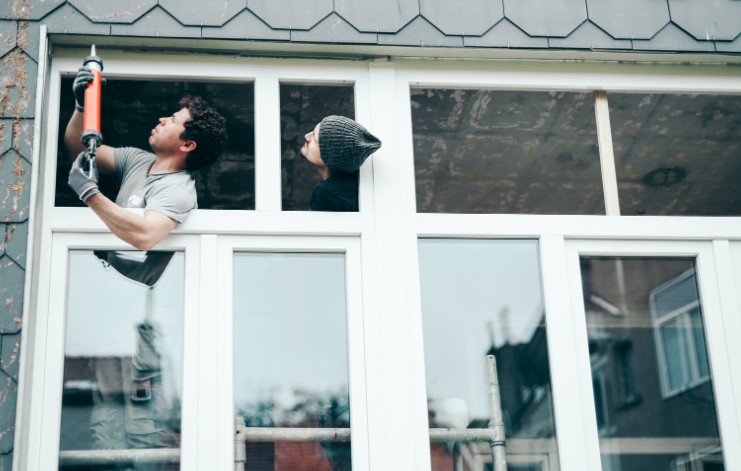
Does Interior or Exterior Application Affect Drying?
Yes — interior as well as exterior conditions make a huge difference.
- Interior caulking usually dries faster due to controlled environments.
- Exterior caulking is affected by rain, wind, and humidity.
- Always check the forecast before applying caulk outdoors.
External caulking drying time may take 24 to 48 hours depending on conditions.
What are the Common Mistakes That Delay Drying Time?
Avoid these issues if you want your caulk to dry on time:
- Applying too thick a bead
- Painting too early
- Using silicone where paint is needed
- Working in cold, damp rooms
- Poor ventilation

Conclusion – Plan Your Project with Drying Time in Mind
Knowing how long does caulk take to dry can save you from peeling paint, poor adhesion, or wasted effort. Whether you’re using decorators caulk for a smooth interior finish or sealing up a bathroom with silicone, always:
- Check the type of caulk
- Follow the manufacturer’s drying time
- Adjust for temperature and humidity
- And wait before painting, even if you’re in a rush!
With the right approach, you’ll get a clean, professional-looking result that lasts.
FAQs On How Long Does Caulk Take to Dry
1. Can caulk dry overnight?
Yes, many caulks will be dry or close to dry by the next morning—but check for full curing.
2. Does rain affect caulking outdoors?
Absolutely. Moisture can wash away uncured caulk—always wait for a dry window.
3. Will a fan or heater help caulk dry faster?
Yes! Proper airflow and warmth will reduce drying time.
4. When can you paint over decorators caulk?
Usually after 1 to 2 hours, but it’s safest to wait at least 4 hours for thick beads or in cool rooms.
by Kanimozhi BV | Aug 20, 2025 | Water Heater, Appliances
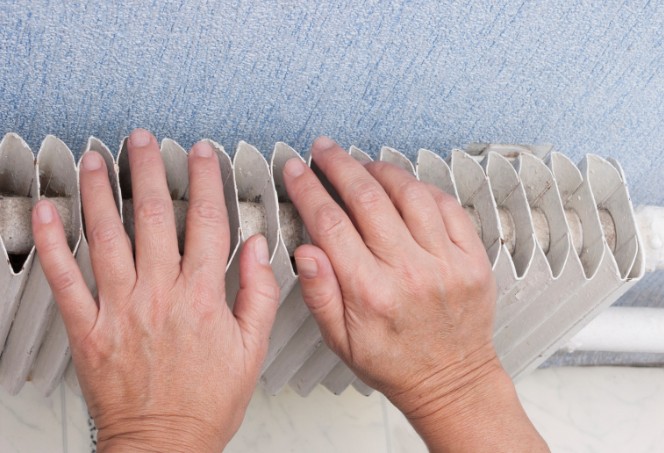
Keeping your home warm and cosy during the chilly UK months often comes down to a properly working radiator system.
But when your radiator isn’t heating up as it should, you might consider bleeding it. One common question many people ask is: what happens if you bleed a radiator with the heating on? Let’s explore the answer, why it matters, and how to do it the right way.
What Happens If You Bleed a Radiator with the Heating On?
Bleeding a radiator when the heating is still on can lead to more trouble than you might expect.
Will it damage your radiator or boiler?
Yes, potentially. When the heating is on, the system is full of hot water under pressure. Opening the valve during this time can let out scalding water, which is dangerous for you and can also reduce the system’s pressure too quickly, affecting your boiler performance.
Is it dangerous to bleed a hot radiator?
Absolutely. The hot water can escape forcefully, increasing the risk of burns or property damage. It’s best to let the radiator and system cool before attempting to bleed it.
Can air get back into the system?
Bleeding with the heating on can sometimes release air unevenly or force more air into the system, reducing the efficiency of the bleed.
Why Do Radiators Need Bleeding in the First Place?

How air gets trapped in your radiator?
Over time, small amounts of air enter the central heating system. This air rises to the top of your radiators, creating cold spots where hot water can’t circulate effectively.
Signs your radiator isn’t working efficiently
You might notice:
- The top of the radiator feels cold, while the bottom is hot
- It takes longer than usual to heat a room
- Gurgling or bubbling noises from the radiator
These are clear signs of trapped air, and bleeding is the fix.
What happens if you don’t bleed it?
If left unresolved, trapped air reduces heating efficiency, increases energy bills, and puts more strain on your boiler system over time.
How to Bleed a Radiator Safely? – A Step-by-Step
- Radiator key (or a flathead screwdriver for some models)
- A cloth or small bowl (to catch any drips)
- Gloves (to protect your hands)
The correct order for bleeding radiators:
- Switch off your heating system & let it cool down fully.
- Start with the downstairs radiators, moving upstairs last.
- Use your radiator key to slowly turn the bleed valve anti-clockwise.
- Listen for a hissing sound (that’s the air escaping).
- When water begins to flow, tighten the valve again.
When to turn your heating system off?
Always before bleeding. This prevents hot water burns, ensures accurate air release, and protects your boiler pressure.

What Are the Risks of Bleeding a Radiator While the Heating Is On?
If you’ve ever wondered whether it’s really that bad to bleed your radiator with the heating on, here’s what could go wrong:
Risk of hot water burns
Hot water is under pressure in a live system. When you open the valve, it can spray out at high speed and temperature — a serious burn hazard.
Sudden pressure drops in your boiler
Bleeding while heating is on may cause an unexpected pressure drop, which can lead to:
- The boiler shutting down
- A fault code appearing
- The need to manually repressurise the boiler
Inaccurate air release or inefficiency
You won’t effectively remove all the air from the system if it’s circulating hot water. Incomplete bleeding can lead to recurring heating issues.
What Should You Do After Bleeding a Radiator?
Once you’re done, there are a few important steps to wrap things up.
How to check your boiler pressure?
Look at the pressure gauge on your boiler. Most systems should sit between 1.0 and 1.5 bar when cold.
How to repressurise a boiler if needed?
If pressure drops too low:
- Locate your boiler’s filling loop
- Slowly open the valves to let in water
- Watch the gauge until it returns to a safe range
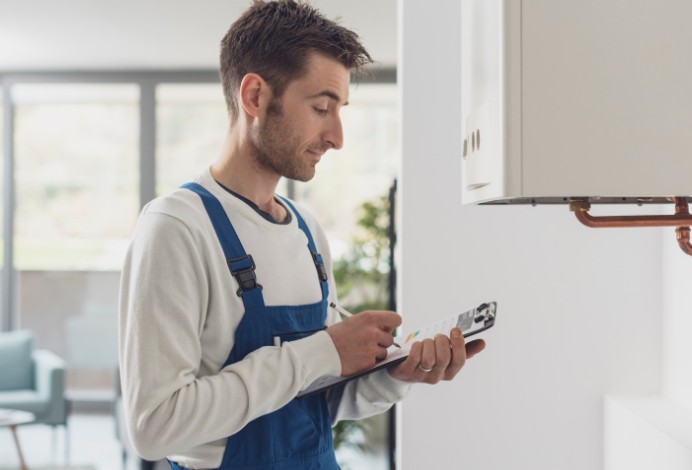
Table: Ideal Boiler Pressure Levels
| System Status |
Ideal Pressure (bar) |
What to Do |
| Cold System |
1.0 – 1.5 |
Normal |
| Hot System |
1.5 – 2.0 |
Normal |
| Below 1.0 |
Too Low |
Repressurise |
| Above 2.5 |
Too High |
Release pressure or call a professional |
How Often Should You Bleed Your Radiators in the UK?
Seasonal tips for radiator maintenance
It’s a good idea to check your radiators:
- At the start of the heating season (autumn)
- After any work on your heating system
- If you notice uneven heating
When bleeding might not be enough
If bleeding doesn’t help, the issue could be with:
- Sludge buildup inside the radiator
- A failing radiator valve
- Boiler pressure problems
Quick Radiator Health Checklist
- Radiator heats evenly from top to bottom
- No gurgling or hissing sounds
- Boiler pressure between 1.0 – 2.0 bar
- No leaks around bleed valve
- Heating system runs efficiently
Common Mistakes When Bleeding Radiators & How to Avoid Them
Bleeding with heating still on
This is the most common mistake — and the most dangerous.
Forgetting to check boiler pressure
After bleeding, always check and top up pressure if needed.
Not closing the valve properly
Leaving the valve slightly open can cause leaks and air re-entry.

Conclusion: Don’t Bleed a Radiator with the Heating On – Here’s Why
To keep your heating system running smoothly, never bleed a radiator with the heating on. It’s unsafe, ineffective, and could cause damage. Always wait for the system to cool, follow a step-by-step approach, and monitor your boiler pressure afterward.
By maintaining your radiators properly and knowing what happens if you bleed a radiator with the heating on?, you’ll enjoy:
- Better heating efficiency
- Lower energy bills
- A safer home environment
So next time your radiator is acting up, you’ll know exactly what to do — and what not to do.
Related Article: Electric Boiler Cost Per Month: How Much Is It for Running?
Frequently Asked Questions About Bleeding Radiators
1. Should you bleed upstairs or downstairs radiators first?
Always start downstairs and work your way up to ensure proper air release.
2. Can all radiator types be bled?
Most UK radiators can be bled, but some modern or sealed units may require a different approach.
3. Do newer systems still require bleeding?
Yes, even modern central heating systems can trap air and need periodic bleeding.
