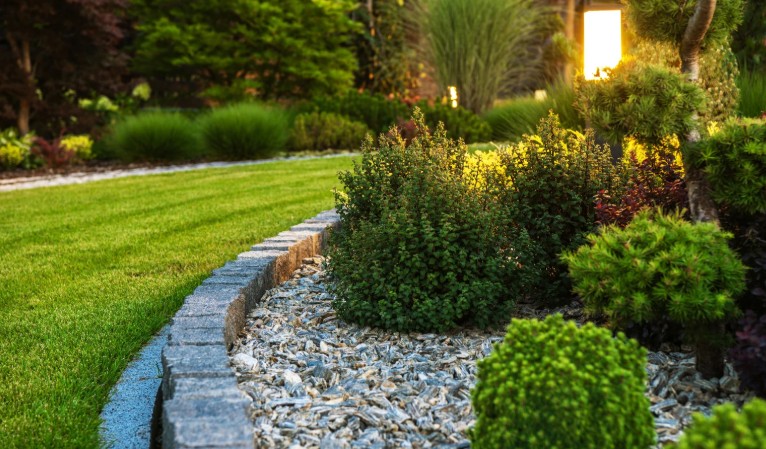
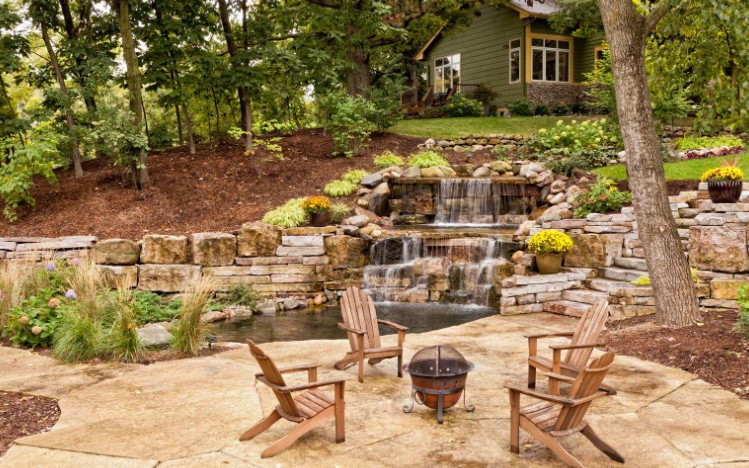
by Kanimozhi BV | Aug 8, 2025 | Garden, Exterior
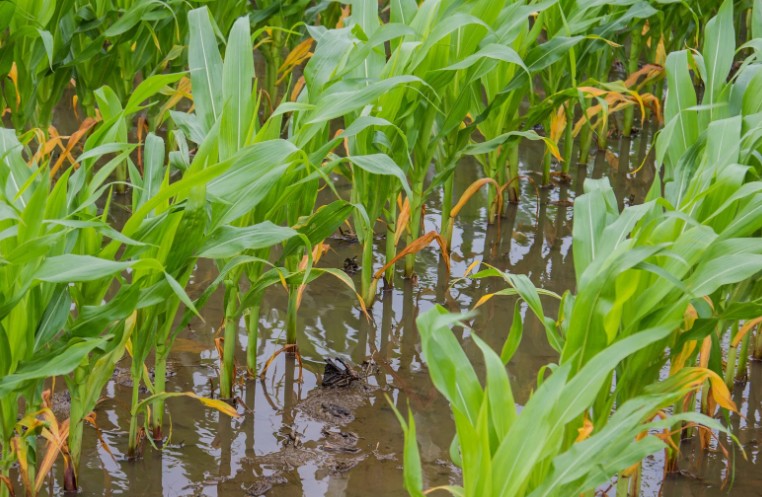
Nothing’s more frustrating than watching your lush green lawn turn into a soggy, unusable swamp after a heavy rainfall.
I’ve dealt with it myself, and I know the damage it can do—not just to your lawn, but to your plants, pathways, and even your home’s foundation.
That’s why I’ve put together this complete guide on how to drain a waterlogged lawn, specifically tailored for UK homeowners.
Whether you’re dealing with clay soil or compacted turf, I’ll walk you through the best methods to fix and prevent lawn drainage problems.
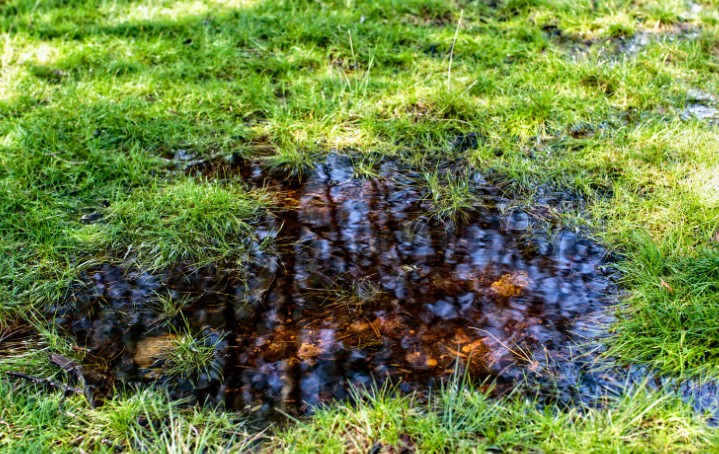
How Do I Know If My Lawn Is Waterlogged?
Common signs of a soggy lawn
- Pools of standing water
- Mud squelching underfoot
- Yellowing or dying grass
- Moss buildup
How to test for compacted or clay soil?
Grab a garden fork and attempt to penetrate the soil. If it feels tough, sticky, or dense, you’re probably dealing with compacted clay soil that doesn’t drain well.
What damage can excess water do to your lawn?
Excess moisture can suffocate roots, invite disease, and ruin grass. It also encourages weeds and moss to take over.
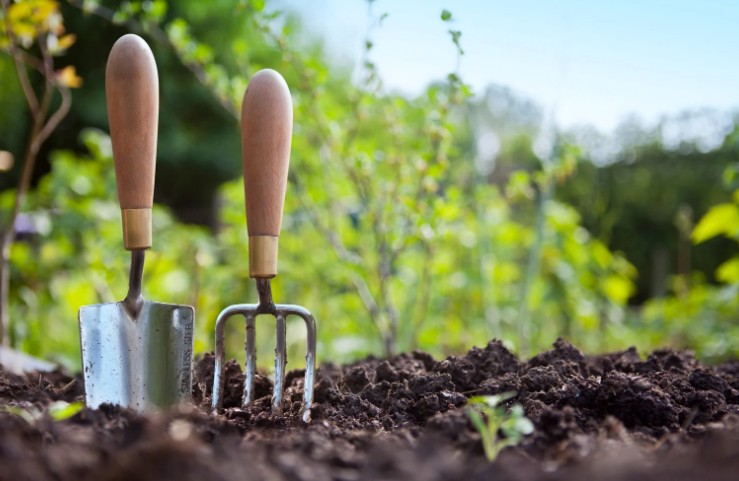
Here’s a quick checklist of what I used to improve my waterlogged lawn:
- Garden fork or aerator
- Topdressing mix (sand + compost or loam)
- Gravel and perforated drainage pipe
- Rake and shovel
- Grass seed for reseeding patches
🛠 Pro Tip: Invest in garden spiking shoes or a hollow tine aerator for regular maintenance.
How to Drain a Waterlogged Lawn? – Step-by-Step Guide
After struggling with a soaked, muddy lawn for weeks, I realised that proper drainage isn’t just a quick fix—it’s a multi-step process.
If your lawn looks like a swamp after every rainfall, here’s exactly what I did to restore proper drainage and bring it back to life.
Step 1: Evaluate How Serious the Water Issue Is and Where It’s Coming From
I started by walking across the lawn after rain to see where water was pooling. Most of it gathered in low-lying spots, especially near compacted areas.
I also paid close attention to how long the water lingered—more than 24 hours was my red flag.
If you have clay soil in lawn, water tends to sit longer because it doesn’t drain well. To understand the behaviour of clay soil and how it impacts drainage, I found this guide very helpful:
Step 2: Aerate the Soil to Break Up Compaction
After spotting the waterlogged spots, I pierced the lawn with a garden fork, creating holes roughly 10–15 cm deep and spaced about 10 cm apart. This opened up the soil and helped water soak through instead of sitting on the surface.
In larger areas, a hollow-tine aerator is even more effective. If you’re working with clay soil like I was, regular aeration is essential. Here’s a great article that helped me understand how to manage and improve drainage in clay soil.
Step 3: Apply a Topdressing Mix
After aerating, I spread a mix of sharp sand, compost, and topsoil over the lawn. This is known as topdressing, and it helped loosen up the clay and improve drainage.
- Sharp sand improved the soil structure and let water pass through
- Compost added nutrients to help the grass recover
I used a stiff broom and rake to work the mix into the holes I’d made during aeration.
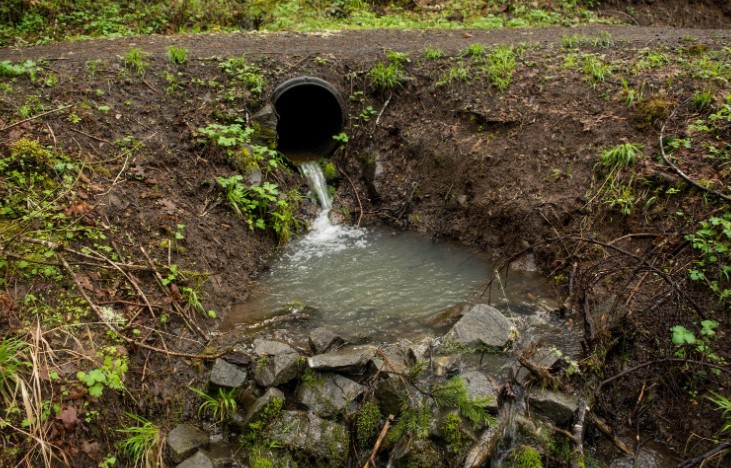
Step 4: Install a Drainage Solution (If Needed)
In one section of my garden, aeration and topdressing alone weren’t enough. I had to install a French drain. It’s a gravel-lined trench with a perforated pipe that helps divert surplus water away from the lawn.
If your lawn holds water regularly despite aeration, a soakaway system may also be needed. This involves digging a pit filled with rubble or a drainage crate that slowly disperses water underground.
Here’s a simple breakdown:
| Drainage Type |
Best Use |
DIY Friendly? |
| French Drain |
Redirecting water from low spots |
Yes |
| Soakaway System |
Deep drainage in heavy clay soil |
With planning |
| Simple Trench |
Channeling surface runoff |
Yes |
Step 5: Level and Reseed the Lawn
After fixing the drainage, I noticed some areas were sunken or bare. I added topsoil to level out the uneven parts, then reseeded those areas with grass seed.
I watered lightly each day and within a few weeks, the lawn had filled in nicely.
Here’s a quick bullet list of essential tools:
- Garden fork or aerator
- Sand and compost mix
- Perforated drainage pipe
- Gravel and trenching tools
- Lawn seed and rake
Should I Consider a Garden Drainage System?
If simple aeration doesn’t help, it may be time for a more permanent solution.
| Drainage Option |
Best For |
Difficulty |
DIY Friendly |
| French Drain |
Redirecting water from large areas |
Moderate |
Yes |
| Soakaway System |
Absorbing excess water in one location |
High |
With some expertise |
| Trench Drain |
Surface water near driveways or patios |
Low |
Yes |
When is a French drain the best option?
Use it if your lawn floods after heavy rain and water collects in a specific direction or slope.
What is a soakaway and how does it work?
A soakaway is a pit filled with gravel that gathers excess water and allows it to gradually drain into the surrounding soil.
DIY vs professional installation
You can DIY a French drain, but for large-scale or sloped lawns, it’s worth consulting a landscaper for proper water redirection.
Can I Prevent Future Waterlogging?
Yes, and here’s how I stay ahead of soggy lawn issues:
Regular aeration and topdressing tips
I aerate twice a year—spring and autumn—and topdress after each session to keep the soil structure healthy.
Improving soil structure over time
Over time, adding organic matter like compost and loam improves water absorption and reduces surface runoff.
Creating a long-term garden drainage plan
Make sure your lawn has a gentle slope and all drainage pipes are clear. Consider landscaping solutions like raised beds or gravel paths to redirect water.
Prevention Checklist:
- Aerate regularly
- Apply topdressing
- Clear gutters and drains
- Add soil amendments
- Monitor after heavy rain
Conclusion
Fixing a waterlogged lawn can feel overwhelming, but with the proper approach and some patience, it’s definitely manageable.
I found that combining aeration, topdressing, and proper drainage systems not only saved my lawn but made it greener than ever.
If you’re in the UK and facing soggy patches or standing water, follow this guide and give your garden the chance to thrive again.
Frequently Asked Questions On How to Drain a Waterlogged Lawn
1. How long does it take for a waterlogged lawn to dry?
Typically 1–3 days after rain, depending on soil type and drainage quality.
2. Will lawn grass recover after water damage?
Yes, with proper aeration, fertilising, and reseeding, most lawns bounce back in 2–4 weeks.
3. Can I still mow a wet lawn?
Avoid it. Mowing a soggy lawn can compact the soil further and damage the grass.
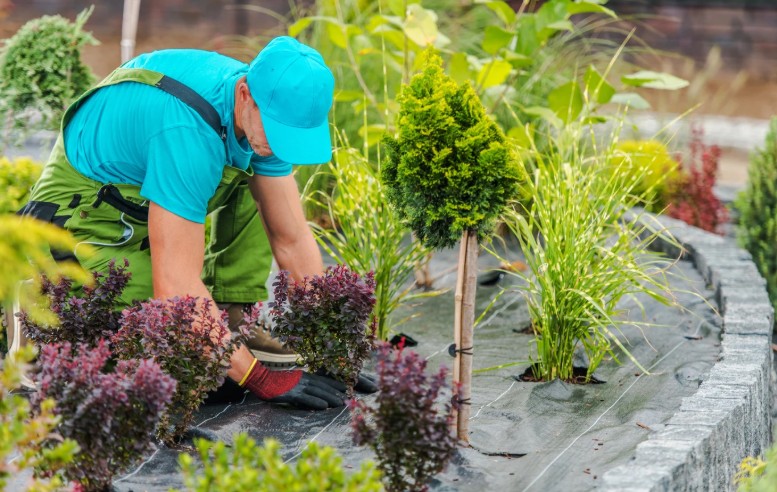
by Kanimozhi BV | Aug 7, 2025 | Garage, Exterior
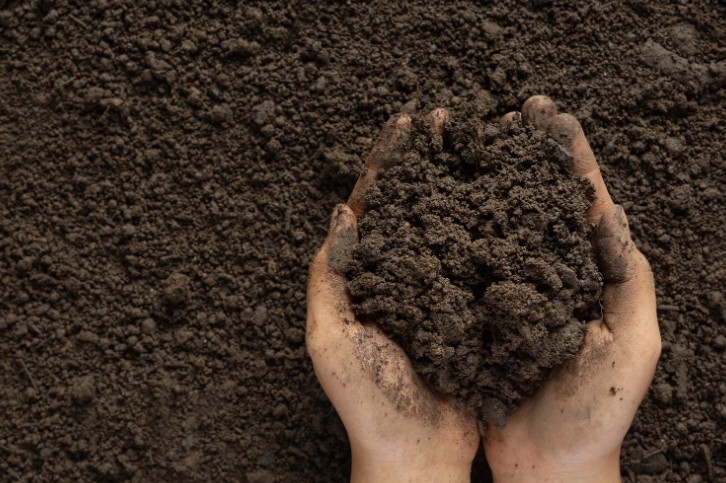
After a few garden projects, I found myself stuck with piles of unwanted soil. It wasn’t the type you could just toss in the bin—and hiring a skip seemed expensive.
If you’re looking for how to get rid of soil cheaply and legally in the UK, let me take you through what worked for me, and how you can do it too without overspending.
When I dug out a new patio and levelled parts of the garden, I was left with a surprising amount of leftover soil. It builds up quickly from:
At first, I thought I might reuse all of it—but much of it was poor quality or simply too much to store.
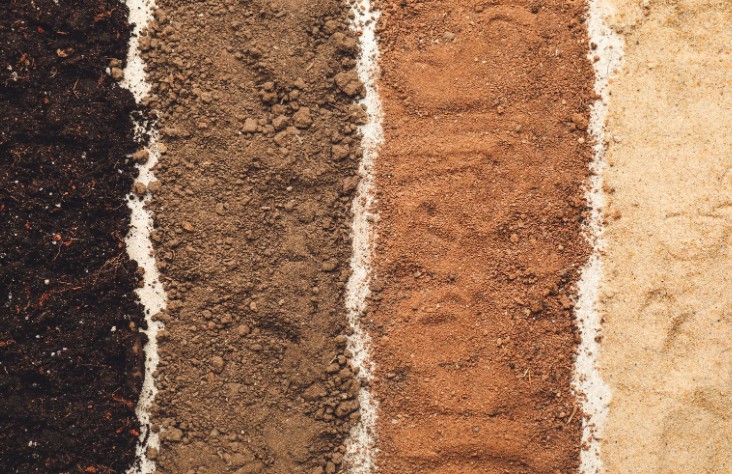
Types of Garden Soil You Can Dispose Of
Not all soil is the same, and knowing what type you’re dealing with can help determine how to get rid of it:
- Topsoil: Usually clean and reusable, perfect for giveaways or garden reuse
- Clay soil: Heavy and compact, harder to dispose of without professional help
- Contaminated or debris-filled soil: Often needs proper handling due to weed seeds, rubble, or pests
Ways to Dispose of Soil
I explored every option before hiring help. Here are the most effective and affordable ways I found:
- Reuse in your own garden – I used some for levelling out low spots or filling raised beds.
- Give it away locally – Facebook Marketplace, Freecycle, and Nextdoor helped me find people who wanted free soil.
- Council recycling centre – I bagged the rest and took it to my local waste site (call ahead, as not all centres accept soil).
- Hire a skip or removal service – Only if you’ve got a large amount and can’t transport it yourself.
Best Methods On How to Get Rid of Soil (Ranked by Cost)
- Reuse it on your property – Free
- Give it away online – Free
- Take it to a recycling centre – Free to low cost
- Hire a grab service – Moderate cost
- Hire a skip – Higher cost but convenient
Should I Use a Skip for Soil Removal?
For large volumes, a skip is convenient—but not always the cheapest. Here’s a simple breakdown I used to compare my options:
| Skip Size |
Approx. Capacity |
Ideal For |
Cost Range (UK) |
| Mini (2 yd³) |
20–30 bin bags |
Small garden clearouts |
£100–£140 |
| Midi (4 yd³) |
40–60 bin bags |
Patio or soil removal |
£140–£200 |
| Builder’s (6 yd³) |
60–80 bin bags |
Larger soil removal projects |
£200–£300+ |
🛑 Note: Soil is heavy. Always check weight restrictions with your skip provider.
Can I Hire a Soil Removal or Grab Service?
If you’ve got more than 1–2 tonnes of soil and can’t load or transport it yourself, a grab hire service is a good choice.
- A truck comes, grabs the soil with a mechanical arm, and takes it away
- It’s faster and often more affordable than a large skip
- Prices typically start from £150–£250 depending on volume and location
Pros: No manual loading, quicker service
Cons: Needs access for a large lorry, higher upfront cost
How Do I Prepare Soil for Disposal?
Before handing off the soil, I made sure to:
- Bag loose soil in tough garden sacks
- Keep it clean – no rubble or waste mixed in
- Store it in a dry, accessible spot for collection or transport

What Mistakes Should I Avoid When Disposing of Soil?
I nearly made a few of these errors, but luckily avoided fines:
- Don’t dump soil illegally – It’s fly-tipping and can lead to serious penalties
- Don’t mix soil with other waste – Especially building rubble, as this may raise disposal costs
- Don’t assume your council will take it – Always check their waste policy first
Conclusion
After testing multiple methods, I found the cheapest way on how to get rid of soil was by offering it for free online or taking it to a local recycling centre.
For larger projects, I weighed up skip hire vs grab lorries and went with what made the most sense based on access and cost.
If you’re dealing with leftover garden soil:
- Start small – try giving it away or reusing it
- Know your soil type – clean topsoil is easiest to move
- Plan ahead – especially if you’re expecting large volumes
Always check your local council’s garden waste rules before disposing—and remember, the right method depends on how much soil you’ve got and how much effort you want to put in.
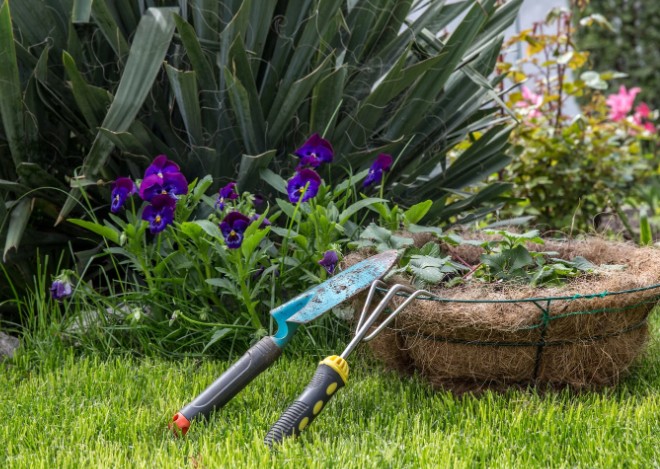
by Kanimozhi BV | Aug 5, 2025 | Garden, Exterior
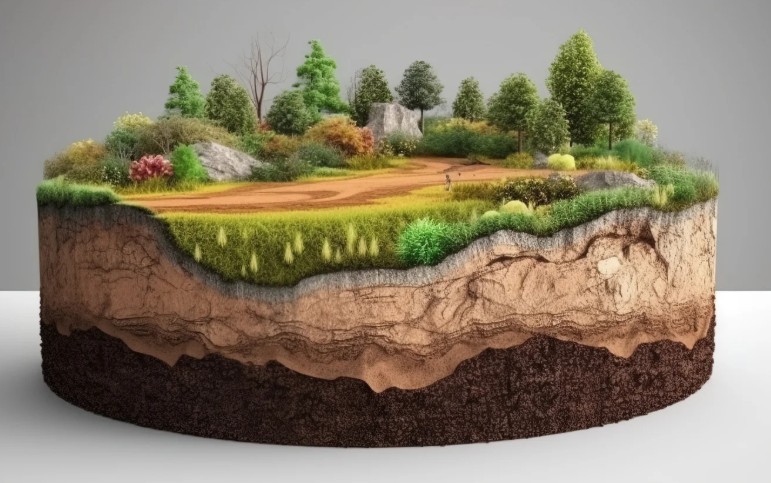
Living in the UK, I’ve come to realise that clay soil is both a blessing and a evil . On one hand, it’s rich in nutrients; on the other, it becomes a sticky, soggy mess after even modest rainfall.
If you’ve stepped into your garden and found yourself ankle-deep in mud, you’re not alone — I’ve been there too. But the good news? You can absolutely fix it.
In this guide, I’ll share exactly how to fix waterlogged clay soil, based on what’s worked (and what hasn’t) in my own garden.
Why Does Clay Soil Get Waterlogged So Easily?
Understanding clay soil composition
Clay soil is made up of tiny, densely packed particles that cling to water. Unlike sandy or loamy soils, which allow water to drain freely, clay tends to hold onto moisture — and not in a good way.
When saturated, it becomes sticky and compact, reducing air circulation and suffocating plant roots.
How UK weather contributes to persistent waterlogging?
The UK climate adds an extra challenge. Frequent rainfall, particularly in autumn and winter, means clay soil often doesn’t get a chance to dry out properly.
The result is standing water, compacted earth, and a slow, soggy mess that doesn’t recover easily — especially if drainage hasn’t been improved.

What are the signs of waterlogged soil in your garden?
In my experience, these are the telltale signs:
- Water pooling or puddles after rain
- Mushy, compacted soil that’s hard to dig
- Stunted or yellowing plants
- A musty smell from overly wet soil
- Poor root development or rotting roots when digging up plants
If you’re seeing two or more of these, you’re definitely dealing with waterlogged clay soil.
How to Fix Waterlogged Clay Soil?: Step-by-Step Methods That Worked for Me
Aerating the soil to relieve compaction
One of the best things I ever did for my clay-heavy garden was aeration. I used a hollow-tine aerator to punch holes deep into the soil.
This allows air and water to migrate more casually and break up compacted layers. It’s physically demanding but makes a big difference.
I recommend doing it in spring or early autumn, when the soil is moist but not soggy.
If you don’t have an aerator, even a sturdy garden fork will do — just push it in every 10–15 cm and wiggle it slightly to open the structure.
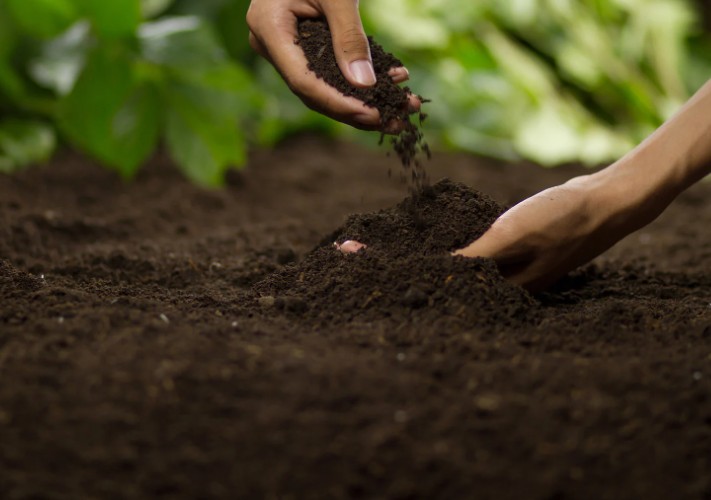
Adding organic matter to improve structure
Clay soil craves organic matter. Each autumn, I spread a generous layer of compost, well-rotted manure, or leaf mould across the surface.
Over time, this takes charge into the soil with the help of earthworms and microbes, converting the heavy clay into a loamier, better-draining texture.
I’ve found that compost made from kitchen waste and garden clippings works beautifully. It not only improves drainage but also feeds your soil.
Topdressing with sand and compost mix
After aerating, I apply a topdressing mix of sharp sand and compost — usually in a 60:40 ratio. This helps open up the topsoil and promotes better water infiltration.
It’s important to use horticultural sand, not builder’s sand, which can actually make things worse by turning the soil into concrete-like sludge.
Brush the mix into the holes after aerating, and repeat once a year. Over time, you’ll see a marked difference in how your lawn or borders handle wet weather.
Installing drainage systems like French drains
If you’ve tried all the above and still find your garden flooding, it may be time to install a more engineered solution.
I’ve used French drains in one of my worst-hit garden corners. These are gravel-filled trenches holding penetrated pipes that alter the water away from saturated zones.
While this isn’t a weekend DIY for everyone, it can be a game-changer for persistently soggy areas. You’ll need to carefully plan where the water will be redirected — a soakaway or low point works best.
Building raised beds for severe problem areas
When all else fails, I’ve found raised beds to be a fantastic workaround. By building up the planting area above the clay, you create a space that drains freely and can be filled with rich, loamy compost.
This method allows me to grow even moisture-sensitive plants like lavender and rosemary, which would otherwise never survive in my natural soil.
Which Soil Amendments Work Best for Waterlogged Clay?
Comparing organic materials: compost, leaf mould, manure
Here’s a comparison of the most effective organic materials I’ve tried:
| Amendment |
Drainage Improvement |
Nutrient Boost |
Best Time to Apply |
| Compost |
Moderate to High |
High |
Autumn/Spring |
| Leaf Mould |
Moderate |
Low |
Autumn |
| Well-Rotted Manure |
High |
Very High |
Autumn/Winter |
Each one offers something different. In person, I layer them, manure in the autumn, compost in spring, & leaf mould as a mulch throughout the entire year.
Should you use sand or grit? What worked for me and what didn’t
Many people say “just add sand”, but I’ve learned the hard way that not all sand is suitable. Only sharp, coarse sand (like horticultural sand) works for clay soil. Fine sand or builder’s sand tends to bind with the clay and create a cement-like mess.
Grit, on the other hand, can work well — especially when mixed with compost — but it’s expensive and heavier to spread. I now mostly stick to sand-compost blends for ease and effectiveness.
Natural soil improvers available in the UK
In UK garden centres and online stores, you can find products labelled as clay soil improvers — many are blends of composted bark, gypsum, or green waste compost. I’ve had good results with products like:
- Westland Clay Breaker
- Melcourt SylvaGrow Soil Improver
- Organic mushroom compost (from local farms)
These are excellent supplements to your DIY efforts.
When Should You Start Fixing Waterlogged Soil?
Best time of year for aeration and amendments
Spring and autumn are your golden windows. The soil is soft enough to work with and not saturated.
I never try to aerate during winter or after heavy rain — it damages the soil structure and just turns things into mud.
Seasonal adjustments to reduce future waterlogging
Each season brings an opportunity:
- Spring: Aerate, topdress, and feed
- Summer: Mulch to protect soil and retain moisture balance
- Autumn: Add compost and manure
- Winter: Avoid heavy foot traffic and compaction
By doing a little each season, you keep clay soil manageable year-round.
Long-term soil health strategies I follow
In the long run, it’s about building healthy soil. I never leave soil bare, always rotate plants, and continue adding organic matter every year. It’s not a one-time fix — it’s a gardening lifestyle.
Can You Still Grow Plants in Waterlogged Clay Soil?
My experience with clay-tolerant plants
Absolutely — once I stopped fighting the soil and started choosing plants that thrive in clay, gardening became far more enjoyable. Plants like:
- Dogwood (Cornus)
- Astilbe
- Ligularia
- Hosta
- Daylilies
They don’t mind the heavy, damp conditions and actually perform better in them.
How I modified my planting techniques?
I started digging wider, shallower holes instead of deep ones, which prevents water from pooling at the root zone.
I also slightly elevate the planting area by mounding compost, giving plants better drainage with drain covers even if the rest of the soil stays wet.
Mistakes to avoid when planting in soggy soil
One major mistake I made early on was overwatering. Clay already holds moisture, so I had to learn to water less and check the soil before grabbing the hose.
I also avoid using bark mulch too thickly, as it can trap moisture at the surface.
Conclusion: Reclaiming Your Garden from Clay Soil Waterlogging
Fixing waterlogged clay soil isn’t a weekend project — it’s a process. But I promise, with the right methods and a little persistence, you’ll begin to see your soil transform from boggy and unworkable to rich, breathable, and full of life.
Here’s a final recap from my own gardening journey:
- Aerate the soil to allow air and water in
- Topdress with sharp sand and compost annually
- Add organic matter regularly — compost, manure, leaf mould
- Install drainage in trouble spots if needed
- Choose plants that love clay conditions
- Work with the seasons and build soil health over time
It took me a couple of years, but now I have a lawn that drains properly, flower beds that flourish, and a garden I can walk through even after heavy rain. If I know how to fix waterlogged clay soil — you can too.
FAQs On How to Fix Waterlogged Clay Soil
1. How long does it take to fix clay drainage issues?
From my experience, you’ll see some improvement within weeks if you aerate and topdress properly. Full transformation, however, can take 12–24 months of seasonal maintenance and organic matter additions.
2. Will adding gravel improve clay drainage?
No — this is one of the biggest myths. Gravel in clay can actually make the situation worse by creating a perched water table, where water collects above the gravel rather than draining through it.
3. Is it better to replace or amend clay soil?
In most cases, amending is better. It’s more cost-effective and sustainable. I only replace soil in raised beds or small garden features. For lawns and large borders, building healthier clay soil is the way to go.

by Kanimozhi BV | Aug 5, 2025 | Garden, Exterior
If you’ve ever stepped onto your lawn after a rainy spell only to find squelchy, muddy ground beneath your feet — you’re likely dealing with clay soil.
I’ve faced this exact issue in my garden here in the UK, where persistent rainfall and compact soil lead to waterlogged lawns that simply refuse to dry out.
Thankfully, through trial, error, and a lot of hands-on experience, I’ve learned exactly how to improve drainage in clay soil lawn UK — and in this gardener’s guide, I’ll walk you through it all step by step.
Why Is Clay Soil a Drainage Problem in UK Lawns?
What makes clay soil different?
Clay soil has very fine particles which bind together deeply. Unlike sandy or loamy soil, which allow water to pass through easily, clay soil holds onto moisture for far too long.
The structure is dense and sticky, making it prone to compaction and reducing the number of air pockets that roots need for healthy growth. When dry, it hardens and breaks; when damp, it turns into a heavy, slick mess.
How does UK weather worsen the issue?
The UK’s maritime climate adds to the difficulty. Frequent rainfall, especially in autumn and winter, keeps lawns saturated.
Because clay soil drains so slowly, each rainfall event adds to the problem — the soil becomes saturated before it has time to dry out. This leads to poor root development, increased moss growth, and overall poor lawn health.
Signs of poor drainage in a lawn
Before I knew my problem was due to clay, I started noticing symptoms that didn’t go away with standard lawn care.
Standing water remained long after rain, the grass was turning yellow in some places and brown in others, and I could hear the ground squelch when I walked across it. These were all classic signs of drainage issues in clay soil.
How Do I Test If My Lawn Has Poor Drainage?
Simple water test you can do at home
One of the easiest ways to confirm whether your lawn has poor drainage is the water infiltration test. I simply dig a small hole around 30 cm deep and fill it with water.
After letting it drain fully once, I fill it again and time how long it takes to empty. If it takes more than 4 hours to drain, then the soil is not draining properly — a clear indication of clay or compacted soil structure.
Observing puddles and waterlogging patterns
Visual cues are just as important. After heavy rain, I take a walk across the lawn and observe how water behaves.
If puddles remain for days, or certain areas always seem wetter than others, this points to uneven drainage and likely areas of compacted clay that need urgent attention.
Checking for soil compaction and hardness
Another simple check is the “fork test.” If I can’t easily push a garden fork 10–15 cm into the lawn, the soil is compacted.
Compacted clay is one of the biggest culprits of drainage problems — it creates a tight, impermeable layer that stops water from moving down into the soil profile.

How to Improve Drainage in Clay Soil Lawn UK? – Step-by-Step
Improving drainage in clay soil isn’t that simple and can be an overnight fix. It’s a sequential practice and intrusion that work together over time.
I’ve learned that consistency is key, and by following the steps below, I’ve turned my waterlogged lawn into a healthy, green oasis.
1. Aerating compacted lawns – How I use a garden aerator effectively
Aeration is the first thing I do when tackling drainage issues. I use a manual hollow-tine aerator to remove plugs of soil across the lawn.
This generates open channels which permits air and water to penetrate deep into the soil. I aerate once in the spring and again in autumn.
Aeration not only relieves compaction but also encourages root growth, which naturally improves the soil’s internal structure.
2. Topdressing with sand and compost – Improving soil structure
Immediately after aerating, I apply a topdressing mix to fill in the holes and improve drainage. My go-to blend is roughly 70% horticultural sand and 30% well-rotted compost.
The sand keeps the soil loose and improves porosity, while the compost adds organic matter and nutrients.
I roll out the mix uniformly across the lawn, brush it in with a stiff broom or lawn lute. This method helps integrate the material into the existing clay and gradually changes its composition over time.
3. Incorporating organic matter – Why it’s essential for clay soils
Clay soil desperately lacks organic content. By regularly incorporating leaf mold, composted manure, and garden compost, I’ve managed to loosen the structure of my soil and encourage better water movement.
Organic matter acts like a sponge — it holds water when needed but also allows excess to drain away.
It also boosts microbial activity, which breaks down the clay and builds healthier soil from within. I usually apply organic material in autumn, allowing it to settle and enrich the soil over winter.
4. Installing drainage channels or soakaways – When natural solutions aren’t enough
Sometimes, especially in large or low-lying lawns, natural remedies aren’t sufficient. In these cases, I’ve installed French drains and soakaway pits.
A French drain is a trench filled with gravel and a perforated pipe that redirects water away from waterlogged areas. Soakaways collect and disperse water underground in a controlled manner.
These methods are more involved but offer a long-term fix when regular aeration and topdressing don’t quite solve the problem.
What Materials Help Improve Drainage in a Clay Lawn?
Understanding which materials to use — and how to use them — has made all the difference in my lawn’s recovery.
Comparing topdressing materials – sand, compost, loam
I’ve created a helpful comparison table based on my experience:
| Material |
Drainage Benefit |
When I Use It |
| Horticultural Sand |
Excellent |
After aeration to improve porosity |
| Compost |
Good |
Autumn application for organic matter |
| Sandy Loam |
Moderate |
General topdressing for mild improvements |
Each material has its role. Blending them correctly is necessary to unbolt the benefits.
Organic amendments I recommend
My favourite materials to work into clay include:
- Composted horse manure – rich in nutrients and loosens soil
- Leaf mold – awesome for better water movement and microbial life
- Homemade compost – easy to access and full of beneficial organisms
These amendments break down slowly and continue to improve the soil long after application.
Avoiding common mistakes
One mistake I learned the hard way: don’t add gravel directly into clay soil. It can trap water above the gravel layer instead of helping it drain, creating worse waterlogging than before.
Stick with organic solutions unless you’re creating engineered drainage systems.
Can Lawn Drainage Be Fixed Permanently?
The truth about long-term solutions
It’s important to understand that while you may never fully change clay soil into sandy loam, you can greatly improve its structure and performance.
With the right combination of aeration, topdressing, and organic matter, I’ve seen my lawn transform from swampy to strong in under two seasons.
Ongoing maintenance to prevent re-compaction
Clay soil loves to compact again if neglected. That’s why I aerate at least once a year and keep up with regular topdressing.
I also try to avoid walking on the lawn during or after heavy rain, which prevents the soil from getting pressed down again.
Seasonal adjustments – What I do in autumn and spring
In autumn, I focus on feeding the soil — I apply compost and mulch to boost nutrients and support overwintering microbes.
In spring, I aerate and topdress to encourage fresh growth and drainage readiness before the rainy season returns.
Quick Tips: How I Maintain a Healthier Lawn in Clay Soil?
Over time, I’ve developed a system for keeping my clay-based lawn thriving:
- I water deeply but infrequently, to train roots to grow downward
- I mow with sharp blades, especially after rainfall, to avoid damaging soggy grass
- I replant bald patches with clay-tolerant grass varieties such as perennial ryegrass & tall fescue
These small habits add up and help maintain all the drainage work I’ve done.
Conclusion: Take Control of Your Clay Lawn Drainage
Improving a lawn with clay soil in the UK takes effort, but it’s absolutely doable. I’ve personally seen dramatic results by committing to regular aeration, topdressing with the right materials, and consistently adding organic matter.
It’s a long-term investment, but the payoff — a healthy, green, and resilient lawn — is well worth it.
If you follow these steps on how to improve drainage in clay soil lawn uk and stay consistent, I promise your lawn will begin to reward your effort with stronger growth, better drainage, and fewer muddy surprises after rain.
FAQs About How to Improve Drainage in Clay Soil Lawn UK
1. Should I dig up and replace clay soil?
Only in extreme situations. It’s far more cost-effective and environmentally friendly to work with the existing soil using the methods I’ve outlined above.
2. How long does it take to see improvements?
Aeration and topdressing can yield visible results in a few weeks, but full transformation often takes a full year or more of consistent care. Patience is key.
3. Can I lay turf on clay without fixing drainage?
You can, but I wouldn’t recommend it. The turf might look good initially, but it won’t thrive unless you’ve addressed the underlying drainage issues. It’s better to spend time improving the soil first.
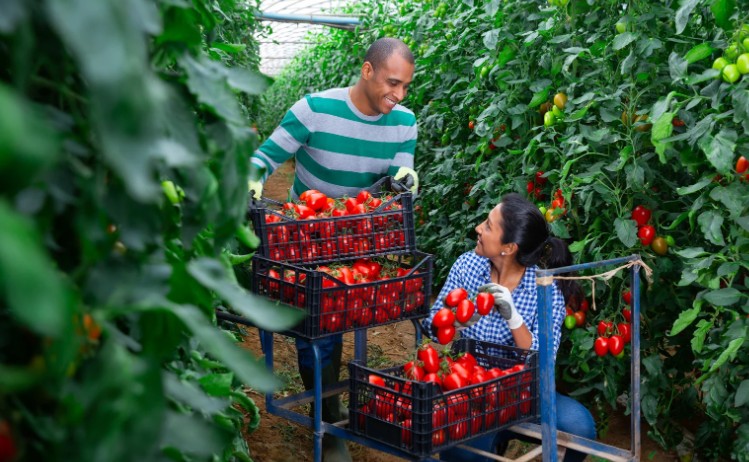
by Kanimozhi BV | Aug 4, 2025 | Garden, Exterior
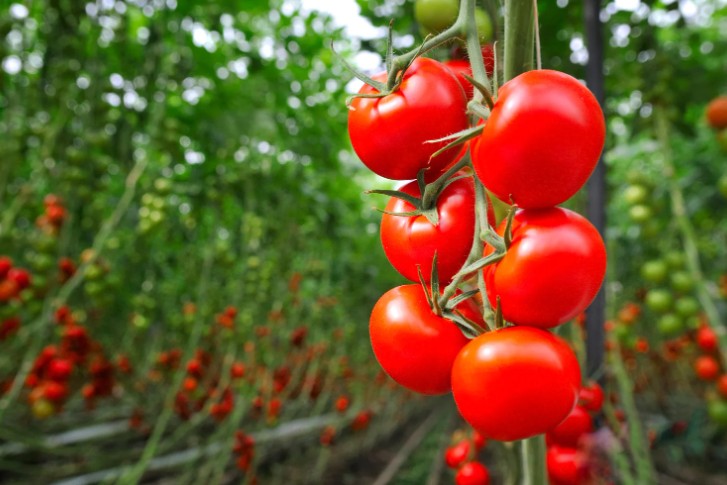
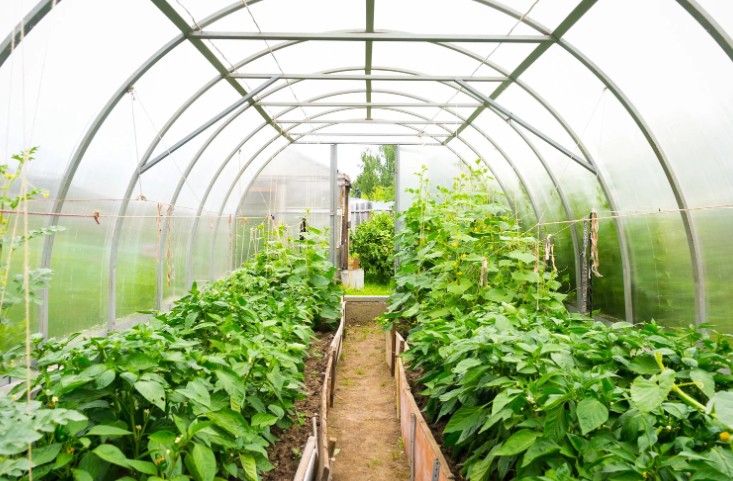
Growing tomatoes in a greenhouse is often seen as the perfect way to enjoy a longer growing season and consistent harvests. But while the controlled environment has many advantages, it also comes with its own set of challenges.
If you’re finding that your tomato plants aren’t thriving under glass, you’re not alone. Many UK gardeners encounter issues that are specific to greenhouse conditions.
In this guide, you’ll learn about the most common problems with growing tomatoes in a greenhouse, understand why they happen, and discover how to solve them.
Common Problems with Growing Tomatoes in a Greenhouse
Greenhouse gardening doesn’t guarantee success — especially with tomatoes, which are notoriously sensitive.
Below, we’ve listed the key problems you’re likely to encounter and explained why each one occurs.
1. Overheating and Poor Ventilation
Why Does This Happen?
Greenhouses trap heat — it’s their job. But too much heat, especially in summer, can stress your tomato plants.
Without proper ventilation, the temperature inside can easily exceed 30°C, which is too high for optimal fruiting.
Poor air circulation also increases the risk of fungal diseases and makes it harder for plants to absorb nutrients.
2. Excess Humidity and Fungal Infections
Why Is High Humidity a Threat?
Tomatoes dislike overly humid environments. When humidity levels rise, especially in enclosed greenhouses, fungal diseases like botrytis (grey mould), powdery mildew, and leaf spot thrive.
High humidity also interferes with transpiration, slowing down nutrient uptake and weakening your plants overall.
3. Pest Infestations: Aphids, Whiteflies, and Spider Mites
Why Are Greenhouses Prone to Pests?
While outdoor pests have natural predators, a greenhouse acts like a sealed buffet even for bugs in mattress.
Aphids, whiteflies, and spider mites multiply quickly in warm, humid environments, feeding on sap and transmitting viruses.
Once inside, they’re hard to control without manual removal or biological intervention.
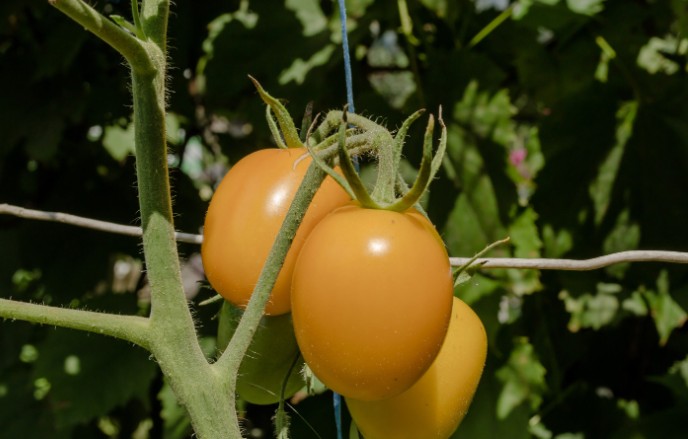
4. Tomato Leaf Curl and Yellowing Leaves
What Causes These Symptoms?
These are common warning signs that something is wrong. Leaf curl can be caused by viral infections, inconsistent watering, high temperatures, or even over-fertilisation.
Yellow leaves may signal nitrogen deficiency or overwatering — both of which are easily triggered in the greenhouse setting.
5. Blossom End Rot
Why Does Blossom End Rot Occur in Greenhouses?
Blossom end rot is one of the most disappointing issues. It looks as black, sunken patches on the bottom of your tomatoes.
The primary cause is the Calcium deficiency, which frequently brought on by uneven watering.
In greenhouses, pots and grow bags dry out unevenly, and inconsistent moisture disrupts calcium flow to developing fruits.
6. Pollination Issues
Why Don’t Tomatoes Pollinate Easily Indoors?
In nature, wind and insects help tomato flowers self-pollinate. In a greenhouse, these natural aids are restricted or not found completely.
As a result, flowers may drop before setting fruit — a clear sign of poor pollination. You may need to hand-pollinate to ensure a good yield.
7. Inconsistent Watering and Root Problems
How Does Watering Impact Tomato Health?
Tomatoes are fussy drinkers. Inconsistent watering causes stress, leading to split fruit, poor growth, and root rot.
In greenhouses, the soil dries quickly, and without regular checks, it’s easy to over or underwater.
This also affects nutrient absorption and can lead to further complications like blossom end rot or leaf curl.
8. Soil and Container Limitations
Why Do Soil and Containers Matter So Much?
Greenhouse tomatoes are often grown in containers or grow bags, which means limited root space.
If the soil pH isn’t between 6.0 and 6.8, or if drainage is poor, your plants will suffer.
Over time, nutrients get depleted quickly in confined spaces, so frequent monitoring and replenishment are essential.
Tips to Avoid These Greenhouse Tomato Problems
Here are some practical steps to help you grow healthy, productive tomato plants in your greenhouse:
- Install automatic roof vents or use oscillating fans to maintain airflow
- Monitor humidity daily with a hygrometer
- Water consistently — little and often is better than soaking
- Feed regularly with a calcium-rich tomato fertiliser
- Introduce beneficial insects like ladybirds for natural pest control
- Hand-pollinate using a soft brush or jiggle the flower stems gently
- Prune side shoots & basel leave to raise air circulation
Troubleshooting Table – Quick Fixes for Problems With Growing Tomatoes in a Greenhouse
| Problem |
Common Cause |
Suggested Solution |
| Leaf Curl |
Heat stress or viral infection |
Improve airflow, prune infected leaves |
| Yellowing Leaves |
Nitrogen deficiency |
Apply balanced tomato fertiliser |
| Blossom End Rot |
Inconsistent watering |
Water evenly, add calcium supplement |
| Poor Fruit Set |
Lack of pollination |
Hand-pollinate using a soft brush |
| Fungal Diseases |
High humidity |
Ventilate regularly, space plants properly |
Conclusion – Can You Still Grow Great Tomatoes in a Greenhouse?
Absolutely — as long as you’re aware of the unique challenges that greenhouse environments present. From managing temperature and humidity to keeping pests at bay and ensuring proper watering, success is all about balance.
By recognising the early signs of problems and taking preventive action, you can enjoy healthy, vibrant tomatoes all season long — even in the unpredictable UK climate.
Related Article: How and When to Prune Hebe?
FAQs About Problems With Growing Tomatoes in a Greenhouse
1. How hot is too hot for greenhouse tomatoes?
Tomatoes prefer daytime temperatures between 18°C and 27°C. Anything above 30°C can cause blossom drop and poor fruit development.
2. Should you prune tomato plants in a greenhouse?
Yes, pruning improves air circulation, reduces the risk of disease, and helps direct energy into fruit production.
3. Do I need to pollinate greenhouse tomatoes manually?
In most cases, yes. Without bees or wind, you can hand-pollinate by gently shaking flower trusses or using a small paintbrush.
4. What’s the best soil pH for greenhouse tomatoes?
Aim for a pH between 6.0 and 6.8. Slightly acidic soil helps tomatoes absorb nutrients efficiently.
