
by Kanimozhi BV | Jan 9, 2026 | Pest Control
Rats are a common problem in many UK homes, particularly in older buildings, lofts, garages, and properties near drains or open land.
While most people worry about rat bites or droppings, rat urine is often overlooked. This raises an important and valid concern: is dried rat urine dangerous to you and your family?
Although it may seem harmless once it has dried, rat urine can still pose serious health risks if disturbed or improperly cleaned. Understanding those risks can help you protect yourself and take the right precautions.
Is Dried Rat Urine Dangerous?
Yes, Is dried rat urine dangerous is not just a theoretical question — it is a real health concern. When rat urine dries, it does not become inactive or safe. Instead, it can leave behind microscopic particles that may still contain harmful bacteria or viruses.
In enclosed or poorly ventilated spaces, these dried particles can become airborne when disturbed by cleaning, walking, or moving stored items.
Once airborne, they can be inhaled without you realising, which is where the danger lies. This is particularly relevant in UK homes where rat infestations often go unnoticed for long periods in lofts or wall cavities.
Why Dried Rat Urine Can Still Harm You?
Even after drying, rat urine can continue to affect your health in several ways:
- Airborne contamination
When dried urine is disturbed, tiny particles can mix with household dust. You may inhale these particles while sweeping, vacuuming, or cleaning, allowing bacteria or viruses to enter your respiratory system.
- Surface contamination
Dried rat urine can cling to floors, shelves, insulation, and food preparation areas. Touching these surfaces and then touching your mouth, eyes, or nose can lead to infection.
- Indirect exposure through food
If rats have accessed cupboards or worktops, dried urine residue may contaminate food packaging. Even sealed packaging can carry residue on the outside, which is why hygiene is critical.
Each of these exposure routes increases your risk, particularly if protective measures are not taken.
What Diseases Can Dried Rat Urine Spread?
Dried rat urine is associated with several rodent‑borne diseases. While infections are relatively rare in the UK, they can still occur and may be severe.

What are the Diseases Linked to Dried Rat Urine?
| Disease |
How It Spreads |
Why It Matters |
| Leptospirosis (Weil’s Disease) |
Bacteria from dried urine enters through cuts or mucous membranes |
Can cause liver or kidney damage if untreated |
| Hantavirus |
Inhalation of airborne urine particles |
Causes flu‑like illness and breathing issues |
| Rat‑Bite Fever |
Contact with contaminated urine or surfaces |
Leads to fever, rash, and joint pain |
| Salmonella |
Indirect contamination of food or surfaces |
Causes gastrointestinal illness |
These illnesses may begin with mild symptoms but can worsen quickly without medical attention.
How Does Dried Rat Urine Infect You?
You may be exposed without ever seeing urine directly. Common situations include:
- Cleaning infested areas
When you sweep, vacuum, or move boxes in lofts or garages, dried urine particles can be released into the air. This makes inhalation one of the most common infection routes.
- Handling contaminated objects
Items stored in areas where rats have been active may carry dried urine residue. Touching these items without gloves can transfer bacteria to your hands.
- Poor hand hygiene after contact
If hands are not washed properly after contact with contaminated surfaces, pathogens can enter your body through your mouth or eyes.
This is why rat urine exposure often goes unnoticed until symptoms appear.
How Likely Are You to Get Sick?
Not everyone exposed to dried rat urine becomes ill. However, your risk increases when:
- The infestation has been present for a long time
- The area is enclosed with little ventilation
- You clean without gloves or a mask
- You have cuts or broken skin
- You already have a weakened immune system
While the overall risk in the UK is considered low to moderate, it is never zero.
What Should You Do If You Find Dried Rat Urine in Your Home?
If you suspect dried rat urine, you should clean the area carefully and methodically.
What are the Explained Safe Cleaning Steps?
- Ventilate the area first
Opening windows helps reduce the concentration of airborne particles before you start cleaning.
- Avoid sweeping or vacuuming
Dry cleaning methods can push contaminated particles into the air, increasing inhalation risk.
- Use disinfectant on all affected surfaces
Wetting the area first prevents particles from becoming airborne and helps kill bacteria.
- Wear protective equipment
Gloves and a mask reduce direct contact and inhalation risk.
- Dispose of waste securely
Used cloths or paper towels should be sealed in a plastic bag before being placed in the bin.
For heavy infestations, professional pest control and specialist cleaning are strongly recommended.
When Should You Seek Medical Advice?
You should contact your GP if you develop symptoms within days or weeks of exposure, particularly if you were cleaning an infested area.
Symptoms to watch for include:
- Fever or chills
- Muscle aches
- Headaches
- Vomiting or diarrhoea
- Yellowing of the eyes or skin
- Breathing difficulties
Always mention possible exposure to rat urine so your GP can assess the risk accurately.
How Can You Prevent Future Rat Urine Exposure?
Prevention is the most effective protection.
- Block entry points by sealing cracks, gaps, and broken vents
- Store food securely in sealed containers
- Keep outdoor bins closed and away from walls
- Declutter lofts and sheds, which attract nesting rats
- Inspect regularly for signs of droppings or smells
Early detection greatly reduces health risks.

Conclusion: Should You Be Concerned About Dried Rat Urine?
So, is dried rat urine dangerous? Yes — it can be, especially when disturbed or cleaned improperly. While serious illness is uncommon in the UK, the health risks are real and should not be ignored.
By understanding how exposure happens, cleaning safely, and preventing infestations, you significantly reduce the danger to yourself and your household.
Related Article: How Do Rats Get in Your House? A UK Homeowner’s Guide to Common Entry Points and Prevention
What are the Frequently Asked Questions (FAQ) About Is Dried Rat Urine Dangerous?
1. Is dried rat urine worse than fresh urine?
In many cases, yes. Dried urine can become airborne, making it easier to inhale harmful particles without noticing.
2. How long does dried rat urine remain dangerous?
It can remain hazardous for days or even weeks, particularly in dark, dry, and undisturbed areas.
3. Can pets be affected by dried rat urine?
Yes. Pets can contract diseases like leptospirosis through contaminated floors, soil, or objects.
4. Does normal household cleaning remove the risk?
Only if disinfectants are used correctly. Dry cleaning methods alone are not safe.
5. Should I hire professionals for cleanup?
If the infestation is large or long‑standing, professional pest control and deep cleaning are the safest options.
Home Diagnostics and Technical Standards Specialist at Hello Mag. She provides high-level Expertise in appliance mechanics and scientific pest management, ensuring every guide follows strict safety protocols and manufacturer standards. As a leading Authority on technical home specs, Kanimozhi audits complex data to provide homeowners with the most accurate, verified, and reliable diagnostic solutions available.
by Kanimozhi BV | Jan 8, 2026 | Bathroom, Interior
Want a New Bathroom Look Without Removing Tiles?
If your bathroom tiles are looking tired but you’re not ready for a full rip-out, you’re not alone — I was in the same boat.
Instead of the time-consuming (and messy) job of removing old tiles, I decided to fit bathroom wall panels over tiles and can i really fit shower panels over existing tiles — and it turned out to be one of the easiest and most effective DIY projects I’ve ever done.
In this guide, I’ll walk you through how to fit bathroom wall panels over tiles, the tools I used, the common mistakes to avoid, and what to expect after the installation.
Whether you’re giving a small ensuite a facelift or updating a family bathroom, this approach is clean, quick and surprisingly affordable.
Why I Chose Wall Panels Over Traditional Tiles?
Before starting, I did my research — and wall panels made more sense for what I needed.
Here’s why I picked them:
- No messy tile removal required
- Grout-free surface = easier to clean
- 100% waterproof when installed correctly
- Fast DIY installation
- Available in stylish tile-effect or marble-look finishes
Best of all, you can install them directly over old tiles, saving time, money and stress.

What are The Importance of Proper Prep Work?
Before you fit panels over tiles, the surface needs to be ready:
- Tiles must be securely fixed (no loose or hollow ones)
- The wall must be flat and even
- Clean and free of mould, soap scum or grease
- Dry and preferably sanded slightly to help adhesion
I used sugar soap to clean, and a fine sandpaper to roughen up the glossy tile surface. That gave my adhesive the best possible grip.
Here’s everything I needed to complete the project:
- High-grab waterproof adhesive (for bathroom panels)
- Spirit level and pencil
- Fine-tooth saw or jigsaw
- Sugar soap and cloth
- Silicone sealant (anti-mould)
- Panel trims (corner, end caps, H-joiners)
- Measuring tape
- Hole saw drill bit (for pipe cut-outs)
- Safety goggles and gloves
All items were easily available from B&Q, Wickes, or Screwfix.
What are Step-by-Step DIY Guide On How to Fit Bathroom Wall Panels Over Tiles?
Step 1: Inspect and Prepare the Tiles
I checked all my tiles to make sure they were:
- Firmly attached
- Crack-free
- Not bulging or hollow
- Clean and dry
Then I washed the tiles using sugar soap, rinsed thoroughly, and left them to dry. I lightly sanded the tiles to give the surface some texture for better adhesion.
Step 2: Measure Walls and Plan the Layout
This step saved me loads of hassle later. I measured:
- The height from floor to ceiling (or bath tray)
- The width of each wall
- The position of fixtures (pipes, taps, windows)
I planned the layout on paper to decide:
- Where to start panel installation
- Where join trims would go
- How many panels to cut and where
I started from the corner and worked outward to ensure a clean, balanced finish.

Step 3: Cut the Panels to Size
Cutting was easy once I marked the measurements. I used different tools depending on the material:
| Panel Type |
Tool I Used |
Cutting Tips |
| PVC panels |
Fine-tooth hand saw |
Cut slowly to avoid tearing |
| Acrylic panels |
Jigsaw or circular saw |
Use masking tape to avoid scratching |
| MDF laminate |
Jigsaw (slow speed) |
Support edges to avoid chipping |
For holes around pipes, I used a hole saw drill bit, then smoothed the edges and sealed them later with silicone.
Step 4: Apply Adhesive
I used a high-grab waterproof adhesive (mine was panel-specific and mould-resistant).
How I applied it:
- In vertical lines, 5–10 cm apart
- Avoiding the very edge (to prevent spillage)
- With extra adhesive near panel edges for a solid seal
Don’t use general-purpose glue — bathroom-specific adhesives are essential.
Step 5: Fix the Panels in Place
I slotted the panel into the corner trim (if applicable) and then pressed it firmly onto the tiled wall, bottom to top.
- I checked the alignment with a spirit level
- Applied steady pressure for a few minutes
- Wiped away any excess adhesive immediately
I repeated this with each panel, slotting into H-join trims and continuing around the room.
Step 6: Seal the Joints and Edges
Once all panels were up, I sealed:
- Corners
- Panel joins
- Top and bottom edges
- Cut-outs around fixtures
I used sanitary-grade white silicone and a finishing tool to create neat, waterproof lines. Sealing properly is critical to prevent water getting behind the panels.
Step 7: Let It Cure and Clean Up
I waited 24 hours before using the shower or running water, giving the adhesive and silicone time to cure fully. Then I wiped down the panels — and that was it!
The final result looked sleek, felt solid, and cleaned up beautifully.
What are the Common Mistakes I Avoided?
Here are a few easy-to-make errors I dodged:
- Skipping surface prep – Always clean and sand tiles
- Using the wrong adhesive – Must be waterproof
- Not sealing edges – Water will get behind if not properly sealed
- Measuring only once – I double-checked every cut
- Forgetting expansion gaps – 2–3mm is vital for temperature changes
What Happens After You Fit the Panels?
Once installed and sealed, bathroom wall panels are incredibly low-maintenance:
- Just wipe them down with warm water — no harsh chemicals
- No grout = no mould
- Silicone edges might need replacing every few years (just like tiles)
It’s been months since I fitted mine, and the walls still look spotless. No peeling, no mould, and no regrets.

Final Thoughts: It’s Easier Than You Think
I was genuinely surprised by how quick and satisfying this project was. If you want a fast, mess-free way to modernise your bathroom — fitting wall panels over tiles is a brilliant solution.
The best part? No more grout lines, no more scrubbing — just a sleek, waterproof finish that looks great and works even better.
What are the Frequently Asked Questions About How to Fit Bathroom Wall Panels Over Tiles?
1. Can I fit bathroom wall panels over tiles in a shower?
Yes — that’s exactly what I did. Just make sure the panels are sealed all the way around.
2. Will the panels hide uneven tiles?
Only slight variations. If your tiles are very uneven or cracked, fix that first.
3. Is this really DIY-friendly?
Absolutely. I did it over a weekend with basic tools and patience.
4. Can I stick panels over mouldy tiles?
No — clean, dry and mould-free surfaces are essential for long-lasting results.
Home Diagnostics and Technical Standards Specialist at Hello Mag. She provides high-level Expertise in appliance mechanics and scientific pest management, ensuring every guide follows strict safety protocols and manufacturer standards. As a leading Authority on technical home specs, Kanimozhi audits complex data to provide homeowners with the most accurate, verified, and reliable diagnostic solutions available.

by Kanimozhi BV | Jan 8, 2026 | Bathroom, Interior
When it comes to updating a tired bathroom, you’re often left wondering: should you rip out the old tiles or simply cover them up?
If you’ve come across shower wall panels as an alternative, you’re probably asking: “Can you put shower panels over tiles?”
The short answer? Yes, you can — and in many cases, it’s not only possible, but easier, quicker and more cost-effective than retiling altogether.
Let’s explore how it works, what you need to consider, and whether this is the right choice for your bathroom renovation.
Can You Put Shower Panels Over Tiles?
Can You Really Install It Over Existing Tiles?
Yes — in most situations, it’s perfectly fine to fit shower panels over existing tiles, as long as the tiled surface is flat, stable, and properly prepared.
Modern bathroom wall panels — whether made of PVC, acrylic, or laminated materials — are designed to be lightweight, waterproof, and grout-free.
That means you can install them directly onto your tiled walls without having to tear everything down.
This approach is becoming increasingly popular across UK homes, especially in rental properties or busy households where downtime and mess need to be kept to a minimum.
What Are Shower Panels and How Do They Work?
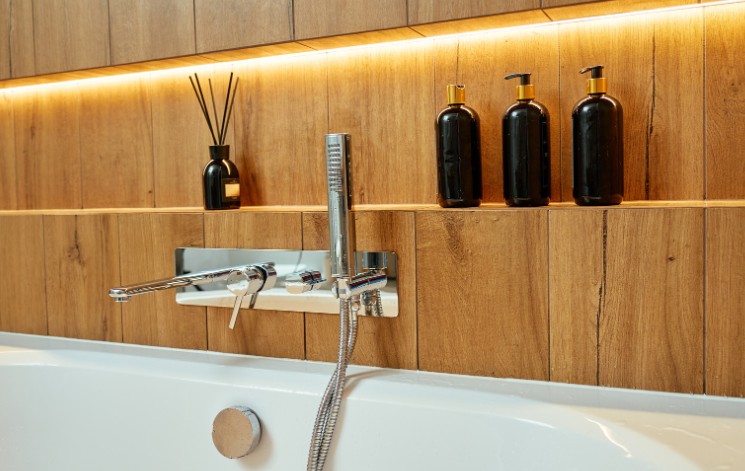
Shower panels (also called wet wall panels or bathroom wall cladding) are large decorative boards designed to cover bathroom walls and provide a completely waterproof surface — making them ideal for shower enclosures and wet rooms.
They’re available in a range of finishes, from sleek marble effects to tile-look designs, so you can still enjoy the aesthetic of tiles without the hassle of grout.
Their core materials often include:
- PVC (Polyvinyl Chloride) – lightweight, budget-friendly and easy to cut
- Acrylic – strong and glossy, often with a glass-like finish
- Laminated MDF – solid-core panels with premium finishes
Since panels are installed with adhesive and sealed with silicone, they create a tight, hygienic surface — ideal for busy households and modern aesthetics.

What Should You Check Before Installing Panels Over Tiles?
Before you go ahead, it’s crucial to assess the condition of your current wall tiles and ensure the surface is suitable for panel installation.
Are Your Existing Tiles in Good Condition?
The tiles you’re covering must be securely fixed to the wall. If you spot:
- Cracks,
- Loose tiles,
- Or hollow sounds when tapped…
…it’s best to remove and repair those areas before installing panels.
Uneven surfaces or protruding tile edges could stop the adhesive from bonding properly, leading to poor results or panels not sitting flush.
Do You Need to Clean or Sand the Tile Surface?
Yes — even if your tiles look clean, they often have residue from:
- Soap scum,
- Limescale,
- Old cleaning products,
- Or tile polish.
Before fitting your shower wall panels over tiles, you’ll need to:
- Clean them thoroughly with a degreaser or sugar soap
- Rinse and allow the surface to dry
- Lightly sand glossy tiles to improve grip
This ensures your panel adhesive bonds properly and stays watertight.
What Adhesive Should You Use?
Using the right adhesive is essential. You should look for:
- High-grab waterproof adhesive (suitable for wet areas)
- Designed specifically for bathroom wall panels
Avoid general-purpose adhesives or cheap glue — these won’t provide the lasting hold you need, especially in a damp environment.
Pro tip: Apply the adhesive in vertical beads or zig-zag lines for full coverage.
What Are the Pros and Cons of Installing Over Tiles?
Here’s a helpful table comparing the benefits and drawbacks of installing wall panels over existing tiles:
| Pros |
Cons |
| No tile removal means less mess and faster results |
Tiled surface must be completely secure and even |
| No need to re-plaster or re-skim walls |
May not adhere well if tiles are glossy or badly prepared |
| Grout-free panels are easier to clean and more mould-resistant |
Potentially traps issues behind the panels if wall is damaged |
| Panels can mimic tile appearance without the maintenance |
May add slight thickness to wall, affecting fittings |
| Ideal for quick renovations or rental properties |
Limited to the stability of the existing tile substrate |
Are Wall Panels Better Than Tiles for UK Bathrooms?
In many ways, yes — especially if you’re looking for:
- A low-maintenance, mould-resistant surface
- Quick turnaround times for renovation
- A budget-friendly upgrade that still looks great
Shower panels are easier to clean (no grout!), easier to install, and don’t crack or chip like traditional tiles. For modern UK bathrooms — particularly in high-humidity areas like flats or ensuites — wet wall panels are an increasingly popular choice.
However, tiles still offer more flexibility in shapes, layouts and custom patterns. So, the best option depends on your design goals and maintenance preferences.
Conclusion: Should You Install Shower Panels Over Tiles?
Yes — you absolutely can put shower panels over tiles in most bathrooms. It’s a smart, time-saving way to upgrade your space without the mess and cost of full tile removal.
As long as your existing tiles are in good shape, securely attached, and properly cleaned, installing panels over them is a safe and stylish choice. Plus, you’ll benefit from easier maintenance, mould resistance, and a grout-free finish.
Thinking of giving your bathroom a refresh? Shower wall panels could be the perfect solution — quick, clean and surprisingly budget-friendly.
What are the Frequently Asked Questions About Can You Put Shower Panels Over Tiles?
1. Can You Put Wet Wall Panels Over Glossy Tiles?
Yes, but you’ll need to lightly sand the surface to allow the adhesive to grip. A smooth, glossy surface on its own may prevent proper bonding.
2. Do You Need a Professional to Install Shower Panels?
Not necessarily. Many UK homeowners install PVC wall panels themselves using basic tools. However, if you’re working with tricky cuts or existing damage, a professional finish might be worth the cost.
3. Will Panels Hide Uneven or Damaged Tiles?
Only to a certain extent. Minor imperfections may be covered, but if your tiles are severely cracked or bulging, it’s best to repair those issues first.
Home Diagnostics and Technical Standards Specialist at Hello Mag. She provides high-level Expertise in appliance mechanics and scientific pest management, ensuring every guide follows strict safety protocols and manufacturer standards. As a leading Authority on technical home specs, Kanimozhi audits complex data to provide homeowners with the most accurate, verified, and reliable diagnostic solutions available.

by Kanimozhi BV | Jan 7, 2026 | Garden, Exterior, Home & Living
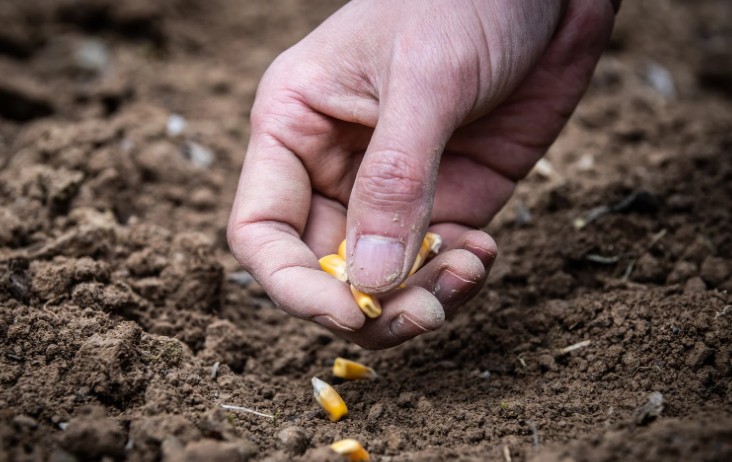
Growing sweetcorn in your UK garden is one of the most satisfying experiences — but the real magic happens only if you harvest at the right time.
Pick it too early, and the kernels are underdeveloped and flavourless. Leave it too long, and the sugar turns to starch, leaving your cobs chewy and dull.
So, when is corn ready to harvest? In this guide, you’ll learn exactly how to spot the signs of ripeness, perform simple tests, and pick your corn with confidence — backed by real UK gardening experience.
When Is Corn Ready to Harvest in the UK?
What Is Typical Harvest Window?
In the UK, sweetcorn is generally ready for harvest from late August through early September, depending on the variety and the summer weather.
If the season has been warm and sunny, you might see maturity by mid-August. Cooler or wetter seasons may delay it into October.
Remember, the timing can shift slightly based on:
- Corn variety (early vs maincrop)
- Local climate and soil temperature
- Rainfall and sunlight
How Long It Takes Corn to Grow?
From sowing to harvest, corn usually takes between 60 and 100 days to mature. Here’s a quick table showing average growth duration:
| Corn Type |
Maturity Time (Days) |
| Early Varieties |
60–75 |
| Mid-Season Varieties |
75–90 |
| Late Varieties |
90–100+ |
Warmth is key — corn needs consistent temperatures over 16°C to thrive. The cooler UK climate means it’s best to choose early to mid-season varieties.

When to Harvest Sweet Corn?
What are the Signs Specific to Sweet Corn Maturity?
Sweetcorn is picked during the milk stage — a short window when the kernels are at their sweetest and juiciest. Here’s how to tell it’s time:
- Silks are brown and dry to the touch
- Ears feel full and rounded, not tapered
- Kernels look plump and glossy when the husk is peeled back slightly
- The ear starts to lean away from the stalk
Timing is critical — miss the window and the sugars will convert to starch.
What are the Differences from Field Corn or Popcorn??\
| Type |
Harvest Stage |
Purpose |
| Sweetcorn |
Milk stage |
Fresh eating or freezing |
| Field Corn |
Fully mature & dried |
Animal feed or flour |
| Popcorn |
Fully mature & dried |
For popping |
Don’t judge sweetcorn based on field corn maturity — they have entirely different harvest requirements.
What Are the Visual Signs Corn Is Ready to Harvest?
Knowing when corn is ready to harvest depends on a combination of visual clues and hands-on testing. Here’s what to look for:
1. Browning and Drying of the Silks
The long, thread-like silks that stick out from the top of the cob will:
- Start greenish-yellow when they emerge
- Turn brown and dry once the pollination is complete
- Indicate the corn is nearing maturity once fully dried (usually 2–3 weeks after silk emergence)
When silks are fully brown and brittle, start testing the ears.
2. Fullness of the Ear
A mature cob will feel:
- Firm and heavy
- Well-rounded and full, not narrow or pointed
- Tight inside the husk when gently squeezed
3. Ear Angle and Stalk Position
Mature ears tend to lean slightly away from the stalk, a subtle but reliable sign that they’ve filled out and are ready to be picked.

How to Test Corn for Readiness?
Even if visual signs are promising, the milky test is the most accurate way to confirm that your corn is harvest-ready.
The Milky Kernel Test (Step-by-Step)
- Peel back a small section of husk to reveal a few kernels in the middle of the cob.
- Press a kernel gently with your thumbnail.
| Kernel Result |
Meaning |
| Clear liquid |
Needs more time |
| Milky liquid |
Perfect time to harvest |
| No liquid or doughy |
Overripe — sugars turned to starch |
Test a few ears from different plants to get a clear picture of the overall crop readiness.
Step‑by‑Step: How to Harvest Your Corn?
Here’s a clear and simple method to harvest your sweetcorn without damaging the plant or compromising the flavour:
Step 1: Pick the Right Time of Day
- Early morning is best — sugar levels are highest
- Avoid hot midday sun, which reduces moisture in the cob
Step 2: Double-Check for Readiness
- Confirm brown, dry silks
- Feel the ear for fullness
- Perform the milky kernel test
- Clean hands are often enough
- Use secateurs or garden shears for thick stalks
- Have a container or basket ready
Step 4: Remove the Cob
- Grasp the cob firmly near the base
- Twist downward and pull to snap it off cleanly
- If using shears, cut just below the ear without damaging the stalk
Step 5: Store or Use Quickly
- Place ears in a cool basket out of direct sunlight
- Refrigerate or cook within a few hours to preserve peak sweetness
🧊 For longer storage, blanch and freeze the kernels or whole cobs.
Case Study – Expert Advice from a UK Grower
First-Hand Insights from an Experienced UK Grower
As someone who has grown sweetcorn in the UK for years, I can tell you this: the window for perfect harvest is narrow — and precision matters.
“I rely on the silk drying method and the milky kernel test. Once the silks are fully brown and dry, I peel back a husk and check a few kernels. If I see milky sap, it’s go-time. Wait too long and the sweetness fades fast.”
“In the UK’s unpredictable climate, you have to check often — especially as September approaches. Rain and cooler nights can affect ripening, and the flavour can drop off quickly if you miss that peak.”
This isn’t guesswork — it’s based on real, seasonal UK gardening experience and it works every time.
After Harvest: What to Do Next?
What about Storing and Eating Fresh Corn?
Sweetcorn should be eaten as soon as possible after picking. Each hour post-harvest reduces sweetness.
- Refrigerate unshucked ears for up to 3 days
- For long-term storage:
- Husk and blanch the ears for 4–6 minutes
- Cool them quickly in ice water
- Freeze whole or slice kernels off and bag

What are the Common Post-Harvest Mistakes?
- Leaving picked corn in the sun
- Waiting too long before cooking
- Harvesting all cobs at once without testing multiple ears
Conclusion
If you’ve ever asked yourself when is corn ready to harvest, now you have your answer: when the silks are brown, the ear is full and firm, and the milky sap test confirms the sweet spot.
By observing the plant closely and acting promptly, you’ll enjoy sweet, juicy corn straight from your UK garden — the way it’s meant to be eaten.
Related Article: SweetCorn Growing Stages Explained: What to Expect and When?
What are the FAQ about when is corn ready to harvest
1. Can I just go by calendar days to harvest corn?
No — while most varieties mature in 60–100 days, factors like weather and soil affect this. Always verify with visual signs and the milky test.
2. What if cold weather arrives before harvest?
If frost is expected, harvest mature ears even if not perfect. You can cook or freeze them immediately. Use garden fleece to extend protection if needed.
3. Why are my cobs small but the silks are brown?
This is often due to poor pollination or overcrowding. Even with brown silks, immature or underdeveloped kernels may result if the ears didn’t get fully pollinated.
Home Diagnostics and Technical Standards Specialist at Hello Mag. She provides high-level Expertise in appliance mechanics and scientific pest management, ensuring every guide follows strict safety protocols and manufacturer standards. As a leading Authority on technical home specs, Kanimozhi audits complex data to provide homeowners with the most accurate, verified, and reliable diagnostic solutions available.

by Kanimozhi BV | Jan 6, 2026 | Garage, Exterior
Sweet, juicy, and satisfying, sweet corn is a delicious summer crop that’s surprisingly easy to grow in British gardens. If you’re wondering how to grow sweet corn in the UK climate, you’re in the right place.
This guide walks you through every step — from sowing and planting to dealing with pests and knowing exactly when to harvest sweet corn at its peak.
What Is Sweet Corn and Why Should You Grow It Yourself?
Sweet corn is a variety of maize harvested while the kernels are still tender and packed with sugar. It’s different from field corn, which is harvested when fully mature and used for animal feed or processed products.
Growing your own sweet corn offers several benefits:
- Superior flavour: Homegrown corn tastes fresher and sweeter than anything from the supermarket.
- Nutritional value: It retains more nutrients when freshly picked and eaten quickly.
- Satisfaction: Watching your tall corn plants grow and produce full cobs is incredibly rewarding.
- Low maintenance: Sweet corn is fairly easy to grow once established.
Whether you have a garden or an allotment, sweet corn can be a great addition to your seasonal crops.
When to Sow Sweetcorn UK: What’s the Best Time to Start?
In the UK, timing is crucial due to the cooler climate. The ideal period to sow sweetcorn in the UK is between mid-April and early May.
Should You Sow Indoors or Outdoors?
- Indoors (preferred): Start your seeds under cover in deep pots or modules to avoid root disturbance. Sow one seed per pot at a depth of 2-3 cm. Keep them in a warm spot with good light.
- Outdoors: You can sow directly outdoors from late May, once the risk of frost is completely gone and the soil has warmed to at least 10°C.
Indoor sowing gives your plants a head start and allows you to control early growing conditions.
How Do You Choose the Right Sweetcorn Variety for UK Conditions?
Not all sweet corn varieties perform well in cooler UK summers. Choose early-maturing or F1 hybrid varieties that are bred for short growing seasons.
What are the Recommended UK-friendly varieties?
- wift F1 – One of the earliest maturing varieties
- Incredible F1 – Consistent results and large, sweet cobs
- Lark F1 – Excellent flavour and high yield
These varieties typically mature within 70–90 days, making them ideal for the UK’s shorter growing window.
Where Should You Grow Your Sweetcorn for Best Results?
Location plays a big role in growing success. Sweetcorn loves warmth, so choose a spot that maximises sun exposure.
What Location Offers the Best Growing Conditions?
Table: Ideal Conditions for Growing Sweetcorn in the UK
| Requirement |
Ideal Condition |
Notes |
| Sunlight |
Full sun (6–8 hours daily) |
Encourages sugar production |
| Soil |
Fertile, well-drained, warm soil |
Improve with compost or manure |
| Shelter |
Wind-protected |
Helps prevent pollination issues |
| Spacing |
Grid layout (45 cm apart) |
Ensures effective wind pollination |
- Avoid low-lying, damp spots.
- Ensure soil is enriched with compost or well-rotted manure.
- Make use of cloches or fleece in order to warm the soil.
When to Plant Out Sweetcorn: What’s the Right Time to Move Seedlings?
You should plan to plant out sweetcorn when your seedlings are sturdy and all danger of frost has passed.
How Do You Plant Out Sweetcorn?
- Timing: Late May to early June is ideal in most UK regions.
- Hardening off: Gradually acclimatise seedlings to outdoor conditions over 7–10 days.
- Spacing: Plant in a grid or block pattern, not rows. This helps wind pollination, which sweetcorn relies on.
- Depth: Transplant each seedling to the same depth it grew in its pot.
Firm the soil across specific plants and water completely after planting.

How Should You Care for Sweetcorn During the Growing Season?
Once planted, sweetcorn needs minimal fuss but consistent care.
What Are the Key Care Tips?
- Watering: Keep the soil moist, especially during dry spells and when silks emerge.
- Mulching: Apply mulch around the foundation to keep the moisture and defeat weeds.
- Feeding: Use a nitrogen-rich liquid feed every two weeks from mid-season onward.
- Pollination: Lightly shake the tassels or rub them onto the silks to help transfer pollen, especially if wind is limited.
Sweetcorn will grow rapidly in warm conditions, reaching 1.5 to 2 metres tall.
When Is Corn Ready to Harvest: How Do You Know It’s Time?
Knowing when is corn ready to harvest ensures the best taste and texture.
What Are the Signs That Corn Is Ready?
- Silks have turned brown but not dried out
- Cobs feel full and firm when gently squeezed
- Kernels release a milky juice when pierced (clear means too early; doughy means too late)
Typically, this happens 16 to 20 weeks after sowing.
When to Harvest Sweet Corn for the Best Flavour?
The best time to harvest sweet corn is just before eating. Sweetness declines quickly after picking as the sugars convert to starch.
Tips:
- Pick early in the morning for peak sweetness
- Use or refrigerate immediately
Growing Sweet Corn Problems UK: What Should You Watch Out For?
Even with the best care, you might encounter issues. Here’s what to expect when dealing with growing sweet corn problems in the UK.
What Are the Most Common Issues?
- Poor pollination: Caused by planting in rows or low wind activity; fix by hand-pollinating
- Slugs and snails: Protect young plants with barriers or organic slug pellets
- Birds: Cover developing cobs with netting or paper bags
- Cool summers: May delay maturity or reduce sweetness
Proactive monitoring and small interventions can keep problems manageable.
What Can You Do with Freshly Harvested Sweetcorn?
Once harvested, sweetcorn is best eaten fresh. Here are a few ideas:
- Boil or steam and serve with butter
- Grill whole with olive oil and spices
- Add to salads, soups, or pasta
- Cut and freeze kernels for future meals
Corn can also be blanched and frozen on the cob if you prefer.
Conclusion: What Should You Remember About How to Grow Sweet Corn?
Mastering how to grow sweet corn in the UK is all about timing, positioning, and care. From understanding when to sow sweetcorn UK to knowing when is corn ready to harvest, each step helps ensure a juicy, flavour-packed crop.
With just a little planning, you’ll enjoy one of the summer garden’s most delicious rewards.
Related Article: SweetCorn Growing Stages Explained: What to Expect and When?
What are the FAQs About How To Grow SweetCorn in the UK?
1. Can you grow sweetcorn in pots or containers?
Yes, use large, deep containers and plant at least 4–6 in a block formation to aid pollination.
2. Does sweetcorn need a lot of water?
It needs consistent moisture, especially during tasseling and cob formation.
3. How tall does sweetcorn grow in the UK?
Depending on the variety, expect heights between 1.5 and 2 metres.
4. Can sweetcorn grow in partial shade?
It prefers full sun. Less sunlight can reduce sugar levels and yield.
Home Diagnostics and Technical Standards Specialist at Hello Mag. She provides high-level Expertise in appliance mechanics and scientific pest management, ensuring every guide follows strict safety protocols and manufacturer standards. As a leading Authority on technical home specs, Kanimozhi audits complex data to provide homeowners with the most accurate, verified, and reliable diagnostic solutions available.
