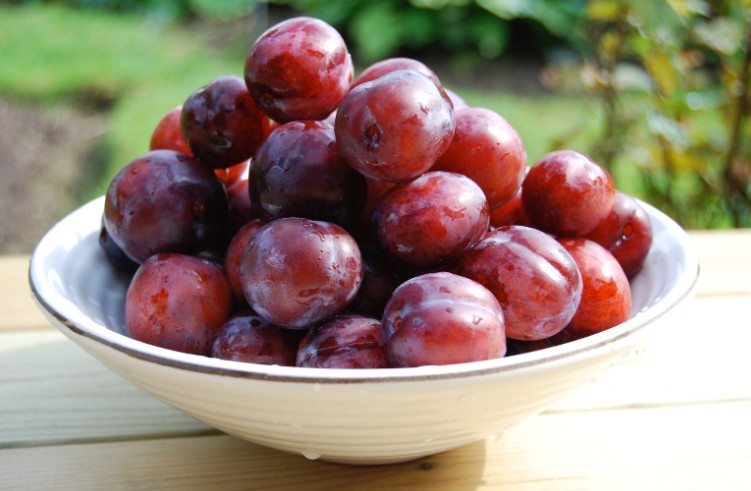
by Kanimozhi BV | Dec 5, 2025 | Garden, Exterior
If you’ve ever had too many ripe plums and wondered what to do with them before they spoil, you’ve likely asked yourself: can you freeze plums?
Whether they’re from your garden, a farmers’ market, or the local supermarket, freezing plums is a brilliant way to extend their shelf life and reduce food waste.
In this guide, you’ll learn how to freeze plums properly, what methods work best, how long they last, and what to do with them after freezing.
You’ll also get answers to common questions like can you freeze plums whole? and can you freeze plums with the stones in?
Can You Freeze Plums at All? – Is It Safe and Practical?
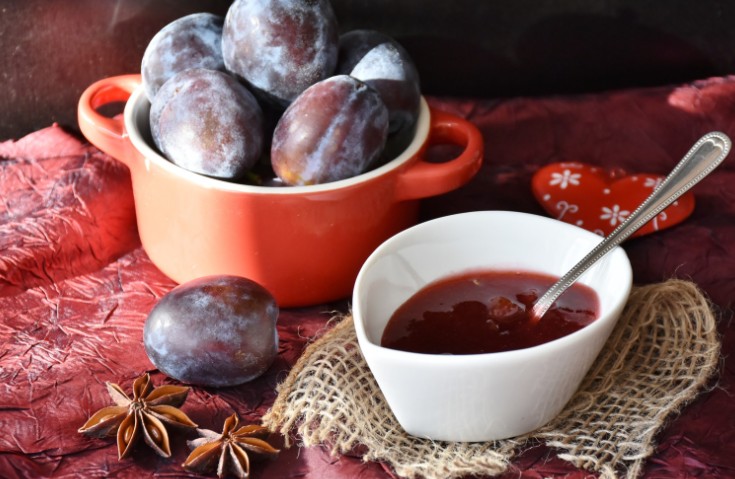
Yes — you can freeze plums, and they freeze very well. Freezing is one of the easiest and most effective ways to preserve plums long term.
Once frozen, they can last for up to six months in a typical UK freezer without losing their flavour.
Freezing works for all types of plums, including:
- Victoria plums
- Damson plums
- Greengages
- Black and red plums
Just keep in mind that the texture will soften after thawing, so frozen plums are best used for cooking, baking, blending, or making jam.

Can You Freeze Plums Whole?
Yes, you can freeze plums whole — and it’s probably the simplest method if you’re short on time.
What are the Benefits of freezing whole plums?
- No prep needed — just wash and freeze
- Retain more moisture and flavour
- Great for smoothies or sauces
However, whole plums take longer to defrost, and they’re harder to pit after thawing. If you’re planning to use them for cooking or baking, it’s often better to slice and pit them first for convenience.
Can You Freeze Plums with the Stones In?
Yes — you can freeze plums with the stones in, but it’s not usually recommended unless you plan to eat them straight from the freezer or use them for blending.
Why You Can Freeze Plums with the Stones In?
- Stones can cause the plums to split or crack as they freeze
- Harder to use in recipes once thawed
- May affect flavour slightly during long storage
If you’re freezing plums for pies, tarts, chutneys, or compotes, it’s best to remove the stones first.

Whole vs Sliced: What’s the Best Way to Freeze Plums?
It depends on how you’ll use them later. Here’s a quick comparison to help you decide:
| Freezing Method |
Best Use Cases |
Pros |
Cons |
| Whole plums |
Smoothies, snacking |
Quick and easy prep, retain more juice |
Harder to pit later, slower thawing |
| Sliced or halved |
Baking, jam, compotes |
Fast to defrost, easier to cook with |
Requires upfront preparation |
What Can You Do with Frozen Plums?
Frozen plums are incredibly versatile and can be used in both sweet and savoury recipes. Whether you thaw them fully or use them from frozen, here are some great ways to put them to use:
- Make plum crumbles or pies
- Add to smoothies or shakes
- Simmer into a compote or sauce
- Use in jam or chutney
- Add to yogurt or porridge
- Roast with pork or duck for a tangy glaze
What are the Tips for Freezing Plums in UK Households?
If you’re freezing plums often, especially from your own garden, a little planning goes a long way. Here are some helpful tips:
- Freeze them in summer, when UK plums are at their peak
- Always label containers with the freezing date and plum variety
- Store in the coldest part of your freezer to maintain quality
- Use within 6 months for the best taste and texture
- Avoid refreezing once thawed — use straight away in a recipe
Conclusion
So, can you freeze plums? Absolutely — and it’s one of the smartest ways to make the most of the plum season in the UK.
Whether you’re dealing with homegrown Victoria plums or store-bought Damsons, freezing helps you cut down on waste and enjoy rich plum flavours all year long.
Whether you choose to freeze them whole or sliced, with or without the stones, you’ve got options. Just follow the easy steps outlined above, and your freezer can become a year-round plum pantry.
Related Article: When Are Plums Ready to Pick in the UK? A Seasonal Guide from My Orchard
FAQs About Can You Freeze Plums
1. Can you freeze plums without removing the stone?
Yes, but it’s better to remove the stones before freezing if you’re planning to cook or bake with them later.
2. Do you need to peel plums before freezing?
No, plum skin freezes well and softens during cooking. You can leave it on.
3. How long do frozen plums last?
They last up to 6 months in the freezer without losing flavour. They’re still safe after that but may lose texture.
4. Can you use frozen plums in jam?
Yes, frozen plums are perfect for jam-making. You can use them straight from the freezer — no need to thaw first.
5. Do plums need blanching before freezing?
Not at all. Plums freeze well raw — just wash, cut, and freeze.
Home Diagnostics and Technical Standards Specialist at Hello Mag. She provides high-level Expertise in appliance mechanics and scientific pest management, ensuring every guide follows strict safety protocols and manufacturer standards. As a leading Authority on technical home specs, Kanimozhi audits complex data to provide homeowners with the most accurate, verified, and reliable diagnostic solutions available.
by Kanimozhi BV | Dec 5, 2025 | Garden, Exterior
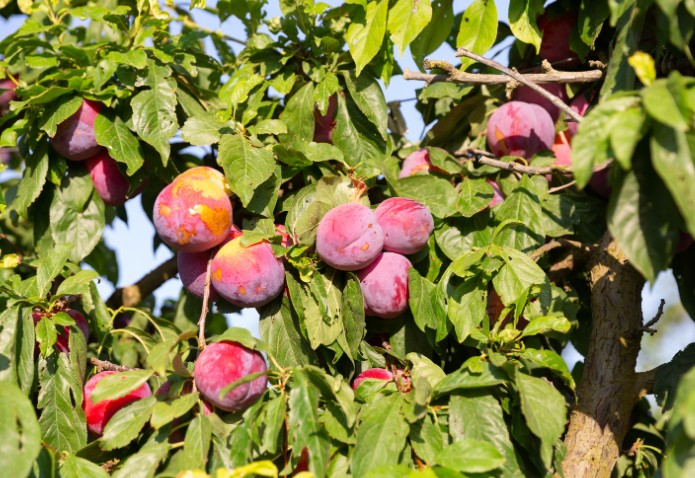
Plums are among the most delightful stone fruits you can enjoy fresh, preserve in jams, or bake into delicious tarts.
But what happens if you pick them before they’re fully ripe? Do plums ripen after picking? If you’ve ever asked this question after buying slightly firm plums or harvesting your own crop, you’re not alone.
This guide gives you clear answers and practical advice to help you handle plums the right way—whether you’re a gardener, a market shopper, or just someone who loves good fruit.
What Kind of Fruit Is a Plum? – Understanding “Climacteric Fruit”
Before diving into whether plums ripen after harvesting, it’s helpful to understand the science behind fruit ripening.
Plums are what botanists call climacteric fruits, which means they can continue ripening after being picked. These fruits produce ethylene gas—a natural plant hormone—that drives the ripening process.
Other common climacteric fruits include:
- Bananas
- Apples
- Mangoes
- Peaches
So yes—plums ripen after picking, but the degree of ripening depends on how mature they were when harvested.
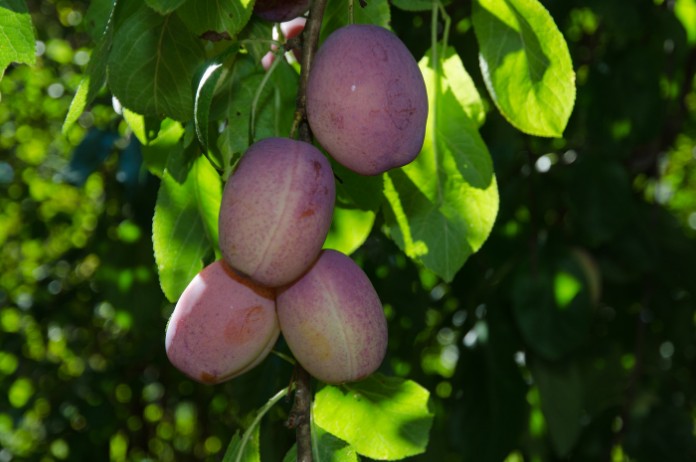
Do Plums Ripen After Picking — Or Does It Depend?
While most plums will continue to soften and develop more flavour after being picked, the outcome depends on the variety and the stage at which they were harvested.
Some types, especially European plums like Victoria or Damson, ripen beautifully off the tree if picked when nearly mature.
However, if the plum was picked too early—before natural sugars developed—it may ripen in texture but remain bland or sour in taste. You should always aim to pick when the fruit shows early signs of ripeness:
- A change in colour appropriate for the variety
- Slight softness when gently squeezed
- A natural fragrance around the stem
- Easy detachment from the tree
If Picked While Firm: How to Make Plums Ripen at Home?
Picked your plums a bit early? No worries—there are simple ways to encourage ripening at home.
What are the proven ripening methods?
- Room Temperature Storage: Place plums on a countertop or in a fruit bowl. Within 2–5 days, they should soften and ripen naturally.
- Paper Bag Method: Put your plums in a brown paper bag. The enclosed space traps ethylene gas and speeds up ripening.
- Add an Ethylene Buddy: Add a banana or apple to the bag to boost ethylene concentration and make ripening faster.
What are the Signs that your plums are ripe?
- Yield to gentle pressure
- Colour deepens and skin may develop a light “bloom”
- Aroma becomes sweet and fruity
Once ripe, either enjoy them immediately or store in the fridge to slow further ripening.

What Ripening — and Post-Harvest Changes — You Should (and Shouldn’t) Expect?
After picking, plums continue to ripen, but not all aspects of ripeness are guaranteed. Let’s break it down.
| Aspect |
What Happens After Picking |
| Softness |
Yes – plums soften significantly after harvest |
| Colour Change |
Yes – skin may darken or brighten depending on variety |
| Sweetness Increase |
Limited – some sugars may increase, but not dramatically |
| Juiciness |
Often improves as the flesh softens |
| Flavour Development |
Improves if fruit was already maturing on the tree |
Note: If the plum was picked when completely green or immature, it may soften but still taste sour or astringent. That’s because sugar accumulation mostly happens while the fruit is still attached to the tree.
Should You Pick Plums Early or Wait for Full Ripeness?
Sometimes you’re faced with the choice: pick your plums slightly under-ripe or risk letting them overripen and fall.
Here’s a quick breakdown:
What are the Advantages of Early Picking?
- Reduces waste from fruit falling or bruising
- Easier to transport and store
- Allows control over the ripening process at home
What are the Disadvantages of Early Picking?
- Flavour may not be as rich
- Less natural sugar, especially if picked too green
- Texture could turn mushy without the sweetness to balance it
For best results, pick when plums are just about ripe—they should be slightly soft and colourful but not overripe.
How Can You Tell If a Plum Is Ripe?
Here’s a quick checklist for checking plum ripeness—whether on the tree or in your kitchen.
Ripeness Indicators:
- Soft but not squishy texture
- Deep, rich colour (varies by type – e.g., purple, yellow, red)
- Fragrant smell from the stem or skin
- Slight give when you gently press the surface
If your plum ticks most of these boxes, it’s ready to eat.
What are the Practical Tips for UK Gardeners or Shoppers?
If you’re growing or buying plums in the UK, your approach may vary slightly depending on weather and storage options.
How is For Home Gardeners?
- Pick in the morning when fruit is cool and firm
- Don’t harvest all at once—plums ripen gradually over weeks
- Check daily during peak season (July to early September)
- Handle gently to avoid bruises, especially if you plan to ripen them further indoors
How is For Shoppers?
- Choose plums that are firm but not rock hard
- Avoid any with greenish tints or dry skins
- Let them ripen in a paper bag or on your kitchen counter
- Once ripe, store in the fridge for up to 3–5 days
Summary: What to Expect When You Pick Plums?
Yes—plums ripen after picking, thanks to their climacteric nature. But what you get depends on how mature they were when picked.
- Slightly firm, coloured plums with good aroma? Great for ripening at home.
- Hard, green, immature plums? May soften but won’t sweeten much.
Your goal should always be to harvest or buy plums when they’re close to ripe, then give them time to finish the process in a controlled setting.
Conclusion
To answer your question once and for all: do plums ripen after picking? Yes, it do—but only if they’re picked at the right time.
As someone in the UK dealing with unpredictable summers and delicate fruit, your best bet is to look for signs of maturity before harvesting or buying.
Use simple at-home ripening techniques like paper bags or countertop storage, and don’t refrigerate plums until they’ve ripened. That way, you get the best texture and flavour—just like nature intended.
Related Article: When Are Plums Ready to Pick in the UK? A Seasonal Guide from My Orchard
Home Diagnostics and Technical Standards Specialist at Hello Mag. She provides high-level Expertise in appliance mechanics and scientific pest management, ensuring every guide follows strict safety protocols and manufacturer standards. As a leading Authority on technical home specs, Kanimozhi audits complex data to provide homeowners with the most accurate, verified, and reliable diagnostic solutions available.
by Kanimozhi BV | Dec 4, 2025 | Garden, Exterior
When Are Plums Ready to Pick in the UK? — My Orchard Experience
I’ve spent years growing plums in my small UK garden, and each summer brings that familiar question: when are plums ready to pick?
It’s not just about watching the calendar — it’s about noticing the little details in colour, feel, and timing that signal the perfect moment.
Let me guide you through everything I’ve learned about plum picking season in the UK, so you can enjoy delicious, ripe fruit right from your own tree.
Why Timing Matters? – Getting the Best Flavour and Texture
Plums, like many fruits, reward patience. The moment they ripen on the tree is when they offer their fullest sweetness and juiciness.
If picked too early?
- The fruit is hard and sour
- Texture is chalky or rubbery
- It won’t ripen well off the tree
If left too late?
- The plum becomes mushy or bruised
- It might drop and spoil
- Insects or birds may get to it first
So yes — timing really is everything.
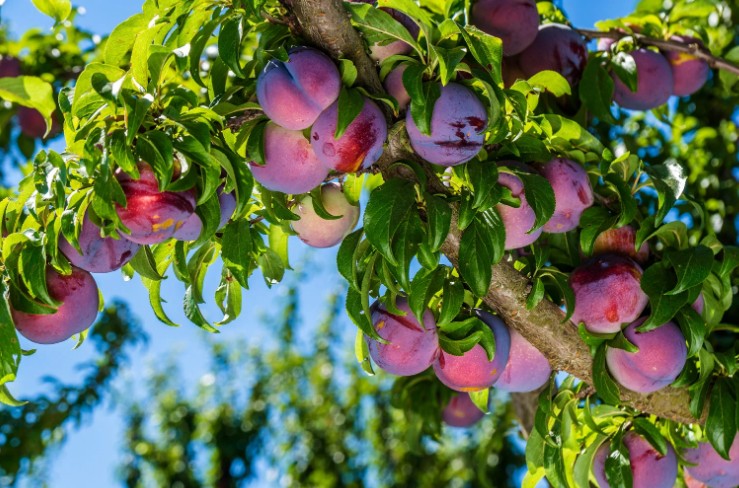
What Is the Plum Harvest Season in the UK?
In the UK, plums are generally ready to harvest from late July through early September, depending on the variety and your local microclimate.
Here’s a table I use to keep track of plum ripening times:
| Plum Variety |
Typical Ripening Time (UK) |
Type |
| Early Rivers |
Mid to Late July |
Early |
| Victoria |
Late August to Early September |
Mid-season |
| Marjorie’s Seedling |
Mid to Late September |
Late |
| Opal |
Early to Mid August |
Early-Mid |
| Czar |
Late July to Early August |
Early |
From my experience, Victoria plums, one of the most popular varieties in Britain, usually hit their sweet spot around late August.
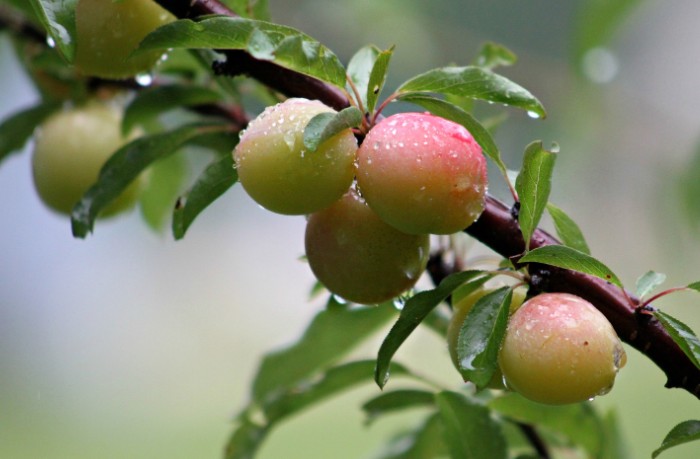
How Do I Know When a Plum Is Ripe?
Over the years, I’ve created a little ripe plum checklist I go through when inspecting my tree. Here’s what I look for:
- Softness – The plum yields slightly when gently squeezed
- Colour – It deepens depending on the variety (e.g. rich purple for Victoria)
- Natural bloom – A light, powdery coating means they’re at their best
- Fragrance – A subtle, sweet aroma is often present on warm days
- Easy to pick – Ripe plums come off with a gentle twist
Tip: If you tug and the fruit resists, it’s not ready.
Why Don’t All Plums Ripen at Once?
One of the first surprises I had was that even a single tree will ripen its fruit over a few weeks, not all at once.
Here’s how I handle that:
- I check the tree every 2–3 days during peak season
- I pick only the plums that meet the ripeness test
- I return again and again as the next batch matures
This staggered approach helps me avoid waste and ensures I always get the tastiest plums.
What Affects When Plums Ripen in the UK?
Several things play into when your plums will be ready:
- Variety – Some are bred to be early, others late
- Weather – A sunny summer brings earlier and sweeter plums
- Location – South-facing trees often ripen faster
- Tree health – Well-fed, properly pruned trees fruit better
I noticed my plum tree produced a week earlier the year we had that heatwave — sun makes a huge difference.
How I Pick Plums Without Damaging Them?
Because plums bruise easily, I’ve developed a gentle routine:
- I use a shallow, padded basket or tray to collect them
- I never shake the tree — I only twist or cup the plum gently
- I pick during cooler times of the day — morning or late afternoon
- I store them in a single layer if I can
This care ensures my harvest stays firm and flavourful.

Can You Ripen Plums Off the Tree?
Yes — but it’s not ideal.
If I accidentally pick some a bit too early, I leave them at room temperature for a couple of days. They soften, but they never taste quite as good as those that ripened fully on the branch.
If in doubt, leave them on the tree another day.
When I get a big glut or a few overripe fruits, I use them in other ways:
- Jam or chutney
- Stewed plum compote
- Plum crumble
- Freezing for smoothies
Here’s a quick breakdown of uses:
| Plum Condition |
Best Use |
| Firm & ripe |
Eat fresh or bake |
| Slightly soft / bruised |
Jams, crumbles, sauces |
| Overripe |
Compost or wildlife treats |
Conclusion — Picking the Perfect Plums in the UK
So, when are plums ready to pick? In my experience, the best approach is to know your variety, monitor your tree frequently, and rely on your senses — not just the calendar.
Each year might bring slightly different timing, but if you watch for softness, colour, and that tell-tale scent, you’ll know exactly when to reach out and pick the perfect plum.
Related Article: How to Remove Fruit Flies?
Frequently Asked Questions On When Are Plums Ready to Pick in the UK
1. Can I pick all my plums at once to save time?
No — most plums ripen in stages. Picking them all at once means some will be underripe and others may spoil.
2. What’s the easiest plum variety to grow in the UK?
Victoria is widely considered the easiest and most reliable for UK gardens.
3. Should I refrigerate plums after picking?
Only if you want to store them longer. Freshly picked plums are best eaten within 2–3 days when kept at room temperature.
4. Do I need to wash plums before storing?
No — washing removes the natural protective bloom. Only wash just before eating.
5. Can plums ripen indoors in a paper bag like bananas?
They can soften slightly, but they won’t sweeten much more. Tree-ripened is best.
Home Diagnostics and Technical Standards Specialist at Hello Mag. She provides high-level Expertise in appliance mechanics and scientific pest management, ensuring every guide follows strict safety protocols and manufacturer standards. As a leading Authority on technical home specs, Kanimozhi audits complex data to provide homeowners with the most accurate, verified, and reliable diagnostic solutions available.
by Kanimozhi BV | Dec 3, 2025 | Garden, Exterior
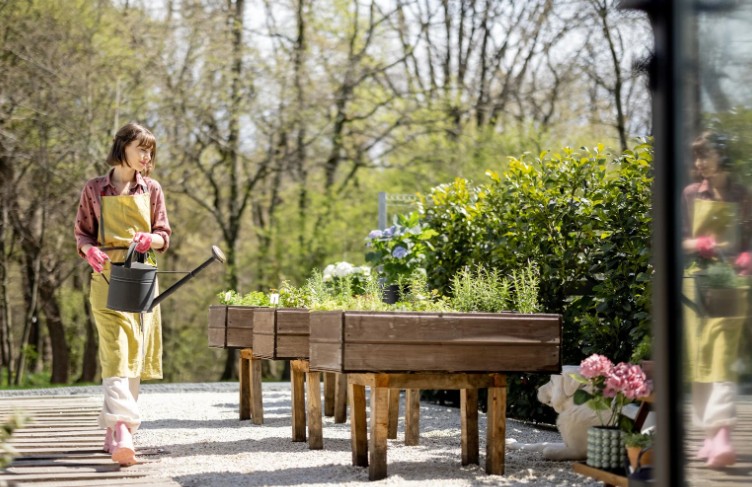
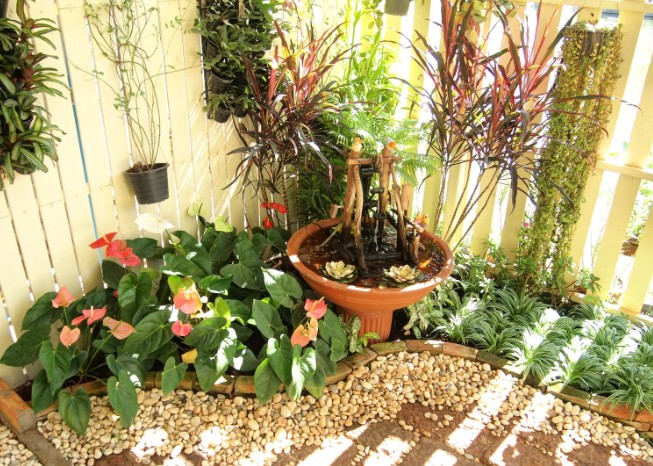
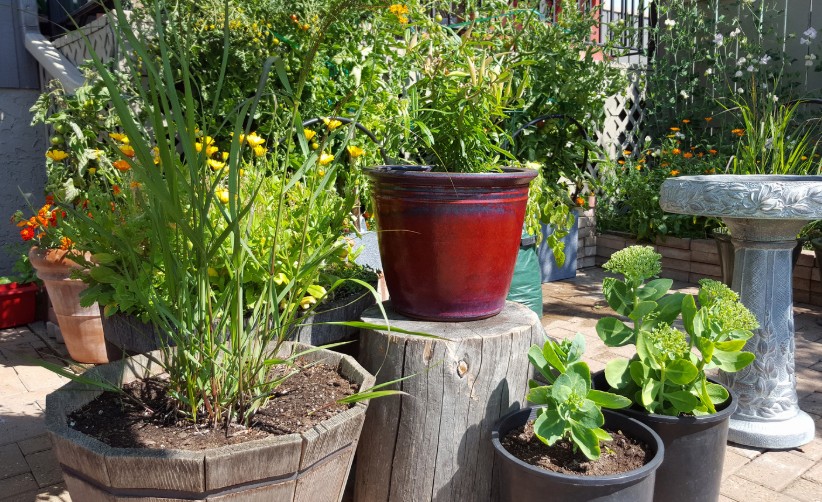
Creating a sense of space in a small garden isn’t just a dream — it’s completely achievable. When I started redesigning my compact outdoor area, I was surprised at how a few simple adjustments dramatically changed how spacious it felt.
Whether you’re dealing with a narrow yard, a tiny courtyard or a modest city garden, let me guide you through how to make a small garden look bigger — using clever layout, smart planting, and thoughtful design.
Why Do Small Gardens Feel Smaller Than They Are?
It might surprise you, but it’s not the actual size of the garden that makes it feel cramped — it’s how it’s designed.
Many small gardens suffer from:
- Cluttered layouts
- Too many items competing for attention
- Flat, low planting without height variation
- Overuse of boundaries (fences, walls) that feel enclosing
Once I started noticing these, I realised that a little rearrangement and a few design tricks could give my garden the openness it desperately needed. It’s all about visual perception, guiding the eye, and maximising depth.
How Can Garden Layout Make a Space Feel Bigger?
How to Use Paths, Curves and Levels to Draw the Eye?
Straight lines can make a garden feel like a tight corridor. I added a curved pathway that gently leads from the patio to the back of the garden. It creates the illusion of distance. Introducing subtle level changes (like a raised bed or a sunken seating area) can also add dimension and interest.
How to Choose the Right Shapes and Paving Patterns?
Large paving slabs, laid diagonally or in a herringbone pattern, make the space feel broader. Circular shapes and flowing lines trick the eye into thinking the space continues beyond what’s visible.

How Do You Make Boundaries Disappear?
Soften the Edges
Solid fences scream “this is the end.” So I painted mine in a muted, consistent colour and added climbing plants to blur the lines. This gave the illusion that the garden stretched beyond its limits.
Borrow the Landscape Beyond
If your garden backs onto greenery or open space, don’t block it. Keep the boundary low or open with trellises and allow your eyes to “borrow” the view beyond, expanding the sense of space.
How Can Plants Help Expand the Feeling of Space?
Grow Upwards: Think Vertical
Instead of cluttering the floor with pots, I began growing plants up walls and fences using:
- Wall planters
- Hanging baskets
- Climbing roses and clematis
- Obelisks and tall supports
This freed up floor space while adding visual interest above eye level, drawing attention upwards.
What are the Layer Your Plants for Depth?
Planting in tiers — from low ground covers at the front to medium shrubs in the middle, and tall climbers or trees at the back — makes your garden feel like it stretches deeper than it is.
What Lighting and Colours Help Open Up a Garden?
Lighting can totally transform a small space at night. I used soft uplights on taller plants and fences to add dimension after dark. During the day, colour plays a huge role.
Here’s a quick comparison of how different choices affect visual perception:
| Element |
Expands Space? |
Shrinks Space? |
| Cool-toned paint (greys, greens) |
Yes |
No |
| Uniform boundary colour |
Yes |
No |
| Heavy, dark furniture |
No |
Yes |
| Mirrors in shaded areas |
Yes |
No (if poorly placed) |
One of my best decisions was to add a mirror against the back fence. It reflected the greenery and light, making the garden feel almost twice as big.
Can Furniture and Storage Make or Break a Small Garden?
Absolutely. The right furniture keeps your garden functional without sacrificing space.
What are the Tips I Followed?
- Used a foldable bistro set instead of bulky seating
- Opted for a bench with hidden storage for tools and cushions
- Positioned furniture at the garden’s edge, not the centre
- Chose transparent or wire furniture that “visually disappears”
Creating functional zones — even in a small space — is powerful. I now have a small seating nook, a mini herb garden, and a decorative pathway. Each zone has a purpose, making the garden feel curated rather than cramped.
What Should You Avoid If You Want to Make a Garden Look Bigger?
From my own trial and error, here are the mistakes that made my garden feel smaller than it actually was:
- Too many pots and decorations competing for attention
- Lack of cohesion in furniture, materials, or fence colour
- Ignoring height and sticking only to low-level planting
- Letting clutter build up — pruning and tidying regularly is vital
- Blocking sightlines with tall or wide objects in the middle of the space
Here’s the process I followed to make my small garden feel much bigger:
- Declutter – Cleared unused pots, broken tools, unnecessary décor
- Sketch a Layout – Decided on paths, planting areas, and seating zones
- Vertical Focus – Installed trellises and planted climbers
- Create Layers – Grouped plants by height to add visual depth
- Mirror Magic – Installed a mirror to reflect space and light
- Furniture Choices – Opted for foldable, dual-purpose pieces
- Regular Maintenance – Pruned plants, repainted fences, refreshed layout seasonally
What are the Budget-Friendly Ideas That Worked for Me?
If you’re working with a tight budget, here are some realistic and affordable tips:
- Repurpose old pallets into vertical planters
- Use climbing plants instead of expensive trees
- Buy pre-owned garden furniture or storage benches
- Paint fences and pots with light, neutral tones to reflect light
- Choose gravel or stepping stones over full paving to save on materials

Conclusion: Small Garden, Big Ideas
Transforming a compact space into something that feels open and inviting isn’t about adding square footage — it’s about smart design choices.
I discovered that with the right layout, planting strategy, and a few optical tricks, my once-cramped garden now feels like a peaceful retreat.
So if you’re wondering how to make a small garden look bigger, start with a vision — and take it one step at a time. With some planning and creativity, your garden can look (and feel) much bigger than it is.
Frequently Asked Questions On How to Make a Small Garden Look Bigger
1. How do mirrors help in a small garden?
Mirrors reflect light and greenery, creating a sense of space. When placed carefully (out of direct sunlight and not facing clutter), they can double the visual depth of a garden.
2. What colours make a small garden look bigger?
Cool tones like soft greys, greens and blues help create the illusion of distance. Avoid strong, dark colours that can make the space feel enclosed.
3. Can I use big plants in a small garden?
Yes — in fact, tall, slender plants can add height without overwhelming the floor space. Just ensure they’re positioned at the back or along the sides.
4. How do I zone a small garden?
Break up your garden into purposeful sections — such as a seating corner, planting area, and pathway. This helps create interest and the feeling of multiple “rooms” outdoors.
Home Diagnostics and Technical Standards Specialist at Hello Mag. She provides high-level Expertise in appliance mechanics and scientific pest management, ensuring every guide follows strict safety protocols and manufacturer standards. As a leading Authority on technical home specs, Kanimozhi audits complex data to provide homeowners with the most accurate, verified, and reliable diagnostic solutions available.

by Kanimozhi BV | Dec 2, 2025 | Home & Living, DIY Ideas
Cleaning tiles after grouting might seem like a minor final step, but trust me — it makes all the difference between a messy, cloudy floor and a crisp, professional-looking finish.
When I first tiled my floors, I made the mistake of ignoring grout haze for a few days, and by the time I got back to it, the residue was stuck on like cement.
So in this guide, I’ll walk you through the smartest DIY ways on how to clean tiles after grouting, using simple tools and techniques that anyone in the UK can follow at home.
Why Cleaning Tiles After Grouting Is Important?
After applying grout, it’s normal for a hazy film to form on the tile surface. This grout haze is essentially fine particles of cement or grout material left behind after wiping.
If not cleaned properly, it can leave tiles looking cloudy and dirty — no matter how well you laid them.
Why I always clean my tiles after grouting:
- Prevents permanent staining or hazy buildup
- Restores the original shine and colour of the tiles
- Improves long-term durability and appearance
- Makes regular floor maintenance easier
Whether you’re dealing with ceramic, porcelain, or stone tiles, cleaning after grouting is essential to preserve that “just-installed” look.

When to Clean and What Is the Ideal Timing After Grouting?
Timing is key. I never rush into cleaning immediately after grouting because it can pull grout out of the joints. But I also don’t wait too long because grout haze becomes tougher to remove the longer it sits.
Here’s a basic timeline I follow:
| Time After Grouting |
What to Do |
| 15–30 minutes |
First wipe-down with a damp sponge |
| 1–2 hours later |
Light buffing with a clean, dry cloth |
| 24–48 hours after grouting |
Deeper cleaning if haze remains |
If I still notice a film after a couple of days, I use a more targeted cleaning method — more on that below.

I’ve learned over time that the right tools make this job much easier. Here’s what I usually have ready when I clean tiles after grouting:
What Are the Basic Supplies?
- Bucket of clean warm water
- Soft sponge or microfiber cloth
- Soft-bristle brush or nylon scrub pad
- Mop or soft towel
- Rubber gloves (optional)
What are the Optional Cleaners?
- Mild pH-neutral tile cleaner
- Diluted white vinegar (for ceramic or porcelain tiles only)
- Commercial grout haze remover (for tougher jobs)
Tip: Always check if your tile type (e.g. marble, travertine) is compatible with cleaning solutions. Natural stones are sensitive to acids like vinegar.
Step-by-Step: How I Clean Tiles After Grouting?
Let’s break down exactly how I do it — this step-by-step process has worked every time for me, even when dealing with stubborn grout haze.
Step 1: Sweep or Vacuum the Floor
Before using any water, I always sweep or vacuum the floor. Any loose grout bits or dust can scratch tiles during cleaning if not removed first.

Step 2: Wipe Down with Warm Water and Sponge
Right after grouting, I wipe the tiles gently using a damp sponge and clean water. This removes most of the grout residue before it dries.
- I use smooth, circular motions
- I rinse the sponge regularly in clean water
- I avoid scrubbing the grout lines too hard to prevent damage
Step 3: Use a Mild Cleaning Solution
If a haze remains after the initial wipe, I mix a bucket of warm water with a few drops of mild detergent or a diluted vinegar solution (1 part vinegar to 4 parts water — only on porcelain or ceramic tiles).
I then:
- Dampen a sponge or cloth in the solution
- Gently wipe down the tiles
- Let the solution sit for 5–10 minutes (but don’t let it dry)
- Rinse the area with clean water afterward
Step 4: Lightly Scrub Residue
For stubborn grout residue or dried-on haze, I gently scrub with a soft nylon pad or brush. I never use anything abrasive like steel wool, as it can scratch the tile surface.
If that still doesn’t work, I use a commercial grout haze remover. These are designed to break down grout film without damaging the tile — but I always test a small area first.
Step 5: Final Rinse and Dry
Once I’m happy with the result, I rinse the floor one last time with clean water. Then I dry it using a soft towel or let grout air dry. Buffing the tiles with a clean microfiber cloth really brings back their shine.
What to Avoid? – Common Mistakes & How to Protect Your Tiles?
I’ve learned a few things the hard way, so here are some mistakes I make sure to avoid every time:
Don’t:
- Let grout haze sit for days – it gets harder to remove and may leave permanent marks
- Use vinegar on natural stone tiles – it can etch and dull the surface
- Scrub too hard with abrasive pads – especially on glazed or polished tiles
- Mix cleaning chemicals – always stick to one type of solution at a time
- Forget to rinse – leftover cleaning solution can leave streaks or sticky residue
Taking these precautions helps me maintain a flawless tile surface after grouting.
Conclusion — My Tips for a Sparkling, Long‑Lasting Floor Finish
Cleaning tiles after grouting isn’t the most glamorous part of tiling — but it’s the part that gives your floor that final “wow” factor. With the right tools, gentle cleaning, and a bit of patience, I always get a polished, professional finish.
Here’s what I always remember:
- Clean early but not too early — timing matters
- Use gentle tools and safe cleaners
- Don’t ignore leftover haze — it doesn’t go away on its own
- Tailor your method to your tile type
In the end, it’s these finishing touches that turn a good DIY job into a great one.
Related Article: How to Grout Floor Tiles? – A Step By Step Guide for Beginners

What are the Frequently Asked Questions (FAQs) On How to Clean Tiles After Grouting?
1. When should I clean the tiles after grouting?
I usually do the first wipe-down 15–30 minutes after grouting, then a second light clean within the next 24 hours. The sooner you remove grout haze, the easier it is.
2. What if grout haze won’t come off with water?
If water alone doesn’t work, I use a diluted vinegar solution (only on compatible tiles) or a grout haze remover. Some residues are more stubborn, especially from sanded or epoxy grout.
3. Can I use vinegar on all tile types?
No — only on ceramic and porcelain tiles. For natural stone tiles like marble or slate, I avoid acidic solutions completely and opt for pH-neutral cleaners.
4. Is grout haze remover safe?
Yes, most commercial removers are tile-safe if used as directed. I always read the label carefully and do a spot test first, especially on delicate or decorative tiles.
5. How can I maintain my tiles after cleaning?
Once cleaned, I stick to regular sweeping and mopping. I also consider sealing grout lines (especially in kitchens and bathrooms) to prevent staining and make cleaning easier long-term.
Home Diagnostics and Technical Standards Specialist at Hello Mag. She provides high-level Expertise in appliance mechanics and scientific pest management, ensuring every guide follows strict safety protocols and manufacturer standards. As a leading Authority on technical home specs, Kanimozhi audits complex data to provide homeowners with the most accurate, verified, and reliable diagnostic solutions available.
