
by Kanimozhi BV | Sep 10, 2025 | Garden, Exterior
Hiring a gardener was one of those things I thought I’d never need. I used to believe that a bit of weekend effort and some YouTube tutorials could handle anything my garden threw at me.
But after years of struggling with overgrown hedges, patchy lawns, and the never-ending weeding cycle, I realised it was time to call in some help.
But how much does it actually cost? And more importantly, how much is a gardener per hour in the UK?
I asked myself the same question before hiring someone — and now I want to share everything I’ve learned from that journey, backed by experience, research, and a few hard-earned lessons.
Why I Decided to Hire a Gardener in the UK?
Maintaining a garden sounds relaxing in theory. For me, it turned into a constant battle with brambles, ivy, and unpredictable weather.
At first, I thought I just needed a few extra tools and some free time. But between work, kids, and rainy weekends, I found myself dreading outdoor jobs.
My garden started looking like a wild patch of countryside rather than a tidy outdoor space. What pushed me over the edge was a family gathering I hosted last summer.
The lawn was patchy, the hedges were wild, and my flower beds looked like something from a Victorian horror novel. That’s when I started seriously looking into professional gardening services.
So, How Much Is a Gardener Per Hour in the UK?
After making dozens of enquiries across different regions, browsing gardening forums, and speaking with neighbours, I found that hourly rates vary quite a bit across the UK.
What is The Average Hourly Rate in 2025?
Generally speaking, a gardener in the UK will charge between £20 and £45 per hour depending on several factors. Here’s the breakdown I gathered:
| Region |
Average Hourly Rate (£) |
Notes |
| London & South East |
£35–£45 |
Higher due to cost of living and demand |
| Midlands |
£25–£35 |
Moderate pricing, often negotiable |
| North of England |
£20–£30 |
More affordable, lower labour costs |
| Wales & Scotland |
£20–£30 |
Similar to northern regions |
| Rural Areas |
£18–£25 |
Lower overheads, but limited availability |
I personally live in the South East and ended up paying £38 per hour for a solo gardener with all his own tools.

What Influences the Hourly Price?
Several things affect what you’ll pay. From my own experience and research, here are the biggest pricing factors:
- Location: Gardeners in London and commuter towns tend to charge more
- Season: Spring and summer are peak months, so prices go up
- Experience: A highly qualified gardener or horticulturist will cost more
- Job Type: Complex tasks like landscaping or tree surgery push up the rate
- Tools & Transport: If your gardener provides heavy-duty tools and handles waste, expect to pay more
How much is One-Off Visit vs Ongoing Service?
One thing I didn’t realise at first was that many gardeners offer discounted rates for regular maintenance. I initially paid for a one-off tidy-up, but later negotiated a monthly maintenance package, which worked out much cheaper per visit.
What Services Are Included in the Hourly Rate?
Not every gardener offers the same services, so always ask what’s included. Here’s what I got in my package — and what most UK gardeners generally offer within their hourly rate.
What are the Basic Gardening Tasks You Can Expect?
These are usually covered in a standard hourly charge.
Most professional gardeners bring their own tools, from lawnmowers to hedge trimmers. In my case, everything was included, which made things easy.
However, be aware — some may charge extra for fuel or wear and tear if heavy equipment is involved.
Yes, in most cases. If you don’t have a green bin or composting setup, your gardener might charge an additional £5–£15 per visit for waste removal.
Mine offered to bag everything and leave it for council collection — which I found more cost-effective.
When Should You Expect to Pay More?
Not all gardening jobs are equal. Some tasks require more skill, time, or equipment — and that’s where costs can increase quickly.

What are the Tasks That Typically Cost More Per Hour?
- Large hedge reductions or topiary
- Tree surgery (often requires licensing)
- Decking or patio cleaning
- Garden clearance of overgrown or neglected spaces
- Pest or disease treatment
- Installing irrigation systems
- Landscaping or turf laying
In these cases, I found hourly rates could go up to £50–£70, or even shift to fixed project pricing.
How Is My Personal Experience? – What I Paid and Why?
After contacting five different local gardeners, I ended up hiring someone I found through a community Facebook group. What stood out?
- He had solid reviews and photos of previous work
- He offered a free first visit and quote
- His pricing was transparent and fair
I paid £114 for a three-hour session, which included hedge trimming, lawn mowing, and a basic border tidy. I later moved to a £90 per month plan for ongoing maintenance, and honestly — it was worth every penny.
Is It Worth Hiring a Gardener or Doing It Yourself?
This is something I really debated with myself.

What I Considered Before Outsourcing?
- My lack of time during the workweek
- The cost of buying and maintaining tools
- The patchy results I was getting on my own
How Is My Breakdown On Time vs Money?
Here’s how it looked when I crunched the numbers:
| Option |
Monthly Time Spent |
Cost |
Result |
| DIY |
6–8 hours |
£0–£50 (tools/fuel) |
Inconsistent, frustrating |
| Hiring a Gardener |
2–3 hours (supervision) |
£90/month |
Professional, consistent |
For me, the time saved and results delivered made the choice clear.
When DIY Works and When It Doesn’t?
If you enjoy gardening and have the time, DIY absolutely works for regular maintenance. But for larger projects, specialist pruning, or reclaiming a neglected space, I recommend bringing in a pro — even if just to get you started.
Conclusion: My Honest Advice If You’re Thinking of Hiring a Gardener
Hiring a gardener was one of the best decisions I made for my home. It saved me time, boosted my property’s appearance, and brought a level of polish I could never achieve alone.
What are My Checklist Before Hiring a Gardener?
- Get at least 3 local quotes
- Ask what’s included in the hourly rate
- Check for insurance and reviews
- Clarify waste disposal options
- Try a one-off visit before committing long-term
If you’re wondering how much is a gardener per hour in the UK, expect to pay between £20 and £45 per hour, with rates climbing based on location, complexity, and season.
But trust me — once you find the right person, it’s not just a cost. It’s a portion of investment in peace of mind & outdoor happiness as well.
What are the FAQ On How Much Is a Gardener Per Hour in the UK?
1. Do Gardeners Charge VAT?
Some do, some don’t. If you recruit a limited company or VAT-registered sole trader, VAT will be additionally included. Many local gardeners working independently are below the VAT threshold.
2. Is There a Minimum Number of Hours Required?
Usually, yes. Most gardeners ask for a minimum of 2 hours per visit, especially in urban areas. This covers travel and setup time.
3. Can I Negotiate a Better Rate for Regular Visits?
Absolutely. Most gardeners are happy to offer a discounted monthly rate if you commit to regular bookings — usually biweekly or monthly.
4. Are Gardeners Insured in the UK?
Reputable ones are. Public liability insurance protects you and them in case of accidents or property damage. Don’t be afraid to ask for proof — it’s completely normal.
5. How Do I Know If a Quote Is Fair?
Get at least three quotes, compare services, and check online reviews or community forums. Watch out for prices that seem too low — they may skip insurance, proper tools, or reliability.
Home Diagnostics and Technical Standards Specialist at Hello Mag. She provides high-level Expertise in appliance mechanics and scientific pest management, ensuring every guide follows strict safety protocols and manufacturer standards. As a leading Authority on technical home specs, Kanimozhi audits complex data to provide homeowners with the most accurate, verified, and reliable diagnostic solutions available.

by Kanimozhi BV | Sep 9, 2025 | DIY Ideas, Kitchen
When I first started cooking regularly at home, I didn’t think twice about pouring leftover oil down the sink. It seemed harmless.
But once I learned how much damage that causes to plumbing and the environment — especially in the UK — I knew I had to change my habits.
In this guide, I’ll walk you through exactly how to dispose of cooking oil at home in the UK, in ways that are safe, responsible, and eco-friendly.
Whether you’re dealing with oil from a pan or a deep fryer, this step-by-step blog shares everything I’ve learned about environmentally friendly oil disposal.
How to Dispose of Cooking Oil UK? — What I’ve Learned Living Here?
Living in the UK, we’re lucky to have well-structured waste management services — but that doesn’t mean it’s okay to pour oil down the drain. Here’s what I discovered:
What Happens If I Pour Oil Down the Drain in the UK?
Pouring oil down the sink might seem easy, but it’s one of the biggest contributors to fatbergs — huge masses of congealed fat, grease, and waste that block UK sewers.
Thames Water has reported clearing fatbergs weighing more than a double-decker bus!
What Do UK Councils Recommend?
Most councils explicitly state on their websites: Do NOT pour oil down the drain. Instead, they recommend:
- Recycling used cooking oil at local Household Waste Recycling Centres (HWRCs)
- Disposing small amounts in general waste after solidifying
- Using oil collection services, where available
How I Follow the Rules in My Own Kitchen?
I keep a sealable container under the sink. After cooking, I let the oil cool, pour it into the container, and once full, I take it to my local recycling point. It’s easy, safe, and I avoid plumbing nightmares.
How to Dispose of Cooking Oil Environmentally? — My Step-by-Step Method
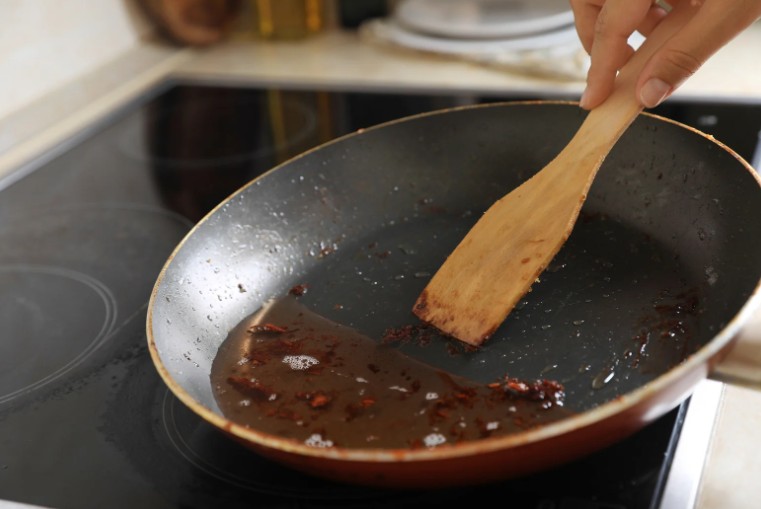
To dispose of cooking oil environmentally, here’s the process I personally follow — combining reuse, recycling, and conscious waste handling.
Step 1: Cool It Down
Let the oil cool completely. Hot oil can melt plastic containers and is dangerous to handle.
Step 2: Filter and Reuse (If Safe)
If the oil is still relatively clean (like from frying chips), I strain it through a coffee filter and reuse it 2–3 times. This reduces waste and saves money.
Step 3: Store in a Resealable Container
I always use a bottle or jar with a secure lid. Label it clearly — especially if you plan to store it before disposal.
Step 4: Choose a Disposal Method
- Small amounts: Solidify with flour or freeze it in a container, then throw in the general waste bin.
- Large quantities: Take it to your nearest HWRC, where cooking oil is often recycled into biofuel.
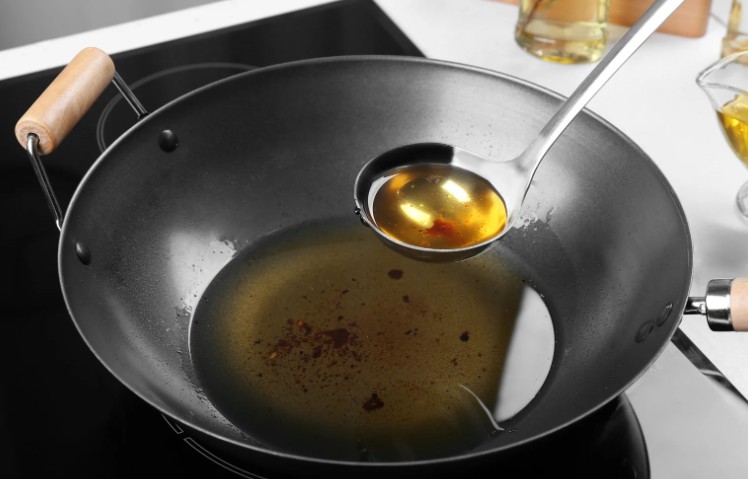
How to Dispose of Cooking Oil from Deep Fryer? — My At-Home Routine
Using a deep fryer means dealing with a lot more oil. Here’s how I manage it responsibly:
Can I Reuse First?
Deep fryer oil is typically cleaner after one use. I filter it and reuse it up to 3 times — but always discard if it smells bad or turns dark.

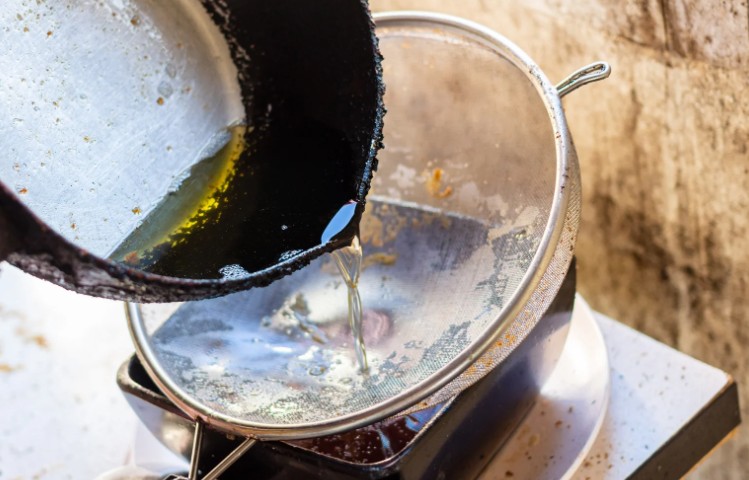
How To Store Properly?
Once it’s no longer usable, I pour it into a strong plastic bottle or glass jar. Never in flimsy containers — they can leak or burst.
Where I Take It?
Because I use several litres over time, I collect it in bulk and drop it off at my local recycling centre. Many of these centres in the UK accept used cooking oil specifically from domestic kitchens.
Tip: Some biodiesel companies even offer free home collection in certain areas. I once booked one through a local Facebook group!
What Are the Best Ways to Dispose of Cooking Oil at Home in the UK?
If you’re like me — cooking often and wanting to stay eco-friendly — here are the best at-home methods I swear by:
1. Reuse When Possible
- Great for shallow frying or deep frying in clean conditions
- Strain the oil and then store in a labelled jar or container
- Helps reduce overall oil consumption
2. Solidify and Bin
- Mix hot oil with flour, sawdust, or even cat litter
- Let it cool and harden
- Place it in a compostable or biodegradable bag and then into general waste
3. Freeze the Oil
- For messy or greasy oil, I pour it into a disposable container and freeze it
- Easy to toss once it’s a solid block
4. Recycle at Your Nearest Centre
- Most UK Household Waste Recycling Centres accept cooking oil
- You can check your postcode on Recycle Now
5. Never Do This:
- Never pour oil down the sink, toilet, or outside in the garden
- It clogs pipes and harms wildlife
How to Dispose of Out of Date Cooking Oil?
Out-of-date cooking oil shouldn’t go into your meals — but it still doesn’t belong in the drain.
Can I Still Recycle It?
Yes, expired oil can be recycled the same way as used oil. I pour mine into a clean bottle and take it to a recycling centre.
What are the Other Uses for Expired Oil?
- Homemade soap or oil lamps (if you’re crafty)
- Wooden furniture polish (mix with vinegar)
- Just make sure it’s not mouldy or rancid before experimenting
How Cooking Oil Disposal Methods are Compared?
| Disposal Method |
Eco-Friendly |
Suitable for Home Use |
Recyclable |
Notes |
| Reuse (filter & store) |
Yes |
Yes |
N/A |
Use max 2–3 times |
| Solidify & bin |
Yes |
Yes |
No |
Best for small amounts |
| Freeze & bin |
Yes |
Yes |
No |
Minimizes mess |
| HWRC recycling |
Yes |
Yes |
Yes |
UK-wide availability |
| Pour down drain (DON’T DO THIS) |
No |
No |
No |
Damages plumbing & environment |
What are My Kitchen Checklist for Responsible Oil Disposal?
Here’s a simple list I follow:
- ✅ Let oil cool completely
- ✅ Reuse oil when possible (max 2–3 times)
- ✅ Store used oil in a sealed container
- ✅ Take large amounts to your local HWRC
- ✅ Solidify small amounts before binning
- ❌ Never pour oil down the drain or toilet
- ❌ Don’t mix oil with water or cleaning products
Final Thoughts – How I Make My Kitchen Greener Every Day?
Over time, I’ve learned that small changes at home add up to big environmental impacts.
By properly knowing how to dispose of cooking oil — whether it’s from a quick stir-fry or a full-on deep-fried feast — I’m protecting my plumbing, helping reduce fatbergs, and contributing to greener UK cities.
If more of us follow these simple, responsible steps, we can make a real difference — starting right in our kitchens.
What Are The FAQ On How to Dispose of Cooking Oil?
1. How do you dispose of kitchen oil?
I cool it, reuse it if possible, or take it to my local recycling centre in a sealed container. For small amounts, I solidify it and put it in the general waste bin.
2. How to dispose of cooking oil after frying?
I strain the oil to remove crumbs, reuse if it’s still clean, or pour it into a sealed jar for recycling if it’s spent.
3. How to dispose of used cooking oil?
Used cooking oil should never go down the drain. I store mine in a labelled bottle and either reuse it or drop it off at a recycling point.
4. Can I throw oil in the bin?
Yes, but only if it’s a small amount and has been solidified. Liquid oil can leak and create problems in waste collection.
5. Does my council collect used cooking oil?
Some do! I recommend checking your local council’s website or Recycle Now to see if doorstep or drop-off recycling is available.
Home Diagnostics and Technical Standards Specialist at Hello Mag. She provides high-level Expertise in appliance mechanics and scientific pest management, ensuring every guide follows strict safety protocols and manufacturer standards. As a leading Authority on technical home specs, Kanimozhi audits complex data to provide homeowners with the most accurate, verified, and reliable diagnostic solutions available.

by Kanimozhi BV | Sep 8, 2025 | DIY Ideas, Interior, Kitchen
I remember the first time I tried to get rid of an old kitchen knife — I stood over the bin, unsure what to do. Could I just throw it in? Would that be dangerous? And what about the legal side of it? How To Dispose Of Kitchen Knives?
It turns out that disposing of kitchen knives in the UK isn’t as straightforward as it seems. Whether you’re getting rid of a blunt chef’s knife, a broken blade, or a full set, you need to do it safely, legally, and — where possible — sustainably.
In this guide, I’ll walk you through how to dispose of kitchen knives the right way, based on my own experience and local UK council advice.
Why Proper Kitchen Knife Disposal Matters in the UK
Kitchen knives are household tools — but they’re still sharp and potentially dangerous. Tossing them into the bin without care puts refuse collectors, family members, and even pets at risk. Here’s what I’ve learned:
Is It Illegal to Throw Knives in the Bin?
No, it’s not illegal, but it can be considered negligent or dangerous if the knife is improperly discarded. Councils often warn residents not to place unwrapped sharp objects in the general rubbish.
Risks of Improper Disposal
- Injury to waste handlers or neighbours
- Legal issues if found in public or unsecured areas
- Environmental harm if thrown in the wrong bin
Council Guidelines
Most UK councils recommend one of the following:
- Wrap knives securely before disposal
- Recycle at a local scrap metal site
- Use knife amnesty bins, where available
How to Dispose of Kitchen Knives Safely? — My Step-by-Step Method
Here’s exactly how I dispose of my old or unwanted kitchen knives:
Step 1 – Wrap the Blade Securely
I always start by wrapping the blade in several layers of:
- Thick cardboard
- Old newspaper
- Bubble wrap
Then I secure it with strong tape, so the blade can’t cut through.
Step 2 – Label the Package
I write “SHARP ITEM” or “KNIFE – HANDLE WITH CARE” on the wrapping. It helps waste handlers identify potential hazards.
Step 3 – Choose the Right Disposal Method
You have a few options depending on the condition of the knife:
- Still usable? Consider donating.
- Broken or blunt? Recycle as scrap metal or wrap and dispose in the general bin.
Can You Recycle Kitchen Knives in the UK?

Are Knives Recyclable?
Yes, many UK recycling centres accept metal kitchen knives as part of scrap metal recycling. Just be sure to wrap the blade, even if it’s going into a metal bin.
My Recycling Centre Experience
I once took a few rusted knives to my local Household Waste Recycling Centre (HWRC). The staff appreciated that I had labelled and packaged them properly.
🔍 Tip: Check your postcode at Recycle Now to find local knife recycling points.
What Happens to Recycled Knives?
Once recycled, the knives are:
- Melted down with other scrap metal
- Used to create new metal products — possibly even new tools
What to Do with Old or Broken Kitchen Knives?
Not every knife deserves to be binned. Here’s how I handle different conditions:
Are Blunt Knives Still Usable?
Sometimes! If the blade isn’t damaged, I’ll try to sharpen it first. A good whetstone or sharpening tool often gives knives new life.
When I Repair vs Replace?
If the handle is loose, broken, or cracked — I usually replace it. Safety comes first.
How I Disposed of Damaged Knives?
For rusted or bent knives, I:
- Wrapped the blade in cardboard
- Labelled it clearly
- Took it to my local HWRC for scrap metal recycling
Are Knife Amnesty Bins an Option for Kitchen Knives?
What Are Knife Amnesty Bins?
These bins are part of knife crime prevention efforts in the UK, usually located at police stations.

When I Used One?
I had a full set of old knives and didn’t feel safe keeping them in the house. I called my local police station, confirmed the amnesty bin was available, and dropped them off safely.
Can You Use Them for Kitchen Knives?
Yes, in most cases. But I recommend calling ahead — some amnesty bins may only accept weapons or certain types of knives.
Donating Old Kitchen Knives — Is It Possible?
When Knives Are Safe to Donate?
I’ve donated gently used knives to:
- Charity kitchens
- Shelters
- Upcycling workshops
But only when the knives were in good condition, clean, and not visibly damaged.
Who Might Accept Them?
- Local repair cafés
- Community kitchens
- Second-hand shops (check policies first)
What Bin Do Kitchen Knives Go In? (Table)
| Disposal Method |
Safe? |
Legal? |
Eco-Friendly? |
Best For |
| General waste (wrapped) |
✅ |
✅ |
❌ |
Small, broken knives |
| Scrap metal at recycling centre |
✅ |
✅ |
✅ |
All metal kitchen knives |
| Knife amnesty bin |
✅ |
✅ |
✅ |
Full sets, unwanted knives |
| Donation |
✅ |
✅ |
✅ |
Good-condition knives |
| Loose in general waste (⚠️ NO) |
❌ |
❌ |
❌ |
Dangerous & illegal |
What are My Checklist for Safe Kitchen Knife Disposal?
Here’s what I do every time:
✅ Wrap blades securely (cardboard, tape)
✅ Label the package clearly (“SHARP”)
✅ Check if the knife can be reused or donated
✅ Recycle metal knives where possible
❌ Never put loose knives in the bin
Final Thoughts – How I Keep My Kitchen Safe and Responsible
Disposing of kitchen knives might seem like a small task, but doing it wrong can lead to serious risks. I’ve learned that just a few extra minutes — wrapping blades, labelling them, and finding the right disposal method — makes a big difference.
So whether you’re clearing out old utensils, replacing a knife set, or just trying to be safer at home, I hope this guide helps you dispose of kitchen knives responsibly and legally in the UK.
Related article: How Long Does Silicone Take to Dry? – Sealant Drying Time
FAQ – People Also Ask
1. How to properly dispose of kitchen knives?
Wrap the blade in cardboard or thick paper, secure with tape, label it “SHARP,” and either recycle, donate, or carefully bin it — depending on the condition.
2. Where can I take kitchen knives?
You can take them to:
- Scrap metal bins at your local recycling centre
- Knife amnesty bins (check availability)
- Charity shops or shelters (if reusable)
3. Which bin do kitchen knives go in?
Only wrapped and labelled knives should go into the general waste bin. Never place exposed blades directly in household rubbish.
4. Can you put knives in the rubbish bin?
Yes, but only if they are properly wrapped and labelled. This keeps waste collectors and others safe. For larger or metal knives, recycling is better.
Home Diagnostics and Technical Standards Specialist at Hello Mag. She provides high-level Expertise in appliance mechanics and scientific pest management, ensuring every guide follows strict safety protocols and manufacturer standards. As a leading Authority on technical home specs, Kanimozhi audits complex data to provide homeowners with the most accurate, verified, and reliable diagnostic solutions available.
by Kanimozhi BV | Sep 5, 2025 | Home & Living
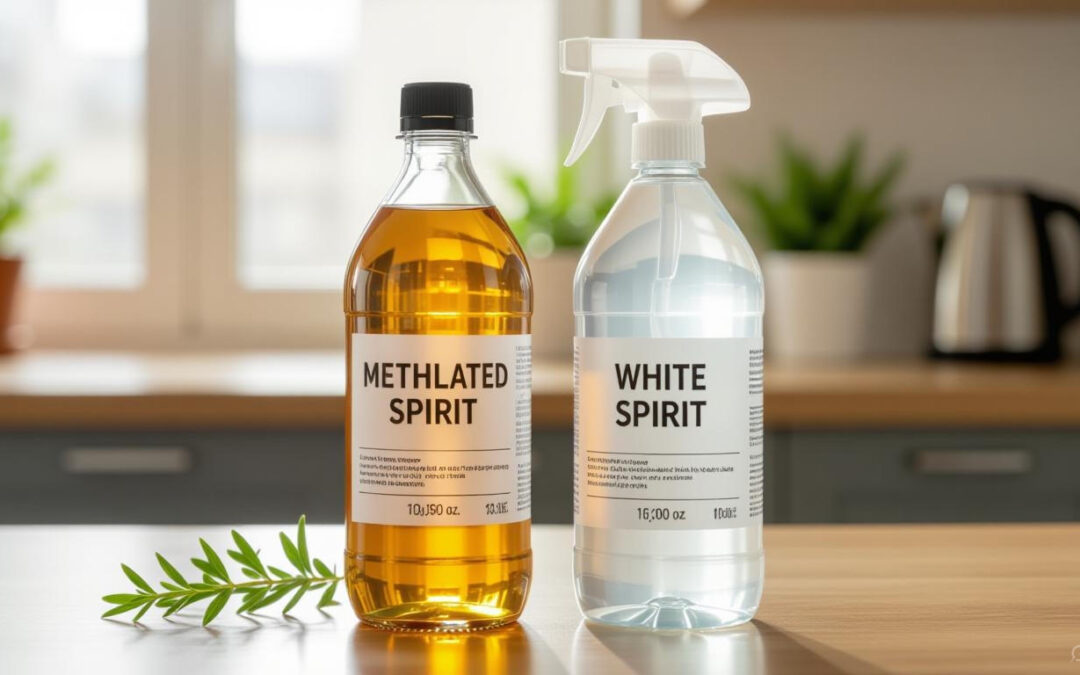
Why I Wrote This Guide on Methylated Spirit vs White Spirit?
Is methylated spirit the same as white spirit? I’ve always been a hands-on person when it comes to home maintenance and DIY projects.
Over the years, I found myself repeatedly reaching for bottles labelled methylated spirit and white spirit without fully understanding the difference.
One day, I accidentally used methylated spirit instead of white spirit while trying to clean a paintbrush—and the results weren’t what I expected.
That moment sparked a proper investigation into these commonly used household solvents.
If you’ve ever stood in the cleaning aisle at B&Q or Screwfix wondering whether these two spirits are interchangeable, then this guide is for you.
What Is Methylated Spirit Exactly?
Methylated spirit, often referred to as “meths” in the UK, is a denatured form of alcohol. Essentially, it’s ethanol with additives that make it unfit for consumption—hence the name “denatured alcohol”.
How is the Composition of Methylated Spirit?
Typically, it contains:
- 90–95% ethanol
- Methanol (toxic)
- Colourants (usually purple to indicate it’s poisonous)
- Bittering agents (to prevent ingestion)
What are the Common UK Uses? – From Cleaning to Disinfecting
Methylated spirit is commonly used for:
- Cleaning glass, windows, and mirrors (leaves no residue)
- Removing ink stains and adhesives
- Disinfecting surfaces and tools
- Fuel for alcohol burners
What are the Safety Concerns & Handling Tips?
Methylated spirit is highly flammable and toxic if inhaled or ingested. It should always be used in well-ventilated spaces, kept away from flames, and stored securely—especially if there are kids or pets at home.
What Is White Spirit and How Is It Used?
Unlike methylated spirit, white spirit is typically a petroleum-based solvent. It’s clear, oily, and has a strong chemical odour.
What White Spirit Is Made Of?
- Derived from mineral turpentine
- Contains a blend of hydrocarbons (mainly aliphatic)
- Sometimes mixed with additives for odour reduction
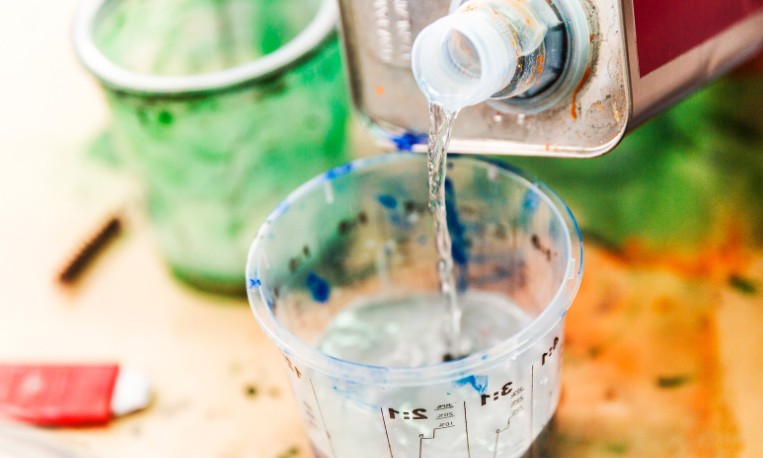
What is the Typical UK Uses? – Paint Thinning & Degreasing
White spirit is a go-to product in the UK for:
- Thinning oil-based paints and varnishes
- Cleaning paintbrushes and rollers
- Degreasing metal parts and tools
- Removing sticky residues from surfaces
How about the Safety, Ventilation, and Flammability Notes?
While not as volatile as methylated spirit, white spirit still releases harmful vapours and must be used in well-ventilated areas. It can cause skin irritation and must be handled with gloves and care.
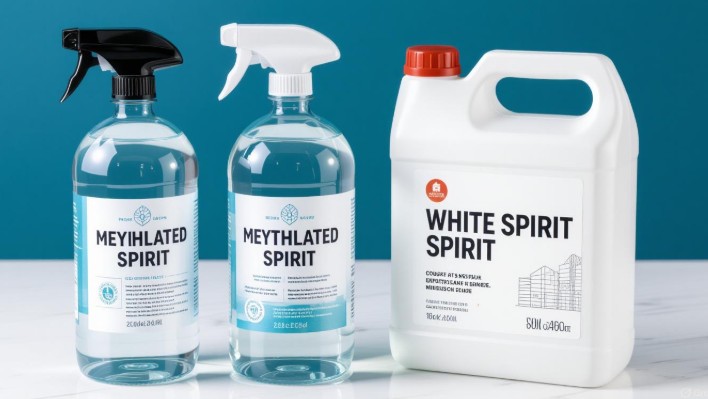
Is Methylated Spirit the Same as White Spirit?
This is the million-pound question—and the short answer is: No, they are not the same.
What is the Key Chemical Differences?
| Property |
Methylated Spirit |
White Spirit |
| Base |
Ethanol (alcohol-based) |
Petroleum distillate (oil-based) |
| Colour |
Purple (dyed) |
Clear |
| Smell |
Alcoholic, sharp |
Oily, chemical |
| Toxicity |
High (methanol content) |
Moderate |
| Flammability |
Very high |
Moderate to high |
How is Visual, Smell, and Usage Differences?
If you’ve ever opened both bottles side by side, you’ll notice:
- Methylated spirit is purple and smells like rubbing alcohol.
- White spirit is clear and smells like turpentine.
Can They Be Used Interchangeably?
Absolutely not. Using one in place of the other can damage surfaces or ruin your project. For example:
- White spirit will leave oily residue on glass.
- Methylated spirit can damage paint or varnish.
Where Should You Use Methylated Spirit vs White Spirit?
Let’s break this down clearly:
How to Clean Glass, Mirrors, and Surfaces?
- ✅ Methylated Spirit: Perfect for streak-free cleaning
- ❌ White Spirit: Leaves residue, not recommended
How to use it for Paintwork, Brushes, and Adhesives?
- ✅ White Spirit: Ideal for thinning oil-based paints and cleaning brushes
- ❌ Methylated Spirit: Can damage painted surfaces
Quick Comparison Table
| Task/Use |
Recommended Spirit |
| Cleaning windows & glass |
Methylated Spirit |
| Thinning oil-based paint |
White Spirit |
| Cleaning paintbrushes |
White Spirit |
| Removing sticky residue |
White Spirit |
| Disinfecting hard surfaces |
Methylated Spirit |
| Fuel for camping burners |
Methylated Spirit |
Which One Is Safer to Use at Home?
Toxicity, Fumes, and Residue
- Methylated spirit is more toxic due to methanol but evaporates cleanly.
- White spirit is less toxic, but can cause headaches and skin irritation.
- Both require gloves and ventilation.
- Methylated spirit evaporates faster and leaves no residue.
- White spirit is greasy and can linger in the air.
Child and Pet Safety at Home
- Neither is safe for unsupervised use around children or pets.
- Store securely and label containers clearly.
How to Store and Dispose of These Solvents Safely?

What is the Best Practices for Storage?
- Keep in original containers with sealed caps
- Store in cool, dry, ventilated places
- Keep away from open flames or heat sources
What are the UK Guidelines for Disposal?
- Never pour down drains or toilets
- Take to a local Household Waste Recycling Centre (HWRC)
- Contact your local council for collection services
How To Store & Dispose? – A Comparison Table
| Criteria |
Methylated Spirit |
White Spirit |
| Store in cool area |
Yes |
Yes |
| Recyclable at HWRC |
Yes |
Yes |
| Safe to pour in sink |
No |
No |
| Flammable warning label |
Yes |
Yes |
What is the Cost and Availability in the UK? – Which Is Cheaper?
Both spirits are widely available in UK stores and online.
How is Price Compared? (As of 2025)
| Brand |
Product |
Price (Approx.) |
| B&Q |
Methylated Spirit 500ml |
£2.50 |
| Screwfix |
White Spirit 1L |
£3.00 |
| Wilko |
Methylated Spirit 250ml |
£1.80 |
| Toolstation |
White Spirit 750ml |
£2.20 |
What are the Cost-Effectiveness Per Use?
- White spirit is more cost-effective for painting tasks.
- Methylated spirit lasts longer for small cleaning jobs.
My Final Verdict: Which One Do I Recommend?
After using both extensively, here’s how I choose between them:
When to Use Methylated Spirit?
- Cleaning glass and mirrors
- Removing sticker residue
- Disinfecting surfaces
- Fuel for camping stoves
When to Use White Spirit?
- Thinning oil-based paints
- Cleaning paintbrushes
- Degreasing metal tools
Can I Have a Quick Reference Bullet List?
Where To Use Methylated Spirit for?
- Cleaning glass or mirrors
- Disinfecting surfaces
- Removing ink or adhesives
Where To Use White Spirit for?
- Thinning paints
- Cleaning brushes
- Degreasing surfaces

Conclusion: Know Your Spirits Before You Start Your Next DIY
To wrap it up, methylated spirit and white spirit are definitely not the same. They serve different purposes, have different chemical makeups, and require different safety precautions.
I hope this guide on is methylated spirit the same as white spirit has cleared up any confusion and helped you understand the right solvent to reach for during your next home or DIY project.
Always read the label, use the correct protective gear, and follow safe storage and disposal methods.
Remember: When in doubt, choose the right spirit for the task—not just any bottle from the shed.
Related Article: How to Remove Tea Stains from Composite Sink? – Top DIY Tips
Home Diagnostics and Technical Standards Specialist at Hello Mag. She provides high-level Expertise in appliance mechanics and scientific pest management, ensuring every guide follows strict safety protocols and manufacturer standards. As a leading Authority on technical home specs, Kanimozhi audits complex data to provide homeowners with the most accurate, verified, and reliable diagnostic solutions available.
by Kanimozhi BV | Sep 3, 2025 | Interior
Why I Decided to Investigate Silicone Drying Times?
A while back, I sealed the edge of my bathroom shower thinking I’d done a perfect job—until I used it just six hours later.
The next morning, the silicone had bubbled and separated. Turns out, it hadn’t cured properly. That mistake cost me both time and money, and taught me a valuable lesson: curing time matters more than most DIYers realise.
Since then, I’ve paid close attention to drying and curing times, experimented with different sealants, and learned how to make silicone dry effectively—especially in UK conditions.
If you’re wondering how long does silicone take to dry, this guide breaks it all down with real-world experience, facts, and product-specific advice.
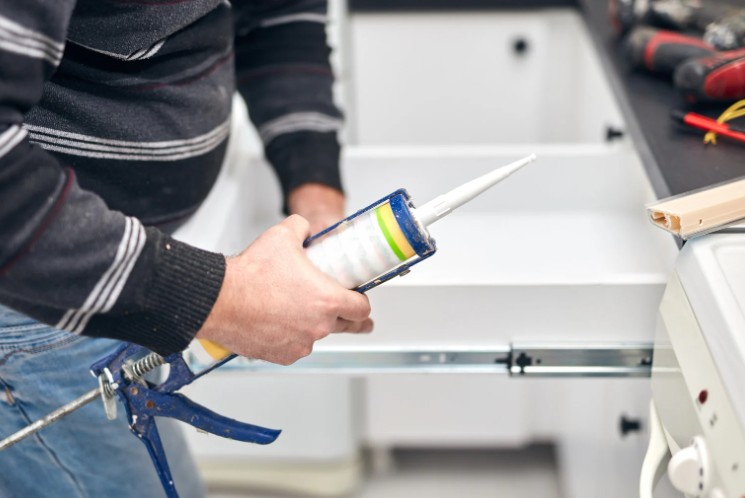
So, How Long Does Silicone Take to Dry?
In most cases, silicone sealant becomes surface dry in 30 minutes to 1 hour, but takes 24 to 48 hours to fully cure. This timeline can vary depending on the product formula, environment, and how thickly it’s applied.
From my experience, standard acetoxy-cure silicones (the kind you find at B&Q or Screwfix) dry fastest—usually tack-free in 30 minutes.
Neutral-cure silicones take longer, but are better for delicate surfaces like metal or mirrors. Fast-drying formulas are great in a pinch but may sacrifice some flexibility or long-term durability.
Here’s a product-based overview I use for reference:
What are the Average Drying & Curing Times by Silicone Type?

| Silicone Type |
Touch-Dry Time |
Full Cure Time |
Ideal Use |
| Standard Acetoxy Cure |
20–60 minutes |
24 hours |
Kitchens, bathrooms |
| Neutral Cure Silicone |
30–120 minutes |
36–48 hours |
Mirrors, metals, uPVC |
| Fast-Dry Sealant |
10–30 minutes |
3–6 hours |
Quick fixes, temporary seals |
| Anti-Mould Bathroom Sealant |
30–60 minutes |
24–36 hours |
Wet areas like showers and baths |
Even if the surface feels dry to touch, don’t expose it to water or pressure until it’s fully cured.
Get to know about the removal of black mould from silicon sealant here.
What Factors Affect Silicone Drying Time?
When it comes to drying time, product instructions only tell part of the story.
In the real world, several environmental and technical factors influence how quickly silicone sets—especially in the UK, where indoor conditions vary wildly between seasons.
How Room Temperature Affect Silicone Drying Time?
Silicone cures fastest in warm environments—ideally between 20°C and 25°C. In cooler rooms (under 10°C), the chemical curing process slows down considerably.
I once sealed a window in January, and it took nearly 48 hours to fully harden.
How Humidity Levels Affect Silicone Drying Time?
Contrary to what many think, higher humidity can speed up curing. Silicone reacts with moisture in the air during the curing process.
So, on warm and humid days, you might notice it setting faster. However, if it’s excessively humid and cold (like a poorly ventilated winter bathroom), curing may stall.
How Ventilation Affect Silicone Drying Time?
Ventilation ensures fresh air circulates around the sealant, aiding solvent evaporation and speeding up curing.
I learned this the hard way when sealing behind a washing machine in a poorly ventilated room—it stayed tacky overnight. Adding a fan or opening windows now makes a big difference in my setup.
How Thickness of the Application Silicone Drying Time?
More isn’t always better. If you lay the silicone too thick, especially in deep joints or large gaps, the surface may dry while the inside stays uncured for days.
These thick applications also trap moisture, slowing down internal curing. I now use just enough to form a smooth, even bead, and it cures much more reliably.
How Surface Material Silicone Drying Time?
Silicone bonds better and cures faster on smooth, non-porous surfaces like glass, ceramic tiles, and enamel.
On absorbent materials like raw wood or natural stone, it takes longer to set due to moisture interaction and adhesive resistance.
How Do I Know When Silicone Is Fully Cured?
One of the most misleading things is when the silicone feels dry after 30–60 minutes—it’s not ready yet. Curing is a deeper chemical process, and a “skin” on top doesn’t mean the inside has set.
A fully cured bead of silicone:
- No longer smells strongly (acetoxy types have a vinegar-like odour until cured)
- Feels firm to the touch, not squishy
- Doesn’t dent when pressed
In wet areas like showers or baths, I now wait a full 24 hours minimum, regardless of what the packaging says. For neutral cure products or cold conditions, I give it 48 hours to be safe.

Quick Comparison Table – Drying Time by Silicone Type
| Silicone Type |
Touch-Dry |
Fully Cured |
Common Use |
| Acetoxy Cure |
30 minutes |
24 hours |
Bathrooms, kitchens |
| Neutral Cure |
1–2 hours |
48 hours |
Glass, mirrors, metals |
| Quick-Dry |
15–30 minutes |
3–6 hours |
Emergency repairs |
| Anti-Mould |
45 minutes |
24–36 hours |
Showers, wet corners |
Does Silicone Dry Faster in Heat or with a Hairdryer?
Many people ask whether they can speed up silicone drying using heat, and I’ve tested this myself.
Silicone does dry faster in a warm room, especially with good airflow. However, using a hairdryer or fan heater directly on the sealant isn’t a good idea.
Once, I used a hairdryer to “speed up” the process, and while the top layer skinned over quickly, the inner layer didn’t cure—leading to cracking days later.
Instead, I suggest sealing in the evening, allowing it to cure undisturbed overnight in a warm, ventilated room.
For quicker results, use a fast-cure product, but even then, always check that the full curing time is complete before using the sealed area.
What are the Common Mistakes That Delay Silicone Drying?
Here are the most common missteps that I’ve seen—and made myself—that can cause long drying times or failed seals:
- Applying too much silicone – Thick beads don’t cure evenly, especially inside.
- Sealing in cold or damp conditions – Below 10°C or in high-humidity rooms, drying slows significantly.
- Skipping surface prep – Dust, grease, soap, or old sealant prevents proper adhesion.
- Poor ventilation – Airflow is essential for curing. Without it, solvents can’t evaporate efficiently.
- Using expired sealant – Always check the date. Old product won’t cure properly and may separate.
What are My Personal Tips for Getting the Best Sealant Finish?
I’ve sealed everything from kitchen sinks to shower trays, and a few techniques have helped me get reliable results every time.
First, I always clean surfaces thoroughly with methylated spirit or isopropyl alcohol. This ensures there’s no grease, dust, or old residue that could interfere with bonding.
Then I apply masking tape along the joint edges for a cleaner finish and use a smoothing tool—or my finger dipped in washing-up liquid—to smooth the line.
From all the brands I’ve tested, here are some that consistently deliver in UK conditions:
Table: Best UK Silicone Sealants I’ve Used
| Brand |
Product |
Dry Time |
Notes |
| UniBond |
Anti-Mould Sealant |
24 hrs |
Excellent for bathrooms |
| Everbuild |
Everflex 500 |
24–36 hrs |
Great for general purpose |
| No Nonsense |
Quick-Dry General Purpose Silicone |
3–6 hrs |
Fastest drying for light work |
| Dow Corning |
785+ Sanitary Silicone |
24 hrs |
Reliable and durable in wet areas |
Conclusion – Be Patient and Let the Silicone Work
So, how long does silicone take to dry? While it may feel dry to the touch in under an hour, most silicones need 24 to 48 hours to fully cure—especially in colder or poorly ventilated UK homes.
My advice, after years of trial and error, is simple: don’t rush it. Follow the curing time on the label, consider your room conditions, and let the silicone cure fully before exposing it to water or stress.
Patience pays off with a strong, long-lasting seal—and fewer redos.
Related Article: How Long Does Caulk Take to Dry?
Home Diagnostics and Technical Standards Specialist at Hello Mag. She provides high-level Expertise in appliance mechanics and scientific pest management, ensuring every guide follows strict safety protocols and manufacturer standards. As a leading Authority on technical home specs, Kanimozhi audits complex data to provide homeowners with the most accurate, verified, and reliable diagnostic solutions available.
