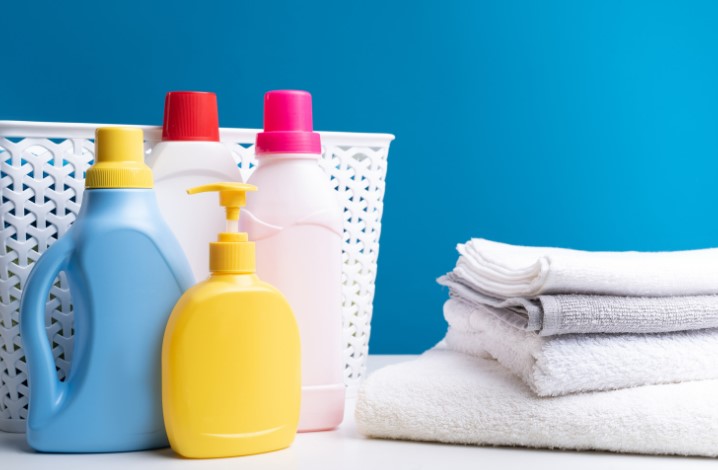
When using a Bosch washing machine, it’s essential to understand its washing machine detergent drawer to ensure optimal cleaning results. Many people wonder where does detergent go in a washing machine, and using the correct detergent drawer compartment is key to achieving fresh, stain-free laundry.
In this guide, I’ll answer what are the 3 compartments in a washing machine drawer bosch , how they function, and the best way to use them.
What Are the 3 Compartments in a Bosch Washing Machine Drawer?
The washing machine dispenser drawer in Bosch models typically has three compartments, each designed for a specific purpose:
Pre-Wash Compartment – Marked ‘I’ or ‘1’
Main Wash Compartment – Marked ‘II’ or ‘2’
Fabric Softener Compartment – Marked with a flower symbol ‘✿’
1. Pre-Wash Compartment – What Does It Do?
This section of the washing machine drawer is meant for detergent used in the pre-wash cycle.
When Should I Use the Pre-Wash Compartment?
Ideal for heavily soiled clothes.
Helps loosen dirt before the main wash cycle.
Typically used in longer washing programs.
What Type of Detergent Should I Use?
Only powder detergent is recommended.
Avoid liquid detergent, as it might drain away before the wash cycle begins.
2. Main Wash Compartment – The Primary Cleaning Section
The most important part of the washing machine detergent drawer is the main wash compartment, which handles the core washing process.
Where Does Detergent Go in a Washing Machine?
Powder or liquid detergent goes into this section.
If using liquid detergent, check if your Bosch model has a detergent dosing system.
Fabric softener should never be placed here.
What Are the Best Practices for Using This Compartment?
Avoid overfilling to prevent detergent residue buildup.
Follow the recommended detergent quantity for best cleaning results.
3. Fabric Softener Compartment – How It Works
The third compartment in the washing machine dispenser drawer is for fabric softener, designed to keep clothes soft and fresh.
How Much Fabric Softener Should I Use?
Add up to the MAX line in the compartment.
Avoid overfilling, as excess softener can clog the detergent drawer.
Can I Use Other Additives in This Compartment?
No, this section is strictly for fabric softeners.
Avoid putting detergent, bleach, or vinegar here.
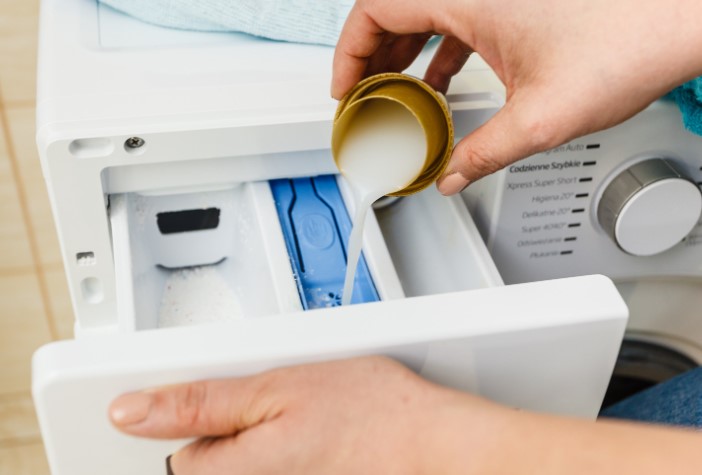
How to Use the Bosch Washing Machine Detergent Drawer Properly?
To ensure effective washing, follow these simple steps:
Open the washing machine detergent drawer fully.
Add detergent to the correct compartment based on your wash cycle.
Pour fabric softener (if needed) into the appropriate section.
Close the drawer gently to avoid spills.
Select your desired washing program and start the machine.
What are the Common Mistakes to Avoid?
Using liquid detergent in the pre-wash compartment.
Understanding your Bosch washing machine detergent drawer is crucial for effective laundry results. By using the correct compartments, adding the right detergent, and maintaining the washing machine drawer, you can ensure a cleaner, fresher wash every time.
FAQs About Bosch Washing Machine Drawers
1. Can I Put Liquid Detergent in the Main Wash Compartment?
Yes, but ensure your Bosch model supports liquid detergent, or use a liquid detergent dispenser if available.
2. What Happens if I Put Detergent in the Wrong Compartment?
If detergent goes into the fabric softener section, it may not dissolve properly.
If softener is placed in the main wash section, clothes may feel greasy.
3. How Can I Prevent Detergent Residue in the Drawer?
Use the right detergent quantity.
Clean the detergent drawer regularly.
Run an empty hot wash cycle monthly to remove buildup.
4. Can I put liquid detergent in the pre-wash compartment?
No, the pre-wash compartment is designed for powder detergent only. Liquid detergent may drain away before the cycle starts.
5. How do I know if I am using too much detergent?
If you notice excessive soap suds, residue on clothes, or detergent buildup in the washing machine dispenser drawer, you may be using too much detergent. Follow the recommended dosage.
Home Diagnostics and Technical Standards Specialist at Hello Mag. She provides high-level Expertise in appliance mechanics and scientific pest management, ensuring every guide follows strict safety protocols and manufacturer standards. As a leading Authority on technical home specs, Kanimozhi audits complex data to provide homeowners with the most accurate, verified, and reliable diagnostic solutions available.
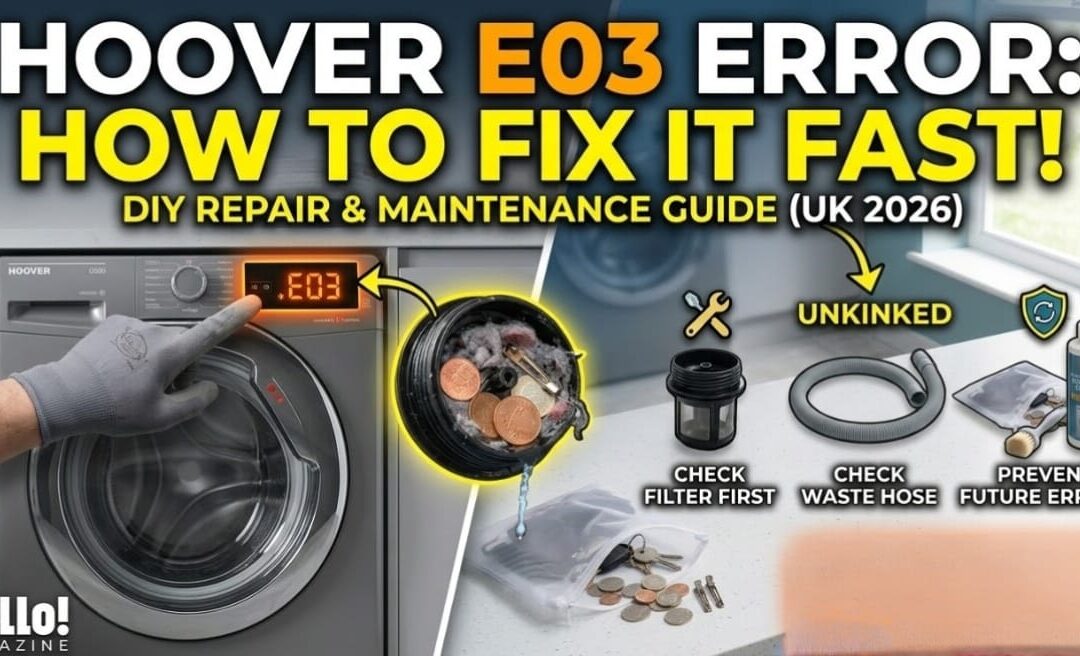
Hoover Washing Machine E03 Error: How to Fix Drainage Issues Fast?
Updated:06 March 2026
Is your Hoover washing machine showing an E03 error and refusing to drain? This common fault code indicates a “Drainage Timeout”—meaning the machine hasn’t sensed the water level dropping within the required 3 minutes.
Before you call a local UK engineer (saving you a typical £50-£80 call-out fee), most E03 faults can be fixed in under 15 minutes with basic DIY steps.
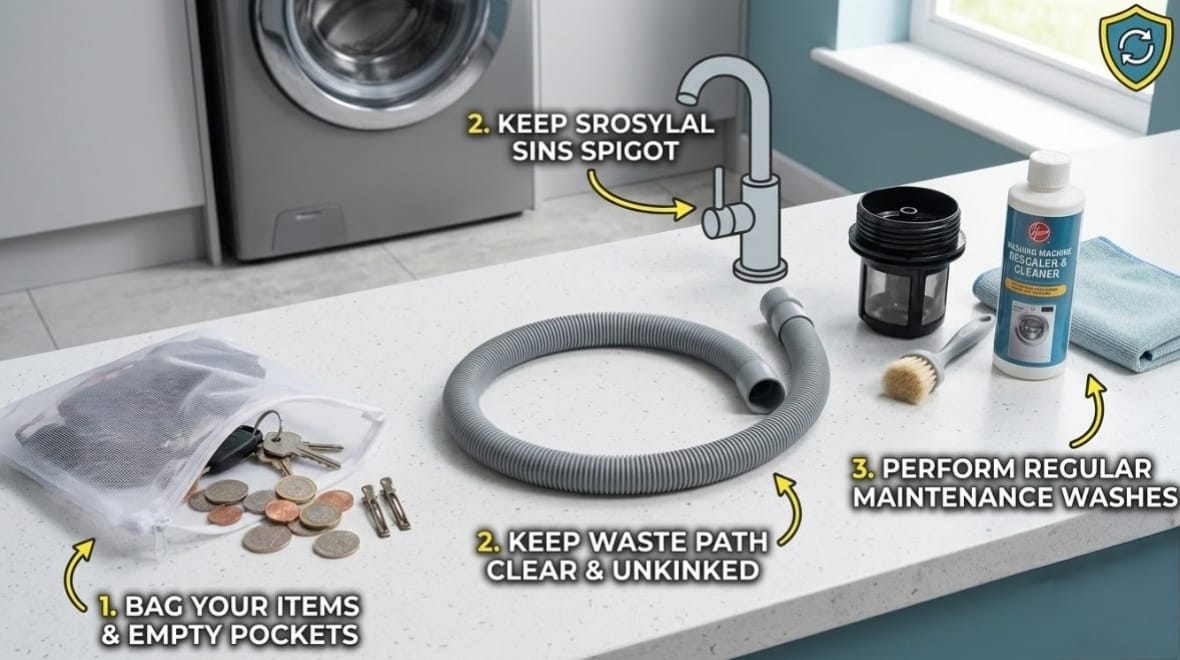
Quick Fix: How to Clear Hoover E03 Fast?
Follow this 2-minute checklist to reset your machine:
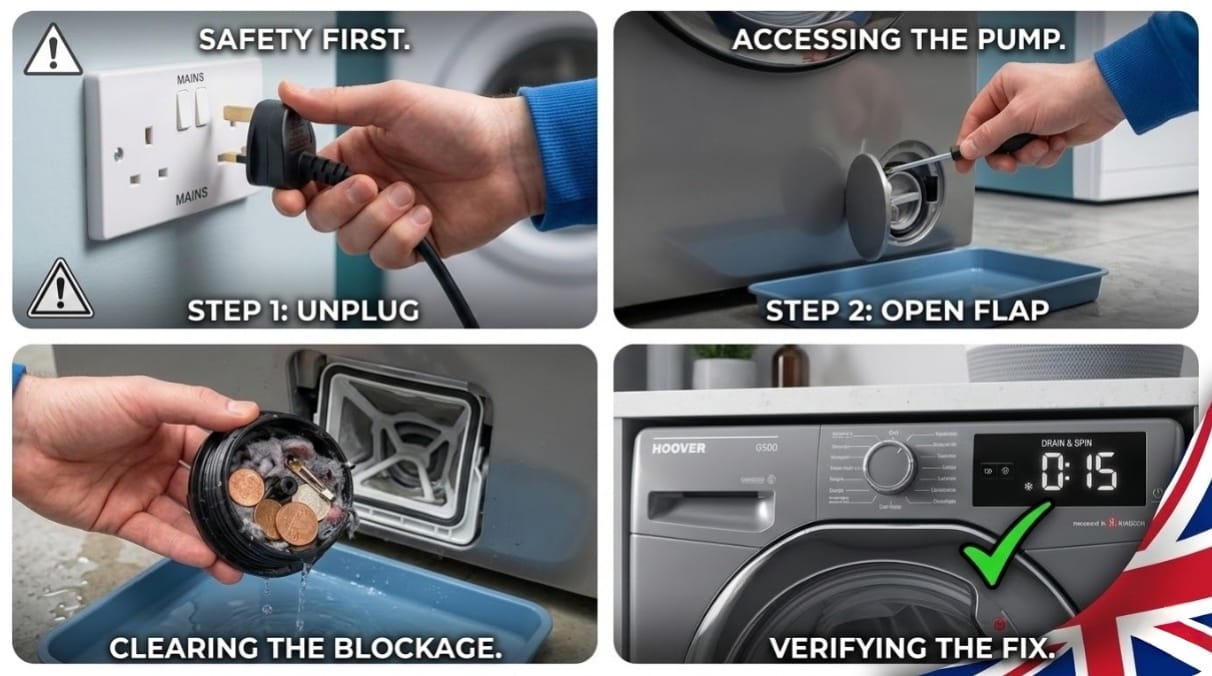
⚠️ Safety First: Always unplug the machine from the mains electricity before starting.
💧 Check the Filter: Open the bottom-right flap, unscrew the filter, and remove any coins, hairpins, or lint.
🔍 Inspect Waste Hose: Ensure the grey ribbed hose at the back isn’t kinked or pushed too far into the standpipe.
🚰 Clear the Sink Spigot: If connected under a sink, ensure the plastic spigot isn’t blocked by food waste.
🔌 Hard Reset: Leave the machine unplugged for 10 minutes to clear the internal memory.
What Does the E03 Error Specifically Mean?
In technical terms, the Hoover E03 error signifies that the PCB (Printed Circuit Board) has detected that the pressure switch is still reporting “full” after the drain pump cycle has ended.
Common symptoms include:
The machine stops with 1 minute left on the timer.
What are the Step-by-Step Solutions for Hoover Washing Machine E03 (UK Specialist Guide)?
1. Cleaning the Drain Pump Filter (The #1 Cause)
The filter protects the pump impeller from damage.
Locate: Behind the plinth or small circular flap at the bottom front.
Drain Manually: Use the small emergency black hose (if present) or tilt the machine back slightly and slide a shallow tray underneath.
The “Impeller Test”: Once the filter is out, look inside the hole. Use a torch to see the plastic fan (impeller). Reach in and see if it spins freely. If it’s jammed by a bra wire or coin, the pump will hum but won’t drain.
2. Checking the Drain Hose & Standpipe
In many UK homes, the drain hose is hooked into a standpipe or connected under the kitchen sink.
The “U-Bend” Trap: If you recently installed a new sink or dishwasher, check that the “blanking cap” on the sink plumbing was removed.
Siphoning Issues: Ensure the hose isn’t more than 10cm down the standpipe. If it’s too deep, it can cause a vacuum that prevents draining.
3. Testing the Pressure Switch & Chamber
If there is no blockage but E03 persists, the pressure chamber might be blocked with soap scum.
This “fools” the machine into thinking it’s still full of water.
The Fix: Run a 90°C maintenance wash with a dedicated descaler to clear internal fatty deposits and “biofilm” from the pressure pipes.
Advanced Diagnostics: E03 but No Blockage?
If the filter is clean and the hoses are clear, the issue is likely electrical:
Worn Pump Motor: Over time, the magnetic seals in the pump fail. If the pump feels “wobbly” when you touch the impeller, it needs replacing.
Wiring Loom: On some Hoover Link or H-Wash models, vibrations can cause the wires leading to the pump to fray or snap.
Resistance Check: A technician would use a multimeter to check the pump; a healthy Hoover pump usually reads around 150–250 Ohms.
Estimated Repair Costs in the UK (2025/2026)
If DIY fails, here is what you should expect to pay a professional:
Repair Task
Part Cost
Labour (Average)
Total Estimated Cost
Pump Replacement
£15 – £35
£50 – £70
£65 – £105
Unblocking Service
£0
£45 – £60
£45 – £60
Pressure Switch
£20 – £40
£50 – £70
£70 – £110
How to Prevent E03 Errors?
Pocket Check: Always check trousers for coins, hair clips, and screws.
Laundry Bags: Wash small items like baby socks and bra wires in mesh bags so they don’t migrate into the pump.
Monthly Maintenance: Clean your filter every 4–6 weeks to prevent the pump from straining.
Final Verdict
Don’t panic when you see Hoover Error E03. 90% of the time, it is a simple blockage in the filter or a kinked hose. Clear the debris, perform a hard reset, and your laundry schedule should be back on track.
For more appliance diagnostics, visit our Home Improvement Hub.
What are the FAQs About Hoover Washing Machine E03 Error?
1. How do I reset my Hoover washing machine after an E03 error?
To perform a “hard reset,” turn the machine off at the power socket and unplug it completely. Wait at least 10 minutes for the capacitors on the control board to discharge. Plug it back in and select a “Drain & Spin” cycle. If the code persists, a physical blockage is still present.
2. Can I open the door if my Hoover has an E03 error?
Warning: If the drum is full of water, do not use the emergency release. Opening the door will cause a flood. You must first drain the water manually using the drain filter at the bottom front of the machine. Once the water level is below the door seal, the electronic lock will usually release after 2 minutes.
3. Why does my Hoover machine say E03 when the filter is clean?
If the filter is clear, the E03 code is likely caused by a blocked pressure chamber or a kinked waste hose. Check the grey hose at the back of the machine for any sharp bends. Additionally, a “fatty buildup” of detergent in the internal pressure pipe can trick the sensor into thinking the machine is still full.
4. Is the Hoover E03 error worth fixing?
Yes. In 90% of cases, the E03 error costs £0 to fix because it is a simple blockage you can clear yourself. If the drain pump is actually broken, a replacement part in the UK typically costs between £15 and £35, making it much cheaper than buying a new appliance.
Home Diagnostics and Technical Standards Specialist at Hello Mag. She provides high-level Expertise in appliance mechanics and scientific pest management, ensuring every guide follows strict safety protocols and manufacturer standards. As a leading Authority on technical home specs, Kanimozhi audits complex data to provide homeowners with the most accurate, verified, and reliable diagnostic solutions available.
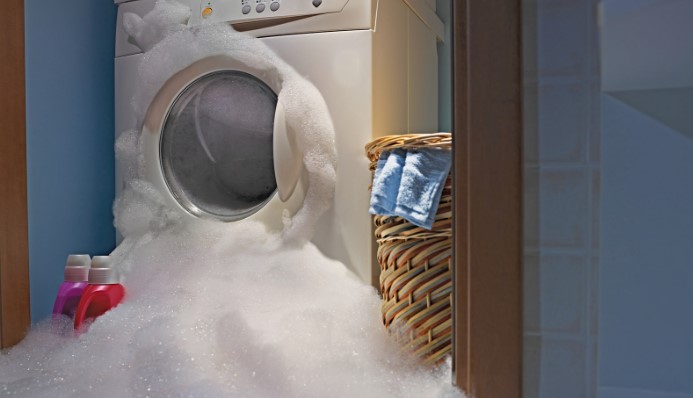
A leaking washing machine can be frustrating and concerning. If you notice water pooling underneath, it’s crucial to act quickly to prevent further damage to your appliance and flooring. Leaks can occur due to worn-out seals, clogged drains, or faulty hoses, and understanding the root cause is the first step toward fixing the issue.
This guide will help you identify why is your washing machine leaking from bottom and provide step-by-step solutions to fix it.
Why Is My Washing Machine Leaking From the Bottom?
Washing machines are designed to handle large volumes of water, but any malfunction can result in leakage. Common reasons include:
Loose or damaged hoses that allow water to escape.
Faulty or Blocked drain pump that prevents water from draining properly.
Worn-out door seal in front-loading machines.
Excessive detergent use, causing over-sudsing and leaks.
Internal component failures, such as a broken tub seal.
Ignoring these issues can lead to water damage, mold growth, and costly repairs.
What are the Causes of a Washing Machine Leaking from the Bottom?
Faulty or Loose Water Supply Hoses
Water supply hoses connect your washing machine to your home’s plumbing. Over time, these hoses can become loose, cracked, or burst, causing leaks.
How to Fix Faulty or Loose Water Supply Hoses?
Turn off the water supply.
Inspect hoses for cracks or loose connections.
Tighten connections or replace damaged hoses.
Clogged or Damaged Drain Pump
A drain pump removes water from the washing machine after each cycle. If it becomes clogged with lint, small objects, or debris, water may leak from the bottom.
How to Fix Clogged or Damaged Drain Pump?
Locate the drain pump (usually behind a small door at the front).
Place a towel underneath and remove the filter cap.
Clean out any debris and check for cracks in the pump.
If the pump is damaged, replace it.
Worn-Out Door Seal (For Front-Load Machines)
Front-load washing machines have a rubber gasket around the door that prevents leaks. Over time, this seal can wear out, crack, or develop mold, leading to water leakage.
How to Fix Worn-Out Door Seal?
Inspect the rubber gasket for signs of wear.
Clean it with a mild detergent to remove dirt and mold.
If the seal is damaged, change it with a better one.
Detergent Overuse or Wrong Detergent Type
Using too much detergent or non-HE (high-efficiency) detergent in an HE machine creates excessive suds, which can overflow and leak from the bottom.
How to Fix Detergent Overuse or Wrong Detergent Type?
Use the correct suitable type of detergent for your washing machine.
Reduce the amount of detergent used per load.
Run a rinse cycle to clear excess soap buildup.
Faulty Internal Hoses or Tub Seals
Internal hoses and tub seals prevent water from leaking inside the machine. If they are damaged or worn out, leaks can occur from underneath.
How to Fix Faulty Internal Hoses or Tub Seals?
Remove the back panel to inspect internal hoses.
Check for cracks or loose connections.
Replace any damaged hoses or seals.
How to Fix a Washing Machine Leaking from Bottom?
Step 1: Turn Off the Machine and Unplug It
Safety is the first priority.
Unplug the washing machine and turn off the water supply before troubleshooting.
Step 2: Inspect Water Supply Hoses and Connections
Check for leaks around the inlet hoses.
Tighten loose connections or replace cracked hoses.
If the leak persists, internal components may be damaged.
Consider calling a professional for repairs.
Preventing Future Washing Machine Leaks
Regular maintenance can help prevent leaks and extend the lifespan of your washing machine. Here are some tips:
Check hoses and seals in a regular routine for wear and tear.
Clean the drain pump filter every few months.
Use the correct detergent to avoid over-sudsing.
Ensure your washing machine is level to prevent strain on hoses and seals.
Table: Common Washing Machine Leaks and Fixes
Leak Source
Possible Cause
Solution
Bottom of machine
Clogged drain pump
Clean or replace pump
Back of machine
Loose water supply hose
Tighten or replace hose
Front of machine (door)
Worn-out door seal
Clean or replace seal
Under the machine
Faulty internal hose or tub seal
Inspect and replace if needed
Excessive suds overflow
Too much detergent used
Use correct detergent amount
When Should You Call a Professional?
Some leaks require professional repair, especially if:
The tub seal is leaking, which requires major disassembly.
There is significant water damage inside the machine.
You have already tried troubleshooting but the leak persists.
In the UK, professional washing machine repair costs typically range from £50 to £150, depending on the issue. If your appliance is old, it may be more cost-effective to replace it instead of repairing it.
Conclusion
A washing machine leaking from the bottom can be caused by several issues, from loose hoses and clogged pumps to damaged door seals and excessive detergent use. By following the troubleshooting steps outlined in this guide, you can identify and fix the problem quickly.
Regular maintenance, proper detergent use, and timely inspections can prevent future leaks and keep your washing machine running efficiently. If the issue persists despite troubleshooting, consider seeking professional help.
Home Diagnostics and Technical Standards Specialist at Hello Mag. She provides high-level Expertise in appliance mechanics and scientific pest management, ensuring every guide follows strict safety protocols and manufacturer standards. As a leading Authority on technical home specs, Kanimozhi audits complex data to provide homeowners with the most accurate, verified, and reliable diagnostic solutions available.
The weight of a washing machine is an important factor when considering installation, transportation, and stability. A heavier machine tends to vibrate less and offers better durability, while a lighter model is easier to move but may not be as stable during high-speed spins.
If you are wondering how much does a washing machine weigh or is a washer considered heavy, this guide will provide a detailed breakdown of washing machine weights by type, brand, and size to help you choose the right model.
How Much Does a Washing Machine Weigh?
The weight of a washing machine varies depending on its type, drum capacity, materials, and added features.
Standard washing machines weigh between 55-90 kg (120-200 lbs).
Compact/portable models weigh 10-25 kg (22-55 lbs).
Heavy-duty/commercial washers can weigh over 100-250 kg (220-550 lbs).
The main factors affecting washing machine weight include:
Materials Used – Stainless steel drums and reinforced frames make machines heavier.
Motor Type – Direct-drive motors tend to be heavier than belt-driven motors.
Added Features – Washers with inverter technology, vibration reduction, or extra insulation are usually heavier.
How Heavy Is a Washing Machine?
The term “heavy” washing machine depends on comparison:
Compared to other home appliances, washing machines are one of the heaviest items.
A refrigerator weighs between 60-150 kg (130-330 lbs), making it similar to a washer.
A dishwasher weighs 30-50 kg (65-110 lbs), significantly lighter than most washers.
A dryer weighs 50-70 kg (110-155 lbs), slightly lighter than a washing machine.
Weight Comparison with Other Appliances
Appliance
Average Weight (kg)
Average Weight (lbs)
Washing Machine
55-90 kg
120-200 lbs
Refrigerator
60-150 kg
130-330 lbs
Dishwasher
30-50 kg
65-110 lbs
Dryer
50-70 kg
110-155 lbs
Washing Machine Weight by Type
Front-Load Washing Machine Weight
Weight Range:60-90 kg (130-200 lbs)
Why It’s Heavier: Uses counterweights to reduce vibration.
Best For: Households needing better cleaning efficiency and energy savings.
Top-Load Washing Machine Weight
Weight Range:55-75 kg (120-165 lbs)
Why It’s Lighter: Lacks heavy counterweights and has a different drum design.
Best For: Those who prefer traditional top-loading designs.
Portable & Compact Washing Machine Weight
Weight Range:10-25 kg (22-55 lbs)
Why It’s Lighter: Smaller drum size and lightweight plastic construction.
Best For: Apartments, small spaces, and travel use.
Heavy-Duty & Commercial Washing Machine Weight
Weight Range:100-250 kg (220-550 lbs)
Why It’s Heavier: Made with industrial-grade components and larger drums.
Best For: Laundromats, hotels, and commercial use.
Washing Machine Weight by Brand
Different brands manufacture washers with varying weights depending on design, drum size, and features.
Comparison of Washing Machine Weights by Brand
Brand
Front-Load Weight (kg/lbs)
Top-Load Weight (kg/lbs)
Heavy-Duty Weight (kg/lbs)
Samsung
60-85 kg / 130-185 lbs
50-70 kg / 110-155 lbs
100-150 kg / 220-330 lbs
LG
65-90 kg / 140-200 lbs
55-75 kg / 120-165 lbs
120-180 kg / 265-400 lbs
Bosch
65-95 kg / 145-210 lbs
50-70 kg / 110-155 lbs
110-160 kg / 240-350 lbs
Whirlpool
60-80 kg / 130-175 lbs
55-75 kg / 120-165 lbs
100-200 kg / 220-440 lbs
Miele
70-100 kg / 155-220 lbs
60-80 kg / 130-175 lbs
130-200 kg / 285-440 lbs
Is a Washing Machine Considered Heavy Weight?
A washing machine is generally considered heavy if it weighs over 90 kg (200 lbs).
Portable models (10-25 kg) are light.
Standard home washers (55-90 kg) are moderately heavy.
Heavy-duty commercial models (100+ kg) are classified as heavy weight.
How to Move a Heavy Washing Machine Safely?
Moving a heavy washing machine requires the right tools and techniques to prevent injury and damage.
Step-by-Step Moving Guide
Disconnect the washer – Turn off power and water supply.
Drain excess water – Remove standing water from hoses and drum.
Secure moving parts – Use transit bolts or foam padding.
Use a dolly or lifting straps – Never lift with bare hands.
Get help if needed – Washing machines are too heavy to move alone.
Can You Move a Washing Machine Alone?
Not recommended unless it’s a portable model.
Standard washers require at least two people or a dolly.
Heavy-duty washers (100+ kg) need professional movers.
Conclusion
A washing machine’s weight varies based on its type, brand, and features:
Standard washing machines weigh between 55-90 kg (120-200 lbs).
Front-load washers are heavier than top-load models.
Commercial washers can weigh over 100 kg (220+ lbs).
Brands like Samsung, LG, and Bosch offer different weight options.
If you need a lightweight washer, consider a portable or compact model. If stability and durability are priorities, a heavier front-load or commercial washer is the best choice.
Would you like more details on washer installation or moving tips? Let me know in the comments!
Home Diagnostics and Technical Standards Specialist at Hello Mag. She provides high-level Expertise in appliance mechanics and scientific pest management, ensuring every guide follows strict safety protocols and manufacturer standards. As a leading Authority on technical home specs, Kanimozhi audits complex data to provide homeowners with the most accurate, verified, and reliable diagnostic solutions available.
Railway sleepers are an excellent choice for creating a durable and stylish garden border. Their rustic charm, affordability, and ease of installation make them popular among DIY gardeners and landscapers.
Whether you want to define flower beds, create a pathway edge, or frame your lawn, sleepers offer a practical and visually appealing solution.
In this guide, I will walk you through the step-by-step process on how to lay railway sleepers as a border, including the tools and materials needed, installation techniques, and maintenance tips.
Why Use Railway Sleepers for Garden Edging?
Railway sleepers have become a go-to option for garden edging due to their versatility and durability. Here are some key benefits:
Sturdy and Long-Lasting: Timber sleepers, especially hardwood ones, can last for decades with proper treatment.
Aesthetic Appeal: Their natural wood finish complements both modern and traditional garden designs.
Cost-Effective: Compared to stone or brick edging, sleepers are relatively affordable and easy to install.
DIY Friendly: They require minimal groundwork and can be laid by homeowners with basic tools.
New vs. Reclaimed Railway Sleepers
Feature
New Railway Sleepers
Reclaimed Railway Sleepers
Condition
Fresh, untreated
Aged, often treated with creosote
Appearance
Smooth, uniform
Weathered, rustic look
Durability
Longer lifespan if treated properly
May have some wear but still durable
Cost
More expensive
Generally cheaper
Suitability
Ideal for formal gardens
Great for rustic, natural designs
New sleepers offer a cleaner look and longer lifespan, while reclaimed sleepers provide character and sustainability. The choice depends on your garden’s style and budget.
What Materials and Tools Do You Need?
Before starting your project, gather the necessary materials and tools.
Materials:
Railway sleepers (hardwood or softwood)
Gravel or sand for bedding
Long timber screws, rebar, or stakes for securing
Wood preservative (if using untreated sleepers)
Tools:
Saw (for cutting sleepers to size)
Drill and screws
Spirit level
Shovel and rake
Rubber mallet (to position sleepers)
Having the right tools ensures a smoother installation process and a professional-looking result.
Step-by-Step Guide: How to Lay Railway Sleepers as a Border?
Step 1: Plan and Mark the Border Area
Determine the layout of your sleeper border and mark the area using string or chalk.
Decide whether you want the sleepers laid flat, stacked, or upright.
Measure the sleepers to ensure they fit the space.
Step 2: Prepare the Ground
Dig a shallow trench where the sleepers will sit, approximately 5-10 cm deep.
Ensure the base is level using a spirit level to prevent uneven edging.
Add a layer of gravel or sand for stability and drainage.
Step 3: Position the Sleepers
Lay the sleepers in the trench according to your planned design.
If placing them flat, ensure they sit evenly along the border.
For stacked sleepers, arrange the first layer securely before adding additional layers.
Step 4: Secure the Sleepers in Place
Option 1: Wooden Stakes – Drive stakes behind the sleepers and screw them in place.
Option 2: Rebar or Metal Rods – Drill holes and hammer rods through the sleepers into the ground for added stability.
Option 3: Timber Screws – If stacking, use long screws to join the layers together.
Step 5: Finishing Touches
Apply a wood preservative to prevent rotting and extend the lifespan of the sleepers.
Fill any gaps with gravel, soil, or plants to integrate the edging with the garden.
Check the alignment one last time and make necessary adjustments.
Maintenance Tips for Railway Sleeper Borders
To ensure your railway sleeper border remains in good condition, follow these maintenance practices:
Prevent Rotting: Use a wood preservative, especially on the ends that touch the soil.
Check Stability: Inspect sleepers periodically and secure any that become loose.
Clean and Treat: Wash off dirt and apply a sealant to protect the wood from weather damage.
Improve Drainage: Ensure water does not pool around the sleepers, as excess moisture can speed up decay.
Creative Garden Edging Ideas with Railway Sleepers
Railway sleepers can be used in various ways beyond simple garden borders. Here are some inspiring ideas:
Raised Flower Beds: Stack sleepers to create elevated garden beds for flowers or vegetables.
Pathway Edging: Use sleepers to line a gravel or stone pathway, giving it a structured look.
Layered Steps: Create steps on sloped gardens using sleepers for a natural transition between levels.
Combination Borders: Mix railway sleepers with gravel, bricks, or metal edging for a unique design.
Conclusion
Laying railway sleepers as a garden border is a simple yet effective way to enhance your outdoor space. By following the right installation steps and using quality materials, you can create a long-lasting, attractive edging that defines your garden beautifully.
Whether you prefer a rustic reclaimed look or a polished new sleeper design, this DIY project adds character and structure to your garden and learn about few best garden edging sleepers and how to lay them.
If you’re planning to install railway sleeper borders, take your time to prepare the ground properly, secure the sleepers well, and maintain them regularly for the best results.
Frequently Asked Questions (FAQs)
1. Can I lay railway sleepers directly on soil?
Yes, but using a gravel or sand base improves stability and drainage, preventing rot over time.
2. Do I need to treat railway sleepers before installation?
If using new untreated sleepers, apply a wood preservative to protect against moisture and pests. Reclaimed sleepers may already have treatment but should be checked for any hazardous chemicals.
3. How long do railway sleepers last in the garden?
With proper treatment and maintenance, railway sleepers can last 15-30 years, depending on wood type and environmental conditions.
4. Should I use hardwood or softwood sleepers?
Hardwood sleepers (oak or tropical hardwood) are more durable but expensive. Softwood sleepers (pine or spruce) are budget-friendly but require regular treatment to prevent decay.
5. Can I use reclaimed railway sleepers for borders?
Yes, but ensure they are free from harmful chemicals like creosote, which can be hazardous for plants and pets.
Home Diagnostics and Technical Standards Specialist at Hello Mag. She provides high-level Expertise in appliance mechanics and scientific pest management, ensuring every guide follows strict safety protocols and manufacturer standards. As a leading Authority on technical home specs, Kanimozhi audits complex data to provide homeowners with the most accurate, verified, and reliable diagnostic solutions available.


 Is a Washing Machine Considered Heavy Weight?