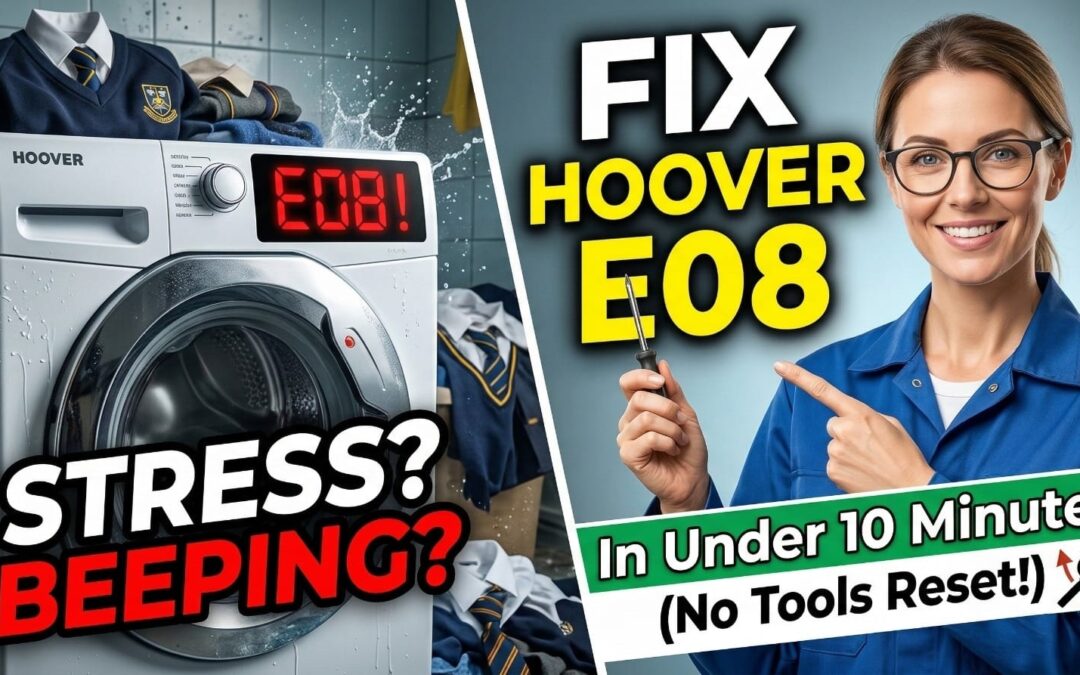
I’ve seen many Hoover washers beep for no reason—here is the manual-free way I fix the dreaded E08 error in under 10 minutes before calling an expensive engineer.
As a busy parent, I know there is nothing more stressful than a mountain of school uniforms and a washing machine that refuses to spin, but in my experience, the E08 code is often just a “hiccup” in the motor sensor that you can handle yourself.
The Short Answer: The Hoover E08 error code indicates a motor speed sensor (Tacho) fault, meaning the machine can’t tell how fast the drum is spinning. Usually, this is caused by a tangled laundry load or a temporary sensor glitch that can be fixed with a 10-minute power reset.
📺 Watch: My 6-Minute E08 Troubleshooting Guide
If you’re a visual learner, I filmed a quick walkthrough showing exactly where that pesky motor sensor is located and how I reset my machine without tools.
Quick Fix Guide: Hoover Washing Machine E08 Error At A Glance
Before you start unscrewing panels, use this table to see which fix matches your situation:
Fix Type
Difficulty (1-5)
Time Needed
Estimated Cost
Simple Power Reset
1
10 Mins
£0
Load Redistribution
1
5 Mins
£0
Tacho Magnet Check
3
20 Mins
£0
Carbon Brush Replacement
4
45 Mins
£15 – £25
Tools You Will Need
Before diving into the mechanical fixes, ensure you have these basic tools ready. Having the right gear prevents stripped screws and frustration:
Phillips Screwdriver: For removing the back panel and motor mounting screws.
7mm Nut Runner (or Socket): Often required to remove the bolts holding the motor in place.
Multimeter (Optional): Highly recommended if you want to verify the sensor’s health scientifically.
Torch/Flashlight: The back of a washing machine is a dark place!
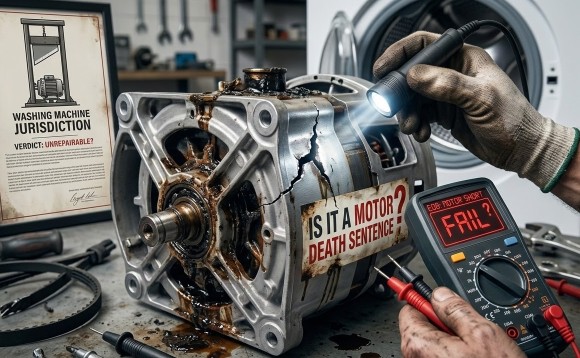
What Does The Hoover E08 Error Code Actually Mean?
Is It A Motor Death Sentence?
When your Hoover display flashes “E08” or you see 8 red blinks on the LED models, the control board is essentially saying, “I’m trying to spin the motor, but I can’t track the speed.”
It isn’t always a sign that your motor has “blown.” Most of the time, the Tacho coil (a small sensor at the back of the motor) has simply lost its connection or the magnet has vibrated loose.
If you’re stuck with a different message on your screen, be sure to check our Hoover error code master list for a full breakdown of other common faults.
Why Is My Machine Beeping At Me?
The beeping is a safety feature. If the machine thinks the motor is spinning too fast (or not at all), it stops the cycle to prevent the drum from flying off its dampers. This is why you’ll often see the machine start to spin, then suddenly stop and throw the E08 code.
Can Overloading Really Cause An E08 Error?
The “Wet Towel” Syndrome
Believe it or not, I’ve seen E08 triggered simply by a single heavy item, like a bath mat or a large hoodie. If the load is “clumped,” the motor struggles to maintain a consistent speed during the initial distribution phase. The sensor detects this “jerkiness” as a speed error.
The Balancing Act
Before you panic, try this: Pause the machine, wait for the door to click open (if it will), and manually redistribute the clothes. Ensure there is a mix of small and large items. If the clothes are soaking wet, take one or two heavy items out and try a “Spin & Drain” cycle.
Note that drainage issues can sometimes present similar symptoms; if you suspect a blockage instead of a motor fault, how to fix a Hoover E20 drainage fault might be the guide you actually need.
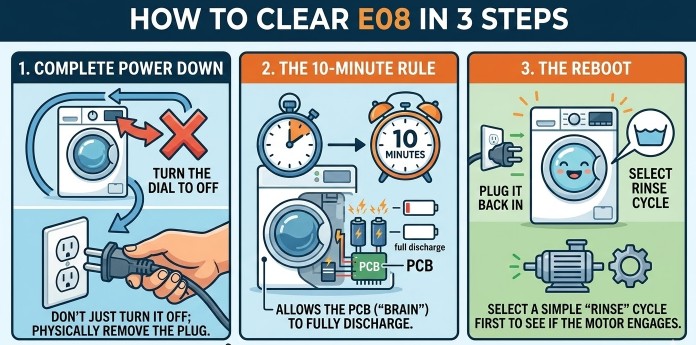
The “No-Tools” Reset: How To Clear E08 In 3 Steps?
If your machine is stuck in a loop, follow my “Manual-Free” reset sequence:
Complete Power Down: Turn the dial to ‘OFF’ and pull the plug from the wall. Don’t just turn it off at the socket; physically remove the plug.
The 10-Minute Rule: Leave it for a full 10 minutes. This allows the capacitors on the PCB (the “brain”) to fully discharge.
The Reboot: Plug it back in and select a simple “Rinse” cycle first to see if the motor engages.
Pro-Tip #1: If the door is stuck locked because there’s water in the drum, hold the “Start/Pause” button and the “Option” button (usually the first one) simultaneously for 5 seconds. On many Hoover models, this forces a 2-minute emergency drain.
How To Manually Open The Door With An E08 Error?
There is nothing worse than having school clothes trapped in a broken machine. If the E08 error has locked your door and the reset didn’t work:
The Filter Drain: Locate the small flap at the bottom right of the machine. Place a shallow tray down, unscrew the filter slowly, and let the water drain. Once the water is gone, the pressure switch usually tells the door to unlock.
The Pull-Cord: Some newer Hoover models have a hidden plastic pull-cord behind that same filter flap. Pull it downwards to manually release the door latch.
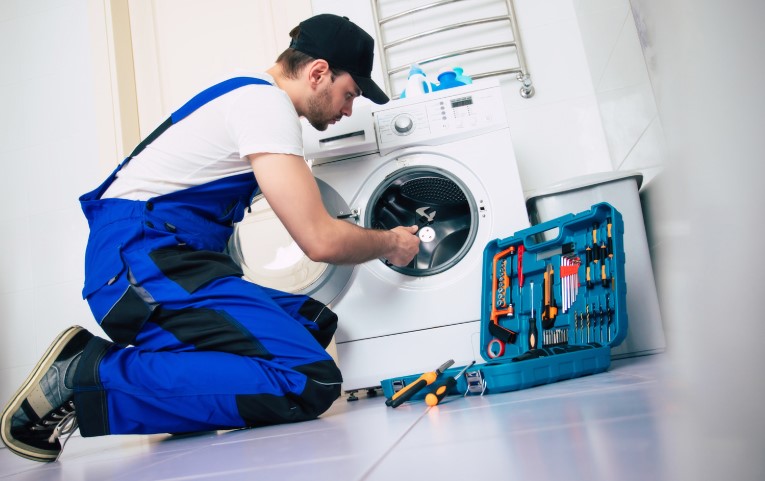
Is It Time To Inspect The Motor Brushes?
If the reset didn’t work, the most likely culprit is the carbon brushes. These are small blocks that provide power to the spinning part of the motor.
What are the Signs Of Wear?
If you’ve noticed a “screeching” sound lately, or if the machine washes fine but fails only when it gets to the high-speed spin, your brushes are likely worn down.
Pro-Tip #2: When you take the brushes out, measure the carbon length. If they are under 10mm, they are in the “danger zone.” They won’t have enough spring tension to touch the motor, causing the intermittent E08 connection.
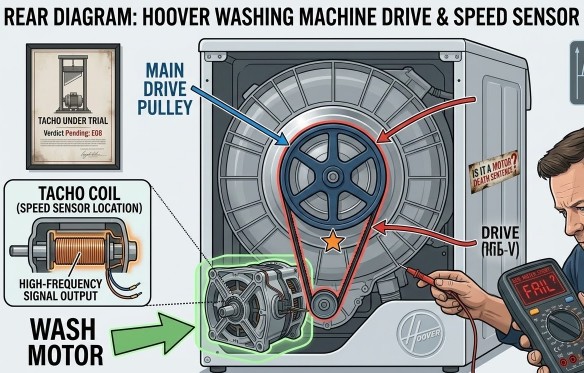
Step-by-Step: How Do I Check The Motor Speed Sensor (Tacho)?
If your brushes look long and healthy, the problem is the Tacho Magnet. This is a common Hoover quirk where the magnet at the end of the motor shaft vibrates loose.
Access the Back: Unplug the machine and unscrew the back panel.
Locate the Motor: The motor is located at the bottom of the drum, connected by a large rubber drive belt.
The Magnet Check: Gently tug on the plastic housing of the small coil at the very end of the motor shaft.
Pro-Tip #3: If you have a multimeter, you can test the health of the sensor itself. Set your meter to Ohms ($\Omega$); the coil should read between $150\Omega$ and $180\Omega$. If it reads “Open” or $0\Omega$, the sensor is dead and needs replacing. However, I’ve saved dozens of machines by simply using a screwdriver to tighten the central screw holding that magnet onto the motor shaft. If the magnet is wobbling, the machine can’t read the speed!
When Should I Give Up And Call A Professional?
If you’ve checked the brushes and the Tacho magnet and the E08 persists, you might have a PCB (Printed Circuit Board) failure. At this point:
Repair Cost: A new PCB can cost £80 – £120 plus labour.
Replacement: If your Hoover is more than 5 years old, I’d suggest looking at a new machine rather than sinking £150 into an old one.
Hoover UK Support: If the machine is under 12 months old, stop! It’s under warranty. Call Hoover directly and don’t open the back panel, as this may void your cover.
Conclusion
Facing an E08 error doesn’t have to mean a £200 repair bill. By following the Reset-Load-Inspect workflow, most parents can get their laundry back on track before the kids even realize their PE kits were trapped. Start with the 10-minute power reset—you might be surprised how often “turning it off and on again” actually works!
Frequently Asked Questions About Hoover Washing Machine E08
1. Why Does E08 Keep Coming Back?
If it’s intermittent, it’s almost always the carbon brushes being right at the limit of their life. One day they touch the motor, the next they don’t.
2. Can I Still Use The Machine If It Only Happens On The Spin Cycle?
I wouldn’t recommend it. Forcing a machine with a sensor fault can eventually burn out the motor controller on the expensive main circuit board.
3. Does The E08 Error Mean My PCB Is Blown?
Not necessarily. In about 80% of the cases I’ve dealt with, it’s a mechanical issue (brushes or magnet) rather than an electronic one. If you are experiencing drainage issues instead, see our guide on solving Hoover E20 errors.
Kani
Lead Technical Researcher
Kanimozhi BV
Kanimozhi is a home improvement and diagnostics specialist at Hello Magazine UK. With a background in technical research, she bridges the gap between professional trade standards and practical DIY solutions. From troubleshooting complex appliance error codes to ecological pest control and modern interior design, Kanimozhi provides evidence-based guides to help UK homeowners maintain safe, efficient, and beautiful living spaces.
Home Diagnostics and Technical Standards Specialist at Hello Mag. She provides high-level Expertise in appliance mechanics and scientific pest management, ensuring every guide follows strict safety protocols and manufacturer standards. As a leading Authority on technical home specs, Kanimozhi audits complex data to provide homeowners with the most accurate, verified, and reliable diagnostic solutions available.
A Hoover washing machine is a reliable home appliance, but like any device, it can experience occasional malfunctions. When something goes wrong, your machine will display error codes to indicate the issue.
Understanding these codes can help you diagnose problems quickly and potentially fix them without needing professional assistance. In this guide, I will walk you through the most common Hoover washing machine error codes, explain their causes, and provide step-by-step solutions.
Whether your washer isn’t draining, spinning, or filling with water, this troubleshooting guide will help you get your appliance back in working order.
What are the Common Hoover Washing Machine Error Codes & Fixes?
What Do Hoover Washing Machine Error Codes Mean?
Hoover washing machines have a built-in diagnostic system that detects faults and displays corresponding error codes. These codes appear on the digital display (if your model has one) or may be indicated by flashing LED lights.
Each error code corresponds to a specific problem, such as water supply issues, drainage problems, motor faults, or door lock failures. By identifying the error code, you can determine the best way to fix the issue.
How to Identify Error Codes on a Hoover Washing Machine?
To read an error code, follow these steps:
Check the display panel for an alphanumeric code (e.g., E01, E03).
If your model doesn’t have a screen, observe the flashing LED lights and refer to your user manual for their meaning.
Note the error code and compare it with the list below to understand the problem.
Now, let’s go through the complete list of Hoover washing machine error codes and their solutions.
Complete List of Hoover Washing Machine Error Codes & Solutions
Error Code
Issue
Cause
Solution
E01
Door lock problem
Faulty door lock or latch
Check the door lock, clean the latch, reset the washer
E02
Water supply issue
Low water pressure, clogged inlet hose
Ensure water supply is on, clean filters, check for hose blockages
Perform a maintenance wash every few weeks to remove residue and bacteria.
Regular maintenance can prevent many of the common error codes from appearing, saving you time and repair costs.
When to Call a Professional?
While many Hoover washing machine errors can be fixed at home, some problems require professional assistance. You should call a technician if:
The error code persists after troubleshooting.
The washing machine won’t start or keeps shutting down.
You hear unusual noises like grinding, banging, or humming.
There is a water leak that you cannot locate or fix.
The drum is not spinning even after resetting.
If needed, contact Hoover customer support or a local appliance repair specialist for further assistance.
Conclusion
Understanding Hoover washing machine error codes allows you to quickly diagnose and fix common problems. By following the troubleshooting steps outlined in this guide, you can save money on repairs and keep your washer running smoothly.
Regular maintenance and proper usage will help prevent future issues. However, if an error persists, don’t hesitate to seek professional assistance.
If you found this guide helpful, consider bookmarking it for future reference.
What are the FAQs on Hoover Washing Machine Error Codes?
1. Why does my Hoover washer keep showing error codes?
Error codes indicate specific faults in the washing machine. If an error keeps appearing, there may be an unresolved issue that needs attention, such as a blocked drain or faulty sensor.
2. How do I clear an error code on my Hoover washing machine?
You can try resetting the washer by turning it off, unplugging it for a few minutes, and restarting it. If the code persists, refer to the troubleshooting section above.
3. Can I fix Hoover error codes myself, or do I need a technician?
Many errors, such as blocked drains, faulty door locks, or detergent issues, can be fixed at home. However, motor faults, heating element issues, and control board failures may require professional repair.
4. How often should I clean my washing machine to prevent errors?
To prevent blockages and buildup, clean the drain pump filter, detergent drawer, and drum at least once a month.
Home Diagnostics and Technical Standards Specialist at Hello Mag. She provides high-level Expertise in appliance mechanics and scientific pest management, ensuring every guide follows strict safety protocols and manufacturer standards. As a leading Authority on technical home specs, Kanimozhi audits complex data to provide homeowners with the most accurate, verified, and reliable diagnostic solutions available.
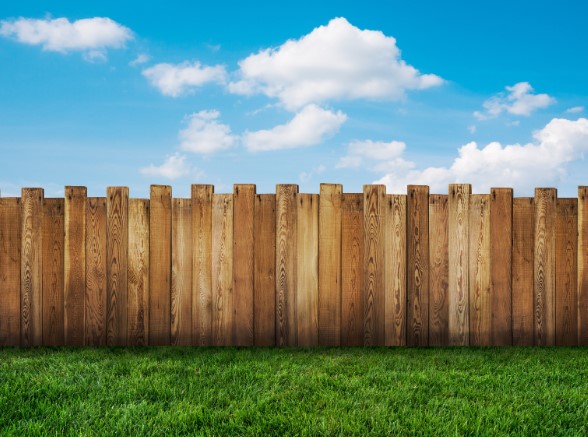
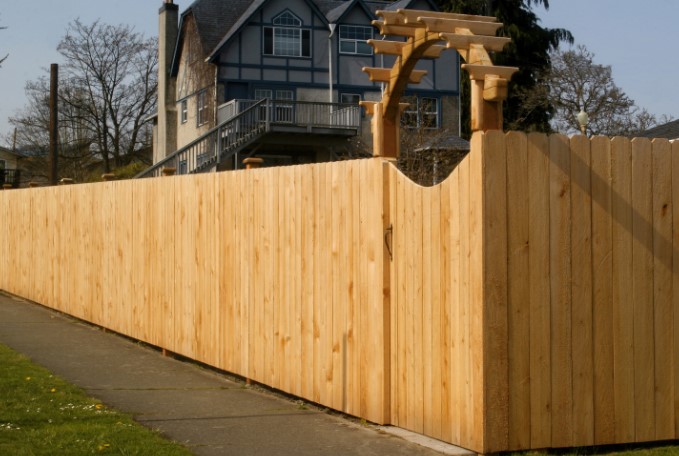
Over time, wooden fences are prone to developing green algae, especially in damp or shaded areas. This not only makes the fence look unkempt but can also lead to wood deterioration, slipperiness, and potential rot if left untreated.
If you’re noticing green patches on your wooden fence, don’t worry—there are several effective ways to remove algae and restore your fence to its original condition. In this guide on how to remove green algae from a wooden fence, I’ll walk you through:
What causes algae on fences
DIY and commercial cleaning solutions
The best methods to remove algae
How to prevent algae from coming back
By following these step-by-step instructions, you can keep your wooden fence clean, well-maintained, and algae-free for years to come.
What Causes Green Algae on Wooden Fences?
Algae thrive in moist, shaded, and poorly ventilated areas. If your wooden fence is exposed to frequent rain, has limited sunlight, or is close to overgrown plants, it becomes a prime location for green algae growth.
Here are the main factors that contribute to algae on fences:
Damp Conditions: Rain, high humidity, or poor drainage can create excess moisture.
Lack of Sunlight: Fences that are shaded by trees, buildings, or other objects are more prone to algae buildup.
Poor Air Circulation: Limited airflow prevents wood from drying out properly.
Organic Debris: Leaves, moss, and soil deposits on the fence can trap moisture and encourage algae growth that too on the taller fence which is extended.
Unlike moss or mildew, algae do not have roots and do not feed on wood, but their presence retains moisture, leading to fungal growth and potential wood rot over time.
Best Methods on How To Remove Green Algae from a Wooden Fence
Method 1 – Cleaning Green Algae Off Wood with Vinegar
One of the most effective and eco-friendly ways to remove algae is by using white vinegar. Vinegar is a natural disinfectant that kills algae without damaging the wood.
What You’ll Need:
White vinegar (undiluted for heavy algae, 50/50 mix with water for lighter growth)
Spray bottle or bucket
Stiff-bristle brush
Water hose
Step-by-Step Instructions:
Spray or apply the vinegar solution directly onto the green algae patches.
Let it sit for 20-30 minutes to break down the algae.
Scrub the area using a stiff-bristle brush to remove the algae.
Rinse the fence thoroughly with clean water.
Allow the fence to fully dry before applying any protective sealant.
This method is safe, non-toxic, and does not harm nearby plants or pets.
Method 2 – Using a Commercial Algae Remover
For tougher algae stains, commercial algae removers can be more effective than DIY methods. These solutions are specially formulated to break down algae without harming wood.
Best Algae Removers for Wooden Fences:
Wet & Forget Moss, Mould, Lichen & Algae Remover
Algon Organic Path & Patio Cleaner
Ronseal Decking Cleaner & Reviver
How to Use a Commercial Algae Remover?
Follow the instructions on the product label.
Apply the solution using a sprayer, sponge, or brush.
Allow the cleaner to sit for the recommended time (usually 10–30 minutes).
Scrub if necessary, then rinse with water.
Most commercial cleaners offer long-term algae prevention, meaning you won’t have to clean as often.
Method 3 – Pressure Washing a Wooden Fence
If your fence has a large amount of algae, using a pressure washer can quickly restore its appearance. However, high-pressure water can damage wood, so it’s important to use the right settings.
Pressure Washing Instructions:
Use a low-pressure setting (no more than 1500 PSI) to avoid damaging the wood.
Start at a distance of 12-18 inches from the fence.
Spray evenly in a sweeping motion, working from top to bottom.
Let the fence dry completely before applying a wood preservative.
Warning: Avoid using a high-pressure setting, as it can strip away wood fibers, leading to splintering and damage.
Method 4 – Homemade Algae Remover for Fences
If you prefer a chemical-free approach, you can make a DIY algae remover using household ingredients.
DIY Algae Cleaning Solution:
Ingredient
Measurement
Purpose
White vinegar
1 part
Natural algae killer
Baking soda
½ cup per litre of water
Gentle scrubbing agent
Lemon juice
2 tablespoons
Helps break down algae naturally
Water
2 parts
Dilutes solution
How to Use?
Mix the ingredients in a bucket or spray bottle.
Apply to the affected areas.
Let sit for 20 minutes, then scrub with a brush.
Rinse thoroughly with water.
This eco-friendly solution is safe for use around plants and pets.
How to Prevent Green Algae from Growing on a Wooden Fence?
Regular Cleaning and Maintenance
Wash your fence every 6–12 months to prevent algae build-up.
Remove leaves, soil, or moss that can trap moisture.
Improve Airflow and Sunlight Exposure
Trim back trees and bushes to increase airflow around the fence.
Allow more sunlight to reach the wood, reducing damp conditions.
Apply a Wood Treatment and Sealant
Use a water-resistant sealant to protect the wood.
Consider oil-based treatments for better longevity.
Install a Gravel or Stone Barrier
Add gravel or stones at the base of the fence to reduce soil moisture contact.
This helps keep the lower sections of the fence dry and algae-free.
Conclusion
Removing green algae from a wooden fence is a straightforward task when using the right methods. Whether you choose vinegar, a commercial cleaner, pressure washing, or a homemade solution, regular cleaning will help maintain the beauty and longevity of your fence.
For long-term protection, keep your fence dry, allow airflow, and apply a wood sealant. By following these steps on how to remove green algae from wooden fence, you can enjoy a clean, algae-free fence all year round.
Would you like recommendations on the best wood treatments for long-term fence protection? Let me know!
Home Diagnostics and Technical Standards Specialist at Hello Mag. She provides high-level Expertise in appliance mechanics and scientific pest management, ensuring every guide follows strict safety protocols and manufacturer standards. As a leading Authority on technical home specs, Kanimozhi audits complex data to provide homeowners with the most accurate, verified, and reliable diagnostic solutions available.
A washing machine that refuses to start can be frustrating, especially when you have laundry piling up. If your Beko washing machine won’t start, there could be several reasons behind the issue. From power supply problems to faulty door locks, understanding the root cause is essential for an effective fix.
In this guide, I will walk you through the most common problems like Beko washing machine not starting and provide step-by-step troubleshooting solutions to get it working again.
Why Is My Beko Washing Machine Not Starting?
1. Is the Power Supply Working?
Before assuming there is a major fault, check whether the washing machine is receiving power.
Ensure the power cord is properly plugged in.
Test the socket by plugging in another appliance.
Inspect the fuse in the plug and change it if needed.
Check the circuit breaker for any tripped switches.
If there is no issue with the power supply, move on to the next possible cause.
2. Is the Washing Machine Door Locked Properly?
Most modern Beko washing machines have a safety lock mechanism that prevents the machine from starting if the door is not closed properly.
Make sure the door clicks shut firmly.
Check for obstructions in the door seal that may prevent proper closure.
If the door lock mechanism is faulty, it need to be replaced or altered.
3. Are There Error Codes Displayed?
Beko washing machines display error codes when something is wrong. If your machine won’t start, check if there is a code on the display panel.
Common Beko washing machine error codes related to startup issues:
Error Code
Meaning
Possible Fix
E01
Door lock issue
Ensure the door is properly closed, replace the door lock if faulty
If your machine shows an error code, refer to the user manual for specific troubleshooting steps.
4. Is the Start Button or Control Panel Faulty?
A malfunctioning start button or control panel could be the reason your Beko washing machine won’t start a cycle.
Try pressing the start button firmly.
If the panel is unresponsive, unplug the machine for a few minutes and plug it back in.
If some buttons work but the start button does not, the control board may need repair.
5. Is the Water Supply Properly Connected?
Some Beko washing machines won’t start if they detect a water supply issue.
Ensure the water tap is fully turned on.
Check the inlet hose for kinks or blockages.
If the inlet valve is clogged, clean or replace it.
6. Is There a Drainage Issue?
A blocked drain pump can prevent the machine from starting, often causing a clicking sound without beginning the cycle.
Remove and clean the drain filter.
Check the drain hose for clogs.
If the pump is faulty, it might need replacement.
How to Fix a Beko Washing Machine That Won’t Start
1. Perform a Basic Reset
Resetting your Beko washing machine can sometimes resolve startup issues.
How to reset a Beko washing machine?
Unplug the machine for 5–10 minutes.
Plug it back in and hold the start button for 5 seconds.
Turn the machine off and on again.
Try starting a new cycle.
2. Check the Power and Fuse
If there is no power, inspect the fuse and circuit breaker.
Replace a blown fuse in the plug.
Reset the circuit breaker if it has tripped.
Try using a different power socket.
3. Inspect and Fix the Door Lock
A faulty door lock can protect the machine from starting.
Check if the door is completely closed and latched.
If the door lock is damaged, replace it with a new one.
If the door switch is faulty, a technician may need to replace it.
4. Check Water Supply and Drainage
A washing machine may not start if it detects low water pressure or a blocked drain.
Ensure the water tap is open and the hose is not twisted.
Remove and clean the drain filter.
If the drain pump is clogged, clean it out.
5. Diagnose the Control Panel
If the control panel is unresponsive:
Press different buttons to check functionality.
Try performing a reset.
If the panel remains unresponsive, the mainboard may need repair.
Quick Troubleshooting Table
Problem
Possible Cause
Solution
No power
Plug issue, blown fuse
Check plug, replace fuse
Door not locking
Faulty door latch
Ensure door clicks shut
Clicking sound, no start
Drain pump clogged
Clean drain filter
No water entering
Blocked water inlet
Check tap & hoses
Buttons unresponsive
Control panel fault
Try a reset, call a technician
When to Call a Professional?
If you have tried all the troubleshooting steps and your Beko washing machine won’t start, it may require professional repair. Consider calling a technician if:
The machine still doesn’t start after resetting.
There is a burning smell or electrical sparking.
The error codes persist even after troubleshooting.
The control panel or mainboard appears faulty.
Conclusion
If your Beko washing machine not starting, the problem could be due to a power supply issue, door lock failure, water supply problem, or a faulty control panel. By following the troubleshooting steps outlined in this guide, you can identify and fix the issue in most cases.
For persistent problems, consult a professional technician to avoid further damage. Regular maintenance, such as cleaning the drain filter and checking the power supply, can help prevent startup issues in the future.
Home Diagnostics and Technical Standards Specialist at Hello Mag. She provides high-level Expertise in appliance mechanics and scientific pest management, ensuring every guide follows strict safety protocols and manufacturer standards. As a leading Authority on technical home specs, Kanimozhi audits complex data to provide homeowners with the most accurate, verified, and reliable diagnostic solutions available.
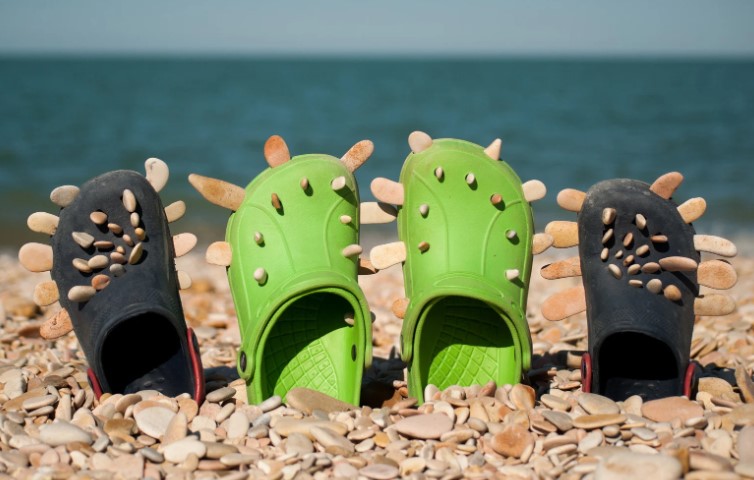
Crocs have long been a favourite of mine for their comfort, lightweight build, and resilience. Whether I’m out in the garden or heading to the corner shop, they’re my go-to.
But like any shoes, they eventually need a good clean. One common question that comes up is: can you put Crocs in the washing machine?
The answer depends on the type of Crocs you have. Some are perfectly fine to machine wash, while others require more delicate care. Let me take you through how to clean Crocs properly without ruining them.
Can Crocs Go in the Washing Machine?
Which Types of Crocs Can Be Machine Washed?
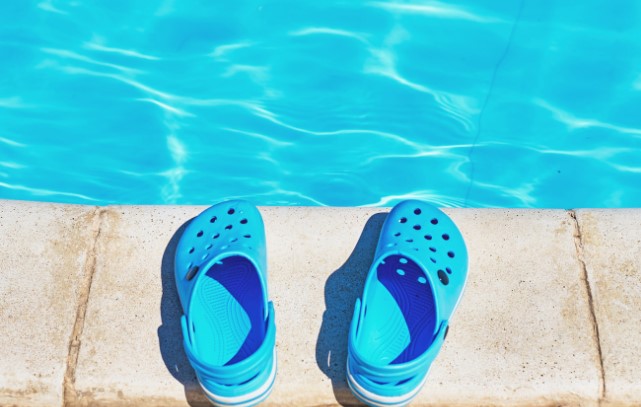
If your Crocs are made from Croslite™, which is the signature material used in classic Crocs clogs and some sandal designs, they can generally go into the washing machine. These types are sturdy enough to handle a gentle wash.
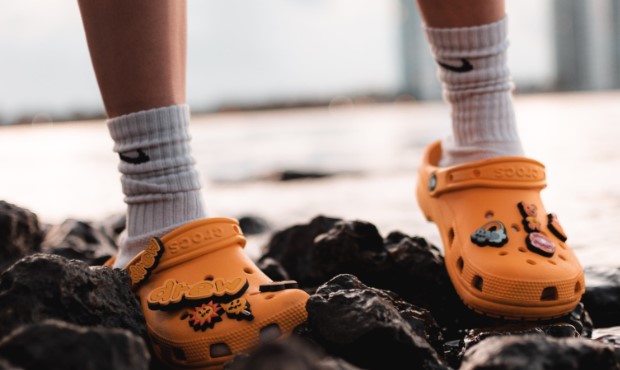
On the other hand, Crocs with fur lining, leather elements, or decorative additions held on with glue should be kept far away from the washing machine. The heat and motion of spinning in washing machine can damage these features beyond repair.
What Can Go Wrong in the Machine?
Putting the wrong type of Crocs into the washing machine can cause several issues. In the past, I’ve seen fur-lined pairs come out with matted linings and warped soles.
Others can shrink, lose shape, or even split at the seams. That’s why knowing what your Crocs are made of is key before washing them.
How to Wash Crocs?
Can You Put Crocs in the Washing Machine?
Yes, you can put Crocs in the washing machine, provided they’re made from Croslite™ and don’t have sensitive components. I always stick to a cold or lukewarm water setting and choose the delicate cycle. Hot water is a no-go, as it can cause the material to warp.
Before I place them in the machine, I give them a quick rinse under the tap to remove loose dirt. Then I tuck them into a mesh laundry bag or an old pillowcase.
This prevents them from bouncing too hard against the drum of the washer. Adding a couple of towels in the wash helps soften the impact too.
Should You Use Detergent?
Using a mild detergent is perfectly fine. I avoid bleach or anything with strong chemicals, as these can degrade the Croslite™. A small amount of regular laundry detergent in the detergent drawer does the trick without damaging the material or causing discolouration.
How to Clean Your Crocs with Washing-Up Liquid and Water?
Handwashing When Machine Washing Isn’t Suitable
If you own lined Crocs or those with leather elements, handwashing is the best route. I usually fill a basin with warm water and add a squirt of washing-up liquid.
Using a soft cloth or sponge, I gently clean the outer surface. If any areas are particularly grubby, a soft-bristled brush helps loosen the dirt without scratching the surface.
For the inside of the Crocs, I use the same soapy water with a clean cloth and wipe gently. It’s important not to soak lined Crocs, especially if they’ve got a furry inner layer, as this can take forever to dry and may develop a smell.
Getting Rid of Smells and Stains
Crocs can absorb odours over time. To freshen them up, I often sprinkle a bit of baking soda inside and let it sit overnight.
For tougher stains or scuff marks, a damp melamine sponge (commonly called a magic eraser) usually brings them right off. I’ve also tried a mix of white vinegar and water for a quick soak when smells linger – it works surprisingly well.
Can I Put Crocs in the Washing Machine If They’re Lined?
Why Fur-Lined Crocs Need a Different Approach?
Fur-lined Crocs are great for colder months, but they’re not suited to machine washing. The lining can become flattened, shed, or lose its softness.
In some cases, the interior fabric even separates from the sole. That’s why I always clean them by hand and treat them gently.
The Best Way on How To Wash Fuzzy Crocs
For these pairs, I dampen a soft cloth with warm soapy water and wipe down the exterior. To clean the lining, I use a slightly damp cloth and gently dab at the material.
If the fur holds odours, baking soda left overnight helps absorb the smell. I brush it out the next morning and let them air dry naturally. Heat is the enemy here, so I always keep them away from direct sunlight or radiators.
What is the Best Way to Clean Crocs?
My Routine for Keeping Crocs Fresh
Over the years, I’ve developed a cleaning routine that’s kept my Crocs in excellent shape. I usually give them a quick wipe once a week, especially after outdoor use.
When they start looking dull or a bit grubby, I go in with a deeper clean – either machine or hand wash depending on the style.
Storing Crocs in a cool, shaded area helps too. Leaving them in a hot car or next to a heater can warp the material or fade the colour. I’ve learned that the hard way.
What are the Common Mistakes to Avoid?
Many people make the mistake of using hot water or placing Crocs in the tumble dryer. Both can cause shrinking or deformation. Another issue I’ve seen is scrubbing too harshly, which can leave scuff marks or strip away colour.
Can You Wash Crocs in the Washing Machine Without Damaging Them?
How to Prevent Damage During Washing?
If you’re careful about the settings and preparation, washing Crocs in the machine can be completely safe. The trick is using cool water, a low spin cycle, and a laundry bag.
I also avoid overloading the machine – two or three pairs at a time are fine, but more than that increases the risk of damage.
Here’s a quick look at what I follow when machine washing my Crocs:
Washing Step
Recommendation
Water Temperature
Cold or lukewarm
Wash Cycle
Gentle or delicate
Spin Speed
Low or off
Laundry Bag or Pillowcase
Always use one to protect the shoes
Extra Protection
Add towels to minimise impact
Can Crocs Go in the Dryer?
One thing I never do is put Crocs in the tumble dryer. The high heat will almost certainly shrink or warp them. Instead, I let them air dry in a cool, shaded spot.
If I want to speed up the drying process, I stuff them with paper towels to help absorb the moisture and keep their shape.
Depending on the weather, they usually dry within a few hours. In winter, it can take longer, so I plan ahead if I need them the next day.
Conclusion: What’s the Safest Way to Wash Crocs?
In summary, yes, you can put Crocs in the washing machine – but only if they’re the right type. Classic Crocs made from Croslite™ can handle a machine wash on a gentle cycle, using cold water and mild detergent. For lined or more delicate designs, handwashing is the way to go.
The key to keeping your Crocs looking good is knowing what materials they’re made of and adjusting your cleaning method accordingly. With a bit of care and the right approach, they’ll stay fresh and comfortable for years.
FAQs About Washing Crocs
1. Can I wash Crocs with clothes in the same load?
Yes, but only with similar colours and soft items like towels to prevent damage.
2. What should I do if my Crocs shrink?
Try soaking them briefly in warm water and then wear them with thick socks to help stretch them out as they cool.
3. How often should Crocs be cleaned?
That depends on how often you wear them. I clean mine every two to three weeks on average.
4. Can bleach be used on Crocs?
No, bleach can damage the material and cause it to break down over time.
5. Why do Crocs still smell after washing?
If they’re not dried properly, moisture can remain trapped, which leads to odour. Try using baking soda or a vinegar rinse and ensure they dry fully.
Home Diagnostics and Technical Standards Specialist at Hello Mag. She provides high-level Expertise in appliance mechanics and scientific pest management, ensuring every guide follows strict safety protocols and manufacturer standards. As a leading Authority on technical home specs, Kanimozhi audits complex data to provide homeowners with the most accurate, verified, and reliable diagnostic solutions available.