by Kanimozhi BV | Oct 24, 2024 | Garden, DIY Ideas, Exterior
Are you looking for how to get council to cut trees in UK? Trees play a vital role in enhancing the beauty of public spaces, improving air quality, and providing habitats for wildlife.
However, there are times when trees can become a nuisance or even a danger, which raises the need for them to be cut or trimmed. If you’re dealing with a tree that’s causing issues in your area, you might be wondering how to get the local council to take action.
In this guide, I’ll walk you through the reasons for requesting tree maintenance, the steps to submit your request, and what to expect from the council in the UK.
Why Might You Need the Council To Cut Trees?
There are several common reasons to ask the council to cut or trim trees:
- Safety Concerns: Trees that are damaged, diseased, or at risk of falling.
- Blocking Light: Overgrown trees may block natural sunlight from entering homes or gardens.
- Property Damage: Tree roots or branches causing damage to buildings, fences, or utility lines.
- Obstructing Roads or Pavements: Trees that block walkways or roads, creating hazards for pedestrians and vehicles.

Step-by-Step Guide: How To Request the Council to Cut or Trim Trees?
If you’ve determined that a tree needs to be cut or trimmed, it’s time to submit a formal request to the council. Here’s how to go about it.
Step 1: Identify If the Tree Is Council-Owned
The first step is to check whether the tree in question is located on council property. In the UK, councils are responsible for trees on public land, such as parks, streets, and communal areas.
However, they won’t take action on trees located on private property.
- Check Council Websites: Many local councils provide maps or information on public lands that they manage. If the tree is located on or near a public space, it’s likely council-owned.
- Verify with the Council: If you’re unsure, contact your local council directly and provide the location of the tree. They can confirm if the tree falls under their jurisdiction.
Step 2: Submit a Tree Maintenance Request
Once you’ve confirmed that the tree is on council land, the next step is to submit a formal request for tree maintenance.
Most councils provide online forms to make this process simple and straightforward.
- Locate the Form: Visit your local council’s website and find the relevant page for tree maintenance or reporting a problem with a tree.
- Provide Details: Be specific about the issue. Include the location of the tree, the nature of the problem (e.g., to clear overgrown branches, blocking sunlight, posing a safety hazard), and any supporting evidence such as photos.
- State the Reason for the Request: Explain why the tree needs to be cut or trimmed. Use clear reasons such as safety concerns, property damage, or obstruction.
Some local councils provide additional tools, such as apps or interactive maps, to make the process even easier.
- Upload Photos: If the reporting tool allows it, upload pictures of the tree and the issue you’re facing. This visual evidence can help the council assess the urgency of the situation.
- Provide GPS Location: For larger councils, using GPS coordinates or specific addresses can ensure they locate the tree quickly.
Step 4: Follow Up on Your Request
After submitting your request, it’s important to keep track of the status.
- Wait for a Response: Councils typically acknowledge receipt of your request within a few days, but the actual response time can vary depending on the urgency of the issue.
- Contact the Council: If you don’t receive a response or update within a reasonable time (usually two weeks), you may want to follow up by calling or emailing the council to check the progress of your request.
What is the Council’s Tree Removal Policy?
Local councils follow specific guidelines when deciding to cut or trim trees:
- Tree Preservation Orders (TPOs): Some trees are protected by law and cannot be cut without special permission unless there’s a safety concern.
- Council Priorities: The council prioritises cutting trees that pose risks to public safety, while trees that benefit the environment or landscape are usually preserved.
- Response Time: For urgent safety issues, councils may respond quickly, but non-urgent requests (like overgrown trees) may take several weeks.
What Happens If the Council Refuses to Cut the Tree?
It’s possible that the council may refuse your request to cut or trim the tree, especially if it’s protected or deemed not to pose a significant risk.
Understanding the Refusal
Common reasons for refusal include:
- TPO Protection: The tree is protected and cannot be removed unless there’s a severe safety risk.
- Minimal Risk: The council might determine that the tree does not pose enough of a risk to warrant cutting or trimming.
Filing an Appeal or Raising Further Concerns
If your request is denied, you may have the option to file an appeal or provide additional evidence. For example, you might need to:
- Document Further Issues: Keep track of any ongoing or worsening problems, such as cracks in your walls caused by tree roots.
- Seek Professional Advice: Sometimes, involving a tree expert or arborist to assess the situation can help build a stronger case.

What If the Tree Is on Private Land?
If the tree that’s causing an issue is located on private property, the council may not be able to intervene directly. However, there are still steps you can take.
Overhanging Trees From Private Property
If branches from a neighbour’s tree are overhanging your property and causing problems, you have the legal right to trim the branches up to the boundary of your property. However, you must return the cut branches to your neighbour, as they remain their property.
Can the Council Help With Private Land Trees?
In some cases, if a tree on private land poses a significant risk to public safety, the council may be able to step in. They can issue notices to the landowner to carry out maintenance or, in extreme cases, enforce action to remove the hazard.
Conclusion
Getting the council to cut or trim trees in UK involves following a clear process that starts with determining whether the tree is council-owned and submitting a formal request.
By understanding the council’s policies, prioritising safety concerns, and keeping track of your request, you can ensure that the issue is handled efficiently and effectively.
Remember, trees play a crucial role in our environment, so it’s essential to balance your concerns with the need to preserve green spaces.
Table: Types of Tree Requests vs. Response Times
| Type of Request |
Expected Response Time |
| Urgent Safety Concern |
2-5 days |
| Overgrown Trees Blocking Light |
2-4 weeks |
| Property Damage |
1-3 weeks |
| Non-Urgent Trimming Request |
4-12 weeks |
FAQs On How To Get Council To Cut Trees
1. How long does it take for the council to respond to a tree cutting request?
The council typically responds within two weeks for non-urgent requests, but urgent safety concerns may receive a response within a few days.
2. What do I do if the tree is blocking sunlight?
You can submit a request to the council, stating how the overgrown tree is affecting your light. The council will assess whether the tree is causing a significant obstruction.
3. Are all trees protected by Tree Preservation Orders (TPOs)?
No, only specific trees or woodlands are protected under TPOs. These are usually trees of particular environmental, historical, or aesthetic value.
4. Can I cut down a council-owned tree myself?
No, it is illegal to cut or trim council-owned trees without permission. Always go through the proper channels by contacting the council.
Home Diagnostics and Technical Standards Specialist at Hello Mag. She provides high-level Expertise in appliance mechanics and scientific pest management, ensuring every guide follows strict safety protocols and manufacturer standards. As a leading Authority on technical home specs, Kanimozhi audits complex data to provide homeowners with the most accurate, verified, and reliable diagnostic solutions available.
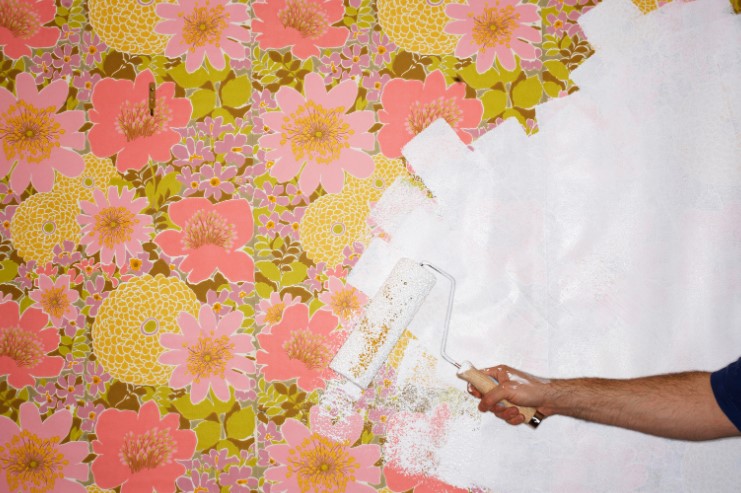
by Kanimozhi BV | Oct 23, 2024 | Wall, Interior
Whether you’ve found an old tub of Solvite in the shed or have leftover mixed paste from yesterday’s project, knowing if it’s still viable is the difference between a professional finish and a peeling disaster.
In this expert guide on how long does wallpaper paste last, we break down the exact shelf life of wallpaper adhesive and how to spot the signs of expiration before you touch your walls.
Quick Summary: Wallpaper Paste Shelf Life Table
If you’re in a hurry, use this comparison table to check your adhesive’s viability.
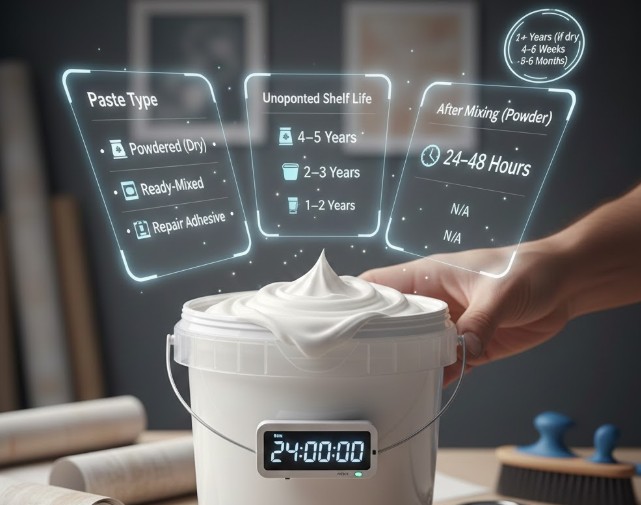
| Paste Type |
Unopened Shelf Life |
After Opening (Tub) |
After Mixing (Powder) |
| Powdered (Dry) |
4–5 Years |
2+ Years (if dry) |
24–48 Hours |
| Ready-Mixed |
2–3 Years |
4–6 Weeks |
N/A |
| Repair Adhesive |
1–2 Years |
3–6 Months |
N/A |
How Long Does Unopened Wallpaper Paste Last?
Most manufacturers, such as Solvite or Bartoline, provide a best-before date, but the actual longevity depends on the state of the product.
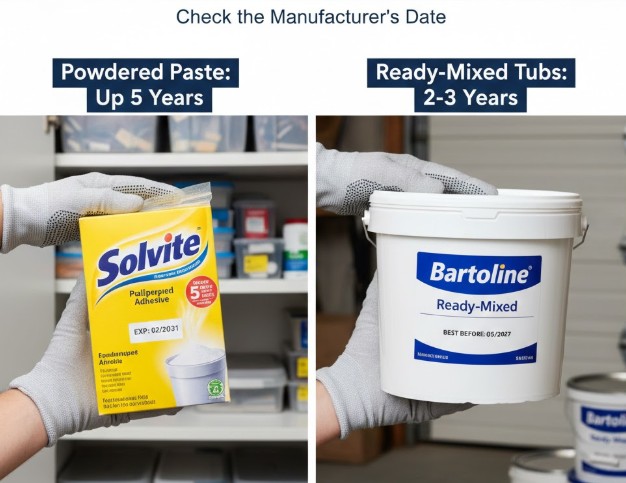
- Powdered Paste: Because it contains no moisture, it is incredibly stable. If kept in a bone-dry, cool environment, it can remain effective for up to 5 years.
- Ready-Mixed Tubs: These contain water and preservatives. Over time, the chemicals break down. An unopened tub is usually good for 2 to 3 years.
Pro Tip: If the powder feels “clumpy” inside the box before you even open it, moisture has likely seeped in. Discard it, as it will not dissolve smoothly and will cause lumps under your paper.
How Long Does Mixed Wallpaper Paste Last?
Once you introduce water to powdered adhesive, the “countdown” begins.
- The 48-Hour Rule: Most professional decorators recommend using mixed paste within 24 to 48 hours.
- Why does it expire? The starches in the paste begin to ferment and break down once hydrated. After two days, the bonding strength (tack) significantly weakens.
How to store leftover mixed paste?
If you need to finish a room the next morning, move the paste into an airtight container or cover your bucket tightly with cling film and store it in a cool place (like a garage). This prevents a skin from forming on the surface.
Does Wallpaper Paste Expire? 3 Signs It’s Gone Bad
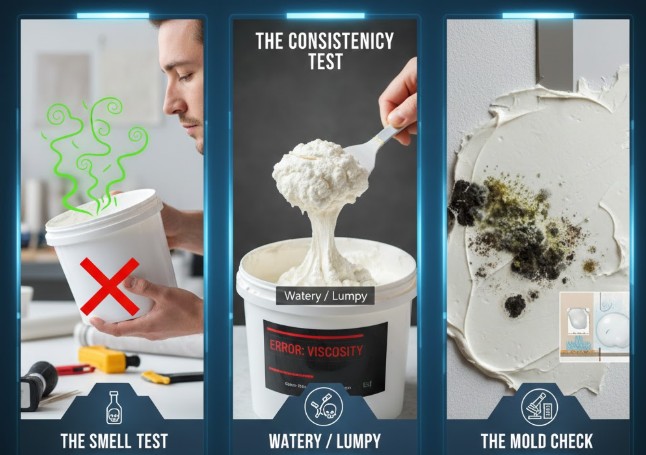
Using expired adhesive is a leading cause of wallpaper bubbling and seam failure. Before applying, perform these three checks:
- The Smell Test: If the paste has a sour, vinegary, or “stale” odour, bacteria have begun to grow. Throw it away.
- The Consistency Test: Fresh paste should be smooth and creamy. If it has turned watery or looks like “cottage cheese” with heavy lumps, the polymers have failed.
- The Mold Check: Look for black, grey, or green specks. Applying moldy paste to a wall traps spores behind the paper, which can lead to a serious dampness issue in your home.
How Long Can Paste Stay on the Wall Before Hanging?
Timing is everything. Once you’ve applied paste to the wall (the “Paste-the-Wall” method) or the paper, you have a 20–30 minute window.
-
Temperature Matters: In a heated room or during summer, this window shrinks to 15 minutes.
-
UK Humidity: In typical UK weather, you have slightly more “slide” time, but avoid letting the paste become “tacky” or dry before the paper is up.
What are the Professional Storage Tips for Longevity?
To get the most out of your purchase, follow these storage rules:
-
Avoid the “Freeze-Thaw” Cycle: Never store ready-mixed paste in a place where it might freeze (like an uninsulated shed in winter). Freezing destroys the chemical bond of the adhesive.
-
Temperature Range: Aim for a stable environment between 5°C and 20°C.
-
Seal the Rim: Before closing a used tub, wipe the rim clean. Dried paste on the rim prevents an airtight seal, causing the whole tub to dry out.
How to Safely Dispose of Old Wallpaper Paste
Do not pour wallpaper paste down the toilet or kitchen sink. It can gelatinize in your pipes and cause massive blockages.
-
For small amounts: Let the paste dry out in the bucket, then scrape the solid residue into your general household waste.
-
For large amounts: Add cat litter or “shredded paper” to the liquid to soak it up, then dispose of it in the bin once it has solidified.
Frequently Asked Questions (FAQ) On How Long Does Wallpaper Paste Last
1. Can I use wallpaper paste after 48 hours?
It is not recommended. While it may still look sticky, the chemical bonding strength is reduced, and your wallpaper may start to peel at the edges within a few weeks.
2. Why is my wallpaper paste turning watery?
This usually happens to mixed powder paste that has sat for too long. The starch molecules are breaking down and can no longer hold the water in suspension.
3. Can I reactivate dried wallpaper paste?
No. Once the moisture has evaporated and the paste has hardened, it cannot be safely thinned back down for use.
Technical Review by Home Decor Professional
This article has been technically reviewed to ensure all storage temperatures, shelf-life data, and disposal methods align with UK safety and professional decorating standards.
Home Diagnostics and Technical Standards Specialist at Hello Mag. She provides high-level Expertise in appliance mechanics and scientific pest management, ensuring every guide follows strict safety protocols and manufacturer standards. As a leading Authority on technical home specs, Kanimozhi audits complex data to provide homeowners with the most accurate, verified, and reliable diagnostic solutions available.

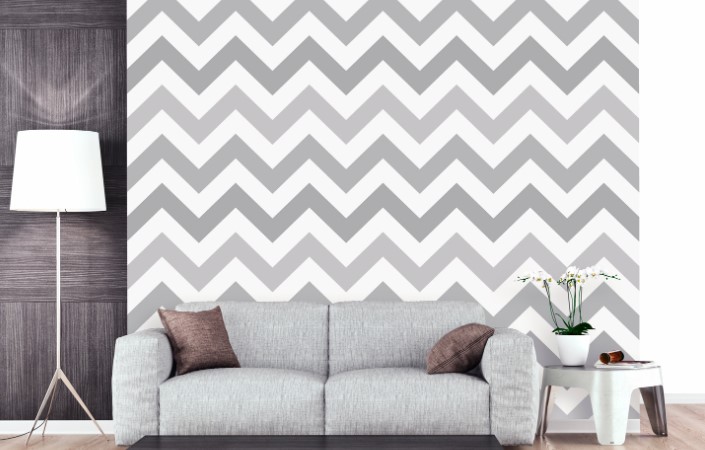
by Kanimozhi BV | Oct 22, 2024 | Wall, Interior, Living Room
Wallpaper installation can dramatically change the look of a room, but after hanging it, the next critical step is waiting for it to dry.
Understanding how long does wallpaper take to dry and how to speed up the process can ensure a smooth, professional-looking finish.
In this guide, I’ll explain the typical wallpaper drying time, the factors that affect it, and some practical tips to help speed up the process, especially in the UK’s unpredictable weather.
How Long Does Wallpaper Typically Take To Dry?
General Drying Time for Wallpaper
In most cases, wallpaper takes about 24 to 48 hours to dry fully. However, this is an average estimate, and drying times can vary depending on several factors. For example:
- Standard paper-based wallpapers will generally fall within this time frame.
- Vinyl wallpapers or heavier fabrics may take longer to dry, possibly up to 72 hours, because of the thicker materials.
- If you’re using pre-pasted wallpaper, the drying process might be quicker compared to paste-the-paper methods, which involve applying moisture directly to the wallpaper.
It’s important to remain patient during this process as wallpapering around window. Trying to rush the drying can result in issues like bubbles, peeling edges, or uneven finishes.
What are The Factors That Affect Drying Time?
Several factors can influence how quickly your wallpaper dries:
- Wallpaper Type: Different types of wallpaper (vinyl, paper, fabric) have varying absorption rates. Thicker materials take longer to dry, while thinner, more porous wallpapers absorb moisture faster and therefore dry quicker.
- Adhesive Used: The type of adhesive or paste used also plays a role. Paste-the-wall adhesives tend to dry faster because they involve less moisture than paste-the-paper methods and the disposal of wallpaper paste plays a vital role in wallpapering a room.
- Room Conditions: The environment where the wallpaper is hung has a significant impact on drying time.
- Temperature: A room that’s too cold or too hot will affect drying. Ideal conditions range between 18-21°C (65-70°F).
- Humidity: High humidity levels slow the drying process because the moisture in the air prevents the wallpaper from drying properly.
- Ventilation: Good airflow is essential for faster drying. Poor ventilation can prolong the process, especially in UK homes, where ventilation may be limited during colder months.
How Long Should Wallpaper Dry Before Trimming?
Once your wallpaper is applied, you’ll likely need to trim excess wallpaper from the edges. But when is it safe to do so?
Wallpaper should dry for about 15 to 30 minutes before you begin trimming. During this time, the wallpaper will have adhered well enough to the wall, but it won’t have dried to the point of shrinking or tightening. Here’s why trimming at the right time matters:
- Trimming too soon could cause the wallpaper to shift or tear, as the adhesive might still be wet and the paper isn’t firmly attached.
- Waiting too long to trim can make the wallpaper more difficult to cut cleanly, especially if it’s started to harden and shrink into position.
For the best results, use a sharp blade or utility knife and trim carefully along the edges or around fixtures, ensuring you don’t pull the wallpaper as you cut.
What Happens If Wallpaper Doesn’t Dry Properly?
Skipping the proper drying process or not giving your wallpaper enough time to set can lead to several issues. Here’s what you might face if wallpaper doesn’t dry fully:
Potential Problems With Poor Drying
- Bubbles or Wrinkles: When wallpaper dries unevenly or too quickly in some areas, it can trap air pockets or moisture underneath, leading to bubbles or wrinkles that ruin the smooth finish.
- Peeling Edges: If the wallpaper hasn’t adhered properly to the surface, the edges can start to peel, leaving you with unsightly seams.
- Mold or Mildew Growth: In the UK’s damp climate, moisture left behind the wallpaper can encourage the growth of mold or mildew, particularly in bathrooms or kitchens where humidity is already high.
To avoid these problems, it’s essential to let your wallpaper dry fully under the right conditions and address any bubbles or peeling quickly.
How Can You Speed Up Wallpaper Drying?
While waiting for wallpaper to dry can feel like watching paint dry (pun intended), there are some practical methods you can use to speed up the process. Here are a few tips to help your wallpaper dry faster:
Improving Room Ventilation
Good ventilation is key to speeding up drying times, as it helps moisture evaporate more quickly.
- Use of Fans or Air Circulators: Placing a fan in the room helps circulate the air and speed up drying. Keep the fan on a low setting to prevent blowing the wallpaper loose.
- Keep Windows Open: When possible, open windows to allow natural airflow. However, if it’s particularly damp or rainy outside, this might backfire by increasing humidity, so balance this based on the weather.
Managing Room Temperature
Temperature control is critical. Keeping the room at the right warmth helps the adhesive set more quickly.
- Use of Heaters: A small heater placed at a moderate distance can help maintain a consistent room temperature, which promotes even drying. Aim for a steady room temperature of about 18-21°C.
- Avoiding Direct Sunlight: Direct sunlight can cause wallpaper to dry too quickly, leading to uneven results, such as cracking or shrinking in the areas that dried faster. Draw the blinds or curtains to ensure even drying.

Control Humidity Levels
High humidity levels can severely slow down drying, particularly in damp UK homes.
- Use of Dehumidifiers: If you live in a particularly humid area, using a dehumidifier will help draw moisture out of the air and reduce the drying time significantly. Place the dehumidifier in the center of the room to evenly lower the humidity.
How Long Does Wallpaper Take to Dry Before Painting?
If you plan to paint over wallpaper, ensuring the wallpaper is completely dry is crucial. Generally, you should wait at least 48 hours before painting over the wallpaper.
This gives the adhesive enough time to fully cure and ensures that the moisture from the wallpaper does not interfere with the paint application.
How to Check if Wallpaper is Ready for Painting?
- Touch Test: Gently press your hand on the wallpaper. If it feels cool or damp, it needs time to get ready.
- Look for Texture Changes: Fully dried wallpaper should be smooth and firm. Any signs of wrinkles, bubbles, or soft spots indicate that it’s still drying.
Can Weather Conditions in the UK Impact Wallpaper Drying?
The UK’s weather can indeed play a big role in how long your wallpaper takes to dry. The country’s cool, damp climate—particularly during the autumn and winter months—can slow down the drying process significantly.
High humidity levels, especially in coastal regions, can extend drying times by several hours or even days.
Best Times of Year to Install Wallpaper
- For faster drying times, aim to install wallpaper in the late spring or summer, when the air is naturally warmer and less humid.
- Avoid wallpapering during particularly wet or cold periods, as this will slow drying and potentially cause issues like bubbling or peeling.
How Long Should You Wait Before Hanging Pictures or Decorating?
After wallpaper has fully dried, it’s tempting to start decorating straight away, but it’s best to wait a little longer to ensure everything has set properly.
Generally, you should wait at least 48 hours before hanging pictures, mirrors, or other decorations on your newly wallpapered walls.
Tips to Ensure the Wallpaper Has Fully Set:
- Check for Moisture: Gently press a clean cloth against the wallpaper. If any moisture is absorbed, it needs more time.
- Examine the Edges: Well-adhered wallpaper will have smooth, tightly sealed edges. If the edges lift when touched, wait longer before decorating.
Conclusion
In most cases, wallpaper takes 24 to 48 hours to dry, but several factors—such as the type of wallpaper, adhesive used, and UK weather conditions—can influence this time.
For the best results of how long does wallpaper take to dry, ensure your room has adequate ventilation, controlled humidity, and a consistent temperature. By being patient and allowing your wallpaper to dry fully, you’ll enjoy a flawless finish that lasts.
Table: Wallpaper Types and Their Drying Times
| Wallpaper Type |
Typical Drying Time |
Notes |
| Paper-based Wallpaper |
24-48 hours |
Standard drying time for most paper wallpapers |
| Vinyl Wallpaper |
48-72 hours |
May take longer due to thicker material |
| Fabric-based Wallpaper |
48-72 hours |
Requires extra time due to heavy texture |
FAQs on Wallpaper Drying Time
1. Can I speed up the drying process using a hairdryer?
While a hairdryer might seem like a quick fix, it’s not recommended as the direct heat can cause uneven drying, which may lead to bubbles or peeling. It’s better to use a fan or dehumidifier to circulate air evenly.
2. Does wallpaper dry faster in smaller rooms?
Yes, smaller rooms may dry faster, but only if they’re well-ventilated. Without proper airflow, moisture can become trapped, slowing the drying process.
3. Can I apply wallpaper during winter in the UK?
Yes, but you’ll need to take extra precautions. Use heaters, fans, and dehumidifiers to control the room environment and compensate for the colder, more humid weather.
4. What should I do if I notice bubbles after the wallpaper dries?
If bubbles appear after drying, you can smooth them out using a wallpaper smoothing tool. For larger bubbles, gently lift the wallpaper and reapply adhesive before smoothing it back down.
Home Diagnostics and Technical Standards Specialist at Hello Mag. She provides high-level Expertise in appliance mechanics and scientific pest management, ensuring every guide follows strict safety protocols and manufacturer standards. As a leading Authority on technical home specs, Kanimozhi audits complex data to provide homeowners with the most accurate, verified, and reliable diagnostic solutions available.
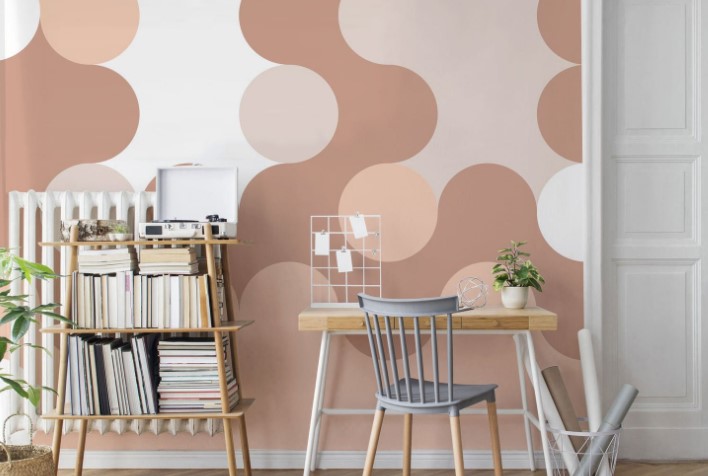
by Kanimozhi BV | Oct 22, 2024 | Interior Painting, Interior, Wall
Painting over wallpaper can be a practical solution when you want to refresh your room without dealing with the hassle of removing the wallpaper.
However, not every type of paint works well for this purpose. It’s crucial to understand similar to wallpaper measurement, which paint provides the best results and how to prepare the surface for long-lasting adhesion.
In this guide, I’ll explain what kind of paint do you use to paint over wallpaper, how to prepare your wallpaper, and offer some expert tips to ensure a smooth and professional finish.
Can You Paint Over Wallpaper?
Yes, you can paint over wallpaper, and in many cases, it’s a practical choice. Removing wallpaper can be time-consuming and may even damage your walls if done incorrectly, so painting over it can save you effort while still giving your room a fresh new look.
Advantages of Painting Over Wallpaper
- Saves Time: Instead of stripping wallpaper and then prepping the wall for paint, you can paint directly over it.
- Preserves the Wall: Removing woodchip wallpaper often damages the underlying wall, requiring patching and repairs. Painting over it keeps the wall intact.
- Smooth Transition: If done properly, painting over wallpaper can give your walls a smooth finish without visible seams or textures.
Types of Wallpaper You Can Paint Over
Not all wallpaper is suitable for painting. In general:
- Vinyl wallpaper can be tricky, as paint might not adhere well to its smooth, shiny surface. You’ll need a strong primer in this case.
- Paper-based wallpaper is the easiest to paint over, as it absorbs the primer and paint better.
- Textured wallpaper can add interesting effects when painted over, but you may need to sand down particularly rough textures.
What Kind of Paint Is Best For Painting Over Wallpaper?
Choosing the right type of paint is crucial when painting over wallpaper. The paint must adhere well to the surface, dry evenly, and provide the desired finish. Here are the three main types of paint you should consider:
1. Water-Based (Emulsion) Paint
Water-based paint, also known as emulsion, is a popular choice for painting over wallpaper. It dries quickly and has low levels of harmful fumes, making it a more environmentally friendly option.
- Pros: Dries quickly, easy to clean up, and has low odour.
- Cons: Might not be as durable or long-lasting as oil-based paints, especially on textured wallpaper.
Best for: Smooth or lightly textured wallpaper surfaces.
2. Oil-Based Paint
Oil-based paint offers excellent durability and a smoother finish, making it an ideal choice for painting over textured or heavily patterned wallpaper.
It covers wallpaper well and tends to hold up better in areas with higher moisture, such as bathrooms or kitchens.
- Pros: Provides excellent coverage and durability. Ideal for covering bold patterns or textures.
- Cons: Longer drying time and requires proper ventilation due to strong fumes.
Best for: Textured wallpaper or wallpaper with intricate patterns that need good coverage.
3. Latex Paint
Latex paint is another option that’s known for its flexibility and ease of application. It’s resistant to moisture and mildew, making it a great choice for rooms where humidity may be an issue.
- Pros: Quick drying, moisture-resistant, and flexible.
- Cons: May need a strong primer to ensure it adheres well to wallpaper.
Best for: Moisture-prone rooms like kitchens and bathrooms.
Do You Need Primer Before Painting Over Wallpaper?
Yes, applying a primer before painting over wallpaper is essential for ensuring that the paint adheres properly and that any patterns or textures underneath are less likely to show through.
The primer seals the wallpaper and provides a smooth, even surface for the paint to cling to.
Best Primers For Painting Over Wallpaper
- Oil-Based Primers: These are particularly good for sealing wallpaper, especially vinyl wallpaper, as they create a strong bond between the wallpaper and the paint.
- Shellac Primers: Known for their stain-blocking properties, shellac primers are great for covering patterns and preventing any bleed-through from the wallpaper beneath.
- Multi-Surface Bonding Primers: These are designed to adhere to a wide variety of surfaces, making them a versatile choice for tricky wallpaper surfaces like vinyl or textured wallpaper.
Using the right primer not only ensures better paint adhesion but also helps prevent future peeling or bubbling.
How To Prepare Wallpaper Before Painting?
Preparation is key when painting over wallpaper or choosing wallpaper for living room. A well-prepared surface will ensure that your paint job looks professional and lasts for years to come. Here are the steps you need to take before picking up your paintbrush.
Clean The Wallpaper Surface
Dirt, dust, and grime can prevent the paint from adhering properly, so it’s crucial to clean the wallpaper before painting.
- Dust the surface: Use a soft cloth or duster to remove any surface dust.
- Wipe down the wallpaper: Use a solution of mild detergent and water to clean the wallpaper. For greasy areas (especially in kitchens), add a bit of vinegar to the mix.
Allow the wallpaper to dry completely further proceeding on to the next step.
Check For Damages or Loose Seams
Before painting, inspect the wallpaper for any damage or peeling.
- Fix loose seams: If you notice the wallpaper peeling away at the edges, apply wallpaper adhesive to reseal the seams.
- Patch small tears or holes: Use a wallpaper seam roller to smooth any loose edges, and patch up any small tears or hole in wall using filler or adhesive.
Sanding or Skimming Textured Wallpaper
If your wallpaper is heavily textured, you may want to sand down some of the rough spots to create a smoother surface for painting.
- Lightly sand the wallpaper with fine-grit sandpaper to reduce the texture.
- Skim coat: For extremely textured wallpaper, you might need to apply a thin skim coat of joint compound to even out the surface before painting.
Step-by-Step Guide: How To Paint Over Wallpaper
Now that you’ve prepped the wallpaper, it’s time to start painting. Follow this step-by-step guide for the best results.
Step 1: Apply Primer
Using a primer is essential for ensuring that your paint adheres properly to the wallpaper and that the underlying pattern or texture doesn’t show through.
- Choose the right primer based on the wallpaper type (oil-based or shellac primer is best for vinyl or heavily textured wallpaper).
- Apply a thin, even coat of primer using a roller, and use a brush for edges and corners.
- Let it dry completely before moving on to the next step, typically 24 hours depending on the primer used.
Step 2: First Coat of Paint
Once the primer has dried, you can begin painting.
- Choose the right tools: Use a quality roller for large areas and a smaller brush for edges and corners.
- Apply the first coat evenly: Start with a light, even coat, ensuring that the paint covers the wallpaper smoothly. Avoid using too much paint at once to prevent dripping.
- Allow the first coat to dry: Wait at least 4-6 hours before applying the second coat, though drying times may vary depending on the paint type.
Step 3: Apply Second Coat
A second coat of paint ensures full coverage and a professional finish.
- Apply a second, even coat: This coat will provide the depth of colour and evenness you need for a polished look.
- Let it dry thoroughly: Again, follow the drying time instructions on your paint tin. Usually, the second coat can dry within 24 hours.
What Paint Finish Should You Choose?
The finish of your paint will influence how your walls look and how durable the paint is. Here’s a breakdown of the most common finishes you can choose from:
Matte Finish
A matte finish is great for hiding imperfections on the wallpaper, such as small bumps or seams. It gives a soft, non-reflective appearance.
- Best for: Hiding texture or seams, creating a calm, flat look.
- Not great for: High-traffic areas, as it’s less durable and harder to clean.
Satin or Eggshell Finish
These finishes offer a balance between a soft sheen and durability. Satin or eggshell finishes are easy to clean and work well for rooms where you want a bit of shine but not too much.
- Best for: Living rooms, hallways, and areas where you want a smooth finish with moderate shine.
Gloss Finish
For a striking, reflective finish, high-gloss paint is an option. It’s incredibly durable and easy to clean but can highlight imperfections in the wallpaper.
- Best for: Trim, doors, or accent walls where durability is essential.
How Long Does Painted Wallpaper Take To Dry?
Drying times for wallpaper which was painted will depend on the type of paint used:
- Water-based (emulsion) paint: Typically dries within 4-6 hours but requires up to 24 hours for a full cure.
- Oil-based paint: Can take up to 24 hours to dry and may require several days to fully cure.
To avoid issues like peeling or bubbling, ensure the room is well-ventilated, and avoid touching the walls until the paint is fully dry.
Conclusion
Painting over wallpaper is a great way to refresh your space without the hassle of removing wallpaper.
By choosing the right paint type, preparing the wallpaper surface, and following the proper steps on what kind of paint do you use to paint over wallpaper, you can achieve a smooth, professional finish.
Whether you opt for water-based, oil-based, or latex paint, remember to prime the wallpaper first and give it adequate time to dry for long-lasting results.
Table: Comparison of Water-Based, Oil-Based, and Latex Paints for Wallpaper
| Paint Type |
Drying Time |
Best For |
Pros |
Cons |
| Water-Based |
4-6 hours |
Smooth, lightly textured wallpaper |
Quick drying, low odour |
Less durable for high-traffic areas |
| Oil-Based |
24 hours |
Textured or heavily patterned walls |
Great coverage, durable |
Longer drying time, strong fumes |
| Latex |
4-6 hours |
Moisture-prone areas |
Flexible, moisture-resistant |
May require strong primer for adhesion |
FAQs On What Kind Of Paint Do You Use To Paint Over Wallpaper
1. Will the wallpaper pattern show through the paint?
If you properly prime the wallpaper before painting, the pattern should not show through. Using an oil-based or shellac primer is ideal for covering strong patterns.
2. Can I paint over textured wallpaper?
Yes, you can paint over textured wallpaper. However, depending on the texture, you may want to sand it down or apply a skim coat for a smoother finish.
3. How do I prevent bubbles when painting over wallpaper?
To prevent bubbles, ensure the wallpaper is properly adhered to the wall, apply a primer, and use even strokes when painting. Don’t overload the roller with paint.
4. Is it better to remove wallpaper before painting?
Removing wallpaper without steamer can provide a smoother, cleaner surface for painting. However, if the wallpaper is well-adhered and you follow the proper preparation steps, painting over it is a practical alternative.
Home Diagnostics and Technical Standards Specialist at Hello Mag. She provides high-level Expertise in appliance mechanics and scientific pest management, ensuring every guide follows strict safety protocols and manufacturer standards. As a leading Authority on technical home specs, Kanimozhi audits complex data to provide homeowners with the most accurate, verified, and reliable diagnostic solutions available.

by Kanimozhi BV | Oct 21, 2024 | Garden, DIY Ideas, Exterior
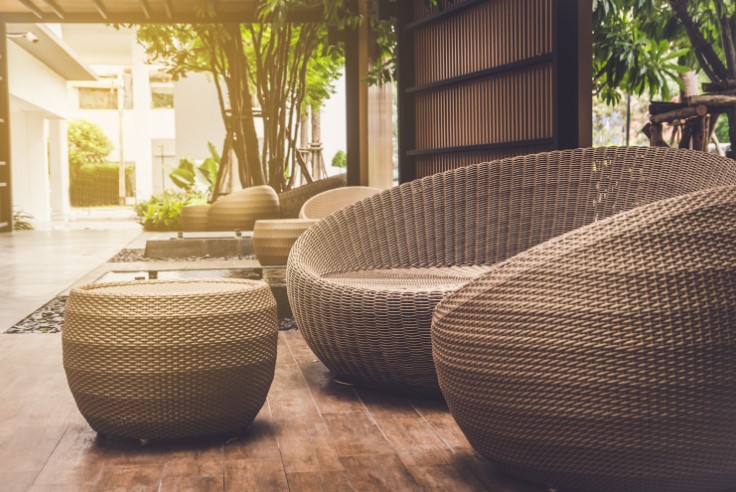
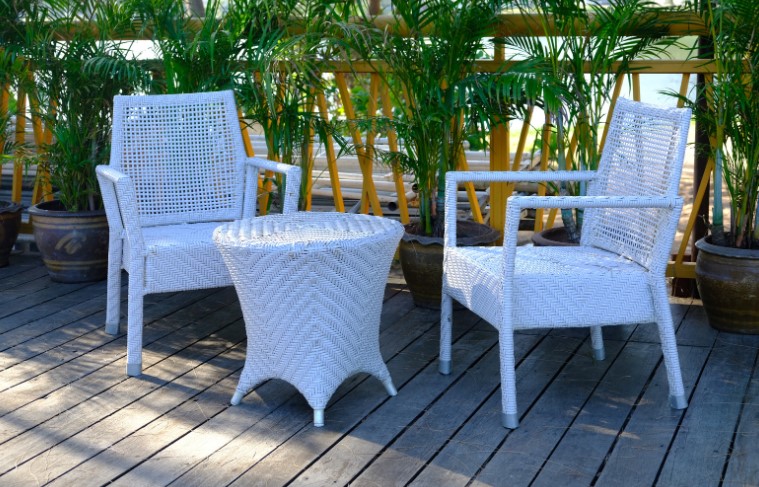
Plastic garden furniture is a convenient and affordable option for outdoor spaces, but it requires regular maintenance to keep it looking fresh and clean.
Over time, dirt, grime, algae, and even sun damage can take a toll on your furniture, but don’t worry! With some basic supplies and DIY methods, you can restore your plastic furniture to its former glory.
In this guide, I’ll walk you through step-by-step tips on how to clean plastic garden furniture and keep it in tip-top shape, especially suited for the UK climate.
Why Is It Important To Clean Plastic Garden Furniture?
Living in the UK, your plastic garden furniture is constantly exposed to changing weather conditions—rain, wind, sun, and even frost. Over time, this exposure can end up as:
- Dirt and grime build-up: Regular exposure to the outdoors causes dust and debris to accumulate on the surface of your furniture.
- Algae and mildew growth: Damp UK weather, particularly during autumn and winter, encourages the growth of algae, which leaves unsightly green patches.
- Sun damage: Prolonged exposure to the sun can cause the plastic to fade or even become brittle.
By regularly cleaning and maintaining your furniture, you not only improve its appearance but also extend its lifespan, saving you from having to replace it prematurely. Plus, a clean patio or garden setup makes outdoor relaxation much more enjoyable!
What Supplies Do You Need For Cleaning Plastic Garden Furniture?
You’ll need a few simple, affordable items:
- Warm soapy water
- White vinegar (a natural cleaning agent)
- Baking soda (for scrubbing tougher stains)
- Soft scrubbing brush or sponge (avoid harsh brushes that could scratch the plastic)
- Garden hose (to rinse off the furniture)
- Optional: Pressure washer (for a quicker clean, but use with caution!)
These cleaning supplies are safe and effective for plastic, and most of them are likely already in your home. Using DIY cleaning solutions like vinegar and baking soda ensures you’re avoiding harsh chemicals that could damage your furniture.
How To Prepare Plastic Furniture Before Cleaning?
Inspect For Stains Or Damages
Before you begin, give your plastic garden furniture a quick inspection. Look for any stubborn stains, discolouration, or potential cracks. This will help you determine if any specific areas need extra attention during the cleaning process.
Rinse Off Loose Dirt With A Garden Hose
The first step is always to rinse the furniture. Using a garden hose, spray down all surfaces of the plastic furniture to remove loose dirt, dust, and debris. This helps avoid scratching the furniture when you start scrubbing. Make sure to focus on crevices where dirt tends to accumulate.
Step-By-Step Guide: How To Clean Plastic Garden Furniture?
Now that the furniture is prepped, let’s get started with cleaning.
Using A DIY Vinegar Solution For General Cleaning
White vinegar is an eco-friendly and highly effective cleaner, especially for everyday dirt and mild stains. Here’s how you can use it:
- Create a cleaning solution by mixing 1 part white vinegar with 2 parts warm water.
- Soak a sponge or cloth in the solution and wipe down the entire surface of the furniture.
- For crevices or textured areas, use a soft brush to gently scrub away dirt.
- After scrubbing, rinse the furniture with your garden hose.
This method works great for removing general grime while being gentle on plastic. Vinegar’s natural acidity helps break down dirt without damaging the material.
How To Remove Tough Stains Using Baking Soda?
For tougher stains, especially those that have built up over time, baking soda is your best friend. Here’s how to tackle them:
- Sprinkle baking soda directly onto a damp sponge or soft brush.
- Scrub the stained areas in a circular motion, applying light pressure.
- Baking soda acts as a mild abrasive, lifting stains without scratching the plastic.
- Once finished, rinse thoroughly with the garden hose.
This method is particularly effective for removing stubborn marks, like bird droppings, sap, or food stains.
Should You Use A Pressure Washer?
If you’re short on time or dealing with a lot of dirt, a pressure washer can be a powerful tool. Anyway, you need to handle it carefully:
- In order to protect the plastic from damaging, use a low-pressure setting.
- Test on a small area first to ensure the pressure doesn’t leave marks or cracks.
- Keep the nozzle at a safe distance (about 1-2 feet away) to avoid damage.
While it’s a quick and efficient method, I recommend using a pressure washer sparingly, especially if your furniture is older or weakened by sun exposure.
How To Remove Algae And Mildew From Plastic Garden Furniture?
In the UK’s damp climate, algae and mildew can easily form on garden furniture, especially if it’s left outside during rainy months. Here’s how you can remove them:
- Mix a bleach solution: Combine 1 cup of bleach with 1 gallon of water.
- Apply the solution to the affected areas using a sponge or brush.
- Let it sit for 10-15 minutes, allowing the bleach to break down the algae and mildew.
- Scrub gently with a brush and rinse off thoroughly with the hose.
Make sure to wear gloves and rinse thoroughly, as bleach can be harmful to plants if it gets onto your lawn or garden. This method is highly effective at removing green patches and discolouration caused by mildew.
Can You Restore Sun-Damaged Plastic Garden Furniture?
Plastic furniture left in the sun can suffer from fading or even become brittle over time. If you notice this, here are a few ways to restore the appearance:
- Commercial plastic restorers: There are various commercial products specifically designed to restore sun-faded plastic. They work by adding a layer of protection and shine.
- DIY Hack with Car Wax: If you want a cheaper option, you can use car wax to restore the shine. Simply apply the wax as you would on a car, buffing it into the plastic with a soft cloth.
These solutions can help bring back the colour and shine of your furniture while providing a layer of protection from further sun damage.
How Often Should You Clean Your Plastic Garden Furniture?
The UK’s weather can be unpredictable, so it’s essential to clean your furniture regularly to keep it looking fresh. I recommend:
- Monthly cleaning during the warmer months (spring and summer) when you’re using the furniture more often.
- Deep cleaning before winter to remove dirt and algae before storing the furniture away.
- Quick clean-ups after heavy rain or storms to prevent grime build-up.
By sticking to a regular cleaning schedule, you’ll make the job easier and prevent the build-up of stains or algae.
What are the Quick Tips For Keeping Plastic Garden Furniture Clean Longer?
Cover Furniture When Not In Use
Invest in good-quality outdoor furniture covers. Not only do they protect against rain and dirt, but they also reduce the chance of sun damage. Covering your furniture when not in use is a simple step to keep it looking new for longer.
Store In A Dry Place During Winter
In the colder months, it’s best to store your plastic garden furniture in a shed or garage especially the outdoor furniture cushions. This protects it from harsh weather conditions like frost, which can weaken the plastic and cause cracking.
Conclusion
By following these smart DIY tips, you’ll be able to keep your plastic garden furniture clean, fresh, and in great condition for years to come.
From regular vinegar cleaning to tackling tough stains with baking soda, the methods I’ve shared are easy, affordable, and perfect for the UK weather.
So, grab your supplies, and enjoy your sparkling garden furniture all year round!
Related Article: Top 10 Websites To Buy Ex-Display Garden Furniture Clearance In UK
Table: DIY vs. Commercial Cleaners for Plastic Garden Furniture
| Aspect |
DIY Cleaners (Vinegar, Baking Soda) |
Commercial Cleaners |
| Cost |
Low (Household items) |
Moderate to high |
| Environmental Impact |
Eco-friendly, non-toxic |
May contain chemicals |
| Ease of Use |
Simple, requires some scrubbing |
Easier but may need multiple applications |
| Effectiveness |
Great for general cleaning |
Often stronger for tough stains |
Home Diagnostics and Technical Standards Specialist at Hello Mag. She provides high-level Expertise in appliance mechanics and scientific pest management, ensuring every guide follows strict safety protocols and manufacturer standards. As a leading Authority on technical home specs, Kanimozhi audits complex data to provide homeowners with the most accurate, verified, and reliable diagnostic solutions available.
