by Kanimozhi BV | Aug 9, 2024 | Garden, DIY Ideas, Exterior
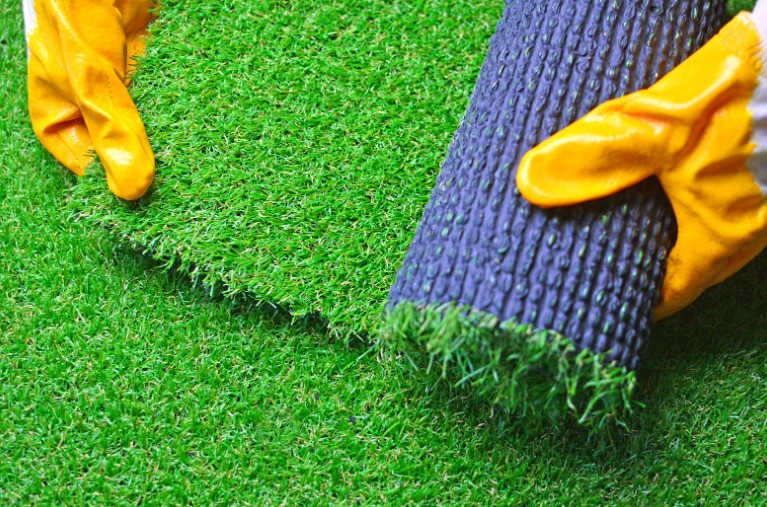
How do you cut artificial grass turf? And here is the solution. Artificial grass turf has become a popular alternative to natural grass due to its low maintenance and long-lasting appeal. Whether you’re installing it in your garden, patio, or balcony, cutting artificial grass correctly is crucial. This ensures it fits perfectly into your designated area and maintains its aesthetic value. In this blog, I’ll guide you through the process of cutting artificial grass turf effectively.
Why is Cutting Artificial Grass Turf Important?
Cutting artificial grass turf is a key step in the installation process. Proper cutting ensures:
- A perfect fit: Avoiding gaps and overlaps that can ruin the overall appearance of your installation.
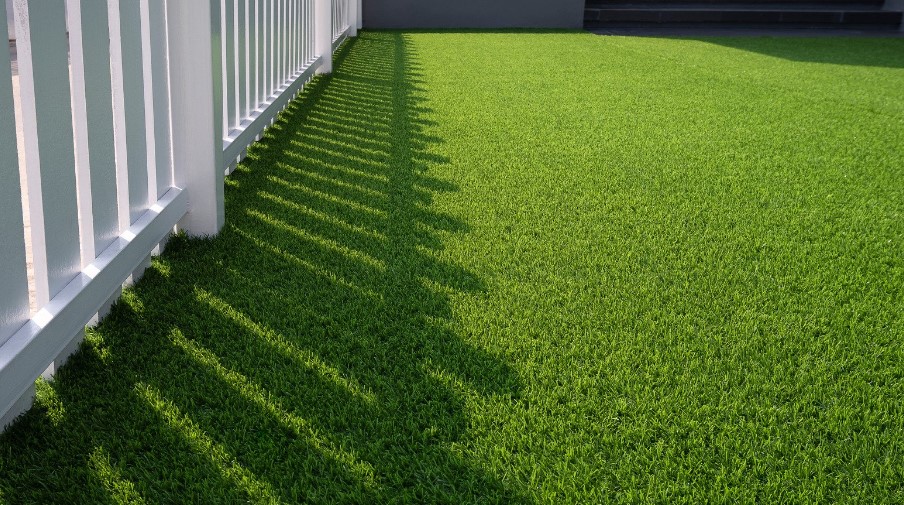
- Enhanced aesthetics: Achieving a neat, professional look that mimics the appearance of natural grass.
- Prevention of damage: Avoiding fraying or uneven edges that could lead to premature wear and tear.
Before you begin, gather the necessary tools:
- Utility knife or carpet cutter: For making precise cuts through the tough backing of the artificial grass.
- Measuring tape: To ensure accurate measurements and avoid mistakes.
- Chalk or marker: For marking cut lines on the backing of the turf.
- Straight edge or ruler: To guide your cuts and ensure they are straight.
- Safety gloves: To protect your hands from sharp blades and rough edges of the turf.
How to Prepare for Cutting Artificial Grass Turf?
Preparation is key to a successful installation:
- Measure the area: Take accurate measurements of the space where the turf will be installed. Double-check your measurements to avoid errors.
- Mark the cut lines: Use chalk or a marker to draw the lines where you will cut the turf. Ensure the lines are straight and clearly visible.
- Ensure a clean and stable surface: Clear any debris from the installation area and ensure the surface is level. A stable surface prevents the turf from shifting during cutting.
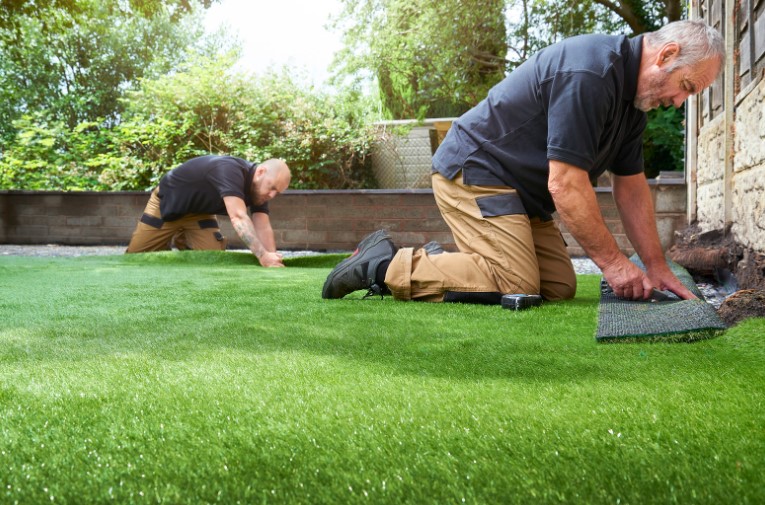
How Do You Cut Artificial Grass Turf?
Follow these steps for a precise cut:
- Measure and mark the area: Double-check your measurements and mark the turf accordingly, ensuring the cut lines are straight.
- Secure the turf in place: Lay the turf flat and use weights or stakes to secure it, preventing it from moving while you cut.
- Make the initial cut: Using a utility knife or carpet cutter, carefully cut along the marked lines. Make sure to cut through the backing completely.
- Trim the edges: After the initial cut, trim the edges to ensure they are clean and even for a professional finish. Use a straight edge to guide your cuts.
How to Handle Corners and Edges?
Corners and edges can be tricky. Here’s how to handle them:
- Cutting around obstacles: Use a sharp knife to make precise cuts around objects like trees, poles, or garden beds. Take your time to ensure a snug fit.
- Finishing edges: Tuck the edges under and secure them with landscape staples or adhesive to prevent fraying and ensure they stay in place.
Common Mistakes to Avoid When Cutting Artificial Grass Turf
Avoid these pitfalls for a flawless installation:
- Cutting too short: Always cut slightly longer than needed; you can trim excess later. This prevents the turf from being too small for the space.
- Uneven cuts: Use a straight edge to guide your cuts to avoid wavy or crooked lines.
- Not securing the turf properly: Secure the turf with weights or stakes to prevent shifting, which can lead to uneven edges and a poor fit.
How to Maintain Artificial Grass After Cutting?
Maintenance ensures your turf stays in top condition:
- Regular brushing and cleaning: Keeps the blades upright and free from debris. Use a stiff brush and a garden hose to clean the turf weekly.
- Checking for loose edges: Periodically inspect the edges and secure any that have become loose with adhesive or landscape staples.
- Periodic inspections: Regularly check for wear and tear, especially in high-traffic areas, to address issues promptly and keep your turf looking great.
| Task |
Frequency |
Tools Needed |
| Brushing and cleaning |
Weekly |
Stiff brush, garden hose |
| Checking for loose edges |
Monthly |
Utility knife, adhesive |
| Periodic inspections |
Quarterly |
Measuring tape, inspection tool |
Conclusion
Cutting artificial grass turf properly is crucial for achieving a professional and long-lasting finish. By following the steps outlined in this guide on how do you cut artificial grass turf and avoiding common mistakes, you can ensure your artificial grass installation looks great and lasts for years. Remember, preparation and precision are key to success.
Home Diagnostics and Technical Standards Specialist at Hello Mag. She provides high-level Expertise in appliance mechanics and scientific pest management, ensuring every guide follows strict safety protocols and manufacturer standards. As a leading Authority on technical home specs, Kanimozhi audits complex data to provide homeowners with the most accurate, verified, and reliable diagnostic solutions available.
by Kanimozhi BV | Aug 5, 2024 | Kitchen, DIY Ideas, Interior
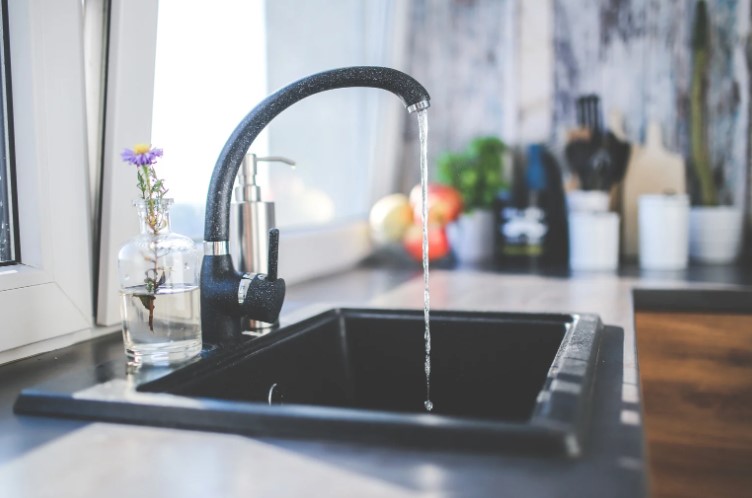
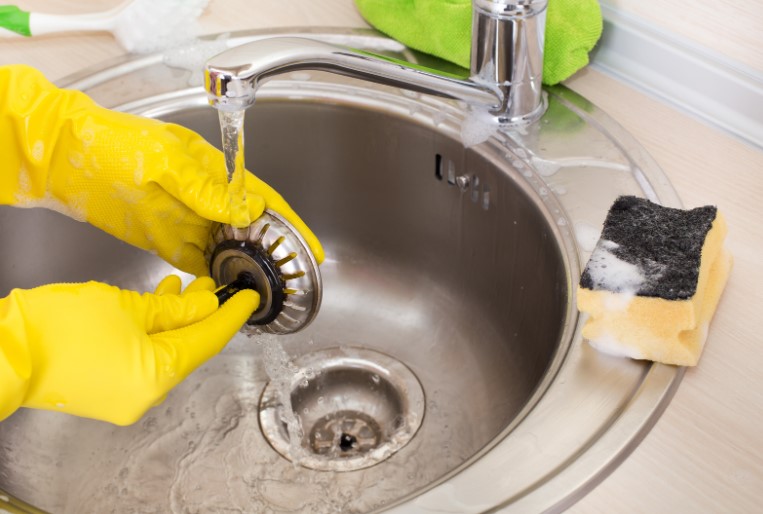
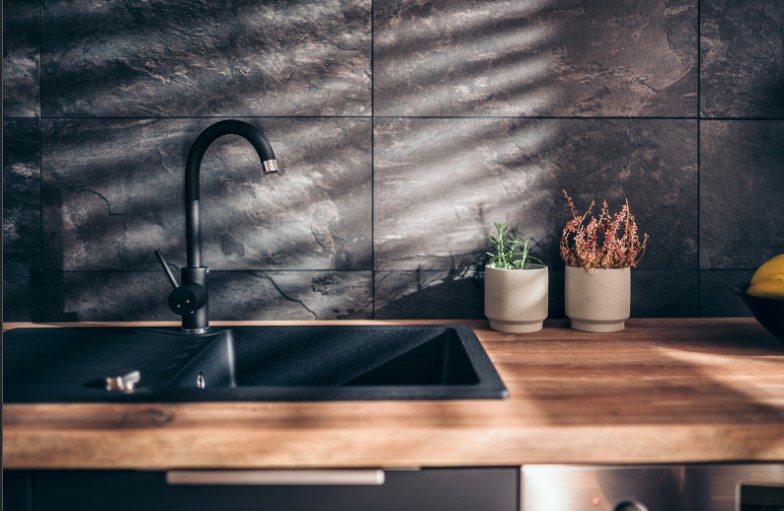
Are you searching for how to unclog a kitchen sink with standing water? Dealing with a clogged kitchen sink can be a frustrating experience, especially when standing water refuses to drain. Addressing this issue promptly is crucial to prevent further complications and maintain a functional kitchen. In this DIY guide, we will explore various methods to unclog a kitchen sink with standing water, using simple tools and household materials.
Why Is Your Kitchen Sink Clogged?
Understanding the common causes of kitchen sink blockages can help you prevent them in the future. The most frequent culprits include food particles, grease buildup, soap scum, and other debris that accumulate over time. If your sink is draining slowly or has standing water, it’s a clear sign that a clog is forming or already present.
Initial Preparations Before Unclogging
Before you begin, take some safety precautions to protect yourself and your kitchen.
- Plunger
- Baking soda and vinegar
- Drain snake
- Hot water
- Chemical drain cleaner (optional)
- Safety gloves
- Bucket
- Towels
Guide to Unclogging a Kitchen Sink with Standing Water
Method 1: Using a Plunger
How to Use a Plunger to Unclog a Kitchen Sink?
Using a plunger is often the first line of defense against a clogged sink. Here’s a step-by-step guide:
- Add Water: Ensure the sink has enough water to cover the plunger’s cup completely.
- Position the Plunger: Center the plunger over the drain, creating a snug seal around the edges.
- Plunge Effectively: Push the plunger down firmly, then pull up sharply while keeping the seal intact.
- Repeat: Perform the plunging motion vigorously for about 30 seconds to dislodge the clog.
- Check Progress: Remove the plunger and observe if the water begins to drain, indicating the blockage may be cleared.
Pros and Cons of Using a Plunger
Pros:
- Easy to use
- No chemicals required
Cons:
- May not work for severe clogs
Method 2: Baking Soda and Vinegar Solution
How to Unclog a Kitchen Sink with Baking Soda and Vinegar?
This natural method is both effective and environmentally friendly. Follow these steps:
- Remove any standing water from the sink.
- Use a cup of baking soda in the drain.
- Follow with 1 cup of vinegar.
- Wait for 15-30 minutes as the solution fizzes and breaks down the clog.
- Pour hot water down the drain to clean.
Additional Tips for Using Baking Soda and Vinegar
For stubborn clogs, repeat the process or combine it with plunging for better results.
Method 3: Hot Water Flush
Can Hot Water Unclog a Kitchen Sink?
A simple yet effective method, especially for grease-related clogs. Here’s how:
- Boil a pot of water.
- Carefully pour the hot water into the sink, aiming directly at the drain.
- Wait for a few minutes and see if the water starts to drain.
Benefits of Hot Water Flush
- Simple and cost-effective
- No chemicals involved
- Environmentally friendly
Method 4: Using a Drain Snake
How to Use a Drain Snake to Clear a Clogged Sink?
A drain snake is a handy tool for deeper clogs. Follow these steps:
- Insert the drain snake into the drain until you feel resistance.
- Rotate the snake to break up the clog.
- Pull the snake out, bringing the clog with it.
- Run water to ensure the clog is cleared.
Effectiveness of Drain Snakes
Drain snakes are effective for reaching and removing deep clogs that other methods can’t.
Method 5: Chemical Drain Cleaners
Are Chemical Drain Cleaners Effective?
Chemical drain cleaners can quickly dissolve clogs, but they must be used with caution:
- Follow the instructions on the cleaner’s label.
- Wear safety gloves and avoid inhaling fumes.
- Pour the cleaner down the drain and wait as directed.
- Flush with water to clear the drain.
Alternatives to Chemical Cleaners
Consider using natural methods or a drain snake before resorting to chemicals due to potential risks and environmental impact.
Preventing Future Clogs
How to Maintain a Clog-Free Kitchen Sink?
Preventing clogs is easier than dealing with them. Here are some tips:
- Avoid pouring grease down the drain.
- Use a sink strainer to catch food particles.
- Regularly flush the sink with hot water.
Long-Term Solutions for Kitchen Sink Maintenance
Implementing routine cleaning practices can keep your sink in top condition:
- Clean your sink drain with baking soda and vinegar monthly.
- Install a sink strainer to prevent large debris from entering the drain.
Conclusion
Unclogging a kitchen sink with standing water can be tackled using various DIY methods. Whether you prefer a plunger, natural solutions, or a drain snake, addressing the problem early can save you from more significant issues. Regular maintenance and preventive measures can help keep your kitchen sink clog-free. If these methods don’t work, it might be time to call a professional plumber for assistance.
Frequently Asked Questions
1. What if none of the methods work?
If none of the DIY methods work, it may be time to call a professional plumber. Ongoing clogs might suggest a more significant problem within your plumbing system that demands professional intervention.
2. Can I use a wire hanger instead of a drain snake?
Yes, you can use a straightened wire hanger as a makeshift drain snake. However, it might not be as effective as a proper drain snake, especially for deeper clogs.
3. How often should I clean my kitchen sink drain?
Regular maintenance can prevent clogs. Cleaning your kitchen sink drain once a month with baking soda and vinegar is a good practice. Furthermore, steer clear of disposing of grease and large food scraps in the drain.
4. Are chemical drain cleaners safe for all types of pipes?
Chemical drain cleaners can be harsh and may cause damage to older or plastic pipes if used frequently. Always follow the product’s instructions and consider alternative methods if you have concerns about your pipes.
5. Is it safe to use boiling water on a ceramic sink?
Yes, but pour the boiling water slowly to avoid cracking the ceramic. If you’re concerned about the integrity of your sink, you can use very hot (but not boiling) water instead.
Home Diagnostics and Technical Standards Specialist at Hello Mag. She provides high-level Expertise in appliance mechanics and scientific pest management, ensuring every guide follows strict safety protocols and manufacturer standards. As a leading Authority on technical home specs, Kanimozhi audits complex data to provide homeowners with the most accurate, verified, and reliable diagnostic solutions available.
by Kanimozhi BV | Aug 5, 2024 | Garden, DIY Ideas, Exterior
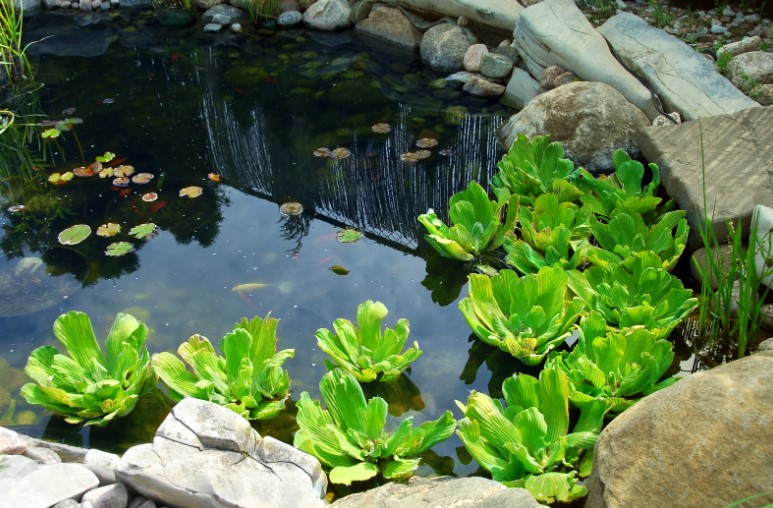
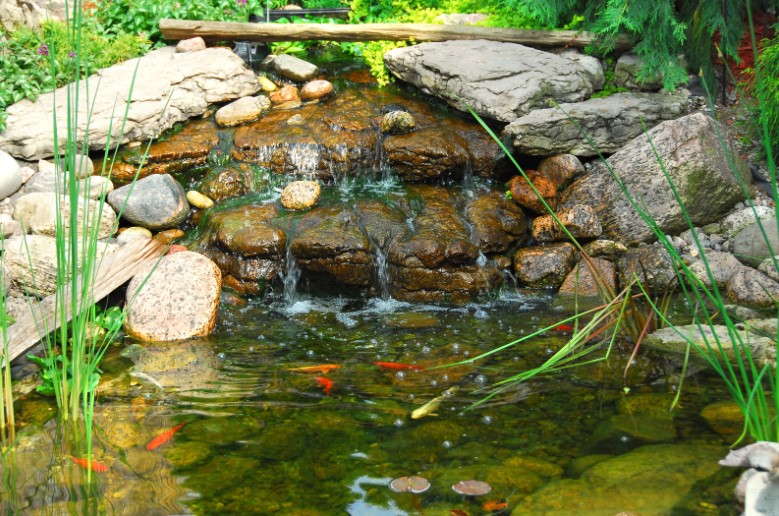
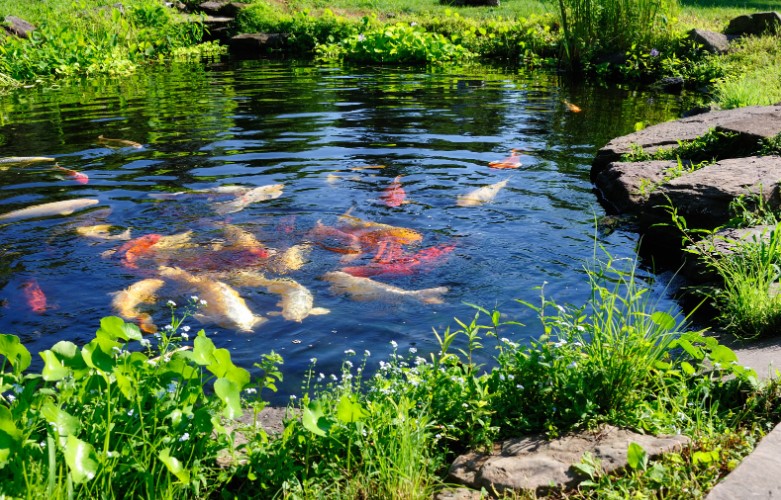
Need tips on how to clean pond water with fish in it? Maintaining clean pond water is necessary for the health and well-being of your fish. Dirty pond water can lead to various issues, including algae growth, poor water quality, and health problems for your fish. In this DIY guide, we’ll explore several effective methods to clean pond water without harming your fish, ensuring a healthy and vibrant pond environment.
Understanding Pond Water Quality
Several factors can affect the quality of your pond water, such as algae, debris, fish waste, and uneaten food. Poor water quality can present itself in various ways, such as cloudy or murky water, unpleasant smells, and the presence of visible algae blooms. Recognizing these signs early is crucial to take appropriate action to restore water clarity and health.
- Pond filter system
- Beneficial bacteria products
- Aquatic plants
- Pond vacuum
- UV clarifier
- Safety gloves
- Water testing kit
- Pond nets
Ensure you have everything you need to protect your fish and make the cleaning process efficient.
Simple DIY Ideas on how to clean pond water with fish in it
Method 1: Installing a Pond Filter System
How Does a Pond Filter System Work?
A pond filter system combines mechanical and biological filtration to remove debris and harmful substances from the water. Mechanical filters trap physical particles, while biological filters use beneficial bacteria to break down ammonia and nitrates.
Choosing the Right Pond Filter
Selecting the right pond filter depends on your pond’s size and the number of fish. There are various types of filters, including submersible, external, and pressurized filters. Research and choose a filter that suits your pond’s specific needs.

Method 2: Using Beneficial Bacteria
How to Introduce Beneficial Bacteria to Your Pond?
Beneficial bacteria play a vital role in maintaining water quality by breaking down organic waste and harmful compounds. Here’s how to introduce them:
- Purchase a high-quality beneficial bacteria product.
- Follow the product instructions for the correct dosage.
- Add the bacteria to your pond, preferably near the filter or water pump for optimal distribution.
Best Beneficial Bacteria Products
Some recommended products include Microbe-Lift PL, PondCare EcoFix, and Tetra Pond Sludge Reducer. These products help maintain a healthy biological balance in your pond.
Method 3: Utilizing Aquatic Plants
How Do Aquatic Plants Help in Cleaning Pond Water?
Aquatic plants absorb excess nutrients that contribute to algae growth, helping to maintain clear water. They also provide oxygen and habitat for fish and beneficial organisms.
Tips for Planting and Maintaining Aquatic Plants
- Choose plants like water lilies, anacharis, and water hyacinth.
- Plant them in submerged pots to control their growth.
- Regularly trim and remove dead plant matter to prevent decay in the water.
Method 4: Regular Pond Maintenance
What Does Regular Pond Maintenance Involve?
Routine maintenance tasks include:
- Skimming debris with a pond net.
- Checking and cleaning the filter system.
- Testing water quality with a kit.
- Removing sludge with a pond vacuum.
Tools for Efficient Pond Maintenance
Invest in a quality pond vacuum, nets, and water testing kits to streamline your maintenance routine. Regular upkeep prevents problems from escalating and keeps your pond in top condition.
Method 5: Using a Pond Vacuum
How to Use a Pond Vacuum for Cleaning?
A pond vacuum effectively removes debris and sludge from the pond floor. Here’s how:
- Assemble the vacuum according to the manufacturer’s instructions.
- Submerge the vacuum head and hose into the pond.
- Move the vacuum head slowly along the bottom to suck up debris.
- Dispose of the collected sludge properly.
Selecting the Right Pond Vacuum
Choose a vacuum that matches your pond size and cleaning needs. Some reliable options include the OASE PondoVac 4 and the Matala Power-Cyclone Pond Vacuum.
Method 6: Employing UV Clarifiers
How Do UV Clarifiers Work?
UV clarifiers use ultraviolet light to kill algae and harmful microorganisms, improving water clarity. They are installed in-line with the pond’s filtration system.
Installation and Maintenance of UV Clarifiers
- Install the UV clarifier according to the manufacturer’s instructions, ensuring proper water flow through the unit.
- To maintain the effectiveness, do regular checkups and replacement of the UV bulb.
Natural Pond Cleaning Methods
What Are Natural Methods for Cleaning Pond Water?
Natural methods are eco-friendly and safe for fish. These include:
- Using barley straw to reduce algae growth.
- Applying small doses of hydrogen peroxide to increase oxygen levels in the water.
- Introducing fish like koi or goldfish that consume algae.
Advantages of Natural Cleaning Methods
Natural methods reduce the need for chemicals, promote a balanced ecosystem, and are safe for fish and plants. They help maintain long-term pond health with minimal environmental impact.
Preventing Future Pond Water Issues
How to Prevent Common Pond Water Problems?
Preventive measures are key to maintaining water quality:
- Avoid overfeeding fish.
- Regularly remove fallen leaves and debris.
- Make sure to have sufficient water movement using pumps and fountains.
Long-Term Solutions for Pond Health
Implementing long-term strategies, such as installing an efficient filtration system and regularly monitoring water quality, ensures a healthy pond environment year-round.
Conclusion
Cleaning pond water with fish in it requires a balanced approach to ensure the health and safety of your aquatic friends. By using methods such as installing a pond filter system, adding beneficial bacteria, utilizing aquatic plants, and employing regular maintenance, you can maintain a clean and healthy pond environment. Natural cleaning methods and preventive measures further enhance water quality, ensuring a thriving habitat for your fish. Regular maintenance and eco-friendly practices are key to a sustainable and beautiful pond. Follow these guidelines on how to clean pond water with fish in it, and make your pond a healthier and more beautiful environment for your fish.
Frequently Asked Questions
1. How often should I clean my pond?
Regular maintenance should be done weekly, while deeper cleaning can be scheduled monthly or seasonally.
2. Can I use tap water to refill my pond?
Yes, but it’s important to dechlorinate tap water before adding it to your pond to protect the fish.
3. What should I do if my fish show signs of stress during cleaning?
Temporarily relocate the fish to a safe, oxygenated container and minimize disturbances during the cleaning process.
4. Are chemical treatments safe for fish?
Use chemical treatments sparingly and carefully. Always adhere to product instructions, and consider natural alternatives first.
5. How can I control algae growth naturally?
Introduce algae-eating fish, use aquatic plants, and ensure proper water circulation to control algae growth naturally.
Home Diagnostics and Technical Standards Specialist at Hello Mag. She provides high-level Expertise in appliance mechanics and scientific pest management, ensuring every guide follows strict safety protocols and manufacturer standards. As a leading Authority on technical home specs, Kanimozhi audits complex data to provide homeowners with the most accurate, verified, and reliable diagnostic solutions available.

by Kanimozhi BV | Aug 2, 2024 | Bathroom, DIY Ideas, Interior
Linoleum flooring is a fantastic option for bathrooms due to its durability, water resistance, and ease of maintenance. If you’re considering a DIY project to install linoleum flooring, this guide on how to lay linoleum flooring in a bathroom will help you more.
-
- Utility knife
- Measuring tape
- Straight edge or ruler
- Trowel
- Roller
- Notched spreader
-
Materials:
- Linoleum sheets
- Adhesive
- Floor primer (if needed)
- Seam sealer
- Cleaning supplies
How to Prepare Your Bathroom Floor?
Clearing and Cleaning the Bathroom
First, remove all items from the bathroom, including furniture, rugs, and any detachable fixtures. Thoroughly clean the floor to ensure there is no dirt, dust, or debris.
Assessing the Subfloor Condition
Inspect the subfloor for any damage. It needs to be smooth, dry, and level. Any imperfections could affect the installation and the longevity of the linoleum.
Making Necessary Repairs
Fill any cracks or holes with a suitable filler and sand the subfloor to create a smooth surface. If the subfloor is uneven, you might need to use a self-leveling compound.
How to Measure and Cut Linoleum?
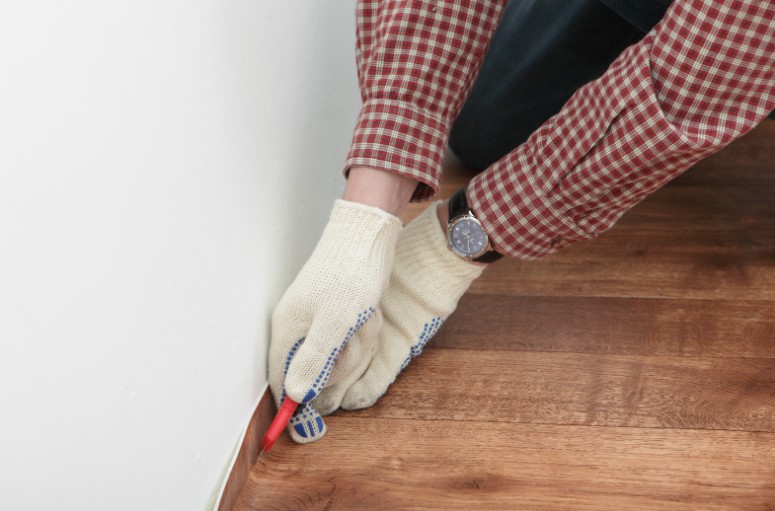
Measuring the Bathroom Floor Accurately
Measure the length and width of your bathroom at several points to get the most accurate dimensions. Remember to measure the spaces around fixtures like the toilet and sink.
Marking and Cutting the Linoleum
Transfer your measurements to the linoleum sheet. Use a straight edge and a utility knife to make precise cuts. Cutting linoleum can be tricky, so take your time to avoid mistakes.
Tips for Precise Cutting
Ensure you leave a small allowance for trimming once the linoleum is laid out. This will help you to achieve a perfect fit.
How to Apply Adhesive and Lay Linoleum?
Choosing the Right Adhesive
Select an adhesive that is recommended for linoleum and suitable for bathroom conditions. Some adhesives are water-resistant, which is ideal for bathrooms.
| Adhesive Type |
Features |
Recommended For |
| Acrylic Adhesive |
Fast-drying, strong bond |
General linoleum flooring |
| Latex Adhesive |
Flexible, water-resistant |
Bathrooms, kitchens |
| Pressure-Sensitive |
Easy to reposition |
DIY projects |
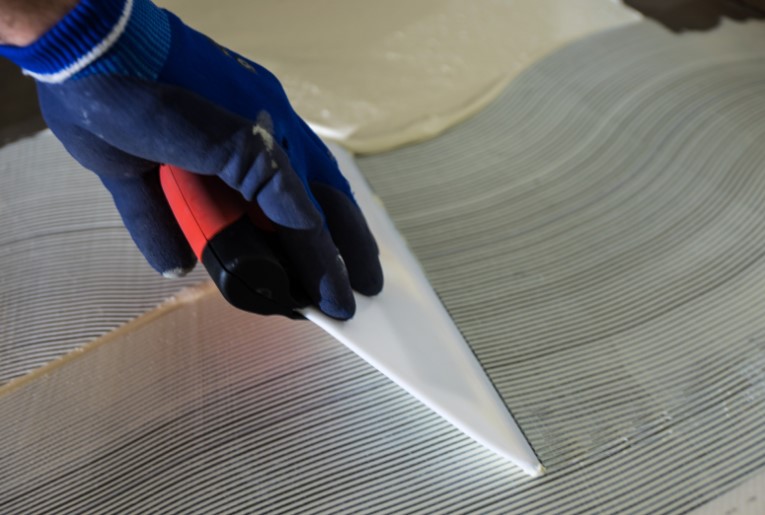
Spreading the Adhesive Evenly
Follow the manufacturer’s instructions for spreading the adhesive. Use a notched spreader to apply it evenly over the subfloor.
Positioning and Laying the Linoleum
Carefully position the linoleum over the adhesive, starting from one end and working your way to the other. Press down firmly as you go to avoid air bubbles.
How to Smooth and Secure the Linoleum?
Rolling Out Air Bubbles
Use a roller to smooth out any air bubbles, working from the center outwards. This will ensure a strong bond between the linoleum and the subfloor.
Trimming Excess Linoleum
Trim any excess linoleum around the edges using a utility knife. Be conscious to avoid gaps or overlaps.
Securing Edges and Seams
Apply seam sealer to any joins between linoleum sheets to prevent water from seeping underneath.
How to Handle Linoleum Around Fixtures?
Cutting Linoleum Around Toilets and Sinks
Make precise cuts around fixtures by creating templates with paper or cardboard first. Lay the template over the linoleum to mark the cut lines.
Sealing Edges to Prevent Water Damage
Use waterproof sealant around the edges of the linoleum, especially near bathtubs, toilets, and sinks. This helps in protecting subfloor from water damage.
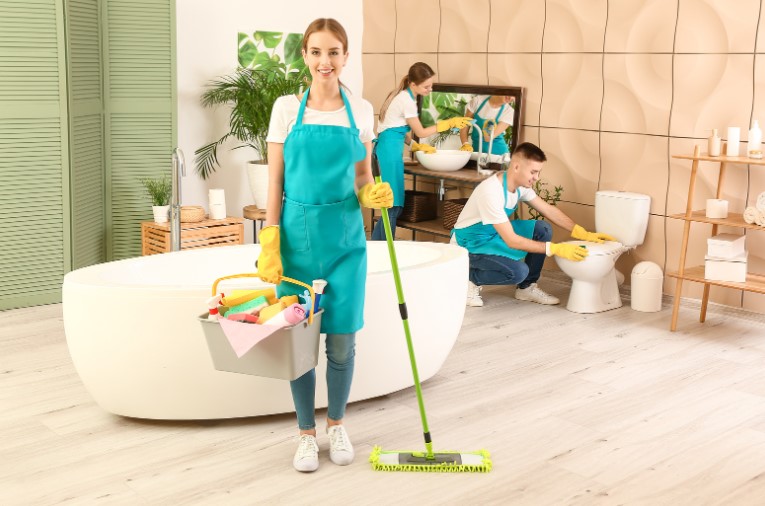
How to Maintain Your Linoleum Flooring?
Regular Cleaning Tips
Sweep and mop your linoleum floor regularly to keep it clean. Use a damp mop and mild detergent; avoid harsh chemicals.
Preventive Measures to Prolong Lifespan
Place mats at the bathroom entrance to reduce dirt and grit. Use felt pads under heavy furniture to prevent indentations.
Addressing Common Issues
If you notice any lifting or curling edges, reapply adhesive and use a heavy object to hold the linoleum in place until the adhesive sets.
How Much Does It Cost to Install Linoleum Flooring?
The cost of installing linoleum flooring can vary based on several factors, including the size of the bathroom, the quality of the linoleum, and whether you hire a professional or do it yourself.
| Item |
Cost Range (UK) |
| Linoleum Flooring |
£15 – £45 per square meter |
| Adhesive |
£5 – £20 per tub |
| Additional Tools |
£10 – £50 |
| Professional Labor |
£20 – £40 per hour |
DIY vs. Professional Installation
- DIY Installation: If you choose to do it yourself, you will save on labor costs but will need to invest in tools and materials.
- Professional Installation: Hiring a professional ensures a high-quality finish and can be faster, but it will be more expensive.
Conclusion
Installing linoleum flooring in your bathroom is a manageable DIY project that can greatly enhance the space. By following these steps on how to lay linoleum flooring in a bathroom, you can get an awesome-looking result for your Bathroom.
Home Diagnostics and Technical Standards Specialist at Hello Mag. She provides high-level Expertise in appliance mechanics and scientific pest management, ensuring every guide follows strict safety protocols and manufacturer standards. As a leading Authority on technical home specs, Kanimozhi audits complex data to provide homeowners with the most accurate, verified, and reliable diagnostic solutions available.
by Kanimozhi BV | Aug 2, 2024 | Washing Machine, Appliances
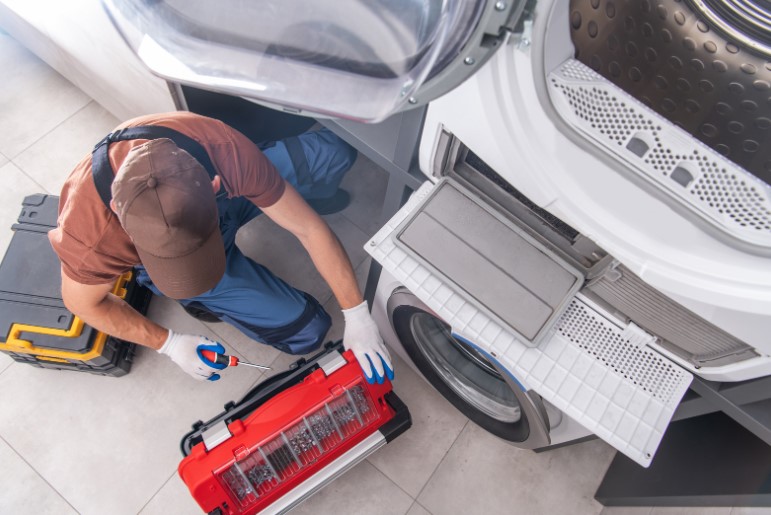
Are you looking for how to remove rotten egg smell from washing machine? Here it is. A washing machine is an essential household appliance, but when it starts emitting a rotten egg smell, it can be both unpleasant and concerning. This guide will help you understand the causes of the odor and provide step-by-step instructions to eliminate it.
What Causes the Rotten Egg Smell in Washing Machines?
Buildup of Bacteria and Mold
The most common cause of a rotten egg smell in washing machines is the buildup of bacteria and mold. These microorganisms thrive in damp, dark environments and can produce sulfuric gases that smell like rotten eggs.
Stagnant Water and Detergent Residue
Stagnant water left in the drum or detergent residue can also contribute to the foul smell. Over time, these stagnant water smell can create an ideal breeding ground for bacteria and mold.
Poor Ventilation
Poor ventilation can exacerbate the problem by not allowing the machine to dry out between uses. This constant dampness can lead to persistent odors.

The following are the required tools and materials.
-
- Screwdriver (for filter access)
- Scrub brush
- Microfiber cloth
-
Cleaning Materials:
- White vinegar
- Baking soda
- Bleach (optional)
- Dish soap
How to Clean the Washing Machine Drum to Remove Rotten Egg Smell?
Step-by-Step Guide to Cleaning the Drum
- Empty the Washing Machine: Ensure there are no clothes left inside.
- Add Vinegar: Use 2 cups of white vinegar to clean the drum.
- Run a Hot Cycle: Set the washing machine to the hottest setting and run a complete cycle.
- Add Baking Soda: Once the cycle is complete, add 1/2 cup of baking soda to the drum.
- Run Another Hot Cycle: Run another hot cycle to neutralize any remaining odors.
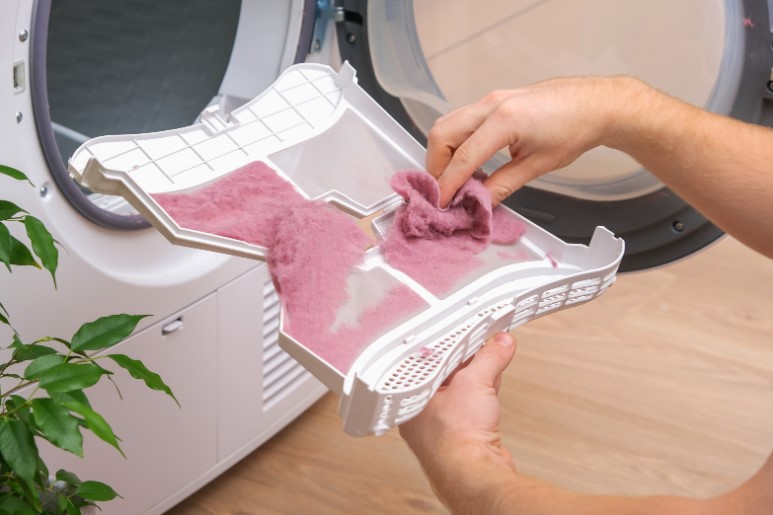
How to Clean the Washing Machine Filter From Bad Egg Kind Of Smell?
Locating the Filter
The filter is usually located at the bottom front of the machine. Refer to your user manual if you’re unsure of its location.
Proper Cleaning Methods
- Turn Off the Machine: Unplug the washing machine for safety.
- Access the Filter: Use a screwdriver to open the filter cover.
- Remove and Clean the Filter: Take out the filter and rinse it under running water. Make use of a brush to remove the debris available in it.
- Reinstall the Filter: Once clean, put the filter back in place and secure the cover.
How to Clean the Washing Machine Seal and Gasket To Avoid Rotten Egg Smell?
Inspecting and Cleaning the Door Seal
- Open the Door: Inspect the rubber seal around the door.
- Clean the Seal: Wipe it down with a cloth soaked in vinegar or a bleach solution to remove mold and mildew.
- Dry the Seal: Ensure the seal is completely dry before closing the door.
How to Clean the Washing Machine Detergent Dispenser From Rotten Egg Smell?
Removing and Cleaning the Dispenser Tray
- Remove the Dispenser Tray: Pull out the tray completely.
- Clean the Tray: Soak the scrub with warm, soapy water to clear any detergent buildup.
- Reinstall the Tray: Dry the tray thoroughly before reinserting it into the machine.
How to Maintain Your Washing Machine to Prevent Odors?
Regular Maintenance Tips
- Run Regular Cleaning Cycles: Run an empty hot water cycle with vinegar once a month.
- Leave the Door Open: For each wash, let the door be open, allowing the machine to dry out.
- Use the Right Detergent: Use high-efficiency (HE) detergents in the correct amounts to avoid residue buildup.
Tips for Keeping the Machine Dry and Ventilated
- Wipe Down the Drum and Seal: After each wash, wipe down the drum and seal with a dry cloth.
- Ensure Proper Ventilation: Place the washing machine in a well-ventilated area to help it dry faster.
How Much Does It Cost to Clean a Washing Machine?
The cost of cleaning a washing machine can vary based on whether you do it yourself or hire a professional.
| Cleaning Method |
Cost Range (UK) |
| DIY Cleaning |
£5 – £15 (for materials) |
| Professional Cleaning |
£40 – £80 per service |
DIY vs. Professional Cleaning
- DIY Cleaning: Doing it yourself is cost-effective and straightforward with the right materials.
- Professional Cleaning: Hiring a professional ensures a thorough clean but comes at a higher cost.
Conclusion
Removing the rotten egg smell from your washing machine is essential for maintaining a fresh and clean laundry environment. By following these steps on how to remove rotten egg smell from washing machine and performing regular maintenance, you can keep your washing machine odor-free.
Home Diagnostics and Technical Standards Specialist at Hello Mag. She provides high-level Expertise in appliance mechanics and scientific pest management, ensuring every guide follows strict safety protocols and manufacturer standards. As a leading Authority on technical home specs, Kanimozhi audits complex data to provide homeowners with the most accurate, verified, and reliable diagnostic solutions available.
