by Kanimozhi BV | Aug 1, 2024 | Washing Machine, Appliances
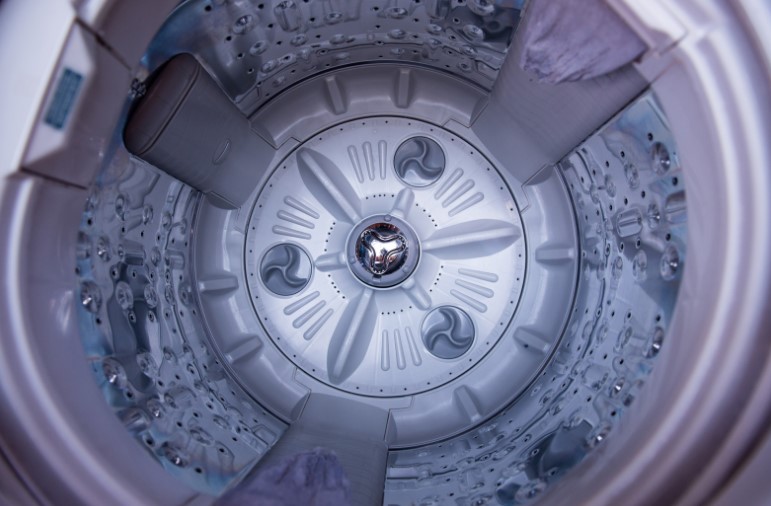
The agitator in a washing machine is a central post with fins that helps move clothes around during the wash cycle. Knowing how to remove the agitator is necessary for thorough cleaning, repair, or replacement. This guide on how to remove agitator from washing machine will take you through out the process step by step.
What is a Washing Machine Agitator?
A washing machine agitator is a component found in top-load washing machines. It moves back and forth to ensure clothes are evenly washed by creating motion in the water. There are various types of agitators, including:
- Straight-Vane Agitators: These have straight fins and are common in older models.
- Dual-Action Agitators: These have a two-part mechanism where the bottom part moves independently of the top.
Why Might You Need to Remove the Agitator?
There are several reasons you might need to remove the agitator:
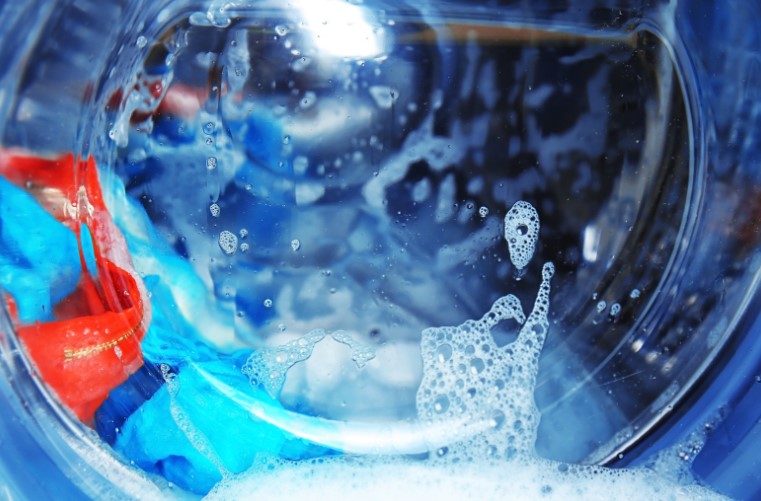
- Cleaning: Over time, dirt, detergent, and fabric softener can build up under the agitator, causing odors and affecting performance.
- Repair: If the agitator is damaged or malfunctioning, it may need repair or replacement.
- Replacement: Upgrading or replacing the agitator can improve washing efficiency.

Before getting into this, gather all the necessary tools and materials:
- Screwdrivers: Flathead and Phillips
- Wrenches: Adjustable wrench or socket set
- Pliers: For gripping and turning
- Towels: To catch any water spills
- Cleaning Supplies: Mild detergent, vinegar, and a scrub brush
Safety Precautions Before Starting
Ensuring your safety is paramount when working on appliances. Follow these steps:
- Unplug the Washing Machine: Disconnect the power to prevent electrical accidents.
- Turn Off Water Supply: Shut off the water supply to avoid leaks.
- Wear Protective Gear: Use gloves to protect your hands from sharp edges and cleaning chemicals.
Step-by-Step Guide to Removing the Agitator
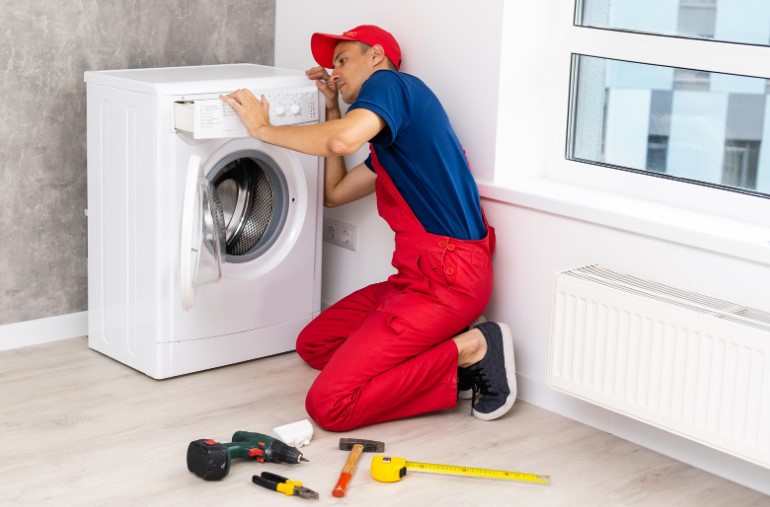
Step 1: Unplug the Washing Machine
Before you start, make sure the washing machine is unplugged from the electrical outlet to avoid any risk of electric shock.
Step 2: Empty the Washing Machine
Remove any clothes or items from the drum. This ensures you have a clear working area and prevents damage to your laundry.
Step 3: Remove the Agitator Cap
- Locate the Cap: The agitator cap is usually at the top of the agitator.
- Remove the Cap: Use a flathead screwdriver to pry off the cap gently.
Step 4: Locate the Agitator Bolt
- Find the Bolt: Look inside the agitator. The bolt is typically in the center.
- Access the Bolt: If the bolt is covered by another cap, remove it to gain access.
Step 5: Unscrew and Remove the Agitator Bolt
- Choose the Right Tool: Use an adjustable wrench or socket set to fit the bolt size.
- Unscrew the Bolt: Turn the bolt counterclockwise to loosen and remove it.
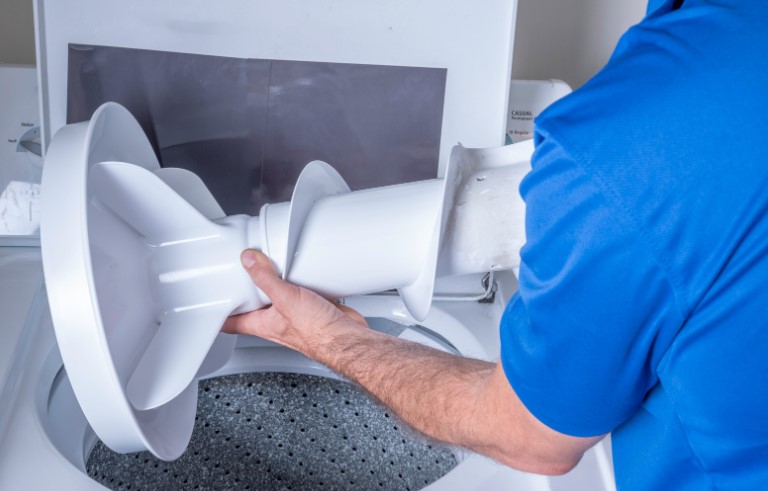
Step 6: Pull Out the Agitator
- Grip the Agitator: Firmly grasp the agitator near the base.
- Pull Upwards: Lift the agitator straight upward and out of the drum.
Step 7: Clean or Replace the Agitator
- Cleaning: Soak the agitator in a solution of warm water and vinegar, then scrub with a brush to remove any buildup.
- Replacement: If installing a new agitator, ensure it is compatible with your washing machine model and follow the installation instructions.
Tips for Maintaining Your Washing Machine
Regular maintenance can help prevent future issues:
- Monthly Cleaning: Run an empty cycle with hot water and vinegar to clean the drum and hoses.
- Check Hoses and Seals: Inspect for any leaks or damage and replace as needed.
- Use the Right Detergent: Use high-efficiency (HE) detergent which is right for your cloths and machine to prevent residue buildup.

Conclusion
Knowing how to remove the agitator from your washing machine is a valuable skill for maintaining its performance. By following this guide on how to remove agitator from washing machine, you can clean, repair, or replace the agitator effectively. Regular maintenance will ensure your washing machine stays in top condition, providing clean and fresh laundry every time.
Frequently Asked Questions
1. What Should I Do If the Agitator is Stuck?
If the agitator is stuck, try using a bit of lubricant around the base and gently rocking it back and forth. If it still won’t budge, consult the washing machine’s manual or seek professional help.
2. How Often Should I Clean the Agitator?
It’s recommended to clean the agitator every six months to prevent buildup and odors.
3. Can I Use the Washing Machine Without the Agitator?
Some washing machines can function without the agitator, but it may affect washing performance. Have a look on the machine’s manual for specific details.
Home Diagnostics and Technical Standards Specialist at Hello Mag. She provides high-level Expertise in appliance mechanics and scientific pest management, ensuring every guide follows strict safety protocols and manufacturer standards. As a leading Authority on technical home specs, Kanimozhi audits complex data to provide homeowners with the most accurate, verified, and reliable diagnostic solutions available.
by Kanimozhi BV | Aug 1, 2024 | Washing Machine, Appliances
Have you noticed a stagnant water smell in your washing machine and need tips on how to remove stagnant water smell from washing machine? This common issue can make freshly laundered clothes smell less than fresh and can be quite off-putting. Maintaining a clean washing machine is crucial not just for the sake of your clothes but also to ensure the longevity of the appliance itself.
What Causes Stagnant Water Smell in a Washing Machine?
Several factors can contribute to the unpleasant odor emanating from your washing machine:
1. Accumulation of Detergent and Fabric Softener Residues
Detergent Residue: Using too much detergent or not using high-efficiency (HE) detergent in an HE machine can lead to excess suds that don’t rinse away completely. These residues can build up over time, creating a breeding ground for bacteria.
Fabric Softener Build-Up: Fabric softeners can leave a waxy coating inside the drum and hoses, trapping moisture and promoting mold and mildew growth.
2. Growth of Mold and Mildew
Mold Spores: Washing machines, particularly front-loaders, have many nooks and crannies where water can pool and mold can grow. This includes the rubber door seal, detergent drawer, and interior drum of a washing machine.
Mildew Formation: Mildew thrives in damp, dark environments. If the washing machine door is kept closed when not in use, the trapped moisture provides an ideal environment for mildew to develop.
3. Poor Ventilation and Trapped Moisture
Sealed Environment: Front-load washing machines are designed to be airtight to prevent leaks. However, this also means that any moisture left inside after a wash cycle remains trapped, leading to musty odors.
Incomplete Drying: If clothes are left in the washing machine for too long after the cycle finishes, the residual moisture can lead to a musty smell. Additionally, leaving the door or detergent drawer closed between washes can trap moisture and promote bacterial growth.
Step-by-Step Guide to Removing Stagnant Water Smell
Step 1: Gather Your Supplies
Before starting, ensure you have the following items:
- White Vinegar: A natural disinfectant that helps break down residues and kill mold.
- Baking Soda: Neutralizes odors and helps scrub away grime.
- Microfiber Cloths: Soft and absorbent, ideal for cleaning delicate surfaces.
- Old Toothbrush: Perfect for scrubbing hard-to-reach areas.
- Warm Water: Used for diluting vinegar and rinsing surfaces.
- Essential Oils (Optional): For adding a pleasant scent.
Step 2: Clean the Washing Machine Drum
- Empty the Machine: Ensure there are no clothes inside the drum.
- Add Cleaning Agents: Pour two cups of white vinegar into the detergent dispenser as a cleaning agent. Sprinkle 1/4 cup of baking soda directly into the drum.
- Run a Hot Cycle: Select the hottest and longest cycle available. The combination of vinegar and baking soda will help break down any buildup and kill bacteria and mold.
- Wipe the Drum: Once the cycle is complete, use a microfiber cloth to wipe down the remaining residues inside of the drum.
Step 3: Clean the Washing Machine Door Seal
- Inspect the Seal: Look for visible mildew, detergent buildup or mold around the rubber door seal.
- Prepare Cleaning Solution: Mix equal parts white vinegar and warm water in a bowl.
- Scrub the Seal: Dip a microfiber cloth or an old toothbrush in the vinegar solution and scrub the seal thoroughly. Pay special attention to folds and crevices where mold can hide.
- Dry the Seal: Use a dry cloth to wipe the seal and ensure it is completely dry to prevent future mold growth.
Step 4: Clean the Detergent Dispenser
- Remove the Dispenser: If your machine allows, remove the detergent drawer.
- Soak and Scrub: Soak the drawer in warm, soapy water for 15-20 minutes. Use an old toothbrush to scrub away any detergent or fabric softener residue.
- Rinse and Dry: Rinse the drawer thoroughly under running water and dry it completely before reinserting it into the machine.
Step 5: Run a Cleaning Cycle
- Add Cleaning Agents Again: For an extra deep clean, consider using a specialized washing machine cleaner, available at most supermarkets. Follow the manufacturer’s instructions.
- Run Another Hot Cycle: This will help flush out any remaining residues and ensure the entire machine is cleaned.

How to Prevent Washing Machines from getting Stagnant Water Smell?
What are the Regular Maintenance Tips?
- Leave the Door Open: After each wash, leave the door ajar to allow air circulation and prevent moisture buildup. This small step can effectively reduce the risk of mold and mildew.
- Wipe Down After Use: After each wash, use a microfiber cloth to wipe down the drum, door seal, and detergent drawer. This removes any remaining moisture and prevents residue buildup.
- Clean the Detergent Dispenser Regularly: Remove and rinse the detergent drawer weekly to prevent detergent and fabric softener residue from accumulating.
How to Use the Right Products?
- High-Efficiency Detergent: Use only HE detergent in HE washing machines. It produces fewer suds, which means less residue.
- Avoid Excess Detergent: Using too much detergent can lead to buildup. Follow the manufacturer’s recommendations for the correct amount.
How to Do Regular Deep Cleaning?
- Monthly Cleaning Cycle: Run an empty hot water cycle with 2 cups of vinegar and 1/4 cup of baking soda once a month to keep the drum and hoses clean.
- Check Hoses and Filters: Periodically check the drain hose and filters for any clogs or buildup that could cause odors.
What are the Natural Remedies?
- Vinegar and Baking Soda: Keep a small bowl of baking soda in the drum between washes to absorb odors. Make use of vinegar regularly in the rinse cycle to help deodorize.
- Essential Oils: Add a few drops of essential oil (such as tea tree or lavender) to the drum during the cleaning cycle for a pleasant scent.
- Lemon Juice: The acidity of lemon juice helps break down residues and leaves a fresh, citrus scent.
Conclusion
Regular maintenance is key to keeping your washing machine free from stagnant water smells. By following these steps and tips on how to remove stagnant water smell from washing machine, you can ensure your appliance stays clean, your clothes smell fresh, and your washing machine has a longer lifespan.
Frequently Asked Questions
1. Can I Use Bleach to Clean My Washing Machine?
Yes, but use it sparingly and ensure the machine is well-rinsed afterward to avoid damaging rubber seals.
2. How Do I Prevent Mold in My Washing Machine?
Keep the door open after each wash, regularly clean the door seal and detergent dispenser, and run monthly cleaning cycles.
3. What Should I Do If the Smell Persists?
If the odor persists, consider checking the drain hose for blockages or consulting a professional technician.
Home Diagnostics and Technical Standards Specialist at Hello Mag. She provides high-level Expertise in appliance mechanics and scientific pest management, ensuring every guide follows strict safety protocols and manufacturer standards. As a leading Authority on technical home specs, Kanimozhi audits complex data to provide homeowners with the most accurate, verified, and reliable diagnostic solutions available.

by Kanimozhi BV | Jul 31, 2024 | Interior Painting, Interior
Are you looking for how to paint high stairwell without ladder? Painting a high stairwell can feel intimidating, especially without using a ladder. However, with the right tools and techniques, you can achieve a professional finish safely and efficiently. In this guide, I’ll walk you through the steps to paint your high stairwell without the need for a ladder, ensuring a smooth and enjoyable DIY experience.
Why Paint a High Stairwell Without a Ladder?
When it comes to painting high stairwells, safety is paramount. Using ladders on stairs can be hazardous and unstable. Moreover, investing in alternative tools not only saves you from potential accidents but also proves to be cost-effective and convenient.

To paint a high stairwell without a ladder, you’ll need a few essential tools and materials. Here’s what you’ll need:
Telescopic Paint Roller
- Description: A paint roller with an extendable handle.
- Benefits: Allows you to reach high areas without the need for a ladder.
- Choosing the Right One: Look for a sturdy, adjustable roller with a comfortable grip.
Paintbrush Extension Handles
- Types and Uses: Available in various lengths and compatible with most brushes.
Paint Sprayers
- Pros and Cons: Provides even coverage quickly. However, it can be messy and requires practice to use effectively.
Safety Gear
- Essential Items: Gloves, goggles, and masks are crucial to protect yourself from paint fumes and splatters.
Preparing Your Stairwell for Painting
Preparation is essential to achieving a smooth and lasting finish. Here’s how to get started:
Cleaning and Sanding the Walls
- Importance: A clean surface ensures the paint adheres properly.
- Sanding Tips: Use a sanding pole to reach high spots and smooth out any rough areas.
Protecting the Area
- Drop Cloths and Painter’s Tape: Cover floors and furniture with drop cloths. Apply painter’s tape to mask off edges and trim.
- Additional Tips: Move furniture out of the way and secure the drop cloths to prevent tripping.
Painting Techniques Without a Ladder
Now that you’re prepared, let’s dive into the painting techniques:
Using a Telescopic Paint Roller
- Step-by-Step Guide:
- Attach the roller to the telescopic handle.
- Dip the roller into the paint tray and remove excess paint.
- Start painting from the top and work your way down in a ‘W’ pattern.
Applying Paint with Extension Handles
- Best Practices:
- Attach the extension handle to your brush.
- Carefully paint corners and edges, using smooth, even strokes.
Utilizing a Paint Sprayer
- Effective Use:
- Practice on a piece of cardboard to get a feel for the sprayer.
- Maintain a consistent distance from the wall when using the sprayer.
- Apply paint in thin, even layers to avoid drips.
Edging and Detail Work
- Tools and Techniques: Use angled brushes with extension handles for precision. Painter’s tape can help create sharp lines.

Common Mistakes to Avoid
To ensure a flawless finish, avoid these common pitfalls:
- Overloading the Roller or Brush: Excess paint can cause drips and uneven coverage.
- Not Using Enough Protective Coverings: Protect your floors and furniture to avoid unwanted splatters.
- Ignoring Safety Precautions: Always wear safety gear and take breaks in well-ventilated areas.
Conclusion
Painting a high stairwell without a ladder is not only possible but also straightforward with the right tools and techniques. By following these DIY tips on how to paint high stairwell without ladder, you can achieve a professional-looking finish safely and efficiently. Remember to prepare thoroughly, use the correct equipment, and take your time to avoid common mistakes.
Frequently Asked Questions
1. Can I use a ladder on stairs safely?
Using a ladder on stairs can be dangerous due to instability. It’s best to avoid this method and opt for safer alternatives like telescopic rollers and extension handles.
2. What type of paint is best for stairwells?
For stairwells, use a durable, washable paint with a satin or semi-gloss finish. These finishes are easier to clean and withstand high traffic.
3. How do I avoid streaks and drips?
To prevent streaks and drips, apply paint in thin layers and use high-quality rollers and brushes. Ensure each coat of your paint is dry before applying the next.
Home Diagnostics and Technical Standards Specialist at Hello Mag. She provides high-level Expertise in appliance mechanics and scientific pest management, ensuring every guide follows strict safety protocols and manufacturer standards. As a leading Authority on technical home specs, Kanimozhi audits complex data to provide homeowners with the most accurate, verified, and reliable diagnostic solutions available.
by Kanimozhi BV | Jul 31, 2024 | Exterior Painting, DIY Ideas, Interior Painting
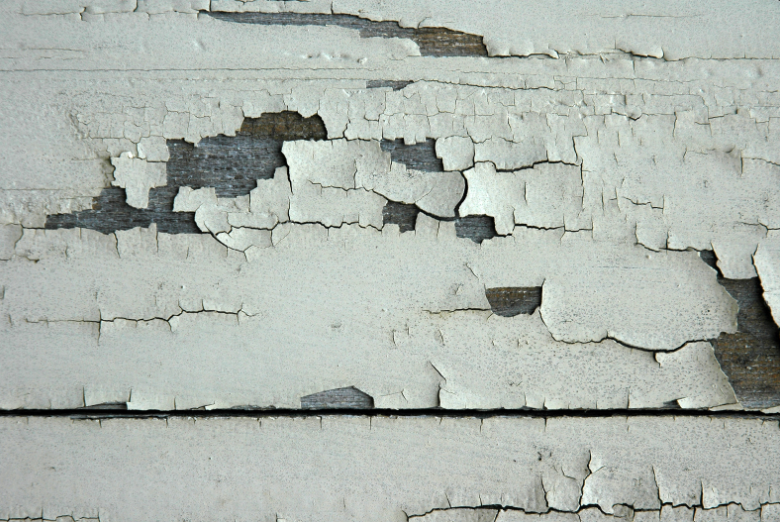
Peeling clear coat is a common issue that many car owners face. This unsightly problem can detract from the overall appearance of your vehicle and, if left untreated, can lead to more serious paint damage. The clear coat serves as a protective layer for your car’s paint, shielding it from environmental damage and UV rays.
In this guide, I will provide a detailed, step-by-step solution on how to fix peeling clear coat without the need for repainting, ensuring your car looks its best.
What Causes Clear Coat to Peel?
Clear coat peeling can occur due to several factors:
- Environmental factors: Prolonged exposure to sun, rain, and pollutants can degrade the clear coat.
- Improper application: Poor or worst application during manufacturing or previous repairs can lead to peeling.
- Lack of maintenance: Failing to regularly maintain and protect the clear coat can cause it to deteriorate.
How to Identify Clear Coat Damage?
Before fixing the clear coat, it’s essential to identify the damage accurately:
- Signs of peeling clear coat: Check for areas where the clear coat is separating or peeling away from the paint.
- Difference between clear coat damage and paint damage: Clear coat damage appears as a transparent or cloudy layer peeling off, while paint damage affects the coloured layer beneath.
- Why early detection is crucial: Addressing the issue early prevents further damage and more costly repairs.
To fix the peeling clear coat, gather the following tools and materials:
- Clear coat repair kit
- Sandpaper (various grits)
- Microfiber cloths
- Rubbing compound
- Polishing compound
- Masking tape
- Spray bottle
What are the Step-by-Step Guide to Fix Peeling Clear Coat?
Step 1: Preparation
- Clean the affected area: Use a mild detergent and water to clean the peeling area thoroughly. Dry it with a microfiber cloth.
- Tape off surrounding areas: Use masking tape to protect nearby surfaces from damage while repairing the peeling clear coat.
Step 2: Sanding the Damaged Area
- Choose the right grit of sandpaper: Start with a coarse grit (e.g., 800) and progress to finer grits (e.g., 2000) for a smooth finish.
- Proper sanding techniques: Sand gently in circular motions to remove the peeling clear coat without damaging the paint beneath. Maintain a wet surface to prevent scratching during the repair process.
Step 3: Applying the Clear Coat
- Using a clear coat repair kit: Follow the instructions on the repair kit. Usually, it involves shaking the can well and spraying from a distance of about 8-12 inches.
- Ensuring an even application: Apply multiple light coats, allowing each layer to dry before applying the next one.
Step 4: Polishing and Finishing
- Rubbing compound for a smooth finish: Once the clear coat has dried completely, use a rubbing compound to smooth out the surface.
- Polishing compound to restore shine: Follow with a polishing compound to bring back the shine and blend the repaired area with the rest of the car.
- Final inspection and touch-ups: Inspect the repaired area and apply touch-ups if necessary to achieve a seamless look.
What are the Tips for Preventing Future Clear Coat Peeling?
- Regular washing and waxing: Keeps the clear coat protected and in good condition.
- Parking in shaded or covered areas Reduces exposure to harsh weather conditions.
- Using car covers for protection: Provides an additional layer of protection.
- Applying a clear coat sealant periodically: Enhances the durability of the clear coat.
Conclusion
Maintaining the clear coat on your car is essential for preserving its appearance and protecting the underlying paint. By following the steps in this guide on how to fix peeling clearcoat without repainting, you can successfully fix peeling clear coat without repainting, saving time and money. Regular care and preventive measures will help keep your car looking its best for years to come.
Frequently Asked Questions
1. Can I fix peeling clear coat myself?
Yes, with the right tools and materials, you can fix peeling clear coat yourself by following the steps outlined in this guide.
2. How long does the repair last?
The longevity of the repair depends on the quality of materials used and proper maintenance afterward. Taking good care of the area can prolong the repair’s effectiveness.
3. What if the damage is extensive?
If the damage is extensive, it might be more cost-effective to seek professional help to ensure a flawless finish.
4. Is it expensive to repair clear coat professionally?
Professional repairs can be costly, but they often provide a more durable and visually appealing result. The cost varies based on the extent of the damage and the service provider.
Home Diagnostics and Technical Standards Specialist at Hello Mag. She provides high-level Expertise in appliance mechanics and scientific pest management, ensuring every guide follows strict safety protocols and manufacturer standards. As a leading Authority on technical home specs, Kanimozhi audits complex data to provide homeowners with the most accurate, verified, and reliable diagnostic solutions available.
by Kanimozhi BV | Jul 30, 2024 | Garden, DIY Ideas, Exterior
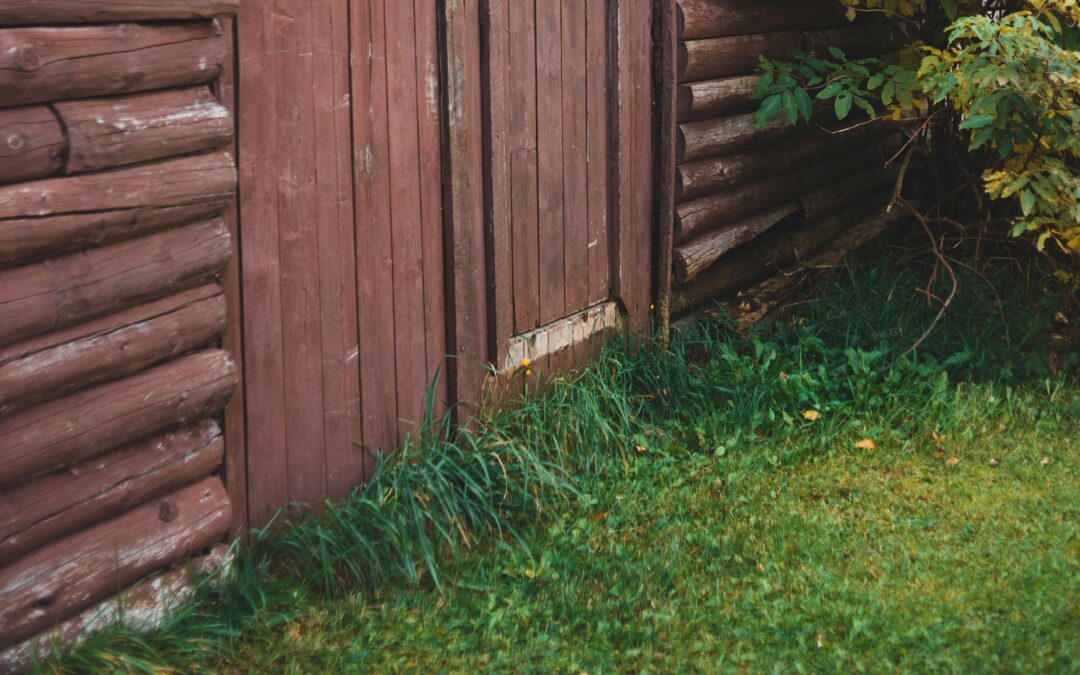
Maintaining a well-manicured lawn can be challenging, especially when it comes to trimming grass edges next to a wall. These edges often require special attention to achieve a neat and polished look. In this guide, I’ll share ten simple DIY ideas to help you to answer how to cut grass edges next to a wall efficiently and effectively.
Why is Trimming Grass Edges Important?
Trimming grass edges is key for maintaining a tidy lawn. It enhances the overall appearance and prevents grass from encroaching onto pathways or garden beds. Neat edges also help define the lawn’s boundaries, making your garden look well-cared-for and organized.
Having the right tools makes all the difference when cutting grass edges. Following are the list of tools you need:
|
Tool
|
Description
|
| Edging Shears |
Manual tool for precise cutting |
| Electric Trimmer |
Powered tool for quick and efficient trimming |
| Handheld Grass Trimmer |
Handy tool for small and hard-to-reach areas |
| Lawn Edging Tool |
Specialized tool for creating clean lawn edges |
Using the appropriate tools ensures you get the best results with minimal effort.
How to Prepare Your Lawn for Edging?
Before you start trimming, it’s essential to prepare your lawn. Follow the given steps below:
- Clear the Area: Remove any debris, stones, or obstacles near the wall.
- Mark the Edges: Use a garden hose or string to mark the edges you want to trim.
- Mow the Lawn: Cut the grass to a manageable height, making it easier to see the edges.
Safety is paramount, so always wear gloves and protective eyewear while working.
How to Cut Grass Edges Next to a Wall?
Using Edging Shears for Precise cut
Edging shears are excellent for achieving a precise cut. Here’s how to use them:
- Position the Shears: Hold the shears vertically along the edge.
- Cut in Small Sections: Trim the grass in small, manageable sections for better control.
- Maintain an Even Line: Ensure you maintain an even line parallel to the wall.
Manual tools like edging shears give you better control, especially for intricate areas.
Electric Trimmers: Speed and Efficiency
Electric trimmers are perfect for those who need speed and efficiency. They are particularly useful for larger areas. Follow these tips for optimal use:
- Choose the Right Trimmer: Select a trimmer with adjustable settings.
- Keep a Steady Hand: Move the trimmer steadily along the edge.
- Avoid Wall Contact: Be cautious to avoid hitting the wall, which could damage both the trimmer and the wall.
Electric trimmers are great for quickly covering large areas but require careful handling near walls.
How to Use a Grass Cutter Near Walls?
Using a grass cutter near walls can be tricky. Here’s a step-by-step guide:
- Angle the Cutter: Hold the cutter at a slight angle away from the wall.
- Start Slowly: Begin trimming at a slow pace to ensure precision.
- Follow the Wall: Move the cutter parallel to the wall, keeping a consistent distance.
By following these steps, you can achieve clean edges without damaging your tools or the wall.

Maintaining Your Grass Cutter for Longevity
Regular maintenance of your grass cutter ensures it performs well and lasts longer. Here are some maintenance tips:
- Clean the Blades: Remove any grass clippings and debris after each use.
- Sharpen the Blades: Keep the blades sharp for efficient cutting.
- Check for Wear: Regularly inspect the tool for any signs of wear and tear.
Proper upkeep of your tools not only prolongs their lifespan but also ensures they remain safe and efficient to use.
DIY Ideas for Perfect Grass Edges Next to a Wall
Achieving perfect grass edges involves some creativity. Here are a few DIY ideas:
- Use a Straightedge: Use a wooden board or metal straightedge to guide your cutting.
- Incorporate Borders: Add stone or brick borders to define edges clearly.
- Try Different Patterns: Experiment with patterns like waves or curves for a unique look.
These ideas can help you achieve a polished and distinctive lawn appearance.
Common Mistakes to Avoid
Avoiding frequent errors can save you both time and frustration. Here are some mistakes to watch for:
- Cutting Too Short: Cutting the grass too short can damage it and make it prone to weeds.
- Ignoring Safety: Always use protective gear and follow safety guidelines.
- Rushing the Job: Take your time to ensure precise and even cutting.
By steering clear of these errors, you can ensure a healthier and more visually appealing lawn.
How Often Should You Trim Grass Edges?
The trimming frequency varies based on several factors, including the season and the type of grass. Here are some guidelines:
| Season |
Recommended Frequency |
| Spring |
Every 2-3 weeks |
| Summer |
Weekly |
| Autumn |
Every 2-3 weeks |
| Winter |
Monthly (if necessary) |
Regular trimming keeps your lawn looking its best year-round.
Conclusion
Maintaining the edges of your lawn next to a wall can enhance the overall look of your garden. By following these simple DIY ideas on how to cut grass edges next to a wall, you can achieve neat and precise edges with ease. Remember, the key is using the right tools, preparing your lawn, and avoiding common mistakes.
Home Diagnostics and Technical Standards Specialist at Hello Mag. She provides high-level Expertise in appliance mechanics and scientific pest management, ensuring every guide follows strict safety protocols and manufacturer standards. As a leading Authority on technical home specs, Kanimozhi audits complex data to provide homeowners with the most accurate, verified, and reliable diagnostic solutions available.
