
by Kanimozhi BV | Aug 4, 2025 | Kitchen, Interior
How much is a Howdens Kitchens Prices?
A Howdens kitchen typically costs between £3,000 and £15,000, depending on size, style, and whether it’s supply-only or fully fitted.
When I was getting quotes for my kitchen renovation, I quickly realised that the price could vary massively. If you’re like me and wondering how much is a Howdens kitchens prices, here’s what you need to know:
- Small supply-only kitchen: £3,000–£5,000
- Medium fitted kitchen: £6,000–£10,000
- Large, premium kitchen: £10,000–£15,000+
These prices don’t always include installation, appliances, or specialist work like plumbing or electrics — so it’s important to ask for a full cost breakdown.
Are Howdens Kitchens Expensive?
Not necessarily. Howdens kitchens are mid-range and can be cost-effective if you manage the design and installation smartly.
When people ask me, “Are Howdens kitchens expensive?” I tell them it depends on how you’re buying.
Because Howdens sells directly to trade professionals, they offer a level of price flexibility you won’t find at high-street kitchen showrooms. The downside? You need a builder or fitter to access trade prices.

What is the average price of a Howdens kitchen?
The average price of a Howdens kitchen is around £6,000–£8,000 for a medium-sized layout, including kitchen cabinets, worktops, and basic appliances (but excluding fitting).
Here’s a rough guide:
| Kitchen Size |
Average Supply-Only Cost |
Average Fully Fitted Cost |
| Small |
£3,000–£4,500 |
£5,000–£7,000 |
| Medium |
£4,500–£7,000 |
£7,000–£10,000 |
| Large |
£7,000–£10,000+ |
£10,000–£15,000+ |
Do Howdens do interest free credit?
No, Howdens themselves do not offer interest-free credit to homeowners. But, your builder or trade account holder might offer payment plans or finance options through their own agreements.
When I asked about payment options, I found out that since Howdens operates on a trade-only basis, they don’t deal directly with the public financially.
However, many tradespeople allow staged payments, so it’s worth discussing early on.

Are Howdens kitchens any good?
Yes – Howdens kitchens are well-built, long-lasting, and stylish, offering solid value for money.
In my experience, Howdens kitchens are any good if you want a balance between durability, style, and cost. I chose rigid pre-assembled units, and the quality was impressive: soft-close drawers, sturdy construction, and easy installation.
Customers on platforms like Trustpilot often highlight:
- Great variety of styles
- Good value if bought through a trusted fitter
- Long-lasting materials
But there are occasional complaints about pricing transparency and trade-only limitations.
What is the average price of a fully fitted kitchen?
The average price of a fully fitted kitchen in the UK is £8,000 to £15,000, including cabinets, worktops, appliances, and installation.
Here’s how the price typically breaks down:
| Component |
Cost Range |
| Kitchen Units |
£2,500–£5,000 |
| Worktops |
£500–£2,000 |
| Appliances |
£1,000–£3,000 |
| Installation |
£1,500–£4,000 |
| Electrics/Plumbing |
£500–£1,500 |
Who is cheaper, Howdens or Wren?
Howdens is usually cheaper for supply-only kitchens, but Wren may be more cost-effective for fully fitted solutions.
Here’s my direct comparison:
| Feature |
Howdens |
Wren Kitchens |
| Pricing Model |
Trade-only |
Direct to consumer |
| Supply-Only Cost |
Often cheaper |
Less flexible |
| Fully Fitted Cost |
Higher (add installer) |
Often included |
| Flexibility |
High (via builder) |
Lower |
| Credit Options |
Via builder |
Yes, including 0% APR |
So, who is cheaper, Howdens or Wren? If you already have a trusted fitter, Howdens might come out on top. But if you want everything handled in one place, Wren offers more packaged deals.
Do Howdens negotiate on price?
Yes – Howdens often negotiates on kitchen prices, especially through your builder or trade contact.
When I was ready to go ahead with my order, my fitter was able to secure a better deal by negotiating directly with the depot. That’s one of the main advantages of their trade-only system.
To get the best price:
- Ask your builder to request discounts
- Get a quote from more than one Howdens branch
- Bundle multiple purchases (units + appliances)
- Shop end-of-line or ex-display ranges

What’s included in a Howdens quote?
Most Howdens kitchens prices cover:
- Kitchen units and cabinets
- Doors, handles, hinges
- Worktops
- Optional appliances
- Design consultation
- VAT
But remember: fitting, removal of old kitchen, plumbing, tiling, and any custom carpentry are not included unless your installer adds them to their quote.
Can I get a Howdens kitchen supply-only?
Yes — and that’s how most homeowners buy it. I chose a supply-only Howdens kitchen and hired my own fitter. It gave me more control and helped keep costs down.
Here’s a quick cost breakdown:
| Kitchen Size |
Supply-Only Price |
| Small |
£3,000–£4,500 |
| Medium |
£4,500–£7,000 |
| Large |
£7,000–£10,000+ |
How much does Howdens kitchen installation cost?
Installation costs range from £800 to £4,000, depending on kitchen size, location, and complexity.
Factors affecting cost:
- Kitchen size and layout
- Worktop type (laminate vs granite)
- Existing plumbing/electrics
- Specialist appliances (e.g., range cooker)
| Kitchen Size |
Installation Cost Range |
| Small |
£800–£1,500 |
| Medium |
£1,500–£2,500 |
| Large |
£2,500–£4,000+ |
I personally paid around £2,200 for a medium kitchen, which included electrics, plumbing and fitting.

Tips to reduce Howdens kitchen costs
Here’s how I managed to save on my Howdens kitchen:
- Use standard door finishes instead of premium ranges
- Choose laminate worktops over quartz or granite
- Reuse existing appliances if still in good condition
- Buy your own appliances separately online
- Ask for discounts and bundle deals through your fitter
Conclusion: Is a Howdens kitchen worth it?
Yes — in my opinion, Howdens kitchens are worth the price if you’re hands-on and have a reliable fitter. With strong build quality, design flexibility, and a wide product range, it’s a great option for anyone who wants value without compromising style.
The key is in the planning and negotiation. Don’t be afraid to ask for discounts, compare multiple depots, and break down every quote you get.
Related a Article: Average Cost Of An IKEA Kitchen UK
Frequently Asked Questions (FAQs) On Howdens Kitchens Prices
1. How much is a basic Howdens kitchen?
A basic supply-only Howdens kitchen typically starts from £3,000 to £4,500, depending on size, cabinet style, and worktop material.
2. Are Howdens kitchens any good for long-term use?
Yes. Howdens kitchens are known for their durability, sturdy construction, and timeless design options. Many come with a 25-year cabinet guarantee when installed by a trade professional.
3. Do Howdens do interest free credit?
No, not directly. Howdens does not offer interest-free credit to consumers, but your builder or trade account holder may provide finance options independently.
4. Can I negotiate kitchen prices with Howdens?
Absolutely. Do Howdens negotiate on price? Yes — prices can vary by branch, and tradespeople often get exclusive discounts, so it’s worth asking for a better deal.
5. Who is cheaper, Howdens or Wren?
Howdens is usually cheaper for supply-only kitchens, especially if you already have a fitter. Wren can be cheaper overall if you need a fully managed service including fitting.
6. What is the average price of a Howdens kitchen including fitting?
For a medium-sized kitchen, the average fully fitted cost is between £7,000 and £12,000, depending on layout complexity and product choices.
7. Can I visit Howdens without a trade account?
Yes, you can visit showrooms and book a design appointment, but you’ll need a trade professional to place an order on your behalf.

by Kanimozhi BV | Aug 1, 2025 | Refrigerator, Appliances
When freezing leftovers, they should be cooled within 4 hours. True or false?
Answer: False.
If you’re freezing leftovers, you should cool them and refrigerate within 2 hours, not 4. While 4 hours might sound like a generous window, it’s actually too long when it comes to food safety.
Letting cooked food sit at room temperature for more than 2 hours allows bacteria to multiply quickly — and that’s something freezing won’t fix.
Understanding why this is important can help you stay healthy, avoid food waste, and make your meals last longer — especially if you’re a student cooking in bulk or saving portions for later.
Why 4 Hours Is Too Long? – The Real Risk Behind Cooling Food Improperly
When food is freshly cooked, it’s usually too hot to go straight into the fridge or freezer. But letting it sit for too long on the kitchen counter is where things go wrong.
Between 8°C & 63°C, which is the “danger zone” — a temperature range where bacteria thrive. Every extra minute your food stays in that range gives bacteria more time to grow. The longer the exposure, the higher the risk of food poisoning.
That’s why the Food Standards Agency (FSA) and NHS UK both recommend this rule:
“Cool cooked food quickly at room temperature and place in the fridge within 1 to 2 hours.”
So, if you’ve been waiting 3 or 4 hours before refrigerating or freezing food, you’re unknowingly increasing your risk of foodborne illness.

What Happens If You Don’t Cool Food Within 2 Hours?
If you leave food out too long before refrigerating or freezing:
- Bacteria begin to multiply rapidly, especially on high-protein foods like meat, rice, pasta, or dairy-based dishes.
- Some bacteria (like Clostridium perfringens) produce toxins that aren’t always destroyed during reheating.
- Freezing food doesn’t eliminate bacteria—it simply puts them in a dormant state. If the food was contaminated before freezing, those bacteria can become active again once thawed and reheated, potentially causing issues.
Put simply, food left out too long before freezing may already be unsafe, even if it looks or smells fine.
Why Not Put Hot Food Straight Into the Freezer?
You might think it’s better to skip the risk and freeze food immediately, even while it’s still hot. But that’s not safe either.
Putting hot food directly into your freezer:
- Raises the temperature inside the freezer, which can partially thaw other frozen items.
- Prevents your leftovers from freezing evenly, especially in the centre.
- Can create condensation and lead to poor food texture or freezer burn.
Freezing doesn’t work like an “instant safety switch.” The food needs to be cooled properly first, so that freezing can lock in freshness — not bacteria.
How Do You Cool Leftovers Safely and Quickly?
If you’re worried about timing, here’s what works — and what I use personally when prepping meals:
- Divide large portions into smaller containers. Smaller amounts cool faster.
- Use shallow containers. They spread the food out, allowing heat to escape more efficiently.
- Leave containers uncovered in a cool part of the room (away from the oven or stove). Once steam stops rising, cover and refrigerate.
- Stir food occasionally, especially sauces, soups, or rice, to release trapped heat.
Aim to have the food cool to the touch within 90 minutes — that’s the sweet spot. Then refrigerate it. Once chilled, it can be frozen safely.
How Long Can You Keep Leftovers in the Freezer?
Once your food is properly cooled and frozen, it can stay there for quite a while. Usually cooked foods are safe in the freezer for about to 3 months.
After that, they might still be edible, but the taste, texture, and nutritional value will start to decline.
To stay organised, use airtight containers or freezer bags, and label everything with the date you froze it. This makes it easier to track and rotate your meals.

Reheating Frozen Leftovers the Right Way
Once you’re ready to eat your frozen leftovers:
- Defrost them safely, either in the fridge overnight or using your microwave’s defrost setting.
- Reheat completely until steaming hot all the way through — mainly in the centre.
- Don’t reheat food more than once. Each cycle increases the chance of bacterial growth.
This is particularly important with dishes containing rice, meat, eggs, or dairy — these ingredients are more likely to harbour dangerous bacteria if mishandled.
Conclusion: What Every Student Should Remember
So, to answer the original question “When freezing leftovers, they should be cooled within 4 hours. True or false?” The answer is clearly: False.
For safe storage:
- Cool food within 2 hours
- Refrigerate promptly
- Freeze only once the food is cool
Following this rule keeps your food safe, saves money, and helps you make the most of your meals — especially when you’re batch cooking, meal prepping, or trying to make your food stretch on a student budget.
Related Article: What Is the Coldest Setting on a Fridge 1-7?
Frequently Asked Questions On When freezing leftovers, they should be cooled within 4 hours
1. Should frozen leftovers be cooled within 4 hours?
No. Waiting 4 hours gives bacteria time to grow, which can lead to unsafe food — even if you freeze it later. So, it must be done within 2 hours.
2. How many hours should leftovers be cooled?
Ideally within 90 minutes, and definitely no more than 2 hours. That’s the safe window before bacterial risk increases significantly.
3. How long is it safe to freeze leftovers?
Up to 3 months. Food may last longer, but quality starts to drop. Always label containers with the freeze date and use older items first.
4. Can I freeze food that’s been left out for 4 hours?
No. If food was at room temperature for more than 2 hours, then it is not safe whether to eat or freeze. Discard it to avoid foodborne illness.
5. Do leftovers need to be fully cold before freezing?
They don’t need to be ice-cold, but they should be cool to the touch. Most people refrigerate them first, then transfer to the freezer after an hour or two.

by Kanimozhi BV | Aug 1, 2025 | Window, DIY Ideas, Interior
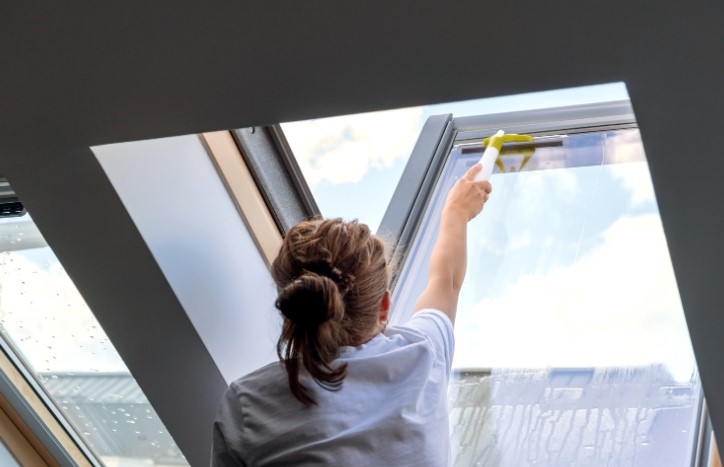
Skylight windows are a beautiful feature in any home—they flood rooms with natural light and open up the ceiling like a window to the sky.
But keeping them clean, especially from the inside, is easier said than done. I used to dread the job myself, thinking it required a professional.
But after trying a few different methods, I found that with the right tools and a bit of know-how, cleaning skylight windows from inside can be a simple DIY task.
Here’s exactlywhat i say on how to clean skylight windows from inside —from gathering supplies to leaving the glass streak-free.
Why Should I Clean Skylight Windows from the Inside?
Do I really need to clean skylight windows from inside?
Absolutely. Over time, dust, grime, and even spider webs can build up on the interior side of skylight windows. This not only blocks natural light but can also trap moisture, leading to issues like mould in sealent or water staining.

How often should I clean skylight windows indoors?
I usually clean mine twice a year—once in early spring and again in autumn. However, if you live in an area with high humidity or have cooking and bathroom skylights, you might want to do it more often.
Can dirty skylights affect light and heating in my home?
Yes. Dirt and film can reduce the amount of light that enters your home, making rooms feel duller and cooler. A clean skylight can actually improve your home’s energy efficiency by letting more sunlight in during the winter months.
What Do I Need to Clean Skylight Windows from Inside at Home?
Here’s what I keep in my skylight cleaning kit:
- Telescopic window cleaner with interchangeable heads
- Microfibre cloths
- Squeegee
- White vinegar and water (for DIY cleaning spray)
- Spray bottle
- Step ladder (if the skylight is low enough)
- Rubber gloves
Should I use a telescopic window cleaner for skylights?
Definitely. If your skylight is high or difficult to reach, a telescopic pole is the safest and easiest way to clean it without climbing. It helps me get into corners without leaning dangerously.
How to Clean Skylight Windows from Inside – Step-by-Step Guide
Step 1 – How do I remove dust from skylights?
First, I use a dry microfibre cloth attached to my telescopic tool to gently remove any dust or cobwebs. I don’t ignore this step—spraying cleaner onto dusty glass just makes muddy streaks.
Step 2 – What’s the best way to apply window cleaner?
I mix a DIY solution using 1 part white vinegar to 3 parts warm water in a spray bottle. Then, I spray it generously onto the skylight surface. Vinegar cuts through greasy films and works really well on glass.
Step 3 – How do I clean skylight glass without streaks?
Using a clean squeegee or another microfibre pad, I wipe the glass in long horizontal strokes, starting from the top. I always overlap slightly to avoid streaks and use a dry cloth to wipe the edges.
Step 4 – Should I clean skylight frames and corners too?
Yes! Frames can trap dust and moisture. I take a smaller cloth and gently wipe around the edges, seals, and any crevices. If I see any signs of mould, I use a diluted vinegar mix to kill it.
Step 5 – How do I dry skylights after cleaning?
Once I’ve cleaned the glass, I go over it one last time with a dry cloth or pad. This step helps prevent new dust from sticking and keeps things looking spotless.
What Is the Best DIY Cleaner for Skylight Windows?
Can I clean skylight windows with vinegar and water?
Yes, and that’s my go-to! It’s eco-friendly, affordable, and doesn’t leave streaks like some chemical sprays. I just mix it in a 3:1 water-to-vinegar ratio.
Are there safe eco-friendly cleaning solutions?
Aside from vinegar, a few drops of lemon juice in water or a splash of mild washing-up liquid can work too. These are great if you’re sensitive to vinegar’s strong smell.
Should I use shop-bought glass cleaner or make my own?
I’ve tried both. Store-bought sprays like Method or Ecover work well, but I often prefer DIY versions for their cost and gentleness on window seals.
Is It Safe to Clean My Skylight Windows from Inside?
Do I need a ladder or long-handled window cleaner?
When the skylight is within reach, a step ladder with rubber feet is fine and best. For higher ones, I always use a telescopic pole with a stable base.
What safety tips should I follow when cleaning skylights?
Here’s my go-to checklist:
- Never clean skylights when alone at home
- Always place the ladder on an even surface
- Wear shoes with grip soles
- Use tools with non-slip handles
- Lay a towel or sheet below to catch any drips
Can I clean skylights alone or should someone assist me?
If I’m using a ladder, I always ask someone to stay nearby—just in case. Even for simple cleaning, safety comes first.

What Are Some Easy Tips for Cleaning Skylight Windows from Inside?
Here are a few tips I’ve learned through trial and error:
- Clean on a cloudy day to avoid streaks
- Dust first, then spray—don’t skip it!
- Place towels underneath to protect your floor
- Use microfibre cloths—they’re streak-free
- Work in sections if you have multiple skylights
What Mistakes Should I Avoid When Cleaning Skylights from Inside?
Can I damage skylight glass using the wrong cleaner?
Yes. Avoid abrasive cleaners, scouring pads, or anything acidic beyond vinegar. These can scratch the glass or damage UV coatings.
Why shouldn’t I ignore the window seals and frames?
Mould and condensation love these areas. If they’re not cleaned regularly, they can cause rot or leakage—especially with Velux or older wooden frames.
Is it risky to overuse water on roof windows?
Yes. Excess water can seep into seams and cause leaks. I spray lightly and always dry the glass and frame after cleaning.
Table: What’s the Best Way to Clean Skylight Windows from Inside?
| Cleaning Method |
Pros |
Cons |
Best Use Case |
| Vinegar and water spray |
Eco-friendly, low-cost |
Strong smell |
Light dirt or smudges |
| Telescopic window cleaner |
No ladder required |
May miss corners |
High skylights |
| Microfibre cloth + spray |
No streaks, reusable |
Needs reach or ladder |
Low to mid skylights |
| Ladder and manual clean |
Thorough clean |
Safety risks |
Easy-access skylights |
Final Thoughts – Here’s How I Clean Skylight Windows from Inside
Cleaning skylight windows from inside doesn’t have to be difficult. With the right tools, a bit of prep, and safe steps, I manage to keep mine spotless all year round. I prefer using a DIY vinegar solution, a telescopic pole, and good lighting. Whether you’re working with a Velux window or a basic rooflight, the trick is to keep things consistent and safe.
FAQ – Cleaning Skylight Windows from Inside
If the Velux window opens inward, yes—you can easily reach and clean it by hand. For fixed models, a telescopic cleaner is best.
2. What’s the best way to clean very high skylights?
Use a telescopic pole with a squeegee head. If that doesn’t reach, you might need a small scaffold or hire a professional.
3. Will vinegar damage skylight seals or coatings?
Diluted vinegar is safe in small amounts. Avoid soaking seals, and always dry them after cleaning.
4. How often should I clean skylight glass indoors?
I recommend twice a year, or quarterly if you’re in a dusty or high-moisture environment.
5. Is it worth hiring a cleaner just for indoor skylights?
If your skylights are extremely high or awkwardly placed, hiring a pro can be safer and faster.

by Kanimozhi BV | Jul 31, 2025 | Window, DIY Ideas, Interior
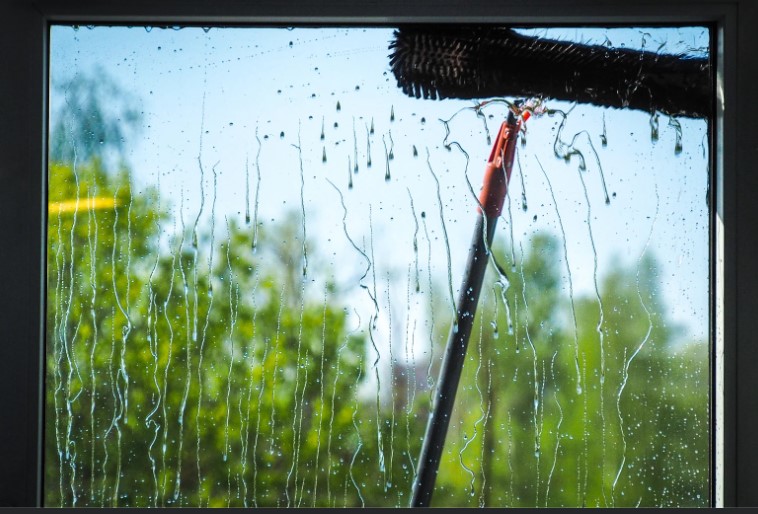
If you’re anything like us, waking up to foggy windows in the morning is all too familiar—especially during those chilly UK months.
Condensation on windows isn’t just annoying; over time, it can lead to mould, damp patches, and even damage to window frames.
Lately, we’ve seen loads of tips online on does vinegar stop condensation on windows, but is there any truth to it?
Let’s explore the facts and separate the myths from the fixes.
What Causes Condensation on Windows in the First Place?
Why do windows fog up indoors?
Condensation happens when warm, moist air inside the house meets the cold surface of the window. The water vapour turns back into liquid, forming droplets on the glass.
It’s most common in winter when there’s a big difference between indoor and outdoor temperatures.
Is condensation a sign of a bigger problem?
Sometimes yes. While a bit of fog is normal, excess condensation could point to poor ventilation, high indoor humidity levels, or insulation issues. Over time, this can encourage mould growth and rot—something we all want to avoid.
Can moisture levels in our homes affect condensation?
Absolutely. Activities like cooking, showering, or even drying clothes indoors can increase indoor humidity. Without proper air circulation, this moisture sticks around and collects on windows.

Does Vinegar Stop Condensation on Windows? – Is It True?
What’s the science behind using vinegar on windows?
White vinegar is known for its acidic properties that break down dirt and kill mould spores. While it doesn’t eliminate moisture from the air, some believe that a vinegar-based window spray can help by creating a film that repels water droplets more effectively.
How does a vinegar solution interact with moisture?
The acetic acid in vinegar may slightly reduce the surface tension on the glass, making it harder for condensation to form. However, it’s more of a temporary cleaning trick than a moisture-reducing solution.
Does vinegar reduce condensation or just clean the glass?
To be honest, vinegar is brilliant for cleaning and even preventing mould, but it won’t stop condensation from happening.
What it can do is help us maintain clean, streak-free windows that are less prone to mould build-up caused by lingering moisture.
How Do We Use Vinegar to Treat Condensation?
DIY vinegar spray recipe for window fog
Here’s a quick and easy DIY window spray using common household items.
Ingredients and Mixing Ratio
- 1 part white vinegar
- 1 part water
- A few drops of lemon juice (optional for scent)
Step-by-step application process
- Mix all ingredients in a clean spray bottle.
- Shake well before each use.
- Spray onto the inside of windows.
- Wipe using a microfibre cloth until dry.
How often should we apply vinegar on our windows?
For the best results, we recommend using the solution once a week—especially during winter when condensation is more likely.
Keep in mind this won’t solve the issue but will help keep your windows clean and mould-free.

What Are the Pros and Cons of Using Vinegar?
Pros: Natural, affordable, and widely available
- Easily found in UK supermarkets
- Environmentally friendly
- Kills surface mould and bacteria
- Leaves glass streak-free
Cons: Limitations of vinegar as a long-term fix
- Doesn’t reduce air moisture
- Has a strong smell (though temporary)
- Can damage wooden or rubber window frames if overused
Is it safe for all types of windows and frames?
Mostly yes, but we need to be cautious. While glass is fine, acidic vinegar can wear down the seals on double-glazed units or corrode wooden sills over time. Always test a small area first.
What Are Some Effective Alternatives to Vinegar?
Mechanical and ventilation solutions
- Use extractor fans in kitchens and bathrooms
- Install trickle vents on windows
- Keep a window slightly open when possible
Commercial anti-condensation sprays
These often contain surfactants or polymers that create a water-resistant layer on glass.
Home lifestyle changes to reduce moisture
- Avoid drying clothes indoors
- Use a dehumidifier in bedrooms or bathrooms
- Keep lids on pans when cooking
- Open windows for 10–15 minutes daily

Comparison Table: Vinegar vs Other Condensation Remedies
| Method |
Cost |
Ease of Use |
Long-term Effectiveness |
Eco-friendly |
| White Vinegar |
Low |
Easy |
Limited |
Yes |
| Dehumidifier |
Medium |
Easy |
High |
No (electricity) |
| Anti-condensation film |
Medium |
Moderate |
Moderate |
Yes |
| Opening windows |
Free |
Easy |
Moderate |
Yes |
Do Experts Recommend Vinegar for Condensation?
What do home improvement professionals say?
Most UK professionals agree: vinegar is not a long-term fix. It’s great for surface cleaning and may help temporarily, but to really fix condensation, we need to control the moisture in our homes.
What does science or research tell us?
Scientific sources focus more on humidity control and insulation than household hacks. Solutions like double glazing, ventilation systems, and dehumidifiers consistently rank higher in effectiveness.
When should we seek expert help?
If we’re seeing black mould, peeling paint, or condensation between double-glazed panes, it’s time to bring in a specialist. These could be signs of deeper structural or insulation issues.

Final Thoughts – Is Vinegar the Right Fix for Us?
Here’s what we’ve learned:
- Vinegar helps clean windows and can reduce mould buildup
- It doesn’t prevent condensation or change humidity levels
- It’s best used as part of a regular cleaning routine
- To truly fix condensation, we need to tackle the moisture source
✔ Key Takeaways:
- Vinegar = Cleaner glass, not drier air
- Use it weekly with care
- Pair it with real ventilation solutions for best results
Frequently Asked Questions (FAQ) On Does Vinegar Stop Condensation On Windows
1. Can I use apple cider vinegar instead of white vinegar?
Yes usage of apple cider vinegar play a vital role, but it may leave more residue and doesn’t clean as effectively.
2. Will vinegar damage window seals or rubber?
Over time, yes. Its acidity can wear down seals if used excessively.
3. How long does the vinegar effect last on windows?
A few days to a week. It’s not permanent but helps reduce mould short-term.
4. Can vinegar help prevent mould around windows too?
Definitely. Vinegar kills many types of mould spores and is great for prevention.
5. Is there a permanent fix for condensation?
Yes — better ventilation, dehumidifiers, and window insulation offer long-term results.
If you’ve been spraying vinegar and still waking up to foggy glass, don’t worry — we’ve all been there. It’s a helpful tool, but not a miracle solution. Let’s keep those windows sparkling while working on smart, long-term fixes for a drier, healthier home.

by Kanimozhi BV | Jul 30, 2025 | Pest Control, Exterior, Interior
When I first spotted those slimy trails winding across my kitchen tiles, I thought, “What on earth is leaving this behind?” Turns out, it was slugs—quiet, slow-moving invaders sneaking in from the garden.
That discovery sent me down a bit of a rabbit hole: how long do slugs live, really? And more necessarily, how do I stop them from demolishing my plants and crawling into my home?
If you’re dealing with the same questions, you’re in the right place.
Let me walk you through everything I’ve learned about slugs—how long they live, where they hide, and how to deal with them the natural way, especially here in the UK.
Understanding the Slug Life Cycle in the UK
What’s the average lifespan of a garden slug?
Believe it or not, most slugs live for about 1 to 2 years. But if conditions are just right—plenty of moisture, steady food sources, and no predators—they can stretch that to 2 or even 3 years. That’s a long time for a creature that spends most of its life in the dirt!
What’s the full lifecycle of a slug?
- Eggs – Laid in damp, hidden spots like under leaves or stones. A single slug can lay up to 300 eggs a year.
- Juveniles – Hatch and grow slowly, usually over several months.
- Adults – Once mature, they initiate the cycle all over again.
Depending on the species and the weather, the whole cycle can wrap up in just a few months.
When are slugs most active in the UK?
You’ll see the most slug activity from March through October, especially after it rains. They come out at night or early morning when it’s cool and damp, then hide away during the day.
Where Do Slugs Live and Thrive in UK Homes & Gardens?
Why do slugs love damp spaces so much?
Slugs don’t just like moisture—they need it to survive. Their bodies are made up mostly of water, so without damp surroundings, they dry out fast. Outdoors, they’re often under pots, inside compost heaps, or buried in mulch.
Indoors, you’ll find them in basements, kitchens, and bathrooms—anywhere they can stay moist and hidden.
How are slugs getting inside my house?
They’re sneaky little things. Slugs can squeeze through tiny cracks in door frames, window vents, and even drainpipes. If the weather’s wet and your home is warm, it’s an open invitation.
Could I be mistaking slugs for other pests?
Definitely. Young slugs, especially, can look like other common UK pests like cutworms, leatherjackets, or even millipedes. The giveaway is the shiny slime trail they leave behind.

What Are the Signs of a Slug Infestation?
How can I tell if slugs are damaging my plants?
You’ll usually notice:
- Irregular holes in leaves (mainly lettuce, hostas, and strawberries)
- Shiny, silver trails across the soil or foliage
- Seedlings disappearing overnight
If any of that sounds familiar, slugs are likely the culprits.
What should I look for inside the house?
Indoors, look for:
- Slime trails on the floor or carpet
- Slugs under appliances or kitchen cabinets
- A musty smell from damp corners (a sign they may be hiding there)
What do slime trails actually mean?
Those trails assist slugs spot their way back to food. So if you’re seeing trails consistently, it’s a sign they’ve set up camp nearby.
How Long Do Slugs Live in Different Conditions?
Do slugs live longer indoors or in the garden?
Indoors, slugs usually survive a few months to a year—mainly depending on how dry your home is. Outdoors, especially in moisty damp gardens or compost heaps, they can live 2–3 years if they avoid predators.
How long can a garden snail or slug survive underwater?
Slugs can survive underwater for a few hours, and some can stretch it to a few days in oxygen-rich water. But they’re not aquatic creatures—they need to breathe, and too much time submerged will drown them.
Can slugs live without food or water?
Without food, a slug might last up to a week, but without water? Not long at all. Just a day or two in dry conditions can dehydrate and kill them.
How do slugs handle extreme weather?
Slugs are surprisingly adaptable. During dry summers, they’ll burrow into the soil to stay cool. In winter, many species go dormant—almost like hibernating—until spring returns.

Do Garden Slugs Have a Purpose in Nature?
Are slugs actually useful?
Yes, as annoying as they are, slugs do have a job. They break down decaying plant material and help recycle nutrients back into the soil. Consider them as part of nature’s compost group.
How do they affect compost and soil health?
In compost heaps, slugs help accelerate decomposition, breaking down food scraps and plant waste. But be warned: too many slugs in your compost can turn it into a breeding ground.
When do slugs go from helpful to harmful?
Once their numbers get out of hand—and they often do—they can destroy young plants, spread disease, and invite other pests into your garden.
What’s the Longest Living Slug Ever Recorded?
What’s the record for slug longevity?
The North American banana slug can live up to 7 years in ideal conditions, though that’s rare. Here in the UK, species like the great grey slug typically live for 2–3 years at most.
Why does the environment matter so much?
Humidity, food, and shelter are key. Slugs living in protected spaces like compost bins or under mulch live longer than those exposed to predators or dry conditions.
Can slugs survive UK winters?
Yes, many UK slugs simply go dormant during winter. They’ll hide in deep soil, mulch, or compost piles and emerge when it warms up.

How I Got Rid of Slugs? – The Natural Way
What natural slug control methods actually work?
These are some that worked in my own garden:
- Copper tape around plant pots and doorways
- Beer traps sunk into the soil (they love yeast)
- Crushed eggshells or sharp gravel to deter crawling
- Hand-picking at dusk or dawn (yes, I’ve done it!)
- Encouraging predators like frogs, hedgehogs, and bird
How did I stop them from coming inside?
- I sealed gaps around doors and windows with weather stripping
- Made sure to fix leaks and reduce damp areas
- Used essential oils like peppermint as natural deterrents
- Placed copper strips near door thresholds
What plants naturally keep slugs away?
Some great slug-repelling plants for UK gardens include:
- Lavender
- Rosemary
- Foxgloves
- Ferns
- Geraniums
These either have strong scents or textures that slugs hate.
Table: Slug Life Expectancy in Various Environments
| Environment |
Lifespan Estimate |
Common Risks |
| Outdoor Garden (UK) |
1–2 years |
Predators, weather extremes |
| Indoors (damp areas) |
6–12 months |
Dry air, lack of food |
| Compost Heaps |
2–3 years |
Overcrowding, overheating |
| Underwater |
Few hours to a few days |
Drowning, lack of oxygen |

Final Thoughts On How Long Do Slugs Live: Know Your Enemy (and Outsmart It)
Slugs might be slow, but when it comes to taking over your garden or sneaking into your home, they’re surprisingly efficient.
Understanding how long do slugs live, where they hide, and how they reproduce gives you the power to take action before things get out of hand.
By combining a few natural control methods and keeping an eye on damp areas, I was able to reduce the slug problem drastically in my own home and garden—and you can too.
Quick Answers: FAQs On How Long Do Slugs Live
1. Can slugs live without a shell like snails?
Yes—they’re basically shell-less snails and evolved that way.
2. Are all slugs bad for my plants?
Not necessarily. Some prefer decaying matter, but when food is scarce, even those can start eating live plants.
3. How fast do slugs reproduce?
Very fast. Some slugs can lay hundreds of eggs each year, and since many are hermaphrodites, every one of them can reproduce.
