
by Kanimozhi BV | Jan 21, 2026 | Coffee Machine, Appliances
⚡ Quick Fix: The 5-Second Reset
If you have already descaled your machine but the light remains orange, the internal counter hasn’t been reset. With the machine plugged in but turned off (Standby Mode), press and hold the power button for 5 to 15 seconds until the light flashes and turns solid green. This manually clears the descaling alert.
Why Is Dolce Gusto Orange Light Still On After Descaling Coffee Maker?
Most Dolce Gusto models (such as the Genio S, Piccolo, or Mini Me) operate on a usage counter rather than a physical sensor that sees the limescale. The machine is programmed to trigger the orange alert after approximately 300 uses.
If you have already followed the steps for how to clean and descale a Dolce Gusto coffee machine but the light remains stubborn, the digital alarm simply needs to be manually told that the job is done.
What are the Troubleshooting Methods to Clear the Orange Light?
1. Complete the Rinsing Cycle
The most frequent reason the light stays orange is that the machine did not register the completion of the “Descaling Mode.”
-
The Second Flush: You must run at least one full tank of fresh, clean water through the machine immediately after the descaling solution has passed through.
-
The Toggle: Move the selection lever to the “Hot” (Red) position and allow it to run until the tank is empty. If the light is still orange, repeat the process on the “Cold” (Blue) setting. The machine often requires this “double rinse” to exit maintenance mode.
2. The Manual Hardware Reset
If the light persists after a thorough rinse, you can force a reset using this button sequence:
- Ensure the machine is in Standby Mode (plugged into the wall but the power button is not lit).
- Press and hold the Power Button (or the start lever on some models) for 15 seconds.
- The light will likely blink between orange and green. Continue holding until it settles on a Solid Green.
- Switch the machine off at the wall, wait 10 seconds, and turn it back on to confirm the reset.

3. Clear the Injection Needle
In some cases, the light stays on because the machine detects a restricted flow rate.
-
Locate the small cleaning needle (usually tucked behind the water tank or in a slot near the capsule holder).
-
Ensure the machine is off and poke the needle into the nozzle to clear any residual “calcification” or coffee grounds.
What are the FAQ about Dolce Gusto Orange Light Still On After Descaling Coffee Maker?
1. Can I still make coffee if the light is orange?
Yes, the machine will continue to function. However, leaving the light on means you won’t know when the next 300-cup cycle has passed, risking permanent damage to the heating element from real limescale build-up.
2. Why did my light turn orange so quickly?
If you live in a hard water area of the UK (like London or the South East), mineral deposits build up faster. Ensure you are using the correct water hardness settings if your specific model allows for that adjustment.
3. Do I need a specific descaling kit?
While you can use white vinegar, it is not recommended as it can damage the internal seals. Using a dedicated lactic acid-based descaler ensures the internal sensors and pipes remain in peak condition.
Expert Maintenance Tip: To keep your coffee tasting its best, always remove the used capsule immediately after brewing. This prevents “back-wash” into the needle, which often triggers flow-rate warnings.
Home Diagnostics and Technical Standards Specialist at Hello Mag. She provides high-level Expertise in appliance mechanics and scientific pest management, ensuring every guide follows strict safety protocols and manufacturer standards. As a leading Authority on technical home specs, Kanimozhi audits complex data to provide homeowners with the most accurate, verified, and reliable diagnostic solutions available.
by Kanimozhi BV | Jan 20, 2026 | Garden, Exterior
Are you looking for step to avoid waiting too long to mow new grass?
You have spent weeks—perhaps even months—preparing the ground, choosing the right seed or turf, and watching those first delicate green shoots emerge. It is a moment of pride for any UK homeowner.
However, that pride often turns into procrastination. You might be worried that the grass is too fragile, or perhaps a typical British rainy spell has kept you off the garden for a week too long.
Suddenly, you realise your “carpet” of green has turned into a shaggy, uneven meadow. If you are asking yourself if you’ve waited too long, the answer usually lies in the height of the blade.
What is The Science of Why “Waiting” is the Enemy?
Before we dive into the rescue steps, it is vital to understand why height matters. When you wait too long to mow new grass, two things happen:
- Hormonal Shift: Grass plants produce a hormone called auxin at the tip of the blade. This hormone encourages vertical growth. When you cut the tip, the plant sends signals to the base to start “tillering” (producing side shoots). Delaying the cut keeps the plant thin and spindly.
- Crown Shading: The “crown” is the base of the plant where growth originates. If the top growth is too long, it blocks sunlight from the crown, leading to a yellow, weak base that is susceptible to moss and disease.
Here are the 4 essential steps to saving your lawn if you’ve let it grow too long.
Waiting Too Long to Mow New Grass? – 4 Steps to Avoid Damage
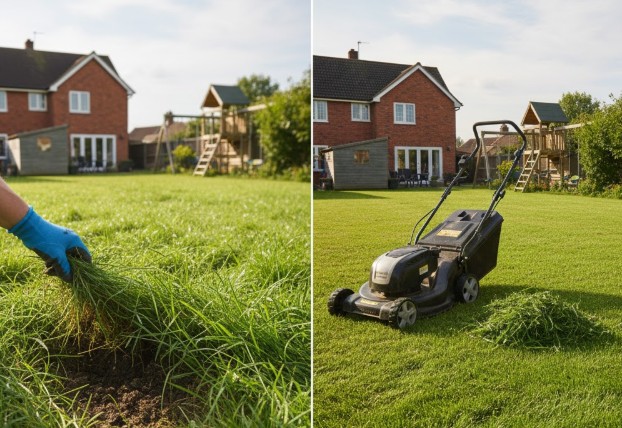
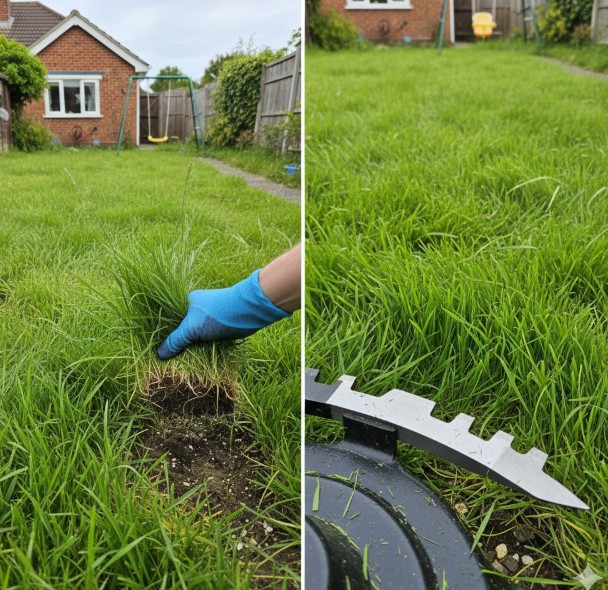
Step 1: The Root Stability “Tug Test”
Before you even wheel the mower out of the shed, you must ensure the lawn can handle the physical stress. New grass—especially from seed—is easily uprooted by the suction of a mower or the weight of your footsteps.
How to perform the test:
Find a few different patches of grass across your lawn. Firmly grasp a small clump of blades and give them a steady, upward tug.
- If the grass stays put: The roots have “knitted” into the soil. You are safe to mow.
- If the grass (or the turf layer) lifts: Stop immediately. The roots are not yet established. If your grass is already too long but fails this test, you must wait another 3–5 days for root development, regardless of the height.
Step 2: Equipment Prep – Why Blunt Blades Kill New Lawns?
For an established lawn, a slightly dull blade is a nuisance; for a new lawn, it is a death sentence. New grass is succulent and full of moisture. A blunt blade won’t “slice” the grass; it will “tear” it.
How Is The Dangers of Tearing?
- Bruising: Tearing causes white, frayed ends on the grass blades. This looks unsightly (a silvery-grey sheen across the lawn) and causes the plant to lose moisture rapidly.
- Disease Entry: Frayed ends are open wounds, making your new lawn a primary target for Red Thread or Leaf Spot—common UK lawn diseases.
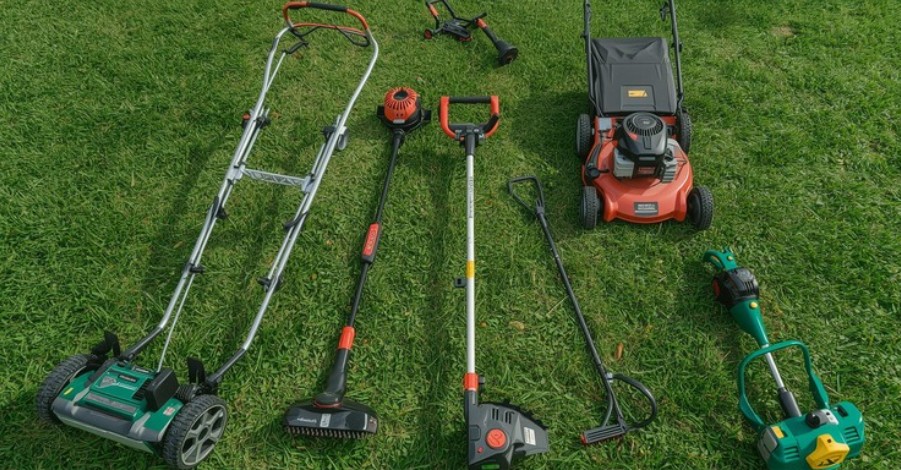
Action: Ensure your mower blades are professionally sharpened or replaced before the first cut. If you use a rotary mower, ensure the underside of the deck is clean to allow for maximum airflow.
Step 3: Applying the “One-Third Rule” (The Rescue Strategy)
This is where most DIY enthusiasts go wrong. If your grass has reached 12cm and you want it at 4cm, do not cut it all at once. Removing more than one-third of the leaf surface at once causes “root shock,” where the plant stops growing roots entirely to focus on repairing the leaf.
What Is The Staged Recovery Plan?
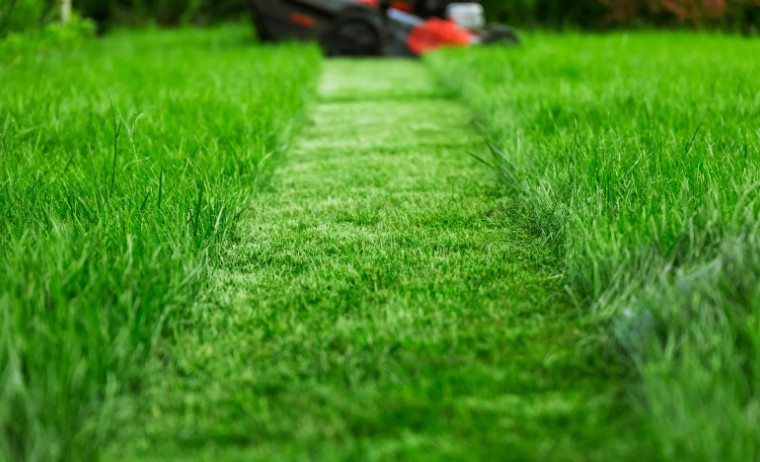
- The First Pass: Set your mower to its highest possible setting. Aim to only take off the very tips (the top 25–30%).
- The 48-Hour Rule: Wait two days. This allows the plant to recover and the “yellowed” base of the grass to be exposed to sunlight.
- The Second Pass: Lower the blades by one notch and mow again.
- Repeat: Continue this every 3–4 days until you reach your target height.
UK Grass Species Height Comparison Table
Knowing your grass type helps you determine the “safe” height for that first delayed cut.
| Grass Type |
Common in UK? |
Ideal First Cut Height |
Maintenance Height |
| Perennial Ryegrass |
Yes (Hardwearing) |
5cm – 6cm |
2.5cm – 4cm |
| Fine Fescues |
Yes (Ornamental) |
6cm – 7cm |
3cm – 5cm |
| Meadow Grass |
Yes (Self-repairing) |
5cm |
3cm |
Step 4: Post-Mow Recovery & Aftercare
Once you have successfully reduced the height of your overgrown grass, your work isn’t quite done. The lawn will be stressed and will need specific care to recover its sward density.
- Hydration: Mowing is a “wounding” process. If the weather is dry, give the lawn a light watering in the evening after the cut to help the plants rehydrate.
- Avoid Heavy Feeding: Do not apply a high-nitrogen “Spring/Summer” fertiliser immediately after a heavy cut-back. The grass is already working hard to repair itself; forcing rapid top growth with chemicals can lead to “lush” growth that attracts pests like leatherjackets.
- Clear the Debris: If the grass was very long, your mower might leave clumps of “hay” behind. Always bag or rake up these clippings on a new lawn. Leaving them will smother the young plants and lead to rot.
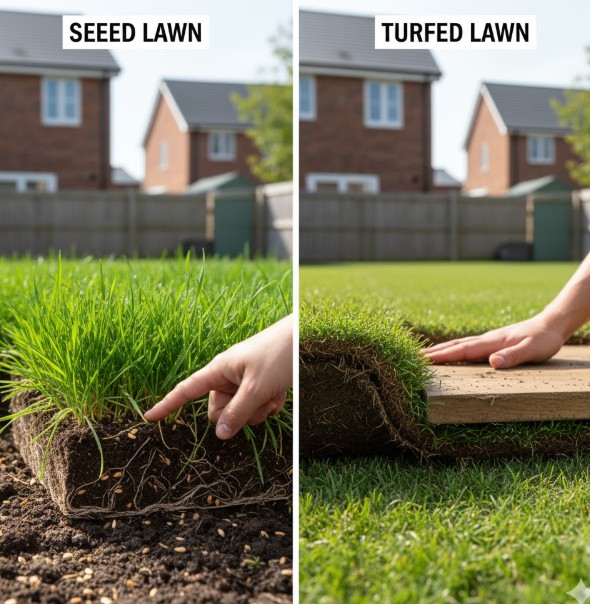
Comparison: Seed vs. Turf (What are the Strategic Differences?)
While “waiting too long” is a risk for both, the consequences differ:
- For Seeded Lawns: The risk is thinning. If you wait too long, the grass becomes “leggy.” Once you finally cut it, you’ll see bare soil between the plants. You may need to “overseed” in autumn to fix the density.
- For Turfed Lawns: The risk is compaction. Turf is often laid on heavy soil. If the grass gets too long, you spend more time walking on it to manage it, which can compact the soil and prevent the turf roots from penetrating the ground.
Conclusion: What Is The Mow High, Mow Often Mantra?
Waiting too long to mow new grass is a hurdle, but it is one you can overcome with patience. By following the 4 steps—testing root stability, ensuring sharp blades, respecting the one-third rule, and providing gentle aftercare—you can transform that overgrown mess back into a healthy, dense UK lawn.
The secret to a perfect lawn isn’t how low you can go, but how consistently you care for it. Moving forward, aim to mow whenever the grass is 2cm taller than your desired height
What are the FAQ about Waiting Too Long to Mow New Grass?
1. What if my grass is flopping over because it’s so long?
This is a sign the grass is starving for light at the base. You must mow it immediately using the “highest setting” mentioned in Step 3. If you leave it “flopped,” the grass underneath will die, creating circular dead patches.
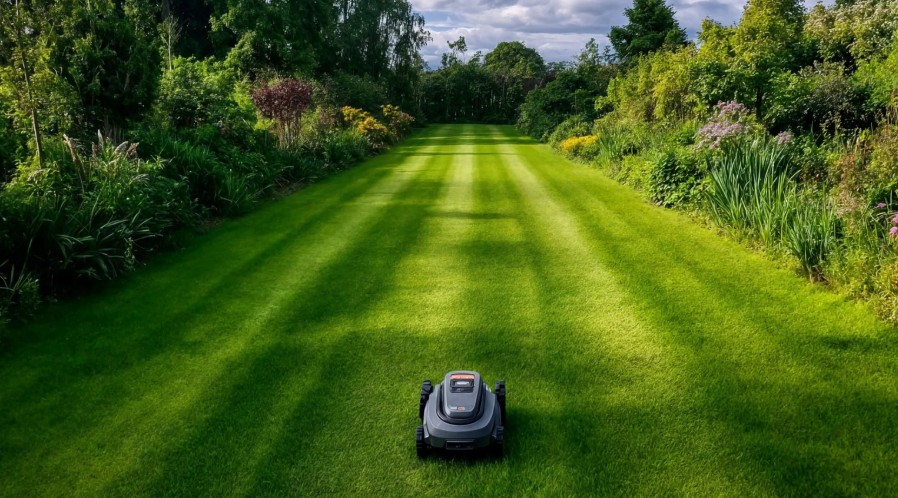
2. Can I use a robotic mower on new grass?
Robotic mowers are excellent for maintenance because they cut tiny amounts frequently. However, if the grass is already too long, a robot mower will struggle and likely “mulch” the grass into a thick paste that smothers the lawn. Use a manual mower to get it back to height first.
3. Should I bag the clippings or leave them?
On a new lawn, always bag them. You want as much sunlight and airflow as possible to reach the soil surface to encourage new shoots to emerge from the base.
Home Diagnostics and Technical Standards Specialist at Hello Mag. She provides high-level Expertise in appliance mechanics and scientific pest management, ensuring every guide follows strict safety protocols and manufacturer standards. As a leading Authority on technical home specs, Kanimozhi audits complex data to provide homeowners with the most accurate, verified, and reliable diagnostic solutions available.
by Kanimozhi BV | Jan 19, 2026 | Garden, Exterior
Will Watering Dead Grass Bring It Back?
No — watering dead grass will not bring it back.
Once grass is truly dead, its roots are no longer functioning, and watering alone cannot revive it. However, if your grass is simply dormant — often due to heat or drought — then consistent watering can help it recover and turn green again over time.
Can Water Really Revive Dead Grass?
If you’ve stepped outside and noticed your lawn has turned brown, patchy, or lifeless, you’re not alone. Many UK homeowners face this issue during dry summers, heatwaves, or after periods of neglect. A common question follows quickly: will watering dead grass bring it back?
The truth is simple but often misunderstood. Whether watering works depends entirely on whether your grass is dead or merely dormant. Understanding the difference will save you time, water, and frustration.
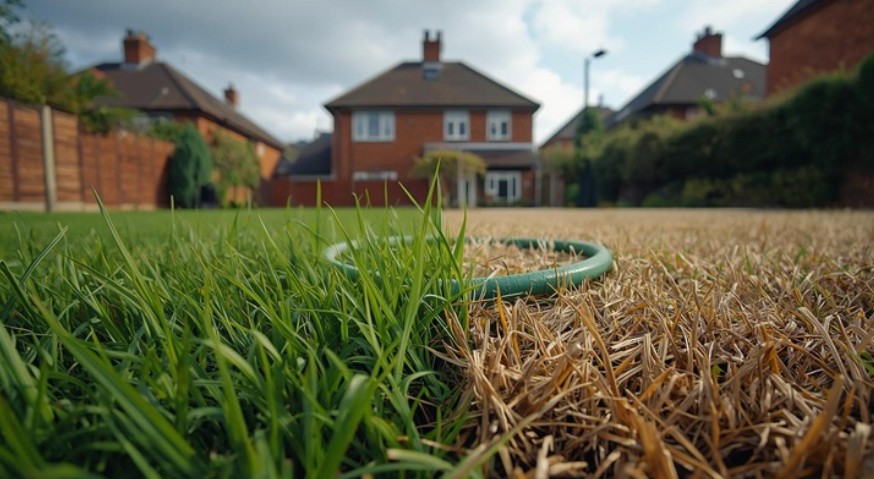
What’s the Difference Between Dead and Dormant Grass?
Not all brown grass is dead. In fact, many UK lawns enter dormancy as a natural survival response to stress.
Dormant Grass (Still Alive)
- Turns yellow or light brown during drought or heat
- Feels dry but remains flexible
- Roots stay intact below the soil
- Can recover once conditions improve
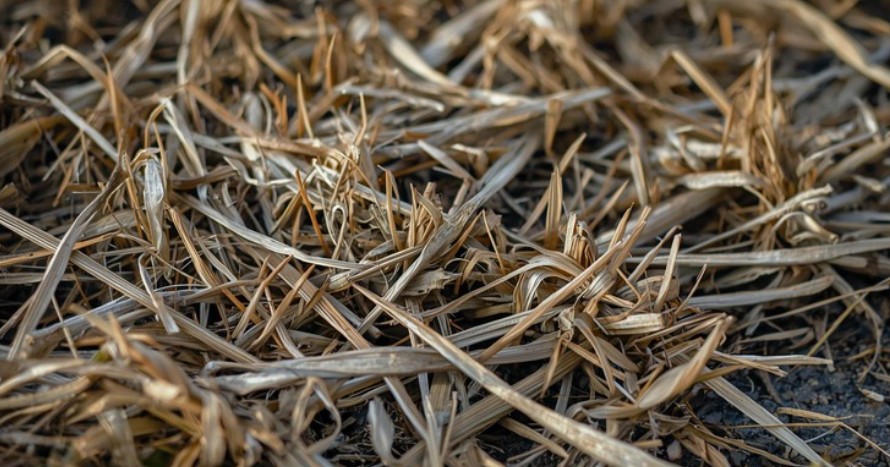
Dead Grass
- Appears grey, white, or straw-like
- Blades are brittle and snap easily
- Pulls out effortlessly with little or no root resistance
- Will not recover with watering
Quick test: Gently pull on the grass. If it resists and you see pale or white roots, it’s likely dormant. If it comes out easily, it’s dead.
Dormant vs Dead Grass: Quick Comparison
| Feature |
Dormant Grass |
Dead Grass |
| Colour |
Yellow or light brown |
Grey or straw-like |
| Texture |
Dry but bendable |
Brittle and crumbly |
| Root Test |
Resists pulling |
Pulls out easily |
| Response to Water |
Gradual recovery |
No improvement |
| Solution |
Water and monitor |
Reseed or returf |
Will Watering Dead Grass Bring It Back?
No — watering dead grass will not bring it back. Once grass has died, its roots can no longer absorb water or nutrients. At this stage, watering serves no purpose other than moistening the soil.
However, if your lawn is dormant, watering can be very effective. Dormant grass temporarily shuts down growth to conserve energy. When moisture returns, the grass can gradually rehydrate and regain its green colour.
The key takeaway is simple: watering only works if the grass is still alive.
When Watering Works And When It Doesn’t?
Watering Can Help If:
- The grass turned brown during a recent dry spell
- Blades remain flexible when bent
- Roots show resistance when pulled
- Discolouration appeared within the last few weeks
Watering Will Not Help If:
- The grass has been brown for months
- Blades are brittle and crumbly
- The turf pulls out easily
- Damage was caused by disease, pests, or fertiliser burn

What are the Common Causes of Dead Grass in UK Gardens?
Several factors commonly cause grass to die in UK lawns:
- Prolonged drought or extreme summer heat
- Over-fertilisation causing root burn
- Pet urine creating chemical damage
- Heavy foot traffic compacting soil
- Poor drainage or waterlogging
Conclusion: What You Need to Know About Watering Dead Grass?
So, will watering dead grass bring it back? The answer is clear: no. Watering only works if the grass is dormant and still alive beneath the surface.
Before investing time and water, always assess your lawn carefully. Knowing the difference between dead and dormant grass helps you make the right decision — whether that’s watering for recovery or preparing for reseeding.
What are the FAQs About Will Watering Dead Grass Bring It Back?
1. Can brown grass turn green again?
Yes, if it is dormant. With regular watering, recovery often takes one to three weeks.
2. Should I water brown grass just in case?
Yes. If you are unsure, water consistently for 7–10 days and watch for signs of improvement.
3. What if there’s no change after watering?
If there’s no improvement, the grass is likely dead and will need reseeding or turf replacement.
Home Diagnostics and Technical Standards Specialist at Hello Mag. She provides high-level Expertise in appliance mechanics and scientific pest management, ensuring every guide follows strict safety protocols and manufacturer standards. As a leading Authority on technical home specs, Kanimozhi audits complex data to provide homeowners with the most accurate, verified, and reliable diagnostic solutions available.
by Kanimozhi BV | Jan 19, 2026 | Garden, Exterior
Introduction: My Journey to Lawn Striping Success
There’s something incredibly satisfying about standing back and admiring a lawn with crisp, bold stripes.
Like many homeowners in the UK, I used to think perfectly striped lawns were only for football pitches or stately homes. But with the right tools and a bit of know-how, I discovered how to get lines in lawn that rival those seen in magazines.
In this guide, I’ll walk you through everything I’ve learned — from the science behind lawn stripes, to the step-by-step process of creating stunning patterns. Whether you’re a beginner or looking to sharpen your mowing technique, this post has got you covered.
How to Get Stripes in Lawn and What Causes Lawn Stripes?
When I first wondered how to get stripes in lawn, I assumed it was about using a fancy mower. But actually, it’s all about light and direction.
- Grass blades bend when mowed.
- Stripes appear because light reflects differently off blades bent in opposite directions.
- The light stripes are blades bent away from you; dark stripes are blades bent towards you.
So, the trick lies in bending grass consistently — and that’s where the right mower and mowing technique come in.
Creating stripes isn’t just about pushing any mower around. Here’s what I use and recommend:
What are the Essential Mowers and Attachments?
| Tool |
Purpose |
Recommendation |
| Lawn mower with rear roller |
Bends grass in direction of mowing |
Hayter, Flymo roller mowers |
| Striping kit |
Alternative to roller |
Available for rotary or cylinder mowers |
| Cylinder mower |
Best for fine lawns |
Ideal for clean, professional stripes |
- String or garden marker – helps maintain straight lines
- Sharp mower blades – dull blades tear grass, weakening the pattern
- Lawn edger or strimmer – for finishing touches along borders
Tip: You don’t need to spend a fortune – even a DIY roller made from a sand-filled pipe can help stripe your lawn!
| Tool |
Effectiveness |
Budget |
Best For |
| Rear Roller Mower |
⭐⭐⭐⭐⭐ |
Medium–High |
Clean, bold stripes |
| Striping Kit |
⭐⭐⭐ |
Low–Medium |
DIY and beginners |
| Cylinder Mower |
⭐⭐⭐⭐ |
High |
Fine, ornamental lawns |
| Manual Roller |
⭐⭐ |
Low |
Minor enhancement |
What are the Best Ways on How to Get Lines in Lawn?
Here’s how I transformed my plain patch of green into a striped showpiece:
Step 1: Prepare the Lawn
- Mow only when the grass is dry
- Remove debris, stones, and sticks
- Water if the weather’s been too dry
Step 2: Set Up Your Mower Correctly
- Adjust blade height to around 20–40mm
- Make sure the roller or kit is clean and functional
- Sharpen your blades for a clean cut
Step 3: Start Mowing in Straight Lines
- Choose a focal point at the far end of your lawn
- Begin mowing straight across
- Slightly overlap each stripe for an even look
- Alternate directions with each pass to get the light-dark effect
Step 4: Edge and Finish
- Use a trimmer to sharpen borders
- Avoid turning the mower sharply at stripe ends (this can damage the grass)
What are the Tips for Advanced Stripe Patterns?
Once I mastered straight lines, I experimented with more creative patterns. Here’s what worked for me:
- Checkerboard: Mow stripes, then mow again at a 90° angle
- Diagonal lines: Follow the same method, just angled
- Diamond pattern: Combine diagonal checkerboards
- Borders: Mow a final pass around the edges to frame your design
Keep the pattern fresh by changing directions each week to avoid turf wear.
How to Stripe Lawn Without Roller?
Not everyone has a roller mower — I didn’t when I started. Here’s how I got lawn stripes without one:
- Use a standard rotary mower, and mow in alternating directions
- Weigh down the back of the mower with a DIY striping kit (like a rubber flap or broom)
- Roll the lawn afterwards using a water-filled garden roller or a home-made solution like a barrel or sandbag
While the results won’t be as dramatic as a roller mower, you’ll still see subtle stripes.
What are the Maintenance Tips to Keep Those Lines Look Sharp?
Striping isn’t a one-time job — regular care keeps the lawn healthy and the stripes vivid.
- Mow regularly (once a week in growing season)
- Water in dry spells
- Apply a seasonal lawn feed for stronger, greener grass
- Aerate in spring/autumn to improve root health
- Scarify to remove thatch and moss
What are the Common Mistakes to Avoid?
When I first began, I made all the rookie mistakes. Here are a few to dodge:
- Cutting grass too short — weakens it and ruins the look
- Mowing when wet — leaves clumps and smudges stripes
- Dull blades — tear the grass instead of cutting cleanly
- Not overlapping — leads to uneven stripe width
Conclusion: My Best Tips for a Lawn That Turns Heads
Striping your lawn isn’t rocket science, but it does take practice and care. From understanding how light affects grass to choosing the right mower, it’s a rewarding process.
To recap:
- Use a roller mower or DIY solution
- Mow consistently and follow a pattern
- Care for your grass — healthy lawns make better stripes
Whether you’re mowing for curb appeal or just personal satisfaction, knowing how to get lines in your lawn adds pride and character to your outdoor space.
What are the FAQs On How To Get Lines in Lawn?
1. How long do lawn stripes last?
They typically last until your next mow, but healthy grass holds a pattern better.
2. Can any mower make stripes?
Technically yes — but mowers with rear rollers or a striping kit make it much easier.
3. What’s the best grass for lawn striping in the UK?
Ryegrass and fine fescues respond best to striping due to their stiffness and colour.
4. Can robot mowers create stripes?
Not usually — most robot mowers mow randomly. Some premium models mow systematically but lack rollers.
Home Diagnostics and Technical Standards Specialist at Hello Mag. She provides high-level Expertise in appliance mechanics and scientific pest management, ensuring every guide follows strict safety protocols and manufacturer standards. As a leading Authority on technical home specs, Kanimozhi audits complex data to provide homeowners with the most accurate, verified, and reliable diagnostic solutions available.
by Kanimozhi BV | Jan 13, 2026 | Door, Interior
Why Should You Learn How to Adjust uPVC Door Hinges?
Over time, your uPVC door may become misaligned due to general wear, weather changes, or frequent use. If your door doesn’t close properly, feels stiff, or allows cold draughts into your home, the solution often lies in a simple adjustment.
Learning how to adjust uPVC door hinges can restore your door’s fit, improve insulation, and prevent long-term issues — all without calling in a professional. This guide walks you through the process step by step.
What Types of Hinges Affect How You Adjust uPVC Door Hinges?
Before making any adjustments, you need to identify the hinge type fitted to your door. Each one allows for different kinds of movement.
| Hinge Type |
Adjustment Available |
Common Location |
| Flag Hinge |
Vertical, lateral, compression |
Modern uPVC front or patio doors |
| T-Hinge |
Usually vertical only |
Older uPVC doors |
| Butt Hinge |
Minimal or no adjustment |
Traditional installations |
- Flag Hinges offer the most flexibility. They are rectangular and mounted externally, often with screw caps.
- T-Hinges resemble the letter “T” and allow some vertical movement.
- Butt Hinges provide little to no adjustment and are often found in older homes.
How Can You Tell If Your uPVC Door Needs Hinge Adjustment?
Before adjusting anything, confirm whether your door is out of alignment. This helps you avoid unnecessary work and focus on the right area.
Look for the following signs:
- The door rubs along the bottom or frame
- You feel draughts entering around the edges
- The handle becomes stiff or difficult to lift
- The door doesn’t latch unless pushed or lifted
- Uneven gaps appear between the door and frame
You can also use a spirit level against the door’s vertical edge to check if it’s square with the frame.
Is Your uPVC Door Misaligned or Warped?
Not every door issue can be fixed with adjustments. It’s important to know if your door is simply misaligned or if the material has warped.
Misalignment occurs when hinges shift or loosen over time. This is fixable.
Warping results from heat, moisture, or structural pressure, and may require door replacement.
Here’s how you can tell:
- If adjustments make no difference, the door could be warped
- If gaps are uneven and worsen seasonally, warping is likely
- Twisted or bowed frame lines indicate possible structural damage
When in doubt, try adjusting the hinges first. If there’s no improvement, consider professional inspection.
Before starting, gather the essential tools to ensure smooth and safe hinge adjustment.
- Allen key (usually 4mm or 5mm)
- Flathead screwdriver (to remove caps)
- Spirit level (to check alignment)
- Lubricant spray (optional, for stiff screws)
These are often all you need to adjust flag or T-hinges. For butt hinges, extra tools may be required to reposition the entire hinge plate.
How Do You Adjust uPVC Door Hinges Based on Hinge Type?
Adjusting your hinges depends on their type. Below are the methods specific to each kind.
Flag Hinges: How to Adjust uPVC Door Hinges for Height, Sides, and Seal Pressure?
How To Do Vertical Adjustment (Raise or Lower Door):
- Remove the plastic cap from the bottom of the hinge.
- Insert an Allen key into the vertical screw.
- Turn clockwise to lift the door or anticlockwise to lower.
- Make equal changes to all hinges for balance.
How To Do Lateral Adjustment (Side-to-Side):
- Open the door and locate the lateral screw on the hinge body.
- Turn it to shift the door closer to or further from the hinge side.
- Helps fix rubbing against the frame.
How To Do Compression Adjustment (Seal Tightness):
- Find the compression screw (often behind a cap).
- Turn slightly to pull the door tighter into the frame.
- Use this to stop draughts or correct stiff handles.
T-Hinges: How to Adjust uPVC Door Hinges with Basic Vertical Control?
- Remove the cap on top of the hinge barrel.
- Use an Allen key on the vertical screw.
- Turn to raise or lower the door.
- Test the latch and movement after each adjustment.
Butt Hinges: What If Your uPVC Door Has Non-Adjustable Hinges?
These are tricky since they often can’t be adjusted with screws.
- Loosen hinge screws slightly and manually lift or shift the door.
- Insert plastic hinge packers behind the hinge for small corrections.
- Re-tighten carefully and check alignment.
- If this doesn’t work, consider replacing the hinge or upgrading to flag hinges.

How to Adjust uPVC Door Hinges to Eliminate Draughts?
If you’re feeling cold air around the edges of your uPVC door, it’s likely a compression issue. Adjusting the seal pressure using the compression screw will usually fix the problem.
What are the Steps involved in eliminating Draughts?
- Locate the compression adjustment screw (common on flag hinges).
- Insert an Allen key and turn clockwise to tighten the seal.
- Adjust each hinge one at a time.
- Test the door — it should close snugly without gaps.
For better results, check your rubber seals. If they’re damaged, replace them while adjusting the hinges.
How to Adjust uPVC Door Hinges If the Door Is Dragging on the Floor?
A dropped uPVC door that catches or drags usually needs a vertical adjustment.
Here’s how to fix it:
- Remove the cap from the bottom hinge.
- Use your Allen key on the vertical adjustment screw.
- Turn it clockwise to raise the door slightly.
- Adjust all hinges equally to maintain the door’s balance.
After each turn, close the door and check if it clears the floor.
What Common Problems Can Be Solved by Adjusting uPVC Door Hinges?
Learning how to adjust uPVC door hinges can fix many everyday issues:
- Door rubbing against the frame ➜ Lateral adjustment
- Door not closing properly ➜ Compression or vertical adjustment
- Cold draughts ➜ Compression adjustment
- Handle hard to lift ➜ Correct vertical and lateral alignment
- Uneven gaps ➜ Balance all hinge adjustments

How Can You Keep Your uPVC Door in Perfect Condition Long-Term?
Now that you’ve learned how to adjust uPVC door hinges, maintaining your door’s alignment becomes easier. Regularly inspect the hinges, seals, and screws — especially before winter.
Properly aligned doors improve:
- Energy efficiency
- Security
- Everyday convenience
Taking a few minutes to adjust your uPVC door hinges can make your home warmer, safer, and more efficient — all without spending a penny on professional services.
Related Article: How to Remove Stains from uPVC Window Frames?
What Are the Most Asked Questions About Adjusting uPVC Door Hinges?
1. How do I adjust a uPVC door that won’t close properly?
Check if the issue is vertical or compression related. Use your Allen key to adjust the height and seal pressure.
2. Why is my uPVC door rubbing at the bottom?
This usually means the door has dropped. Use vertical adjustment on the lower hinge.
3. Can you realign a uPVC door yourself?
Yes, most modern doors with flag or T-hinges are fully adjustable. With a few tools, you can realign the door at home.
4. How tight should uPVC door hinges be?
They should be snug, not overtightened. Tight enough to hold the door firm but not distort the frame.
5. Do hinges wear out over time?
Yes. If you find that adjustments no longer help, the hinges might be worn or damaged and may need replacing.
6. How to Stay Safe While Adjusting uPVC Door Hinges?
Use these tips for a smoother adjustment process:
- Only make small changes — a quarter turn at a time
- Keep the door supported during adjustment
- Mark original screw positions with tape
- Use lubricant to loosen tight screws
- Stop if the hinge seems unstable or over-tightened
If the door still won’t align properly, it’s time to consult a door professional.
Home Diagnostics and Technical Standards Specialist at Hello Mag. She provides high-level Expertise in appliance mechanics and scientific pest management, ensuring every guide follows strict safety protocols and manufacturer standards. As a leading Authority on technical home specs, Kanimozhi audits complex data to provide homeowners with the most accurate, verified, and reliable diagnostic solutions available.
