by Kanimozhi BV | Jan 5, 2026 | Garden, Exterior
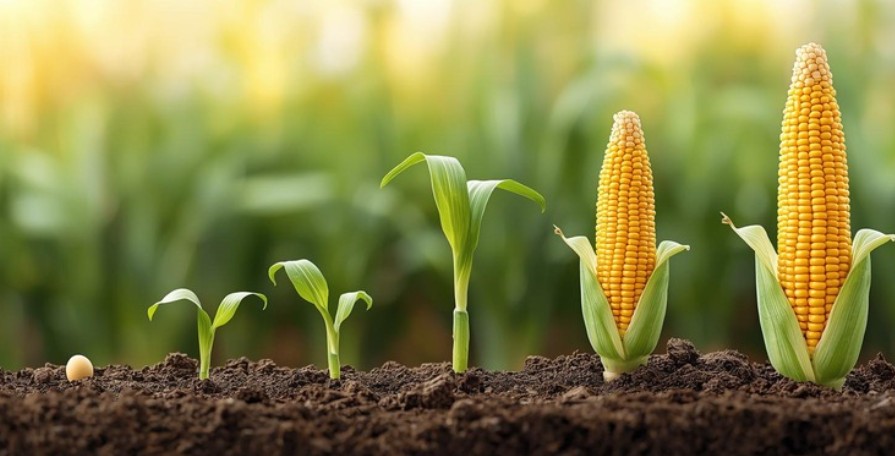
Growing sweetcorn in the UK is one of the most rewarding experiences in my garden. Over the years, I’ve realised that understanding each sweetcorn growing stage isn’t just helpful—it’s essential for a healthy crop.
From sowing seeds in the spring warmth to harvesting juicy cobs in summer, every stage of growth brings its own set of cues and care tips.
In this guide, I’ll walk you through what I’ve learned and what to expect at each phase of sweetcorn’s lifecycle.
What Are the SweetCorn Growing Stages?
Sweetcorn follows a fascinating life cycle with clear stages that I’ve come to recognise year after year. Let’s break down each one, so you’ll know exactly what’s happening above and below ground.
1. Seed Preparation and Planting
Before any green shoots appear, it all begins with the right conditions. I usually sow sweetcorn seeds indoors from late April to early May, using individual pots filled with peat-free compost. The soil temperature should be around 10°C or higher—any colder and germination suffers.
When planting outdoors, spacing is critical. I always plant in a block pattern rather than rows, because sweet corn pollinates by wind, and this setup improves cob formation.
2. Germination (Emergence)
This is one of the most exciting stages. About 7–10 days after sowing, little shoots begin to emerge. The roots dig deep while the stem pushes upwards.
Here’s how I ensure successful corn seed germination:
- Keep the compost moist but not soggy.
- Keep the pots in an area with light, warm location or greenhouse.
- Avoid overwatering—corn hates sitting in waterlogged soil.
Fun fact: The very first green tip you see is the coleoptile—a protective sheath that helps the shoot break through the soil.
3. Vegetative Growth Phase
Once the seedling is established, the plant starts to grow rapidly. This is when leaf after leaf unfurls, forming the structure that will eventually support the cob.
Botanically, this is the V stage of growth (V1, V2, V3, etc.), marked by the appearance of each new leaf. In my experience, this is when the plant needs the most care:
You’ll notice the stem thickens, roots grow stronger, and the plant gains height quickly—sometimes several centimetres a day!

4. Tasseling and Silking (Flowering Stage)
By midsummer, your sweetcorn will enter its most important phase: flowering. Here’s what happens:
- The tassel, which is the male flower, appears at the top of the plant.
- Soon after, silks, the female flowers, emerge from where the cob will form.
Each silk must receive pollen from the tassel for a kernel to develop. Because UK weather can be unpredictable, I give the plants a little shake in the mornings to help pollination along, especially if there’s no breeze.
5. Kernel Development and Filling
After successful pollination, the magic begins. The kernels start to swell and fill with milky fluid. This stage progresses through:
- Blister stage (clear fluid)
- Milk stage (opaque milky fluid)
- Dough stage (thicker starch)
- Mature stage (fully formed kernels)
Watering is critical during this stage—dry roots lead to smaller or misshapen cobs. I make sure the soil stays evenly moist until the very end.
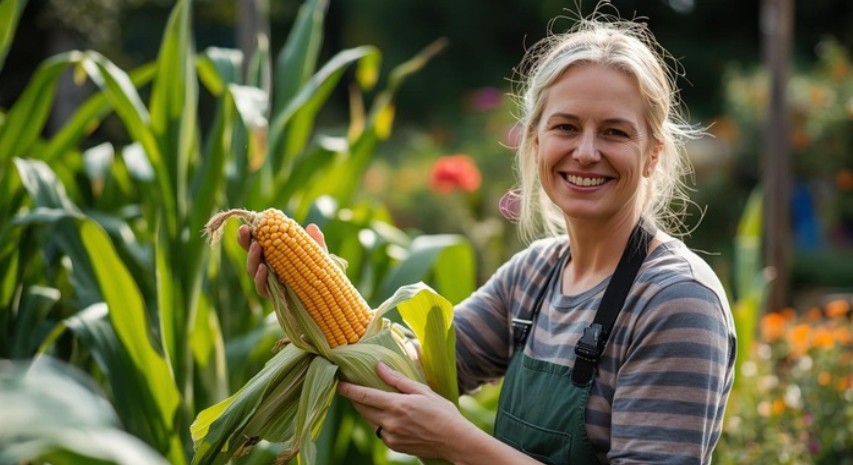
6. Maturity and Harvest Time
In the UK, sweetcorn is usually ready to harvest between August and September, depending on when it was sown.
Here’s how I know when to pick:
- The silks turn brown and dry out.
- Kernels release a milky liquid when pierced (not clear or doughy).
- The cob feels full and rounded when gently squeezed.
Don’t wait too long—sweetcorn loses sweetness quickly once mature. I always harvest in the morning when sugar levels are at their peak and cook them fresh that day!
How Does SweetCorn Grow in the UK?
Here’s a general timeline I follow in my own UK garden:
| Stage |
Time After Planting |
UK Month(s) |
Key Action Points |
| Germination |
7–10 days |
May |
Keep compost warm and moist |
| Vegetative Growth |
2–4 weeks |
Late May–June |
Water and feed nitrogen |
| Tasseling & Silking |
5–7 weeks |
July |
Assist pollination, keep soil moist |
| Kernel Development |
7–9 weeks |
July–August |
Maintain watering, check growth |
| Harvest Readiness |
10–12+ weeks |
August–September |
Pick when kernels reach milky stage |
What are My Personal Tips for a SweetCorn Success Story?
These are the things I swear by for strong, healthy sweetcorn in the UK:
- Start early indoors, especially in colder regions.
- Plant in blocks, never single rows.
- Mulch around the base to hold on the moisture and defeat weeds.
- Manually shake plants during tasseling if there’s little wind.
- Harvest promptly for the sweetest flavour!
Conclusion
Growing sweetcorn is more than just planting a seed—it’s about recognising and supporting each sweetcorn growing stage. From the first sprout to that moment you peel back the husk and see golden kernels, each phase teaches you something.
I’ve learned to watch, listen, and adapt as the season progresses. Follow the stages, stay attentive, and you’ll be rewarded with delicious, homegrown sweetcorn—fresh from your own garden.
What are the Common Questions UK Gardeners Ask About Sweetcorn Growing Stages?
1. When Should I Sow Sweet Corn Seeds in the UK?
I sow indoors in late April, and plant out in late May to early June after all risk of frost is gone.
2. How Long Does Corn Take to Grow?
On average, sweet corn takes 10–12 weeks from sowing to harvest. Warmer years might shorten this slightly.
3. What Nutrients and Care Do Sweet Corn Plants Need?
I use a nitrogen-rich feed during vegetative stages and switch to a balanced fertiliser once tassels appear. Water deeply at the base every few days, especially during flowering and cob formation.
4. How Do I Know If Sweet Corn Isn’t Growing Well?
Here are some common issues I’ve seen:
- Pale leaves = nutrient deficiency.
- No cobs or missing kernels = poor pollination.
- Stunted growth = cold or waterlogged soil.
Home Diagnostics and Technical Standards Specialist at Hello Mag. She provides high-level Expertise in appliance mechanics and scientific pest management, ensuring every guide follows strict safety protocols and manufacturer standards. As a leading Authority on technical home specs, Kanimozhi audits complex data to provide homeowners with the most accurate, verified, and reliable diagnostic solutions available.
by Kanimozhi BV | Jan 5, 2026 | Home & Living, Interior
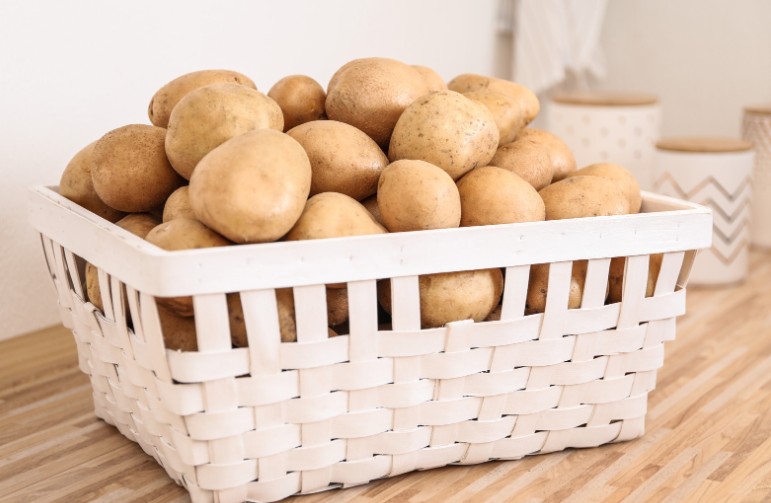
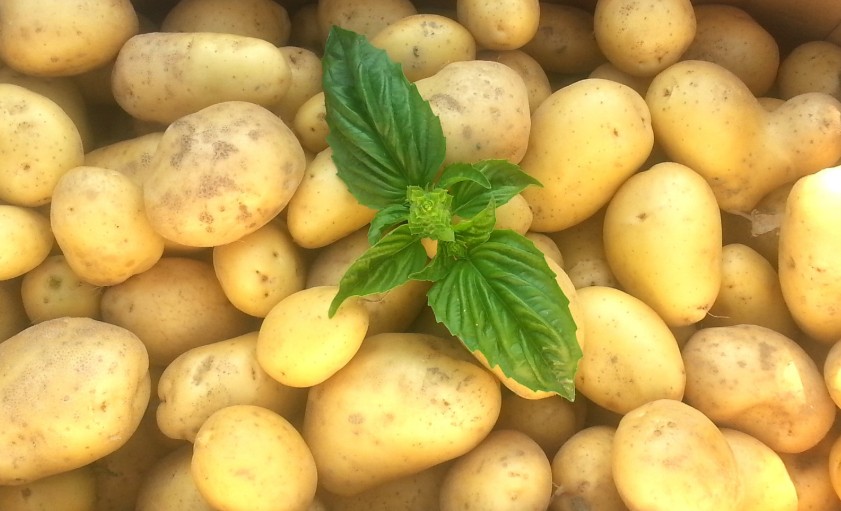
If you’ve ever bought or harvested potatoes and noticed them sprouting, turning green, or going soft too quickly, you’re not alone.
Potatoes are sensitive to their environment, and how you store them plays a major role in how long they last.
In this guide, you’ll learn how to store potatoes the right way, where to store them in your home, how to handle home-grown varieties, and what to do if you’re planning for long-term storage.
Whether you’ve just picked them up from the supermarket or grown them yourself, this guide will help you store potatoes effectively in typical UK conditions.
Why Proper Potato Storage Matters?
Potatoes spoil quickly if they’re exposed to heat, light, or moisture. Poor storage often leads to sprouting, greening, or rot. These not only affect the flavour but can also impact food safety.
Storing potatoes correctly helps extend their shelf life, maintain their texture and flavour, and reduce unnecessary waste in your kitchen.
Whether you keep a few in the cupboard or a full crop from your garden, good storage can make a big difference.
What Conditions Do Potatoes Need to Stay Fresh?
Potatoes stay fresh longest in a space that is cool, dark, dry, and well-ventilated.
- Temperature: The ideal range is between 4°C and 10°C. If stored colder, such as in a fridge, their starches can turn into sugar, altering both taste and texture.
- Light: Exposure to light leads to greening of the skin, which may signal the presence of solanine—a natural toxin.
- Humidity: Excess moisture encourages rot. Potatoes need a dry environment.
- Airflow: Good ventilation prevents heat and moisture build-up.
Understanding these storage conditions can help you choose the right place to keep your potatoes at home.
Where to Store Potatoes in a UK Home?
The best place to store potatoes is somewhere cool and dark with good air circulation.
Suitable options include:
- A cool kitchen cupboard or pantry away from appliances
- Under-stair cupboards, if they don’t get too warm
- Utility rooms, sheds or garages (if temperatures remain above freezing)
- Cellars or basements
Where To Avoid Storing Potatoes?
- On countertops, especially near the cooker or in sunlight
- In sealed plastic bags or airtight containers
- Next to onions or apples, which release ethylene gas and accelerate sprouting
Fridge storage is a bit controversial. Traditional advice said to avoid it, but updated guidance from the UK’s Food Standards Agency suggests refrigerating potatoes is acceptable to reduce food waste, especially if you’re boiling or roasting them. However, avoid frying refrigerated potatoes at high heat to reduce acrylamide risk.
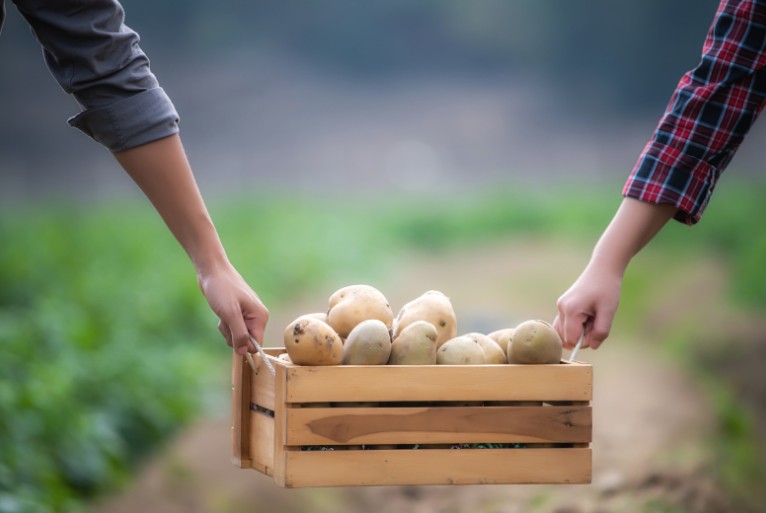
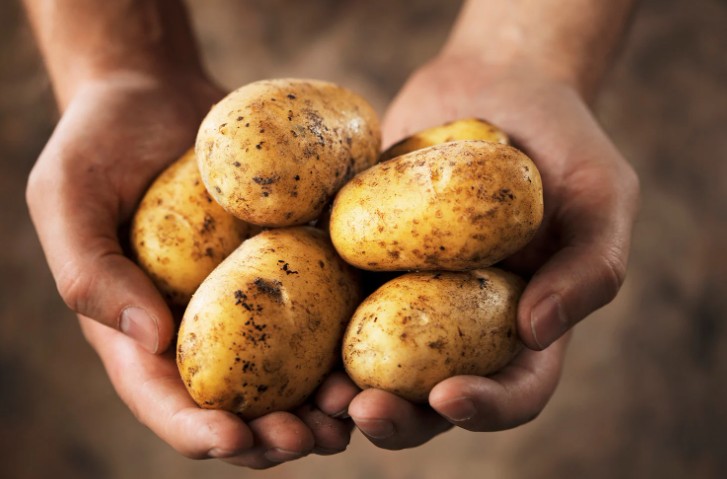
How to Store Potatoes After Harvest?
If you grow your own, storing potatoes after harvest requires a few extra steps.
Start by curing the potatoes. This means placing them in a cool, dark, and ventilated area (around 10°C to 15°C) for about 10 to 14 days. This allows the skin to toughen and small surface wounds to heal.
Do not wash them before storing, as this introduces moisture and speeds up decay. Only store firm, unblemished potatoes. Any with bruises or cuts should be used sooner rather than stored.
After curing, transfer the potatoes to long-term storage containers in a suitable location.
How to Store Home-Grown Potatoes Properly?
Home-grown potatoes are often harvested in larger quantities than shop-bought ones, so long-term storage matters even more.
- Store them in paper bags, jute sacks, or wooden crates
- Avoid washing the potatoes until just before use
- Keep the storage space dark, cool, and ventilated
- Separate early and maincrop varieties if storing both
- Label your stored potatoes with the harvest date
Check regularly and use any that show signs of softening or sprouting first.
What are the Best Containers for Potato Storage?
The container you use can affect how well your potatoes last.
Good options include:
- Paper bags
- Jute or burlap sacks
- Mesh bags
- Wooden crates or slatted boxes
- Cardboard boxes with ventilation holes
What are Should be Avoid for Potato Storage?
- Plastic bags or cling film, which trap moisture
- Sealed containers with no airflow
- Transparent bins that let light in
Always store potatoes in small batches if possible. Overcrowding can lead to uneven airflow and faster spoilage.
How to Store Potatoes Long Term?
To store potatoes long term, especially through winter, start with fully cured, undamaged potatoes.
Choose a storage location with stable temperature and low light. A basement, shed, or garage can work, provided it’s not damp or freezing.
Rotate your stock regularly. Use older or sprouting potatoes first. Avoid stacking too deep, and check every few weeks for any signs of spoilage or sprouting.
By following these steps, your potatoes can last for several months, especially maincrop varieties like Maris Piper or Desiree.
How to Prevent Sprouting and Green Skin?
Sprouting in Potato occurs naturally over time, but it can be delayed with the right environment.
- Store in complete darkness
- Keep away from appliances that emit heat
- Ensure good airflow between potatoes
- Never store near onions, apples, or bananas, which speed up sprouting
- Check them often and remove any that begin to sprout or soften
Green skin is a sign of light exposure and may contain solanine. Cut away any green parts before cooking, or discard the potato if the green area is extensive.
How to Store Peeled or Cooked Potatoes?
If you’ve already peeled or cooked your potatoes, they need to be stored differently.
For peeled raw potatoes:
- Submerge in cold water and refrigerate
- Use within 24 hours for best quality
For cooked potatoes:
- Let them cool completely, then refrigerate in an airtight container
- Use within 3 to 4 days
- Reheat thoroughly before eating
Never leave peeled or cooked potatoes at room temperature for long periods, as bacteria can grow quickly.
What are the Common UK Storage Challenges and How to Handle Them?
Many UK homes don’t have cellars or cool pantries, but there are still workarounds.
- Use an unheated utility room or a cool cupboard
- Hang a breathable storage bag in a shaded area of the kitchen
- In flats or small homes, avoid under-sink storage due to humidity
- In warm months, monitor conditions closely and avoid bulk buying
In damp environments, consider placing a small bowl of rice near your potatoes to help absorb excess moisture.
Conclusion – Store Your Potatoes the Right Way
Storing potatoes correctly helps you reduce food waste, save money, and make your meals more enjoyable.
Whether you’ve bought a few from the supermarket or grown your own harvest, the key is to keep them cool, dark, dry, and well-ventilated.
Avoid washing before storage, use breathable containers, and check your potatoes regularly. When in doubt, use the soft or sprouting ones first and discard any that show signs of rot or extensive greening.
With these tips, you’ll always have fresh, firm potatoes ready for your next meal.
What are the Frequently Asked Questions (FAQ) About How to Store Potatoes?
1. Should you refrigerate potatoes?
Yes, if you’re roasting or boiling them later. However, avoid frying refrigerated potatoes at high heat, as this can produce acrylamide. Traditional advice warned against refrigeration, but updated UK guidance supports it to reduce food waste.
2. How long do potatoes last in storage?
Potatoes can last 2 to 3 months in ideal conditions. Early potatoes spoil faster, while maincrop varieties are better suited for long-term storage.
3. Can I store potatoes in plastic bags?
No. Plastic bags trap moisture, which leads to rotting. Always use breathable containers like paper bags or mesh sacks.
4. How do I store potatoes after harvest?
Cure them first for 1 to 2 weeks in a cool, dark space, then store them in breathable containers away from light and moisture.
5. Why are my stored potatoes turning green?
Exposure to light causes greening. This can make the potato taste bitter and may signal increased solanine content. Always store in complete darkness.
6. Can I store potatoes with onions?
No. Onions release ethylene gas that speeds up sprouting and spoilage in potatoes. Keep them separate.
Home Diagnostics and Technical Standards Specialist at Hello Mag. She provides high-level Expertise in appliance mechanics and scientific pest management, ensuring every guide follows strict safety protocols and manufacturer standards. As a leading Authority on technical home specs, Kanimozhi audits complex data to provide homeowners with the most accurate, verified, and reliable diagnostic solutions available.
by Kanimozhi BV | Dec 17, 2025 | DIY Ideas, Garden
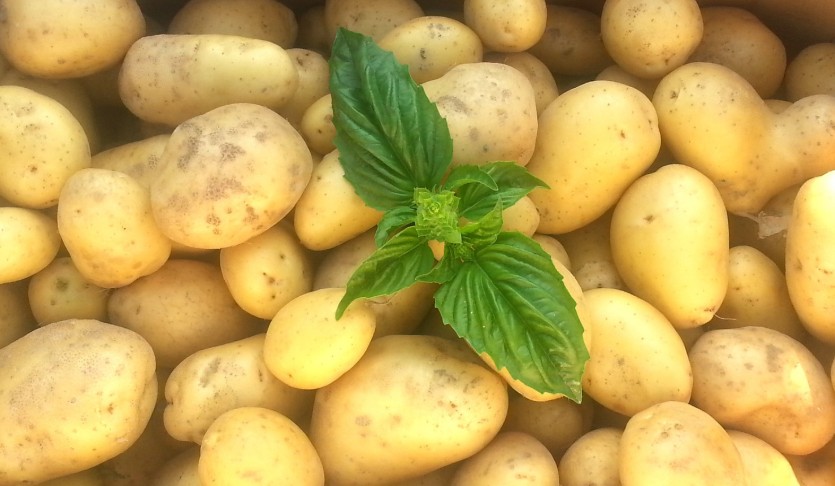
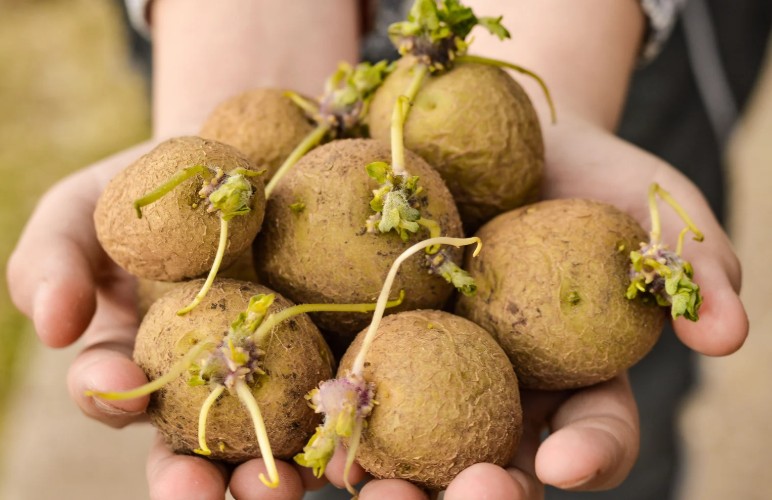
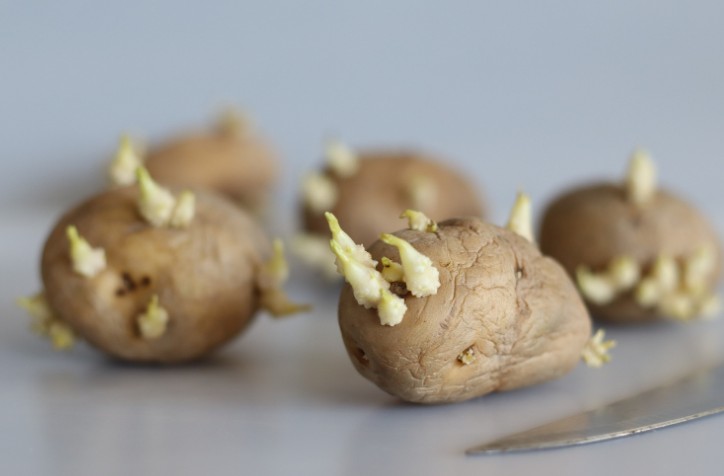
It’s a common kitchen dilemma: you pull out a few potatoes and notice little white or green shoots poking out.
Your first thought might be, can you eat potatoes that have sprouted? Is it safe to simply cut off the sprouts and use them? Or should you throw the whole thing away?
This article explores everything you need to know about sprouted potatoes, including whether they’re safe to eat, how to assess their condition, and how to prepare them safely if they’re still usable.
Whether you’ve asked yourself, is it safe to eat potatoes that have sprouted, or are sprouted potatoes safe to eat, this guide will provide clear, evidence-based answers.
What Does It Mean When a Potato Sprouts?
Sprouting is a natural part of a potato’s life cycle. When stored for too long—especially in warm, bright, or humid environments—potatoes begin to grow new shoots, often called “eyes.” These sprouts are the early signs of the potato attempting to grow into a new plant.
This happens because potatoes are tubers, which means they are storage organs for the plant.
They naturally contain nutrients that support sprout growth when the conditions are right. While sprouting itself isn’t harmful, it does signal changes in the potato’s chemical composition, particularly in relation to toxins like solanine.
Sprouting may also be accompanied by greening of the skin, shrivelling, or soft spots—all of which can affect whether the potato is safe to eat.
That’s why it’s important to understand the difference between a harmless sprout and a health hazard.
Are Sprouted Potatoes Safe to Eat?
The short answer is: sometimes. But caution is essential.
When a potato sprouts, the levels of naturally occurring toxic compounds known as glycoalkaloids—especially solanine and chaconine—tend to increase. These compounds are found mainly in the sprouts, skin, and any green parts of the potato.
While small amounts of glycoalkaloids may not cause noticeable harm, higher concentrations can lead to digestive and neurological symptoms.
It’s worth noting that sprouting alone doesn’t necessarily make a potato dangerous. If the sprouts are small and the potato is still firm with no green discolouration, it may be safe to eat after careful preparation.
However, if the potato shows signs of greening, softness, or extensive sprouting, the level of glycoalkaloids could be high enough to cause health issues.
So, if you’re wondering, are sprouting potatoes safe to eat, the answer depends on their overall condition. We’ll cover how to evaluate that next.
Can You Eat Potatoes That Have Sprouted?
What Happens If You Eat Potatoes That Have Sprouted?
If you accidentally eat a sprouted potato, especially one with green skin or a bitter taste, you could be ingesting higher levels of solanine.
This glycoalkaloid acts as a natural pesticide for the potato plant but can be harmful to humans in large quantities.
Symptoms of solanine poisoning can include:
- Nausea and vomiting
- Diarrhoea or stomach cramps
- Headaches and dizziness
- In rare cases, hallucinations or neurological effects
The severity of symptoms depends on how much solanine is consumed and the individual’s sensitivity.
In most cases, minor exposure won’t cause long-term harm, but it’s not something to ignore. Children, older adults, and those with underlying health conditions may be more at risk.
It’s important to remember that solanine is heat-stable, which means cooking does not destroy it. That’s why preparation and inspection are so important.
How to Tell If Sprouted Potatoes Are Still Safe to Eat?
You don’t necessarily need to throw out every potato that starts to sprout. There are some clear indicators that help you decide if a sprouted potato is still safe to use.
Potatoes may be safe to eat if:
- The sprouts are small and can be easily cut away
- The potato is firm to the touch with no signs of shrivelling
- There is no green colouring on the skin or inside the potato
- The flesh looks fresh and smells normal (not bitter or musty)
On the other hand, discard the potato if:
- It’s soft, shrivelled, or wrinkled
- It has turned green, especially under the skin
- There are large or numerous sprouts across the surface
- It smells bitter or has an unpleasant odour
- The flesh has developed a spongy texture
In short, you can eat potatoes that have sprouted only if they still appear healthy and firm. If there’s any doubt, it’s safer to dispose of them.
How to Safely Prepare Sprouted Potatoes?
If your potatoes pass the visual and physical inspection, you can still use them—but preparation is key to ensuring safety.
Here’s how to prepare sprouted potatoes safely:
- Remove all sprouts completely. Use a knife to cut them away, making sure none of the root or eye remains.
- Peel the skin thoroughly. Focus on any green areas and cut them out entirely, as they contain the highest concentrations of toxins.
- Inspect the flesh. If it’s discoloured, soft, or smells off, discard the potato.
- Cook thoroughly. Baking, boiling, or roasting at high temperatures will not remove toxins but may help reduce bacterial risk.
Even after preparation, if the potato tastes bitter, do not eat it. That bitterness can be a sign of high glycoalkaloid content.
When Should You Just Throw Them Away?
While some sprouted potatoes can be salvaged, there are clear situations when you should not take the risk. Eating heavily sprouted or green potatoes is not recommended.
You should throw away sprouted potatoes if:
- They’re soft, mushy, or look dehydrated
- There’s visible green colouration on large parts of the skin or flesh
- The sprouts are long, thick, or have covered much of the surface
- The potato has a bitter smell or taste, even after cooking
In these cases, the risk of solanine poisoning increases significantly. It’s better to be safe than sorry—especially considering how affordable and replaceable potatoes are.
Common Myths vs. Facts About Sprouted Potatoes
There’s plenty of confusion about what’s safe when it comes to sprouted potatoes. Let’s clear up a few common myths.
| Myth |
Fact |
| Cooking destroys all toxins in potatoes |
Solanine is heat-stable and survives typical cooking temperatures |
| A green potato is fine as long as it’s firm |
Green areas usually contain higher levels of glycoalkaloids |
| All sprouted potatoes are unsafe |
Some can be safe if the sprouts and green parts are removed properly |
| If it smells okay, it’s safe to eat |
Toxins may be present even without a noticeable odour |
Understanding these facts can help you make better decisions when dealing with questionable spuds.
Should You Worry About Eating a Sprouted Potato Once?
If you’ve eaten a sprouted potato once—perhaps without noticing the sprouts or green areas—there’s usually no reason to panic.
Most people won’t experience serious side effects from a single exposure, especially if the potato was cooked and didn’t taste bitter.
However, if you feel unwell afterwards or notice symptoms like nausea, vomiting, or stomach pain, it’s worth monitoring your condition and seeking medical advice if necessary.
While rare, cases of solanine poisoning have occurred in the UK and elsewhere from eating improperly stored or sprouted potatoes. That’s why it’s important to stay informed and err on the side of caution.
Conclusion – Can You Eat Sprouted Potatoes?
So, can you eat potatoes that have sprouted? Yes, in some cases. But you need to be careful.
If the potato is still firm, shows no green colouring, and the sprouts are small, you can eat it after removing the sprouts and cooking it properly. However, if it’s soft, green, smells bad, or is covered in long sprouts, it’s best to discard it.
The key takeaway is this: while sprouted potatoes can sometimes be safe, they do come with increased health risks.
And since cooking doesn’t eliminate the harmful compounds entirely, it’s important to judge carefully.
Always remember:
- Don’t eat green or bitter-tasting potatoes
- Don’t rely solely on smell or taste to detect danger
- When in doubt, throw it out
Related Article: What to Do With Green Tomatoes? – 5 Best Ways You Can Use Them
Home Diagnostics and Technical Standards Specialist at Hello Mag. She provides high-level Expertise in appliance mechanics and scientific pest management, ensuring every guide follows strict safety protocols and manufacturer standards. As a leading Authority on technical home specs, Kanimozhi audits complex data to provide homeowners with the most accurate, verified, and reliable diagnostic solutions available.
by Kanimozhi BV | Dec 16, 2025 | Exterior, Garden, Home & Living
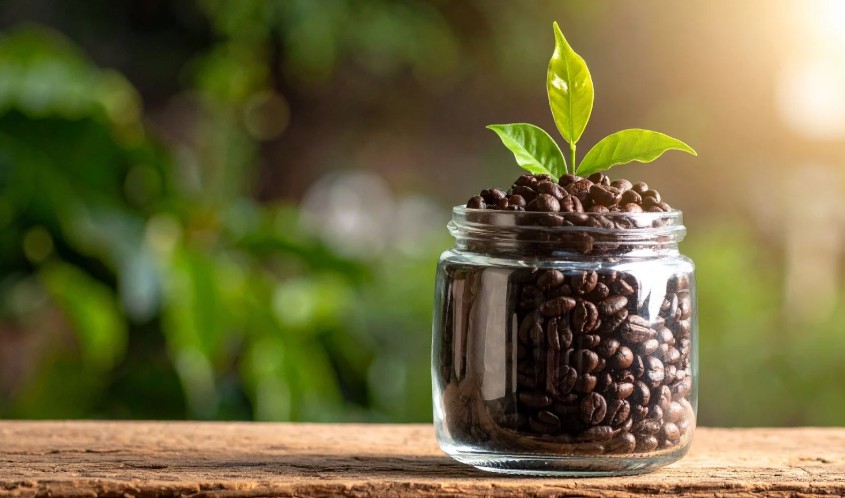
If you’re a home gardener looking for ways to recycle kitchen waste and enrich your soil, you’ve likely wondered: what plants like coffee grounds?
The idea of using your leftover coffee to nourish plants is popular—but it’s not always clear which plants benefit and how to apply it correctly.
This expert guide explains everything you need to know about using coffee grounds in your UK garden, including which plants love them, how to apply them safely, and when to avoid them altogether.
Can Coffee Grounds Help Your Plants? – A Quick Look
What Nutrients Do Coffee Grounds Add to Your Soil?
Used coffee grounds contain several nutrients beneficial to plant growth, including:
- Nitrogen (a key nutrient for leafy growth)
- Phosphorus and potassium (important for root development and flowering)
- Micronutrients like calcium, magnesium, and copper
They’re also rich in organic matter, which improves soil structure and water retention.
Although commonly believed to be highly acidic, most used coffee grounds are actually close to neutral (pH 6.5–6.8) once brewed, making them safe for many plants when used properly.
How Should You Use Coffee Grounds Safely in the Garden?
It’s essential to use coffee grounds in moderation to avoid problems like soil compaction or mould growth. Here are two safe ways to use them:
- Add to compost: Coffee grounds are considered a “green” compost material, rich in nitrogen. Balance them using the “browns” like dried leaves/cardboard.
- Mix into soil lightly: If applying directly, scatter a thin layer and mix it well into the topsoil. Avoid letting it clump or form a crust, which can block water and air.
Used correctly, coffee grounds can give your soil a gentle nutrient boost while cutting down on waste.
What Plants Like Coffee Grounds & Why?
Which Garden Plants Thrive in Acidic Soil with Coffee Grounds?
Some plants naturally prefer slightly acidic soil, and these are the ones most likely to benefit from coffee grounds:
- Hydrangeas – The aluminium in the soil becomes more available in acidic conditions, helping hydrangeas produce vibrant blue flowers.
- Azaleas and Rhododendrons – These woodland plants thrive in acidic, organic-rich soils, much like coffee grounds help create.
- Camellias – Also lovers of acidic soil, these glossy-leaved evergreens respond well to the nutrients found in coffee grounds.
Using grounds as mulch or mixing lightly into the soil around these shrubs can support stronger blooms and healthier foliage.
Which Vegetables Grow Better with Coffee Grounds?
Coffee grounds can be beneficial to certain leafy greens and fast-growing vegetables due to their nitrogen content:
- Spinach
- Lettuce
- Kale
- Swiss chard
These crops benefit from the nutrient-rich boost provided by composted coffee grounds. Avoid using coffee grounds directly on tender seedlings; instead, incorporate them into compost and use the matured compost to feed your veg beds.
Can You Use Coffee Grounds on Houseplants?
Yes, but caution is key. Some indoor plants can benefit when small amounts of coffee grounds are mixed into their potting mix:
- Peace lilies
- Pothos
- Spider plants
Only use a teaspoon or two per month, mixed well into the topsoil. Avoid piling grounds on the surface where they can develop mould or attract pests.
What Plants Don’t Like Coffee Grounds?
Which Plants Should You Avoid Using Coffee Grounds On?
Not every plant is a fan of coffee. These plants either dislike acidity or don’t tolerate the moisture-retaining nature of coffee grounds:
- Succulents and cacti – These prefer dry, sandy soil and are easily harmed by the moisture-retaining texture of coffee grounds.
- Lavender and rosemary – Mediterranean herbs that prefer alkaline, well-drained soils.
- Tomatoes – Sensitive to high nitrogen levels and potentially stunted by coffee application.
- Seedlings – Studies suggest coffee grounds can inhibit seed germination, likely due to caffeine content or texture.
Always research the soil preferences of your plants before applying any amendments.
🧪 What Are the Best Practices for Using Coffee Grounds in Your Garden?
How Much Coffee Grounds Should You Add to Compost?
For composting, coffee grounds are a fantastic nitrogen-rich “green” material, but should be balanced with dry, carbon-rich materials:
| Compost Ingredient |
Type |
Purpose |
| Coffee Grounds |
Green |
Adds nitrogen |
| Dried Leaves |
Brown |
Balances moisture |
| Shredded Paper |
Brown |
Adds structure |
| Fruit/Vegetable Scraps |
Green |
Boosts microbial activity |
Ideal ratio: No more than 20% coffee grounds in your compost mix.
What’s the Proper Way to Apply Coffee Grounds to Soil?
To safely apply coffee grounds directly to your garden:
- Use a thin layer (less than 0.5 cm) and mix it into the topsoil
- Water after applying to help nutrients settle
- Avoid placing directly around plant stems or on seeds
For best results, pair with other organic matter like leaf mould or aged compost to prevent clumping and nutrient imbalance.
Conclusion
Coffee grounds are a powerful, sustainable addition to your UK garden when used wisely. Acid-loving plants like hydrangeas, azaleas, and leafy greens will appreciate the added nutrients, while herbs and succulents may suffer.
Remember:
- Compost first where possible
- Apply in moderation
- Know your plant’s soil preferences
By following these simple tips, you can turn your leftover coffee into a valuable resource for boosting plant health and reducing household waste — one cup at a time.
Related Article: Coffee Grounds For Plants
What are the Frequently Asked Questions On What Plants Like Coffee Grounds?
1. Are Coffee Grounds Acidic Enough to Change Soil pH?
Not significantly. Used coffee grounds are only slightly acidic and unlikely to change soil pH on their own. However, they are still useful for acid-loving plants over time.
2. Can You Scatter Coffee Grounds Around All Garden Plants?
No. While coffee grounds are safe for many plants, others — like succulents or herbs — dislike their moisture and acidity. Always check plant preferences before applying.
3. Do Coffee Grounds Help Repel Pests Like Slugs or Cats?
There’s mixed evidence. Some gardeners report fewer slugs or cats where coffee grounds are present, likely due to the texture or scent, but it’s not a reliable pest control method.
4. Should You Use Fresh or Used Coffee Grounds for Gardening?
Always use used coffee grounds. Fresh grounds are more acidic and contain higher levels of caffeine, which can inhibit plant growth and harm beneficial microbes.
Home Diagnostics and Technical Standards Specialist at Hello Mag. She provides high-level Expertise in appliance mechanics and scientific pest management, ensuring every guide follows strict safety protocols and manufacturer standards. As a leading Authority on technical home specs, Kanimozhi audits complex data to provide homeowners with the most accurate, verified, and reliable diagnostic solutions available.

by Kanimozhi BV | Dec 15, 2025 | Home & Living
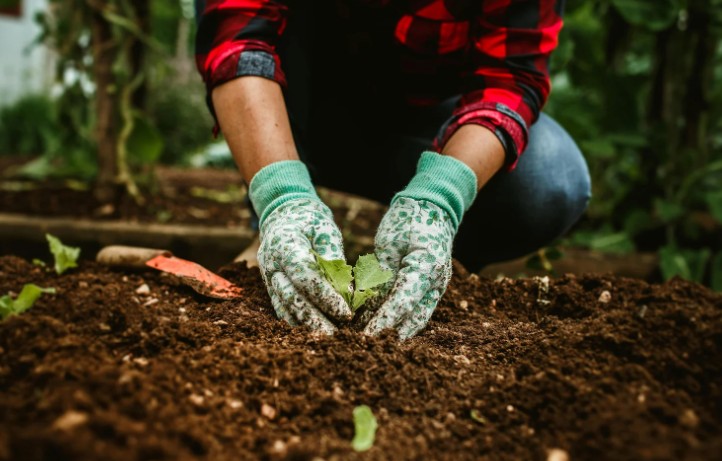
If you garden in the UK, you’ve likely come across conflicting advice about using coffee waste outdoors. Some gardeners praise it as a natural fertiliser, while others warn it can damage plants.
This confusion is exactly why the topic of coffee grounds for plants needs clear, expert‑led explanation.
Used correctly, coffee grounds can support soil health and sustainable gardening. Used incorrectly, they can hinder plant growth.
This guide explains how they work, which plants benefit, which don’t, and — most importantly — how to use them safely in your garden.
Coffee Grounds For Plants: Are Coffee Grounds Good For Plants?
Yes, coffee grounds are good for plants when they are used coffee grounds and applied properly.
They contribute organic matter and small amounts of nitrogen, which help soil microorganisms thrive. These microorganisms then release nutrients in forms plants can absorb over time.
This means coffee grounds improve soil conditions first, which then benefits plant growth indirectly.
They are not a fast fertiliser and should never replace a balanced feeding programme.

Are Coffee Grounds Good For The Garden?
From a broader view, coffee grounds are good for the garden as a soil‑building material.
They help:
- Improve heavy clay soils
- Increase organic content
- Support earthworms
- Reduce household waste
Their greatest value is long‑term soil improvement rather than immediate plant feeding.
What Are Coffee Grounds Good For?
Used coffee grounds are good for:
- Compost enrichment
- Improving soil texture
- Supporting microbial activity
- Mild nitrogen contribution
- Sustainable gardening practices
They work best when combined with other organic materials and used in moderation.
How To Use Coffee Grounds In The Garden?
Knowing how to use coffee grounds in the garden correctly is essential. This is where most mistakes happen. Below is an expert breakdown of the safest and most effective methods.
Can You Put Coffee Grounds Directly Into Garden Soil?
Yes, but only in small quantities and never in thick layers.
Coffee grounds should be:
- Lightly mixed into the topsoil
- Spread thinly to avoid compaction
- Combined with other organic matter
A thick layer of coffee grounds can harden as it dries, forming a barrier that prevents water and oxygen from reaching plant roots.
Should Coffee Grounds Always Be Composted First?
Composting is the best and safest method for using coffee grounds.
In compost, coffee grounds:
- Break down fully
- Lose remaining acidity
- Release nutrients slowly
They are classed as a “green” compost material and should be balanced with “browns” such as dry leaves, shredded cardboard, or straw.
For most UK gardens, composting coffee grounds first is the expert‑recommended approach.

Can Coffee Grounds Be Used As A Liquid Fertiliser?
Yes, but only when diluted.
Leftover brewed coffee can be mixed with water at a ratio of at least 1:10 and used as a mild liquid feed. This is most suitable for acid‑tolerant plants and should only be applied occasionally during active growth periods.
Never pour undiluted coffee directly onto soil or plants.
Are Coffee Grounds Suitable For Mulching?
Coffee grounds should not be used as a standalone mulch.
If used incorrectly, they can:
- Form a crust on the soil surface
- Block airflow
- Increase moisture retention too much
If you want to use them near the soil surface, always mix them with bark chips, compost, or leaf mould to prevent compaction.
How Much Coffee Grounds Should You Use At One Time?
Less is always better.
As an expert guideline:
- Coffee grounds should make up no more than 10–20% of compost material
- Soil applications should be light and infrequent
- Large dumps of grounds should always be avoided
When in doubt, reduce the amount.
Which Plants Benefit From Used Coffee Grounds?
Plants that tolerate slightly acidic conditions benefit the most from used coffee grounds, including:
- Roses
- Hydrangeas
- Camellias
- Rhododendrons
- Azaleas
- Blueberries
These plants respond well to improved soil structure rather than direct nutrition from coffee grounds.
Which Plants Do Not Like Used Coffee Grounds?
Some plants are sensitive to coffee grounds, especially when applied directly.
These include:
For these plants, composted coffee grounds are far safer than direct application. To be completely clear, what plants don t like coffee grounds often includes:
- Lavender
- Rosemary
- Sage
- Thyme
- Orchids
- Succulents
These plants thrive in free‑draining, often alkaline soils and may struggle if coffee grounds are overused.

What Will Coffee Grounds Repel?
Coffee grounds may help deter:
- Slugs
- Snails
- Cats (in limited cases)
They are not a reliable insect repellent and should only be considered a minor deterrent, not a pest‑control solution.
How Often Should You Fertilize Plants With Coffee Grounds?
How Often Can You Put Coffee Grounds On Plants?
Coffee grounds should not be treated like regular fertiliser.
Expert frequency guidance:
- Compost use: Anytime/Regularly
- Soil use: Every 4–6 weeks at most/Infrequently
- Liquid use: Occasionally during the growing season/Rarely
Overuse increases the risk of soil compaction and nutrient imbalance. If plants show stress or slowed growth, stop immediately.
Where To Get Coffee Grounds For Your Garden?
Reliable sources include:
Always dry and store grounds in breathable containers to prevent mould growth.

Conclusion – Should You Use Coffee Grounds For Plants?
When used properly, coffee grounds for plants can be a valuable tool for improving soil health and supporting sustainable gardening. Their benefits come from enhancing soil structure and microbial life — not from acting as a quick fertiliser.
Use them sparingly, compost them when possible, and apply them thoughtfully. Done right, coffee grounds can support a healthier, more resilient garden.
What are the Frequently Asked Questions About Coffee Grounds For Plants?
1. Are Coffee Grounds Good For Plants In Pots?
Yes, when mixed into potting compost or added via diluted liquid feed. Avoid layering them directly on top of the soil.
2. Do Coffee Grounds Acidify Soil?
Used coffee grounds are only mildly acidic and typically have little to no impact on overall soil pH.
3. Can Coffee Grounds Kill Plants?
Yes, if used fresh or in large amounts. Overuse can compact soil and restrict root access to air and nutrients.
4. Are Coffee Grounds Good For Vegetable Gardens?
They are beneficial when composted first. Avoid using them directly around delicate seedlings or roots.
5. Can You Put Coffee Grounds Directly On Soil?
Yes, but only in a thin layer and ideally mixed with compost or other organic materials to avoid crusting.
Home Diagnostics and Technical Standards Specialist at Hello Mag. She provides high-level Expertise in appliance mechanics and scientific pest management, ensuring every guide follows strict safety protocols and manufacturer standards. As a leading Authority on technical home specs, Kanimozhi audits complex data to provide homeowners with the most accurate, verified, and reliable diagnostic solutions available.
