by Kanimozhi BV | Feb 19, 2025 | Interior, DIY Ideas
Drawers with metal glides and no levers can be tricky to remove, especially if you’re used to drawers with a quick-release mechanism. If you’ve ever tried pulling out a drawer only to find it stuck at a certain point, don’t worry—you’re not alone!
In this guide, I’ll walk you through how to remove drawers with metal glides and no levers safely without causing any damage. By the end, you’ll be able to slide out your drawers effortlessly and even troubleshoot common issues.
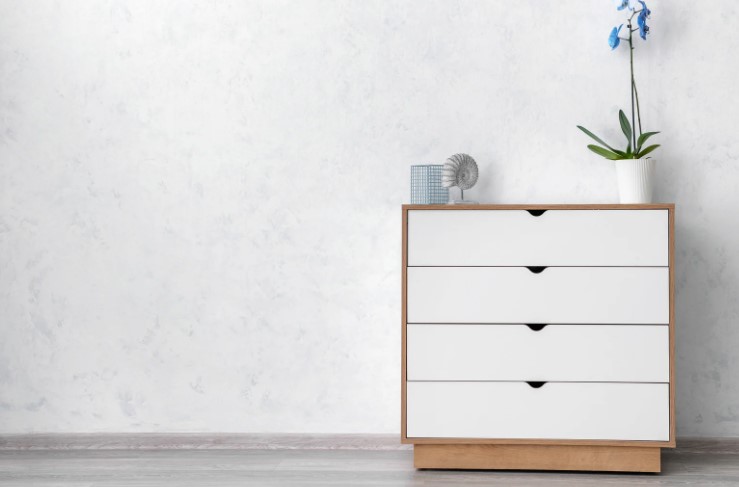
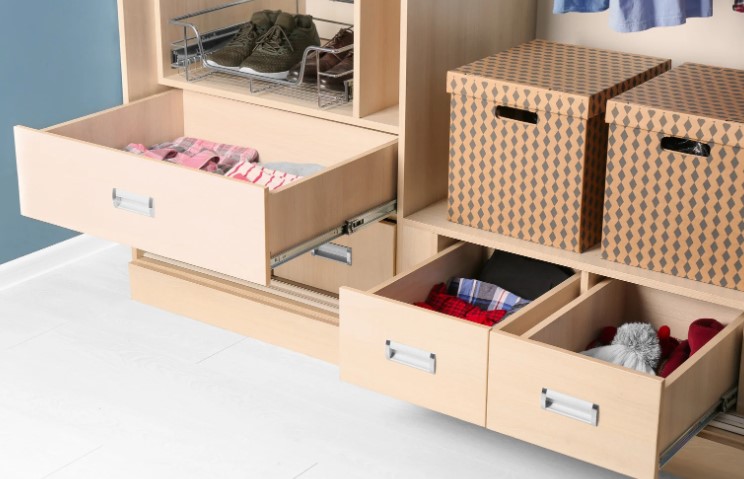
Metal drawer glides are tracks installed on the sides, center, or bottom of a drawer to allow smooth sliding in and out of a kitchen cabinet or dresser. They are durable, stable, and commonly found in modern furniture.
There are three common types of metal drawer slides:
| Type of Glide |
Location |
Removal Difficulty |
| Side-Mounted |
On the sides of the drawer |
Moderate |
| Center-Mounted |
One metal track in the middle |
Easy |
| Under-Mounted |
Attached underneath the drawer |
Moderate to Hard |
Why Do Some Drawers Have No Levers?
Some drawers come with quick-release levers, allowing for easy removal. However, not all manufacturers include this feature. Reasons why some drawers lack levers include:
- Cost-saving design – Simpler construction without extra parts.
- Older furniture models – Many traditional dressers and cabinets don’t use levers.
- Tighter fit for stability – Some brands prefer to keep drawers securely in place without a release mechanism.
Before you start, it’s a good idea to gather a few tools to make the process easier.
- Flashlight – To inspect the drawer track clearly.
- Screwdriver – In case there are screws securing the drawer.
- Gloves – To improve grip and avoid scratches.
Checking the Drawer Mechanism
- Fully extend the drawer to inspect the tracks.
- Look for screws, built-in stops, or brackets that may be preventing removal.
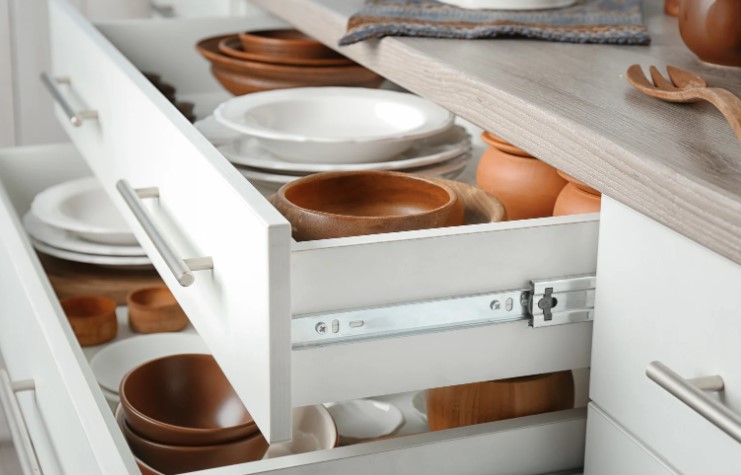
- Identify whether it has side-mounted, center-mounted, or under-mounted glides.
Step 1 – Open the Drawer Fully
Pull the drawer as far as it will go without applying too much force. If it stops, don’t yank it—this could damage the rails.
Step 2 – Lift or Tilt the Drawer
Many drawers with no levers require lifting slightly to remove them. Try:
- Lifting the front slightly upwards to release the drawer.
- Tilting the drawer at a slight angle while pulling forward.
Step 3 – Apply Gentle Force
If the drawer resists, try wiggling it slightly side to side as you pull. Be patient—some drawers may need a gentle rocking motion to disengage from the rails.
Step 4 – Check for Screws or Stops
- Some metal glides have small screws or plastic stoppers that prevent the drawer from coming out completely.
- If screws are present, remove them with a screwdriver before attempting to pull the drawer out again.
Step 5 – Pull the Drawer Out Completely
Once the drawer is free from the glides, slide it out carefully and evenly to avoid damaging the tracks.
Troubleshooting Common Issues When Removing Drawers
Drawer Feels Stuck – What to Do?
- Check for debris – Sometimes, dirt or objects inside the track can block movement.
- Apply lubrication – A little WD-40 or silicone spray can help.
The Drawer Won’t Lift or Tilt – Alternative Methods
- Press the sides inward slightly while pulling.
- Use a rubber mallet or gentle tapping to loosen tight glides.
How to Reinsert the Drawer After Removal?
- Hold the drawer level and line up the glides with the tracks.
- Gently push it back in, ensuring both sides enter at the same time.
Checking for Smooth Operation
- Slide the drawer in and out a few times to make sure it’s aligned properly.
- If it sticks, reposition the tracks or apply lubricant.
What are the Tips to Maintain Drawers with Metal Glides?
Regular Cleaning
- Use a dry cloth or compressed air to remove dust and debris.
Lubricating the Tracks for Smooth Sliding
- Apply silicone-based lubricant or WD-40 to keep glides moving smoothly.
Checking for Loose Screws or Damaged Glides
- Tighten any loose screws with a screwdriver.
- If glides are bent or broken, consider replacing them.
Conclusion
Removing drawers with metal glides and no levers may seem tricky, but with the right technique, it’s actually quite simple.
By following this guide on how to remove drawers with metal glides and no levers, you can safely remove your drawers without damaging the tracks or furniture.
If you ever find a drawer stuck or difficult to remove, don’t force it—just try lifting, tilting, or checking for hidden stops. And remember, regular maintenance will keep your drawers sliding smoothly for years to come.
Related Article: How to Clean Washing Machine Drawer? Easy Home Remedies
- Look on the sides, bottom, or center of the drawer for metal tracks.
- If the drawer slides smoothly on a rail, it likely has metal glides.
2. What if my drawer is stuck and won’t budge?
- Pull both sides evenly to avoid tilting.
- Use a flashlight to check for obstructions or screws.
- Yes! In most cases, you can remove them by lifting and tilting.
- If screws are holding the drawer, a screwdriver may be needed.
4. How do I prevent my drawers from getting stuck again?
- Clean the tracks regularly.
- Apply lubrication to prevent friction.
- Yes, you can buy replacement metal glides at hardware stores.
- Use a screwdriver to remove old glides and install new ones.
Home Diagnostics and Technical Standards Specialist at Hello Mag. She provides high-level Expertise in appliance mechanics and scientific pest management, ensuring every guide follows strict safety protocols and manufacturer standards. As a leading Authority on technical home specs, Kanimozhi audits complex data to provide homeowners with the most accurate, verified, and reliable diagnostic solutions available.

by Kanimozhi BV | Feb 19, 2025 | Garden, Exterior
Cells are the fundamental building blocks of life, but they vary significantly in complexity. If you are looking for what structure is present in both plant and yeast cells, but not in a bacterial cell, the answer lies in their cellular classification.
The Quick Answer: The Nucleus
The primary structure present in both plant and yeast cells, but absent in bacterial cells is a membrane-bound nucleus.
Plants and yeast are eukaryotic organisms, meaning their genetic material (DNA) is safely enclosed within a nuclear membrane. In contrast, bacteria are prokaryotic; they do not have a nucleus, and their DNA floats freely within the cell in a region called the nucleoid.

Why the Presence of a Nucleus Matters?
The nucleus is often called the “brain” of the cell. In plant and yeast cells, it performs several vital functions that bacteria handle differently:
- DNA Protection: It shields genetic material from metabolic byproducts.
- Complex Regulation: It allows for more sophisticated control over how genes are turned on or off.
- Separation of Processes: It separates the reading of DNA (transcription) from the building of proteins (translation), leading to higher biological complexity.
At a Glance: Plant vs. Yeast vs. Bacterial Cells
While the nucleus is the main differentiator, these cells also differ in size and organelle composition. This comparison table highlights the key structural differences:
| Feature |
Plant Cell (Eukaryotic) |
Yeast Cell (Eukaryotic) |
Bacterial Cell (Prokaryotic) |
| Nucleus |
Present |
Present |
Absent |
| Mitochondria |
Present |
Present |
Absent |
| Cell Wall |
Yes (Cellulose) |
Yes (Chitin) |
Yes (Peptidoglycan) |
| Chloroplasts |
Present |
Absent |
Absent |
| Average Size |
10 – 100 µm |
3 – 10 µm |
0.1 – 5 µm |
Why This Matters for Your Home & Garden?
At Hello Magazine UK, we focus on the practical side of home care. Knowing the difference between these cells is actually very useful for gardeners and homeowners:
- Garden Disease Management: Many organic treatments target peptidoglycan (found only in bacterial cell walls). Because your plants have cellulose walls and a nucleus, these treatments can kill harmful bacteria without damaging your flowers.
- Composting Science: Composting relies on bacteria (prokaryotes) to break down soft green waste, while yeast and fungi (eukaryotes) tackle tougher, woody materials.
- Kitchen Fermentation: Yeast is a hardy eukaryotic cell, which is why it behaves differently than the bacteria that cause food spoilage.
1. Membrane-Bound Organelles
Beyond the nucleus, plant and yeast cells contain other specialized compartments called organelles, such as mitochondria (for energy) and the endoplasmic reticulum. Bacterial cells lack these internal compartments, performing all their life functions directly in the cytoplasm.
2. Cell Wall Composition
Interestingly, all three have cell walls, but they are made of different materials. In your garden, plant walls are made of cellulose. The yeast used in baking has walls made of chitin. Bacteria use a unique material called peptidoglycan, which is why many antibiotics can kill bacteria without harming your plants or yeast.
3. Chloroplasts: The Plant Exclusive
While plants and yeast share a nucleus, they are not identical. Chloroplasts (used for photosynthesis) are found in plant cells but are entirely absent in both yeast and bacterial cells.
Conclusion
To summarize, the nucleus is the defining structure present in plant and yeast cells but missing from bacteria. This microscopic difference explains why eukaryotes are capable of forming complex life like the trees in your garden or the yeast in your bread, while prokaryotic bacteria remain simple and single-celled.
Frequently Asked Questions
1. Do yeast cells have chloroplasts like plant cells?
No. While both are eukaryotes, yeast cells do not perform photosynthesis and therefore do not have chloroplasts. They get their energy from organic compounds (like sugar).
2. Why don’t bacterial cells have a nucleus?
Bacteria are prokaryotes, which are evolutionary older and simpler. Their DNA is organized into a single circular chromosome that stays in the cytoplasm for faster replication.
3. Is a cell wall the same as a nucleus?
No. A cell wall is the outer protective layer, while the nucleus is an internal organelle that holds DNA. Bacteria have cell walls but lack the nucleus.
Home Diagnostics and Technical Standards Specialist at Hello Mag. She provides high-level Expertise in appliance mechanics and scientific pest management, ensuring every guide follows strict safety protocols and manufacturer standards. As a leading Authority on technical home specs, Kanimozhi audits complex data to provide homeowners with the most accurate, verified, and reliable diagnostic solutions available.
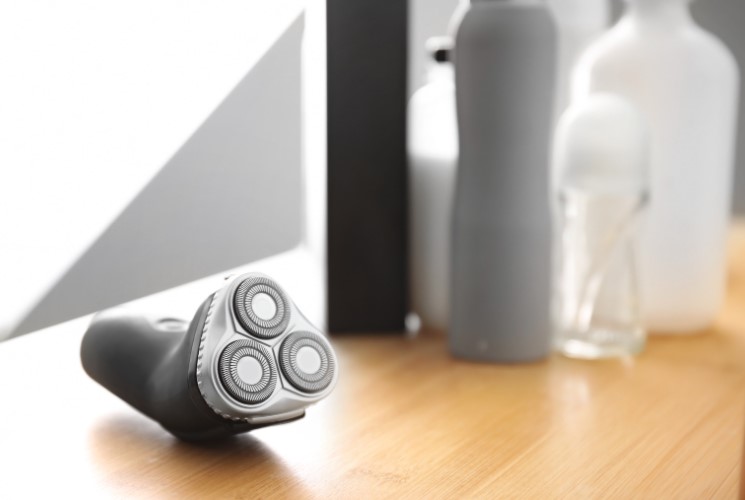
![A 15 W Electric Shaver Is Used for 3 Minutes. How Much Energy Does It Use? [Solved]](https://www.hellomag.co.uk/wp-content/uploads/2025/02/A-15-W-Electric-Shaver-Is-Used-for-3-Minutes.-How-Much-Energy-Does-It-Use-Solved-1.jpg)
by Kanimozhi BV | Feb 18, 2025 | Appliances
Final Answer: 2,700 Joules (J)
A 15 W electric shaver used for 3 minutes transfers 2,700 Joules of energy.
A 15 W Electric Shaver Is Used For 3 Minutes. How Much Energy Does It Use?
To find the energy transferred by any electrical appliance, you use the standard physics formula:
Energy (E) = Power (P) × Time (t)

Step 1: Identify the Power
The power of the shaver is 15 Watts (W). A Watt is defined as one Joule per second.
Step 2: Convert Time to Seconds (The “Trap”)
This is where most students lose marks. The formula requires time to be in seconds, but the question gives it in minutes.
3 minutes × 60 seconds = 180 seconds.
Step 3: Multiply to get the result
Energy = 15W × 180s = 2,700 J.
Physics Tip: If the answer needs to be in Kilojoules (kJ), simply divide by 1,000.
2,700 J = 2.7 kJ.
What Energy Stores are involved?
While the shaver is running, energy is transferred from an Electrical Store to a Kinetic Store (the moving blades). Some energy is also wasted as Thermal Energy (heat) and Sound.
Understanding the Basics of Electrical Energy Consumption
What is Power (Watt) in Electrical Devices?
Power, measured in watts (W), refers to the rate at which an electrical device consumes energy. The higher the wattage, the more electricity the appliance uses per second.
For example:
- 10W LED bulb – Low energy consumption
- 15W electric shaver – Small power usage
- 2000W hairdryer – High energy consumption
FAQs (Frequently Asked Questions)
1. How much electricity does an electric shaver use per year?
If used for 3 minutes daily, a 15W shaver consumes 0.75 Wh per use. Over a year:
0.75 × 365 = 273.75 Wh = 0.27375 kWh
At £0.30 per kWh, the cost is £0.08 (8p per year).
2. Do electric shavers increase electricity bills significantly?
No, electric shavers consume very little power, typically under £0.10 per year for daily use.
3. Is it better to use a rechargeable shaver instead of a plug-in model?
Yes! Rechargeable shavers store energy efficiently and reduce standby power waste.
4. How can I reduce energy consumption while using an electric shaver?
- Use a rechargeable model.
- Unplug when fully charged.
- Use an energy-efficient model.
- Shave efficiently to reduce runtime.
5. Can I use a solar-powered shaver?
Yes, some solar-powered and USB-C shavers are available, which use renewable energy instead of grid electricity.
Home Diagnostics and Technical Standards Specialist at Hello Mag. She provides high-level Expertise in appliance mechanics and scientific pest management, ensuring every guide follows strict safety protocols and manufacturer standards. As a leading Authority on technical home specs, Kanimozhi audits complex data to provide homeowners with the most accurate, verified, and reliable diagnostic solutions available.

by Kanimozhi BV | Feb 17, 2025 | Appliances
Quick Answer: What is the name for the amount of energy transferred every second by an electrical appliance?
The amount of energy transferred every second by an electrical appliance is known as Power.
- Standard Unit: Watts (W)
- The Formula: Power = Energy ÷ Time
- Scientific Definition: 1 Watt is equivalent to a transfer of 1 Joule of energy per second.
Example: A 1000W vacuum cleaner transfers 1,000 Joules of energy every single second it is in use.
Electrical appliances play a crucial role in our daily lives, from lighting up our homes to powering kitchen devices. But have you ever wondered what is the name for the amount of energy transferred every second by an electrical appliance?
The correct answer is power. Power is an essential concept in physics and electrical engineering because it measures how efficiently an appliance transfers electrical energy into other useful forms such as heat, motion, or light.
Understanding power and energy transfer is important for managing electricity consumption, improving efficiency, and making informed decisions about which appliances to use.
Now, let’s explore this concept in detail.
What Is the Name for the Amount of Energy Transferred Every Second by an Electrical Appliance?
The correct term is power.
Power is the rate at which energy is transferred from one form to another. In electrical appliances, it represents how quickly electrical energy is converted into other forms such as heat, light, or motion.
Power is measured in watts (W), where:
1 watt = 1 joule per second
This means if an appliance has a power rating of 100W, it transfers 100 joules of energy every second.

Why Is “Power” the Correct Answer?
Power Measures Energy Transfer per Second
The question specifically asks for the energy transferred every second. This directly relates to power, which is calculated using the formula:
Power(W) = Energy Transferred(J) / Time(s)
This formula shows that power is the correct measurement for energy transfer per second.
The SI Unit of Power: Watt (W)
Power is measured in watts, which are directly linked to joules and time:
1W = 1J/s
If an appliance uses 500W, it transfers 500 joules of energy every second.
Power Helps Compare Appliance Efficiency
Appliances have power ratings that indicate how fast they transfer energy. Here’s a table with common examples:
A higher power rating means faster energy transfer per second.
How Is Energy Transferred in Electrical Appliances?
Electrical appliances operate by converting electrical energy into other forms of energy. This energy transfer happens through different processes depending on the purpose of the appliance. Below are the main ways energy is transferred in electrical devices:
Energy Transfer in Heating Appliances
Some appliances are designed to generate heat by converting electrical energy into thermal energy. These appliances typically use resistive elements to produce heat. Examples include:
- Electric heaters – Convert electrical energy directly into heat to warm a room.
- Kettles – Use an electric heating element to boil water.
- Toasters – Convert electrical energy into heat to brown bread.
Energy Transfer in Motion-Based Appliances
Certain appliances transfer electrical energy into kinetic energy to create movement. These appliances often contain electric motors that drive motion. Examples include:
- Fans – Convert electrical energy into kinetic energy to circulate air.
- Washing machines – Use motors to spin washing machine and clean clothes.
- Electric drills – Convert electrical energy into rotational motion for drilling holes.
Energy Transfer in Lighting and Sound-Producing Appliances
Some appliances convert electrical energy into light or sound. These are often used for illumination, communication, or entertainment. Examples include:
- Light bulbs – Convert electrical energy into light energy, with some energy lost as heat.
- Speakers – Convert electrical energy into sound waves through vibrations.
- Televisions – Convert electrical energy into both light and sound energy.
Energy Transfer Efficiency and Energy Loss
During energy transfer, some energy is always lost, usually in the form of heat due to resistance in electrical components. This is why energy efficiency is an important consideration when designing electrical appliances. More efficient appliances convert a greater proportion of electrical energy into useful work while minimizing waste.
What Is the Unit for Energy Transferred?
The unit for energy transferred is the joule (J). Since power is measured in watts (W), we can express energy transfer as:
Energy(J) = Power(W) × Time(s)
For example, if a 100W bulb is on for 5 seconds, the total energy transferred is:
100W × 5s = 500J
In electricity bills, energy is measured in kilowatt-hours (kWh):
1kWh = 1000W × 1 hour
What Units Are Used for Work Done?
The unit for work done is also joules (J), since work and energy are closely related.
The formula for work done is:
Work Done = Force × Distance
Examples of work done in daily life:
- Lifting a box – Work is done against gravity.
- Pushing a trolley – Work is done by applying force over a distance.
Since electrical appliances transfer energy to do work, they also follow the same principle.
How Do You Calculate the Power of an Electrical Appliance?
Power can also be calculated using voltage (V) and current (I):
P = VI
Where:
- P = Power (W)
- V = Voltage (V)
- I = Current (A)
For example, if a device runs on 230V (UK mains voltage) and draws 2A of current:
P = 230V × 2A = 460W
This means it transfers 460 joules per second.
The Power of an Electrical Appliance Is a Measure of How Quickly It Transfers… What?
The power of an electrical appliance measures how quickly it transfers energy.
- Higher power rating → Faster energy transfer
- Lower power rating → Slower energy transfer
For example:
✔ A 2000W kettle boils water faster than a 700W kettle.
✔ A 100W bulb is brighter than a 40W bulb.
What Are Some Examples of Energy Transfers in Everyday Appliances?
Here are examples of energy transfers in common electrical appliances:
| Appliance |
Energy Transfer |
| Electric Heater |
Electrical → Thermal (heat) |
| Light Bulb |
Electrical → Light + Thermal |
| Speaker |
Electrical → Sound + Some Thermal Loss |
| Fan |
Electrical → Kinetic (motion) + Some Thermal Loss |
| TV |
Electrical → Light + Sound + Some Thermal Loss |
Energy is never lost, only converted into different forms.
Conclusion
- The amount of energy transferred per second is called power.
- Power is measured in watts (W), where 1W = 1 joule per second.
- Electrical appliances convert energy at different rates, which determines their efficiency.
- Understanding power ratings helps manage energy consumption.
Next time you use an electrical device, remember: you’re witnessing energy transfer in action!
Frequently Asked Questions (FAQs)
1. What is the SI unit of power?
The SI unit of power is the watt (W), which equals 1 joule per second.
2. How is power different from energy?
Power measures energy transfer per second (watts), while energy is the total amount transferred (joules).
3. How can I reduce my energy consumption?
- Use energy-efficient appliances like LED bulbs.
- Turn off devices when not in use.
- Unplug chargers to prevent standby energy loss.
Home Diagnostics and Technical Standards Specialist at Hello Mag. She provides high-level Expertise in appliance mechanics and scientific pest management, ensuring every guide follows strict safety protocols and manufacturer standards. As a leading Authority on technical home specs, Kanimozhi audits complex data to provide homeowners with the most accurate, verified, and reliable diagnostic solutions available.

by Kanimozhi BV | Feb 16, 2025 | Washing Machine, Appliances
Keeping the washing machine detergent drawer clean is essential for maintaining hygiene and preventing unpleasant odours. Over time, detergent residue, fabric softener buildup, and moisture can lead to mould growth, mildew, and clogged compartments.
In this guide, I will walk you through several effective home remedies on how to clean washing machine drawer.
From natural solutions like vinegar and bicarbonate of soda to stronger methods like bleach, you will find the best way to keep your washing machine drawer spotless.
Why Does the Washing Machine Drawer Get Dirty?
What are the Common Causes of Dirt and Mould Build-up?
- Detergent residue accumulation – Powdered detergents tend to leave more buildup than liquid detergents.
- Moisture retention – A damp environment encourages mould and mildew growth.
- Fabric softener deposits – These can clog compartments and create a sticky film inside the drawer.
- Poor ventilation – Lack of airflow inside the drawer compartment allows bacteria and bad odours to develop.
How to Remove the Detergent Drawer from a Washing Machine?
What is the Step-by-Step Guide to Remove the Drawer Safely?
- Pull the drawer out as far as possible.
- Locate and press the release clip, usually in the middle or side of the drawer.
- Gently slide the drawer out completely without forcing it.
- Remove any separate compartments such as the fabric softener dispenser.
- Check the user manual if you are unsure about how to remove your washing machine drawer.
If the drawer is stuck due to detergent buildup, gently wiggle it while pulling to loosen it.

How to Clean Washing Machine Drawer? – Step-by-Step Guide
Step 1: Pre-Soak the Drawer to Loosen Residue
- Fill a bowl with warm water and vinegar in a 1:1 ratio.
- Soak the drawer for 15-30 minutes to break down detergent and softener buildup.
Step 2: Scrub the Drawer Thoroughly
- Use a toothbrush or scrubbing brush for hard-to-reach areas.
- Focus on removing mould spots, soap residue, and fabric softener buildup.
Step 3: Clean the Inside of the Drawer Slot
- Dampen a cloth with vinegar solution and wipe the slot inside the washing machine.
- Use cotton swabs to clean tight corners where dirt and mould collect.
Step 4: Rinse and Dry the Drawer Completely
- Rinse the drawer under warm running water to remove any remaining debris.
- Let it air dry fully before reinserting it into the machine.
Never put the drawer back while it is still damp, as this can encourage mould growth.
How to Clean a Washing Machine Drawer with Bicarbonate of Soda?
Why Use Bicarbonate of Soda?
- Removes stubborn stains without the use of harsh chemicals.
- Neutralises bad odours and prevents future buildup.
- Acts as a mild abrasive for scrubbing detergent residue.
What are the Steps for Cleaning with Bicarbonate of Soda?
- Make a cleaning paste by mixing 2 tablespoons of bicarbonate of soda with a little water.
- Apply the paste inside the drawer and scrub using a toothbrush.
- Soak the drawer in warm water and bicarbonate of soda for 15-20 minutes.
- Rinse thoroughly and dry before reinserting into the washing machine.
How to Clean a Washing Machine Drawer with White Vinegar?
Why Is White Vinegar Effective for Cleaning?
- Breaks down detergent residue and limescale.
- Kills bacteria and removes bad odours.
What are the Steps for Cleaning with White Vinegar?
- Soak the drawer in warm water and vinegar (1:1 ratio) for 30 minutes.
- Scrub with a brush to remove remaining dirt and mould.
- Wipe the inside of the drawer slot with a cloth soaked in vinegar solution.
- Rinse and air dry before reinserting.
To keep your machine fresh, add half a cup of vinegar to the detergent drawer and run an empty hot wash cycle once a month.
How to Clean a Washing Machine Drawer Using Lemon Juice?
What are the Benefits of Lemon Juice for Cleaning?
- Natural antibacterial and antifungal properties.
- Removes limescale and hard water stains.
- Leaves a fresh citrus scent.
What are the Steps to Clean with Lemon Juice?
- Squeeze fresh lemon juice into a cup of warm water.
- Dip a cloth or brush in the solution and scrub the drawer.
- Soak for 15 minutes for extra freshness.
- Rinse and dry thoroughly before reinserting.
For an extra powerful natural cleaner, mix lemon juice with bicarbonate of soda.

How to Clean a Washing Machine Drawer Using Bleach?
When to Use Bleach for Cleaning?
- Only when deep mould buildup is present.
- Use caution, as bleach is a strong chemical.
- Always wear gloves and ventilate the area.
What are the Steps to Clean with Bleach?
- Dilute one part bleach with four parts water in a bucket.
- Soak the drawer in the solution for 10 minutes.
- Scrub with a brush to remove mould.
- Rinse thoroughly to remove all traces of bleach.
Never mix bleach with vinegar, as it creates toxic fumes.
How to Clean a Washing Machine Drawer with Dish Soap?
When to Use Dish Soap for Cleaning?
- If you don’t have vinegar or bicarbonate of soda.
- If your drawer has light detergent buildup but no mould.
What are the Steps for Cleaning with Dish Soap?
- Fill a basin with warm soapy water.
- Soak the detergent drawer for 15-20 minutes.
- Scrub with a soft brush or sponge.
- Rinse thoroughly and dry before putting it back.
Choose eco-friendly dish soap to avoid chemical residue.
How to Clean a Washing Machine Drawer with Hydrogen Peroxide?
Why Use Hydrogen Peroxide?
- Disinfects and kills mould effectively.
- Removes stubborn stains without damaging plastic.
- Eco-friendly alternative to bleach.
What are the Steps for Cleaning with Hydrogen Peroxide?
- Apply hydrogen peroxide directly to the mouldy areas.
- Let it sit for about 10 to 15 minutes to break down stains.
- Scrub with an old toothbrush.
- Rinse with warm water and dry completely.
Mix hydrogen peroxide with baking soda to create a thick cleaning paste for tough stains.
My Recommendation: What’s the Best Cleaning Method?
After testing different cleaning methods, the best and most effective way to clean a washing machine drawer is:
- Soak the drawer in white vinegar and warm water for 30 minutes.
- Scrub with bicarbonate of soda paste for deep cleaning.
- Wipe the drawer slot with vinegar solution to remove hidden dirt.
- Dry completely before reinserting.
This method is natural, safe, and highly effective, as vinegar dissolves detergent buildup while bicarbonate of soda scrubs away stains and neutralises odours.

Conclusion
Regular cleaning of your washing machine drawer is essential to prevent mould, odours, and detergent buildup. Using natural home remedies like vinegar, bicarbonate of soda, and lemon juice provides an effective, safe, and eco-friendly cleaning solution.
Follow these tips on how to clean washing machine drawer and with consistent cleaning routine, your washing machine will stay fresh, hygienic, and perform at its best for years to come.
What are the FAQs – Answering Common Questions
1. Can I put my washing machine drawer in the dishwasher?
Some plastic drawers are dishwasher-safe, but check the user manual first.
2. Why does my washing machine drawer smell bad?
The smell is usually caused by mould, detergent residue, or stagnant water. Cleaning with vinegar and bicarbonate of soda will help eliminate odours.
3. How can I prevent detergent buildup in the drawer?
- Use liquid detergent instead of powder.
- Wipe the drawer dry after each wash.
- Run a hot wash with vinegar once a month.
4. How do I stop mould from coming back?
- Leave the drawer open after every wash.
- Use a tea tree oil spray to prevent mould regrowth.
- Clean once a month to keep it fresh.
Home Diagnostics and Technical Standards Specialist at Hello Mag. She provides high-level Expertise in appliance mechanics and scientific pest management, ensuring every guide follows strict safety protocols and manufacturer standards. As a leading Authority on technical home specs, Kanimozhi audits complex data to provide homeowners with the most accurate, verified, and reliable diagnostic solutions available.
